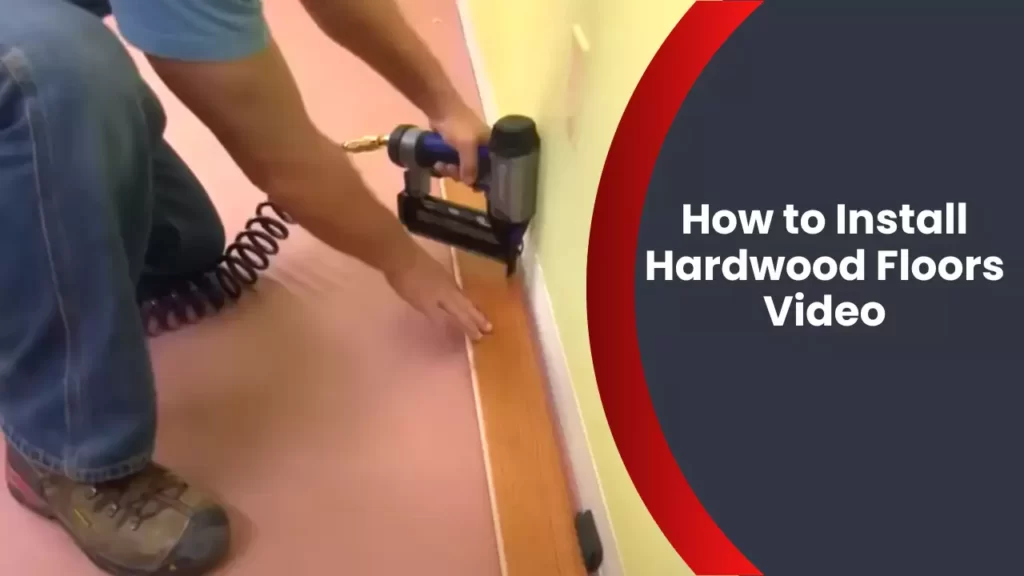
Installing hardwood floors can be done easily by following a video tutorial. The video provides step-by-step instructions on how to install hardwood floors in a straightforward and concise manner.
Installing hardwood floors can greatly enhance the beauty and value of your home. However, it can be a challenging task for those who are not familiar with the process. Fortunately, there are many resources available, including video tutorials, that can guide you through the installation process.
By following a video tutorial, you’ll be able to see the exact steps and techniques needed to install hardwood floors correctly. This will ensure that your floors are installed properly, giving you long-lasting and beautiful results. So, let’s dive into the details of how to install hardwood floors by watching a helpful video tutorial.
Preparing Your Space
Before embarking on the installation of hardwood floors, it is important to properly prepare your space. This includes taking accurate measurements, clearing and cleaning the room, and evaluating the subfloor. By following these essential steps, you can ensure a smooth and successful installation process.
Measuring and Calculating the Amount of Hardwood Needed
The first step in preparing your space for hardwood floor installation is to measure the area where the flooring will be placed. To do this, measure the length and width of the room using a tape measure. Make sure to measure any alcoves, closets, or other areas where the flooring will be installed as well.
Once you have the measurements, you can calculate the amount of hardwood flooring needed. Most flooring is sold by the square foot, so multiply the length and width of the room to determine the square footage. It is recommended to add about 10% to the total square footage to account for any waste or mistakes during installation.
Clearing and Cleaning the Room
Before installing hardwood floors, it is essential to clear the room of any furniture, rugs, or other items. Move them to another area of your home to create enough space for the installation process. This will allow you to work more efficiently and avoid any potential damage to your belongings.
Once the room is cleared, it is crucial to thoroughly clean the floor. Remove any existing carpeting, padding, or other existing flooring materials. Use a broom to sweep away any dirt, dust, or debris. You can also use a vacuum cleaner to ensure that the floor is completely clean and free of any small particles.
Evaluating the Subfloor
Before installing hardwood floors, it is important to evaluate the condition of the subfloor. The subfloor is the foundation upon which the hardwood will be installed. Examine the subfloor for any signs of damage, such as cracks, unevenness, or moisture issues.
If there are any significant issues with the subfloor, it may need to be repaired or replaced before proceeding with the installation. It is crucial to have a solid and stable subfloor to ensure the longevity and durability of your hardwood floors.
In conclusion, preparing your space for hardwood floor installation is a crucial step that should not be overlooked. By measuring and calculating the amount of hardwood needed, clearing and cleaning the room, and evaluating the subfloor, you can ensure a smooth and successful installation process. Take the time to properly prepare your space and you will be rewarded with beautiful, long-lasting hardwood floors.
Gathering The Necessary Tools And Materials
Before you get started with installing hardwood floors, there are several tools and materials you’ll need to gather. Ensuring you have everything ready before you begin will make the installation process smoother and more efficient. In this section, we’ll walk you through the steps for choosing the right hardwood flooring, acclimating the hardwood, and what tools and materials you’ll need for the installation. Let’s dive in!
Choosing the Right Hardwood Flooring
When it comes to choosing the right hardwood flooring, there are a few factors to consider. First, decide on the type of wood that suits your taste and style. Options include oak, maple, cherry, and walnut, each offering a unique look and feel to your space. Additionally, consider the grade of the wood, ranging from clear (without any knots) to rustic (with a more natural and pronounced character).
Next, determine the width and thickness of the planks. Narrow planks create a more traditional look, while wider planks offer a modern and spacious feel. It’s also important to keep in mind the durability of the wood and its compatibility with your lifestyle. For instance, if you have pets or children, opting for a harder wood species may be a wise choice.
Acclimating the Hardwood
Acclimating the hardwood is a crucial step before installation. This process allows the wood to adjust to the temperature and humidity levels of your home, ensuring a stable and long-lasting floor. Start by placing the unopened boxes of flooring planks in the room where they will be installed. Leave them there for at least 48 hours, or as recommended by the manufacturer.
During this acclimation period, make sure the room is at the same temperature and humidity as the rest of your home. This will prevent the wood from warping or expanding after it’s installed. Remember, proper acclimation is essential for a successful hardwood floor installation.
Gathering Tools: What You’ll Need
Now that you’ve selected your hardwood flooring and allowed it to acclimate, it’s time to gather the tools and materials you’ll need for installation. Here is a comprehensive list:
| Tools | Materials |
|---|---|
|
|
Having these tools and materials ready will save you time and ensure a smooth installation process. Make sure to gather them all before you begin so that you can focus solely on the task at hand.
Now that you’ve gathered the necessary tools and materials, it’s time to move on to the next step of the installation process. Stay tuned for our next blog post, where we’ll guide you through the step-by-step process of preparing the subfloor and laying down the hardwood flooring.

Step 1: Removing The Existing Flooring
Before you can install beautiful hardwood floors, you’ll need to start by removing any existing flooring. This crucial step ensures a clean and level surface for your new hardwood to be installed on. In this guide, we’ll break down the process of removing carpet, laminate, or tile in order to prepare your space for hardwood. Let’s get started!
Assessing the Current Flooring
Before you dive into the removal process, take a moment to assess the current flooring in your space. Each type of flooring may require a slightly different approach, so it’s important to understand what you’re working with.
If you have carpet, determine whether it’s wall-to-wall or a loose area rug. This will influence your removal technique. For laminate or tile, check if they are floating or attached to the subfloor. This information will help you prepare for an efficient removal process.
Properly Removing Carpet, Laminate, or Tile
Carpet Removal
To properly remove carpet, start by cutting the carpet into manageable sections with a utility knife. Next, carefully pull up each section, making sure to remove any tack strips or staples in the process. Dispose of the carpet and padding responsibly.
Laminate or Tile Removal
For laminate or tile, the process involves a bit more effort. Begin by removing the trim and baseboards around the perimeter of the room using a pry bar. This will expose the edges of the flooring. If the floor is laminate, you can often remove the planks individually using a crowbar and hammer. For tile, a chisel and mallet can help break apart the adhesive and lift the tiles.
| Laminate Removal Steps | Tile Removal Steps |
|---|---|
| 1. Remove baseboards. | 1. Remove baseboards. |
| 2. Gently pry up planks. | 2. Use a chisel and mallet to break the tile. |
| 3. Dispose of the laminate responsibly. | 3. Lift and remove the broken tiles. |
Once you’ve successfully removed all the carpet, laminate, or tile, be sure to thoroughly clean the subfloor. This will ensure a smooth surface for your hardwood installation and help prevent any future issues. Remove any adhesive residue, debris, or dust that may impact the quality and longevity of your new hardwood floors.
By taking the time to properly remove your existing flooring, you’re setting the foundation for a successful hardwood installation. Stay tuned for our next step, where we’ll guide you through preparing the subfloor for the hardwood installation process.
Step 2: Preparing The Subfloor
Before installing hardwood floors, it is crucial to properly prepare the subfloor. This step ensures a smooth and stable surface for your new flooring, preventing any future issues such as squeaks or warping. In this section, we will go over two essential tasks: inspecting and repairing the subfloor if necessary, and leveling the subfloor.
Inspecting and Repairing the Subfloor if Necessary
Prior to installing hardwood floors, take the time to inspect the subfloor carefully. Look for any signs of damage or structural issues that may need to be addressed. These could include cracks, squeaks, unevenness, or rot.
If you spot any damage, it is crucial to repair it before proceeding with the installation. Failing to do so can compromise the integrity of the flooring and lead to future problems down the line. Here are a few common subfloor issues and their possible remedies:
| Issue | Possible Remedy |
|---|---|
| Cracks or Gaps | Fill with wood filler or patching compound |
| Squeaks | Add screws or nails to secure the subfloor to the joists |
| Unevenness | Use self-leveling compound to create a smooth surface |
| Rot | Replace damaged sections of the subfloor |
Remember, a thorough inspection and necessary repairs are vital for a successful hardwood floor installation. Taking the time to address any issues will ensure that your new flooring lays beautifully and lasts for years to come.
Leveling the Subfloor
Once you have inspected and repaired the subfloor, the next step is to ensure its levelness. A level subfloor is essential for proper hardwood floor installation, as it prevents any gaps or unevenness that could affect the final result.
To level the subfloor, follow these steps:
- Measure the subfloor to identify any low or high spots.
- If you notice low spots, use self-leveling compound to fill them in. Apply the compound according to the manufacturer’s instructions, ensuring a smooth and even surface.
- To address high spots, you can sand them down using a floor sander or a belt sander. Be sure to wear protective goggles and follow proper safety precautions when sanding.
- After leveling the entire subfloor, use a long, straight edge or a level to double-check its evenness. Make any necessary adjustments to ensure a flat surface.
By leveling the subfloor, you create the ideal foundation for your hardwood floors. This step is crucial for achieving a professional-looking result and enhancing the longevity of your flooring.
Once you have completed these steps, you can proceed to the next phase of the installation process with confidence. Preparing the subfloor correctly sets the stage for a successful and flawless hardwood floor installation.

Step 3: Installing The Moisture Barrier And Underlayment
Selecting the Correct Moisture Barrier
Before you begin installing your hardwood floors, it’s crucial to select the correct moisture barrier. This step is essential to protect your flooring from potential moisture damage, which can lead to warping or buckling over time. There are a few different types of moisture barriers to choose from, so let’s take a look at your options.
| Type of Moisture Barrier | Description |
|---|---|
| Film Moisture Barrier | Consisting of a thin plastic sheet, a film moisture barrier is an affordable and easy-to-install option. It provides a basic level of moisture protection for your hardwood floors. However, it’s important to note that a film barrier is not recommended for areas with high moisture levels, such as basements or bathrooms. |
| Felt Moisture Barrier | Unlike a film barrier, a felt moisture barrier is made of recycled fibers soaked in asphalt. This type of barrier offers superior moisture resistance and added insulation. If you live in an area with high humidity or plan to install hardwood in a below-grade space, a felt moisture barrier is a great choice. |
| Combination Moisture Barrier | If you’re looking for the best of both worlds, you may consider a combination moisture barrier. This type of barrier includes a film layer for moisture protection and a cushioned underlayment layer for added durability and noise reduction. Combination barriers are ideal for homeowners who want to maximize both protection and comfort. |
Remember, selecting the correct moisture barrier is crucial for the longevity and performance of your hardwood floors. Assess your specific needs and choose the barrier that best suits your circumstances.
Installing the Moisture Barrier and Underlayment
Now that you have chosen the appropriate moisture barrier for your hardwood flooring, it’s time to move on to installation. Properly installing the moisture barrier and underlayment is essential to create a sturdy and durable foundation for your hardwood floors. Let’s walk through the steps:
- Clean the subfloor: Ensure that your subfloor is free from any debris, dust, or uneven areas that may affect the installation process.
- Lay the moisture barrier: Unroll the moisture barrier across the entire floor, overlapping the seams by a few inches. Secure the barrier in place using a heavy-duty tape or adhesive designed for this purpose.
- Trim excess barrier: Trim off any excess barrier using a utility knife to achieve a neat and clean installation.
- Add underlayment: Once the moisture barrier is in place, it’s time to lay the underlayment. Depending on the type of underlayment you have chosen, follow the manufacturer’s instructions for installation. In most cases, you’ll need to butt the edges of the underlayment together and secure them with a moisture-resistant tape.
- Inspect the surface: Double-check the entire area to ensure the moisture barrier and underlayment are securely in place and there are no visible gaps or defects.
Following these steps will help create a solid foundation for your hardwood floors, protecting them against moisture and providing a smooth and comfortable surface to walk on. Once the moisture barrier and underlayment are properly installed, you’ll be ready to move on to the exciting part – laying down your beautiful hardwood flooring!
Step 4: Arranging The First Row Of Hardwood
Determining the Starting Point
The first step in arranging the first row of hardwood when installing your new flooring is to determine the starting point. This will set the foundation for the entire installation process and ensure that your hardwood floor looks visually appealing. But how do you determine the starting point?
Before you can determine the starting point, you need to consider a few things. First, take into account the direction of the floor joists. The hardwood should be installed perpendicular to the floor joists, as this provides better support and stability. Additionally, consider the main source of natural light in the room. Install the hardwood parallel to the main source of light to maximize the visual aesthetic of your flooring.
Once you have taken these factors into account, begin by measuring the distance from the starting wall to the edge of the first row of hardwood. This will ensure that the first row is properly aligned and centered in the room. Use a tape measure and mark the starting point with a pencil.
Ensuring a Straight and Square Installation
Now that you have determined the starting point for your hardwood floor, the next step is to ensure a straight and square installation. This is crucial for achieving a professional-looking result. Here’s how to ensure a straight and square installation:
- Begin by measuring the width of the room. Take precise measurements at both ends, as walls are often not perfectly straight. This will help you determine any irregularities and ensure a straight installation.
- Next, use a chalk line or straightedge to draw a straight line along the starting wall. This will serve as a guide for the first row of hardwood. Take your time to ensure that the line is perfectly straight and aligned with the starting point you marked earlier.
- Continue to use the chalk line or straightedge to draw additional guide lines parallel to the starting wall. These lines will help you maintain a straight and square installation as you work your way across the room.
- Before laying down the first row of hardwood, double-check that the starting wall is square. Measure the distance between the starting wall and the opposite wall at both ends of the room. If the measurements differ, adjust the starting line accordingly to ensure a square installation.
By following these steps and taking the time to ensure a straight and square installation, you will achieve professional-looking hardwood floors that enhance the overall beauty of your space.
Step 5: Attaching The Hardwood Planks
Now that you have prepared the subfloor and laid the underlayment, it’s time to move on to the exciting part – attaching the hardwood planks! This step is crucial for ensuring a secure and beautifully installed floor. In this section, we will cover two methods for attaching the hardwood planks: applying adhesive or nailing them down.
Applying Adhesive or Nailing the Planks
There are two primary options for attaching hardwood planks to the subfloor: adhesive or nails. Both methods have their own benefits and considerations, so it’s important to choose the right one for your specific flooring project.
Applying Adhesive
If you opt for adhesive, it’s essential to use a flooring adhesive that is specifically formulated for hardwood floors. This adhesive provides a strong bond between the hardwood planks and the subfloor, ensuring stability and minimizing gaps. Here’s the step-by-step process for applying adhesive:
- Start by applying a small amount of adhesive on the subfloor using a trowel or notched trowel. Make sure to follow the manufacturer’s instructions for the correct adhesive application technique.
- Spread the adhesive evenly, ensuring that the coverage is sufficient for the width of the hardwood planks you are using.
- Place the hardwood plank onto the adhesive, pressing it firmly to ensure proper adhesion.
- Repeat this process, working your way across the room, until all the hardwood planks are installed.
- Use a rubber mallet and a scrap piece of hardwood to gently tap the planks into place, ensuring a snug fit.
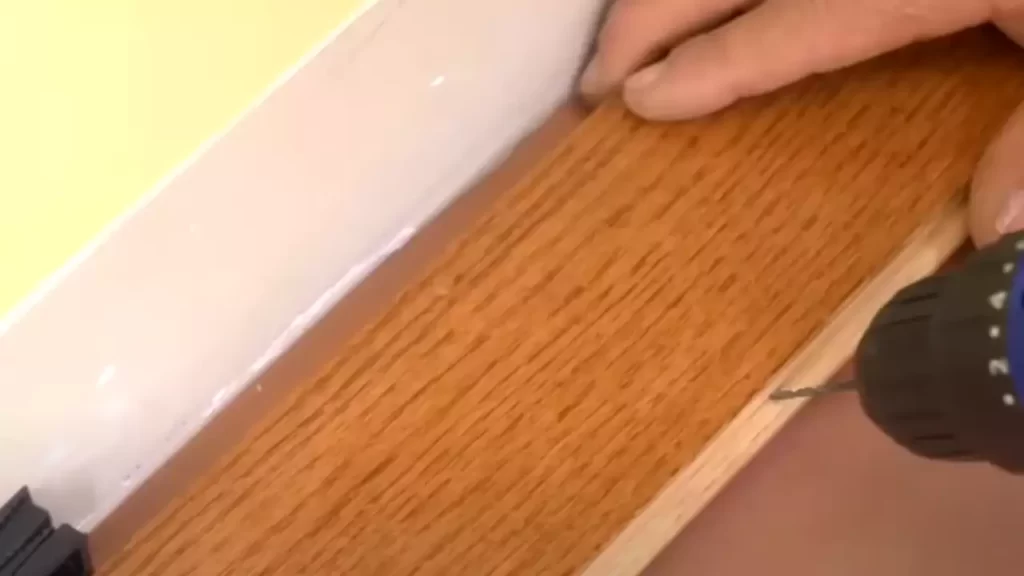
Nailing the Planks
If you prefer the traditional method of attaching hardwood planks, nailing them down can be a great option. This method provides a strong connection and is particularly suitable for thicker hardwood planks or in areas with high foot traffic. Here’s how to nail the planks:
- Begin by positioning the first hardwood plank against the starting wall, leaving a 1/2-inch gap for expansion.
- Using a flooring nailer, drive nails at a 45-degree angle through the tongue of the hardwood plank. Make sure to place the nails every 6 to 8 inches along the entire length of the plank.
- Continue installing the hardwood planks, ensuring each plank’s tongue fits snugly into the groove of the previous plank.
- For the last row, you may need to cut the hardwood planks to fit. Use a miter saw or a circular saw to make precise cuts.
Ensuring the Proper Placement and Spacing
Regardless of whether you choose adhesive or nails, ensuring the proper placement and spacing of hardwood planks is essential for a professional-looking result. Here are a few key tips to keep in mind:
- Ensure that the end joints of adjacent planks are staggered, ideally by at least 6 inches. This prevents weak spots and enhances the overall floor strength.
- Leave a 1/2-inch expansion gap along the walls and any fixed objects to allow for natural movement of the hardwood due to changes in temperature and humidity.
- Use spacers to maintain a consistent spacing between planks. This will help create an even and aesthetically pleasing floor.
By following these guidelines, you will be able to achieve a stunning hardwood floor that not only enhances the beauty of your space but also stands the test of time.
Step 6: Dealing With Doorways And Obstacles
When installing hardwood floors, you’re likely to encounter doorways and other obstacles that require special attention. In this step, we’ll cover how to cut and fit hardwood around doorways, as well as how to work around staircases, fireplaces, or irregular shapes. By following these guidelines, you’ll achieve a professional-looking installation that seamlessly merges with your existing architecture.
Cutting and Fitting Hardwood Around Doorways
One of the trickiest parts of installing hardwood floors is precisely fitting them around doorways. To achieve a seamless transition, you’ll need a few tools and some careful measurements:
- Begin by measuring the gap between the last row of installed flooring and the doorway. Take precise measurements from multiple points to ensure accuracy. Be sure to account for expansion gaps as recommended by your manufacturer.
- Transfer these measurements onto a spare piece of flooring. To cut the hardwood, use a jigsaw or a handsaw with a fine-tooth blade.
- Once you’ve made the cut, dry fit the piece to check its accuracy. Make any necessary adjustments before permanently installing.
- Apply a small amount of adhesive to the bottom of the cut piece and carefully slide it into place. Use a tapping block and mallet to ensure a snug fit without causing damage.
By following these steps, you’ll seamlessly integrate your hardwood flooring with the doorways in your home while maintaining proper expansion allowances.
Working Around Staircases, Fireplaces, or Irregular Shapes
Staircases, fireplaces, or irregular shapes can present unique challenges when installing hardwood floors. However, with careful planning and these tips, you can achieve a professional finish:
- Staircases: To properly install hardwood on stairs, you’ll need to measure each individual step accurately. Cut each tread and riser to fit precisely, using a miter saw for clean and precise cuts. Secure each piece with adhesive and nails to ensure stability.
- Fireplaces: When installing hardwood floors near a fireplace, be sure to leave an expansion gap between the flooring and the hearth. Use a heat-resistant trim to cover the gap and provide a clean and finished look.
- Irregular Shapes: For irregular shapes, such as bay windows or rounded corners, you might need to use a template to trace the shape onto your flooring. Carefully cut along the traced line, ensuring a tight fit while allowing for expansion gaps.
With these tips, you can tackle the challenges posed by staircases, fireplaces, or irregular shapes, resulting in a beautifully installed hardwood floor that enhances the overall aesthetic of your space.
Step 7: Progressing With Additional Rows
Now that you have successfully laid the first few rows of your beautiful hardwood flooring, it’s time to progress with additional rows. In this step, we will cover two important aspects that will ensure the proper installation and professional finish of your hardwood floors: Staggering Plank Lengths and Maintaining Proper Alignment and Spacing.
Staggering Plank Lengths
When installing hardwood floors, it is crucial to stagger the lengths of the planks to create a visually appealing and sturdy structure. Staggering means starting each row with a different length plank than the previous one, ensuring that the end joints are not aligned. This technique helps distribute the weight evenly across the floor and prevents weak spots or visible patterns.
To stagger plank lengths effectively, follow these simple steps:
- Measure the length of the last plank in the previous row.
- Cut a new plank to a different length.
- Start the new row with the shorter or longer plank to create a staggered pattern.
By following this method, you will achieve a natural and seamless look for your hardwood floors.
Maintaining Proper Alignment and Spacing
Proper alignment and spacing are crucial to the longevity and stability of your hardwood flooring. Maintaining uniform gaps between the planks allows for natural expansion and contraction with changes in temperature and humidity, preventing issues like buckling or warping. Additionally, ensuring the alignment of the planks creates a professional and cohesive appearance.
Here are some important tips to remember when maintaining proper alignment and spacing:
- Use wooden spacers or flooring wedges to create consistent gaps between each plank.
- Regularly check the alignment of the planks with a straight edge or string line.
- Make adjustments as necessary to maintain straight rows throughout the installation.
- Double-check the spacing between rows to ensure they are consistent across the entire floor.
By paying attention to these details, you can ensure that your hardwood floor installation is not only visually appealing but also durable and reliable.
Step 8: Reaching The Final Row
After successfully installing the majority of the hardwood flooring, it’s time to tackle the final row. This step may seem challenging, but with proper planning and some essential techniques, you can achieve a tight and professional finish. In this section, we will discuss two crucial tasks to complete the final row installation: measuring and cutting the final row, and ensuring a tight and professional finish.
Measuring and Cutting the Final Row
To ensure a seamless fit for the final row of hardwood flooring, accurate measurements and precise cuts are essential. Here’s how you can do it:
- First, measure the distance between the second to last row and the wall. Be sure to account for any expansion gaps required.
- Transfer this measurement to the last row of hardwood flooring using a measuring tape.
- Using a table saw or a circular saw, make the necessary cuts to fit the planks in the final row. Remember to double-check the measurements before cutting to avoid any mistakes.
- For irregular shapes or obstacles, create a template out of cardboard or paper to trace onto the hardwood planks.
- Once the final row is cut to size, dry-fit the planks in place to ensure a proper fit.
Ensuring a Tight and Professional Finish
Now that the final row is ready to be installed, it’s crucial to make sure it seamlessly blends with the rest of the floor. Here are some tips to achieve a tight and professional finish:
- Apply adhesive or tongue-and-groove glue to the top groove of each plank in the final row. This will help secure the planks and prevent any shifting or gaps.
- Use a tapping block and rubber mallet to gently tap the planks into place, ensuring they are snug against the previous row.
- To maintain a consistent expansion gap, use spacers between the last row and the wall. Remove the spacers once all the planks are securely in place.
- Check the final row for any visible gaps or misalignment. If necessary, use a pry bar and a scrap piece of wood to gently nudge the planks into place.
- Once the final row is installed, go over the entire floor to check for any loose or raised planks. Fix any issues before proceeding to the finishing touches.
By following these steps, you can successfully reach the final row of your hardwood floor installation and achieve a tight and professional finish. Take your time, double-check measurements, and make precise cuts to ensure a seamless fit. With the right techniques and attention to detail, your hardwood floor will be ready to showcase its natural beauty.
Step 9: Installing The Baseboards And Transition Strips
Once you have successfully installed the hardwood floors, it’s time to add the finishing touches to your project. Installing the baseboards and transition strips is the final step that will give your new hardwood floors a polished and professional look. In this section, we’ll guide you through the process of selecting and installing the baseboards as well as adding the necessary transition strips.
Selecting and Installing the Baseboards
The baseboards play a crucial role in covering the gaps between the bottom of the walls and the flooring. They not only provide a visually appealing finish but also protect the edges of the hardwood from any potential damage. Here is a step-by-step guide on how to select and install baseboards:
- Measure the walls: Start by measuring the length of each wall where you plan to install the baseboards. This will help you determine the amount of molding you’ll need to purchase.
- Choose the right material: Baseboards come in various materials such as wood or composite. Consider your budget, style, and durability preferences before making a decision.
- Cut the baseboards: Using a miter saw, cut the baseboards at a 45-degree angle for each corner. Make sure to measure and mark the cutting points accurately.
- Apply adhesive: Apply a strong adhesive to the backside of the baseboards before placing them against the walls. This will ensure a secure and long-lasting installation.
- Attach the baseboards: Press the baseboards firmly against the wall, making sure they are level and aligned with the top edges of your hardwood flooring. Use finish nails to secure them in place.
- Fill the nail holes: Once the baseboards are installed, use putty or a similar filler to fill in the nail holes. Smooth it out with a putty knife for a seamless appearance.
Adding Transition Strips for a Polished Look
Transition strips are essential when your hardwood flooring meets another type of flooring or when there is a height difference between rooms. These strips not only provide a smooth transition but also prevent tripping hazards. Here’s a quick guide on how to add transition strips:
- Select the appropriate transition strips: Measure the width of the doorway or the gap between different flooring materials to choose the right size and style of transition strips.
- Cut the transition strips: Using a saw, carefully cut the transition strips to the desired length. Make sure the cuts are clean and accurate.
- Position the transition strips: Lay the transition strips in place, ensuring they are flush against both sides of the flooring materials. Use adhesive or screws, depending on the type of strips, to secure them in position.
- Smooth out any gaps: If there are any gaps between the transition strips and the floor, use a flexible filler or caulk to fill them in for a neat and seamless look.
By carefully following these steps, you can effectively install baseboards and transition strips to give your hardwood floors a polished and complete appearance. Remember, attention to detail is key to achieving professional results for your flooring project.
Step 10: Finishing Touches And Care Instructions
Now that you have successfully installed your hardwood floors, it’s time to add those finishing touches to make them look even more stunning. Additionally, taking care of your hardwood floors is crucial to ensure their longevity and maintain their natural beauty. Let’s dive into the final steps of the installation process and learn how to fill nail holes and gaps, sand, apply a finish, and properly maintain your hardwood floors.
Filling Nail Holes and Gaps
After installation, you might notice small nail holes or tiny gaps between the hardwood planks. To achieve a seamless look, it’s essential to fill in these imperfections. Here’s how you can do it:
- Gather the necessary supplies: You will need wood filler, a putty knife, and a clean cloth.
- Clean the area: Use a clean cloth to remove any dust or debris from the holes or gaps.
- Apply the wood filler: Take a small amount of wood filler on the putty knife and press it into the nail holes or gaps, filling them completely.
- Smooth the surface: Use the putty knife to level the wood filler with the surrounding floor surface, ensuring a seamless finish.
- Remove excess filler: Wipe off any excess filler with a clean cloth.
Sanding and Applying a Finish
To enhance the appearance and protect your hardwood floors, sanding and applying a finish is necessary. Follow these steps to achieve a beautiful and durable finish:
- Gather the necessary supplies: You will need a floor sander, sandpaper, a vacuum, a tack cloth, and a floor finish of your choice.
- Sand the floors: Use a floor sander and sandpaper to smooth out any rough spots and create an even and polished surface.
- Clean the area: Use a vacuum to remove all the dust and debris left from sanding.
- Prepare the space: Ensure the room is well-ventilated and free of any obstacles that may hinder the finishing process.
- Apply the finish: Follow the manufacturer’s instructions to apply the floor finish evenly, using a brush or roller.
- Allow drying time: Give the finish ample time to dry and cure, adhering to the manufacturer’s recommendations.
Tips for Maintaining and Cleaning Hardwood Floors
Proper maintenance and regular cleaning are essential to keep your hardwood floors looking pristine for years to come. Here are some useful tips to help you maintain and clean your hardwood floors:
- Regular sweeping: Use a soft-bristle broom or vacuum with a hardwood floor attachment to remove dust and dirt from the surface.
- Avoid excessive moisture: Minimize the use of water when cleaning your hardwood floors as excessive moisture can damage the wood. Instead, use a damp mop or a specialized hardwood floor cleaner.
- Protect your floors: Place floor mats or rugs in high-traffic areas and use felt pads on furniture legs to prevent scratches and dents.
- Wipe up spills immediately: Accidental spills should be promptly cleaned to prevent the moisture from seeping into the wood and causing damage.
- Avoid harsh chemicals: When using cleaning products, opt for those specifically designed for hardwood floors and avoid ammonia-based or abrasive cleaners that can harm the surface.
With these finishing touches and care instructions, your hardwood floors will not only look magnificent but also stand the test of time. By filling nail holes and gaps, sanding, applying a finish, and adopting good maintenance practices, you can enjoy the natural beauty of your hardwood floors for years to come.
Frequently Asked Questions
Can I Install Hardwood Floors Myself?
Yes, you can install hardwood floors yourself. It requires careful planning, proper tools, and some expertise. Ensure you have the necessary skills and follow instructions correctly to get the best results. Mistakes can be costly and affect the durability and appearance of the flooring.
What Should I Put Down Before Installing Hardwood Floors?
Before installing hardwood floors, there are a few important steps to take. First, make sure the subfloor is clean, level, and dry. Next, lay down a vapor barrier to protect against moisture. Then, acclimate the wood to the room’s temperature and humidity for at least 72 hours.
Finally, carefully measure and plan the layout before beginning installation.
Does Hardwood Go Directly On Subfloor?
Yes, hardwood can be installed directly on a subfloor. It is important to ensure that the subfloor is clean and level before installation. Additionally, a moisture barrier may be needed to prevent damage from moisture.
Is It Better To Nail Or Staple Hardwood Floors?
Nailing is better than stapling hardwood floors. It provides a stronger and more secure hold.
Conclusion
Installing hardwood floors can be a daunting task, but with the help of this comprehensive video guide, you’ll be able to tackle it with confidence. From preparing the subfloor to laying the boards and finishing touches, this step-by-step tutorial provides clear instructions and tips for a successful installation.
So, why wait? Start transforming your space today with beautiful hardwood floors that will enhance the aesthetics and value of your home.