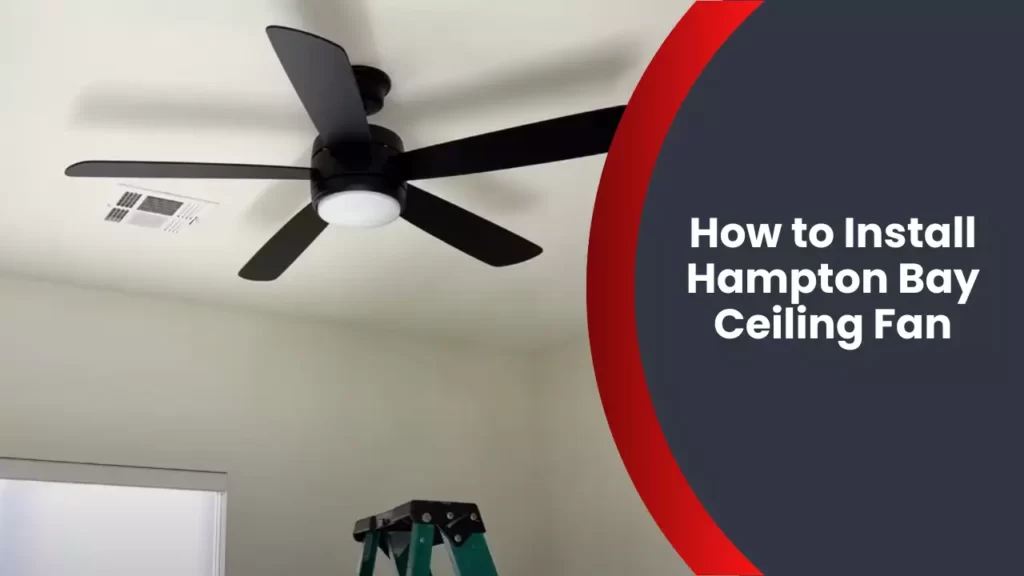
To install a Hampton Bay ceiling fan, mount the fan bracket to the ceiling and wire the fan according to the provided instructions. Now, let’s delve into the step-by-step process of installing a Hampton Bay ceiling fan in your home.
A ceiling fan can be a great addition to any room, providing both lighting and a cooling breeze. Hampton Bay is a trusted brand known for their quality ceiling fans. Installing a Hampton Bay ceiling fan may seem like a daunting task, but with the right tools and instructions, it can be a straightforward process.
We will guide you through the installation process, from mounting the fan bracket to wiring the fan. So, let’s get started and have your Hampton Bay ceiling fan up and running in no time.
Tools Required
Installing a Hampton Bay ceiling fan is a simple and rewarding DIY project that can help improve the airflow and overall comfort of any room. Before getting started, it’s important to gather the necessary tools to ensure a smooth installation process. Here are the essential tools you’ll need:
Screwdriver
A screwdriver is a must-have tool for installing a Hampton Bay ceiling fan. You’ll need it to secure the fan blades, mount the fan bracket, and connect the electrical wires. Opt for a screwdriver with a magnetic tip, as it will make it easier to handle smaller screws and prevent them from getting lost during installation.
Wire stripper
When installing a ceiling fan, you’ll often need to strip the insulation off the electrical wires to make proper connections. A wire stripper is a specialized tool designed to safely and efficiently remove insulation from wires without damaging them. This tool ensures a clean and secure connection, which is crucial for the fan’s functionality and safety.
Pliers
Pliers are another essential tool for installing a Hampton Bay ceiling fan. They come in various types, but needle-nose pliers are particularly handy for this project. These long, slender pliers allow for precise wire bending and twisting, making it easier to connect the wires securely and neatly. Additionally, pliers can be useful for gripping and tightening screws or small parts during installation.
Now that you know the tools required for installing a Hampton Bay ceiling fan, you’re ready to proceed with the installation process. Remember to double-check the instructions provided with your specific fan model for any additional tools or requirements. With the right tools and a systematic approach, you’ll be enjoying the cool breeze of your ceiling fan in no time!
Safety Precautions
When it comes to installing a Hampton Bay ceiling fan, safety should always be your top priority. Following the proper safety precautions will not only protect you from potential accidents, but it will also ensure a smooth and successful installation process. In this section, we will discuss the essential safety measures you need to take before installing your ceiling fan.
Turn off the power
Before starting any electrical work, it is crucial to turn off the power supply. This will prevent any accidental electrocution and reduce the risk of fire hazards. Locate the circuit breaker panel in your home and switch off the circuit that powers the ceiling fan. For added safety, use a non-contact voltage tester to double-check if any electrical current is present.
Use a ladder or sturdy platform
To access the installation area, use a stable ladder or a sturdy platform. Ensure that it is on a level surface, and the ladder is securely positioned. Never stand on chairs, tables, or other unstable surfaces as it can lead to falls and serious injuries. It is recommended to have someone assist you by holding the ladder steady while you work.
Use protective eyewear
Protective eyewear is essential to shield your eyes from dust, debris, and any potential flying objects during the installation process. Ensure that you are wearing safety glasses or goggles that provide sufficient coverage and are approved for working with tools and electrical components. This will prevent eye injuries and help you to focus on the task at hand with confidence.
Step-By-Step Guide
If you’re looking to beat the summer heat or enhance the aesthetic appeal of your room, installing a Hampton Bay ceiling fan is a great choice. With its sleek design and powerful performance, a Hampton Bay ceiling fan can offer both comfort and style to any space. In this step-by-step guide, we will walk you through the installation process, ensuring a smooth and hassle-free experience. Let’s get started!
Check the ceiling fan box
Before diving into the installation process, it’s important to check the contents of the ceiling fan box. Ensure that all the necessary components are present, including brackets, screws, fan blades, and a light kit (if applicable). This step will save you from any last-minute surprises and ensure that you have everything you need for a successful installation.
Assemble the ceiling fan
Once you have verified the contents of the box, it’s time to assemble the ceiling fan. Refer to the provided instruction manual for precise assembly guidelines. Start by attaching the fan blades to the motor housing using the included screws. Make sure to secure the blades firmly to prevent any wobbling or imbalance during operation. Once the blades are securely attached, move on to the next step.
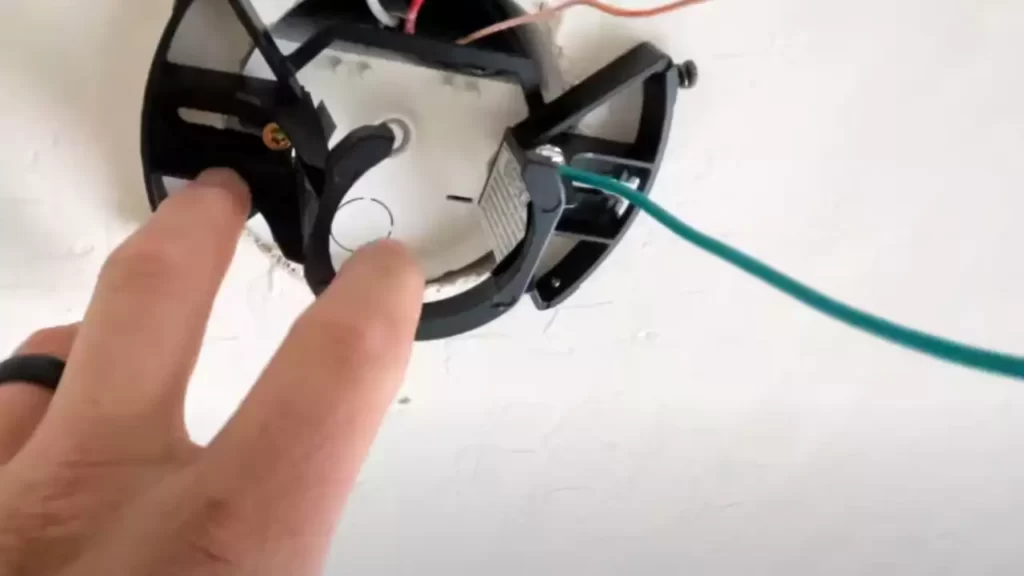
Install the ceiling fan bracket
To efficiently secure your ceiling fan to the ceiling, you’ll need to install the ceiling fan bracket. Begin by turning off the power to the existing ceiling electrical box. Remove any light fixtures or existing fans to access the electrical box. Align the bracket with the holes in the electrical box and secure it using the provided screws. Ensure that the bracket is tight and stable, as it will be responsible for holding the entire fan’s weight.
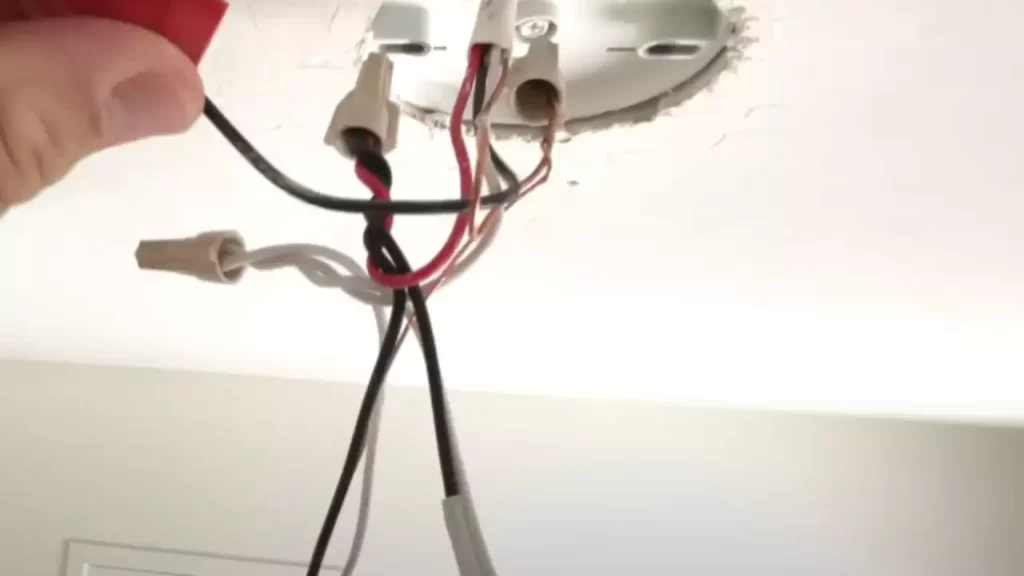
Connect the wiring
With the bracket securely in place, it’s time to connect the wiring. Follow the color-coded instructions provided in the manual to ensure correct wiring connections. Typically, you’ll need to connect the black wire from the ceiling fan to the black (or hot) wire in the ceiling electrical box. Similarly, connect the white (neutral) wires together and ground the green wire. Utilize wire connectors to make secure connections and neatly tuck any excess wiring inside the electrical box.
Attach the fan blades
Once the wiring is complete, it’s time to attach the fan blades to the motor housing. Align the blade arms with the slots on the motor housing and secure them using the screws provided. Be sure to tighten the screws firmly to avoid any wobbling or movement. Give each blade a gentle tug to double-check their stability. Now, you’re one step closer to enjoying the benefits of your Hampton Bay ceiling fan.
Install the light kit (optional)
If your Hampton Bay ceiling fan comes with a light kit, you have the option to install it. Simply follow the instructions in the manual to attach the light kit to the fan assembly. Connect the wiring as directed, allowing for both fan and light control. This step adds a multi-functional aspect to your ceiling fan, offering both cooling and illumination options.
Secure the fan to the ceiling
With the fan blades and light kit (if applicable) installed, it’s time to secure the fan to the ceiling. Gently raise the fan assembly and align it with the mounting bracket. Secure the fan to the bracket using the provided screws. Ensure that all screws are properly tightened to avoid any vibration or movement while the fan is in use. Once secured, give the fan a gentle spin to ensure smooth and balanced operation.
Test the fan and light
Before concluding the installation process, it’s critical to test both the fan and the light (if applicable). Turn on the power and use the provided remote or wall switch to test the fan’s speed settings. Make sure that the fan rotates smoothly without any excessive noise or wobbling. Furthermore, turn on the light (if installed) to ensure proper illumination. If any issues arise, consult the troubleshooting section of the manual or seek professional assistance.
With the completion of these step-by-step instructions, you can now enjoy the cool breeze and added ambiance provided by your newly installed Hampton Bay ceiling fan. Whether it’s in your living room, bedroom, or even on your porch, a Hampton Bay ceiling fan is a stylish and practical addition to any space.
Remember, if you ever need to make adjustments or require additional assistance, always refer to the instruction manual or reach out to the manufacturer’s customer support for expert guidance.
Additional Tips And Troubleshooting
Installing a Hampton Bay ceiling fan can be a breeze with the right guidance. In addition to the basic installation steps we covered earlier, there are some additional tips and troubleshooting techniques that can ensure a smooth and successful installation. Here are some important considerations to keep in mind.
Choosing the Right Fan for Your Room
Before you dive into the installation process, it’s crucial to choose the right Hampton Bay ceiling fan for your room. Consider the size of your room and the fan’s blade span to ensure optimal performance and air circulation. Here’s a helpful table to guide you:
| Room Size | Blade Span (Approx.) |
|---|---|
| Small Rooms (up to 75 sq. ft.) | 29″-36″ |
| Medium Rooms (76-144 sq. ft.) | 36″-42″ |
| Large Rooms (145-225 sq. ft.) | 44″-54″ |
| Great Rooms (226 sq. ft. and above) | 52″-72″ |
Keep in mind that these are general guidelines, and you may need to adjust them based on your specific preferences and the layout of your room.
Balancing the Fan Blades
Once your Hampton Bay ceiling fan is installed, it’s important to ensure that the fan blades are properly balanced. Imbalanced fan blades can cause wobbling, noise, and decreased efficiency. Luckily, balancing your fan blades is a relatively simple process. Here’s a step-by-step guide:
- Turn off the fan and allow it to come to a complete stop.
- Using a dusting brush or a soft cloth, gently clean the fan blades to remove any dust or debris that might affect the balance.
- Attach the included balancing kit to the top of one of the fan blades.
- Turn on the fan and observe its performance. If the wobbling persists, try moving the balancing kit to different blades until you achieve a balanced rotation.
- Once the fan is properly balanced, remove the balancing kit and enjoy a smooth and silent operation.
Troubleshooting Common Installation Issues
While installing your Hampton Bay ceiling fan, you may encounter some common issues that can be easily resolved. Here are a few troubleshooting tips:
- If the fan doesn’t start after installation, check the circuit breaker to ensure it is in the ON position.
- Ensure that all electrical connections are secure and the wires are properly connected.
- If the fan is noisy or wobbling, double-check the installation and balance the fan blades if necessary.
- If the fan is not producing sufficient airflow, ensure that the fan blades are set to the correct angle as per the manufacturer’s instructions.
- Make sure the wall switch or remote control is functioning properly and the fan speed settings are adjusted accordingly.
By following these additional tips and troubleshooting techniques, you can ensure a successful installation of your Hampton Bay ceiling fan. Don’t hesitate to consult the manufacturer’s instructions or seek professional assistance if needed. Now, get ready to enjoy the comfort and energy efficiency provided by your new ceiling fan!
Frequently Asked Questions
How Do You Install A Ceiling Fan For Beginners?
To install a ceiling fan as a beginner, follow these steps: 1. Turn off the power supply. 2. Attach the mounting bracket to the ceiling. 3. Connect the wires from the fan to the corresponding ceiling wires. 4. Securely attach the fan blades.
5. Turn on the power and test the fan. Remember to follow the manufacturer’s instructions for specific details.
Should The Switch Be Up Or Down On A Hampton Bay Ceiling Fan?
The switch on a Hampton Bay ceiling fan should be in the “up” position for the fan to be on.
What Does The Red Wire Go To On A Ceiling Fan?
The red wire on a ceiling fan is typically used to connect the fan’s light kit. It is important to consult the wiring diagram provided by the manufacturer to ensure proper installation.
How Do You Take Down A Hampton Bay Flush Mount Ceiling Fan?
To take down a Hampton Bay flush mount ceiling fan, follow these steps: 1. Turn off the power. 2. Remove the screws holding the fan base to the ceiling. 3. Disconnect the wires from the electrical box. 4. Lower the fan gently and disconnect any additional wiring or brackets.
5. Take down the fan completely.
Conclusion
Installing a Hampton Bay ceiling fan is a fairly simple process that can be completed with the help of a few tools and a step-by-step guide. By following the instructions provided in this blog post, you can easily install your ceiling fan and enjoy its refreshing breeze in no time.
Remember to carefully read the instruction manual and take all necessary safety precautions. With a little patience and attention to detail, you’ll have your Hampton Bay ceiling fan up and running smoothly in no time.