To install green metal fence posts, first, dig holes at equal intervals, then insert the posts and secure them with concrete. For a well-rounded Installing a green metal fence can enhance the aesthetic appeal and add security to your property.
When it comes to the installation process, it is crucial to follow the correct steps to ensure the posts are securely placed. Green metal fence posts offer durability and longevity, making them a popular choice among homeowners. By following these simple guidelines, you can install green metal fence posts efficiently and effectively.
We will cover the step-by-step process of installing green metal fence posts, providing you with the knowledge you need to complete this project with confidence. Ready to get started? Let’s delve into the details.
Factors To Consider When Selecting Green Metal Fence Posts
Installing a green metal fence can add protection, privacy, and aesthetic appeal to your property. However, selecting the right fence posts is crucial to ensure durability and longevity. Here are some factors you should consider when choosing green metal fence posts:
Material Selection
When it comes to selecting green metal fence posts, the choice of material is key. The most commonly used materials for metal fence posts include aluminum, steel, and wrought iron. Each material has its own benefits and considerations.
| Material | Benefits | Considerations |
|---|---|---|
| Aluminum | Lightweight and resistant to rust | May not be as strong as steel or wrought iron |
| Steel | Durable and strong | Prone to rust if not properly coated or maintained |
| Wrought Iron | Highly durable and adds a classic look | Can be more expensive and heavier |
Durability and Longevity
The durability and longevity of your green metal fence posts are essential factors to consider. Metal fence posts designed to withstand harsh weather conditions and resist corrosion will ensure they last for years to come. Look for posts with protective coatings, such as galvanized steel or powder coating, to enhance their lifespan.
Fence Height and Weight
Another crucial consideration is the height and weight of your fence. Taller fences with heavier materials will require sturdier posts to support them. Ensure that the green metal fence posts you choose can bear the weight of the fence panels and withstand any pressure or stress.
It’s important to note that different fence heights and materials may require specific post spacing and installation methods. Consult with a professional or refer to the manufacturer’s guidelines to determine the appropriate post requirements for your specific fence design.
Aesthetic Appeal
Lastly, the aesthetic appeal of your green metal fence posts can enhance the overall look of your property. Consider the style and design of your fence and choose posts that complement the overall aesthetic. Whether you prefer a modern, sleek look or a more traditional charm, there are various post styles available to match your preferences.
By considering these factors, you can make an informed decision when selecting green metal fence posts. Choose posts that not only meet your practical needs but also enhance the visual appeal of your property.
Measuring And Marking The Fence Location
Installing a green metal fence can add a touch of elegance and security to your outdoor space. To ensure a successful installation, proper measuring and marking of the fence location is essential. In this section, we will guide you through the process of determining the fence line, marking the exact location of each post, and ensuring proper spacing between posts, all of which are critical for a sturdy and visually appealing fence.
Determining the Fence Line
Before you begin installing the green metal fence posts, it’s crucial to determine the fence line. Start by surveying your property to identify the boundaries and any obstacles that may affect the placement of the fence. Use a measuring tape to measure and mark the desired fence line. It’s recommended to consult with a professional if you’re unsure about property boundaries or if there are any legal constraints.
Marking the Exact Location of Each Post
Once you have determined the fence line, it’s time to mark the exact location of each post. Begin by measuring the desired distance between each post. Use a tape measure and mark the locations with stakes or spray paint. Ensure that the spacing between posts is consistent for a uniform look. Consider the width of the fence panels when marking the post locations to maintain proper alignment.
Ensuring Proper Spacing Between Posts
To ensure the stability and durability of your green metal fence, it’s important to maintain proper spacing between posts. Start by dividing the total length of your fence line by the desired spacing between posts. For example, if you want a spacing of 6 feet between posts and your fence line is 60 feet long, you will need 10 posts. Measure and mark the locations of each post accordingly.
To achieve consistent spacing between posts, you can use a string or twine and stretch it tightly between the stakes or marks you made earlier. This will serve as a guide for positioning the posts and ensure that they are in line with each other. Adjust the posts as necessary, ensuring they are plumb and level before proceeding with the installation of the green metal fence panels.
By carefully measuring and marking the fence location, you’ll lay the foundation for a successful installation of your green metal fence posts. This meticulous approach will ensure a visually appealing fence that offers security and enhances the overall aesthetic of your outdoor space.
Clearing And Leveling The Area
Before you start installing green metal fence posts on your property, it is important to prepare the area properly. Clearing and leveling the ground not only ensures a straight fence line but also helps to address any drainage issues that may arise. In this section, we will discuss the crucial steps involved in clearing and leveling the area, giving you a solid foundation for your new fence.
Removing any obstacles or debris
The first step in clearing the area is to identify and remove any obstacles or debris that may be in your way. Take a walk along the fence line and look for any rocks, branches, or vegetation that could hinder the installation process. Use a shovel or rake to clear these items away, ensuring a clean and obstacle-free path.
Leveling the ground to ensure a straight fence line
Once any obstacles or debris have been removed, it’s time to focus on leveling the ground. This step is crucial to ensure a straight fence line and prevent any unwanted gaps or unevenness. Here’s how you can level the ground effectively:
- Start by using a shovel or garden rake to level any high spots in the area. Remove excess soil or dirt and distribute it evenly.
- Next, check the ground for any low spots. These areas may require additional soil or a leveling agent to bring them up to the proper height. Use a tamper or the back of a shovel to compact the soil and create a solid foundation.
- Continue this process until the entire fence line is level. Take your time to ensure accuracy, as a straight fence line ultimately depends on a level ground.
Addressing any drainage issues
While leveling the ground, it’s important to address any drainage issues that may be present. Poor drainage can lead to water pooling around the fence posts, causing potential damage and instability. Follow these steps to address drainage issues effectively:
- Identify any areas where water tends to accumulate. This could be due to a natural slope or obstructions that disrupt proper water flow.
- Consider creating a slight slope away from the fence line to encourage water to drain properly. This can be achieved by adding or removing soil, depending on the specific terrain.
- If necessary, install a drainage system such as French drains to redirect excess water away from the fence posts.
By taking the time to clear and level the area before installing your green metal fence posts, you are setting the stage for a successful and long-lasting fence. Remember, proper preparation ensures a straight fence line and helps to address any potential drainage issues. Stay tuned for the next section of this guide, where we will discuss the process of setting the green metal fence posts securely in the ground.

Gathering The Necessary Tools And Materials
Gathering the necessary tools and materials is an essential first step when it comes to installing green metal fence posts. Having the right tools on hand will make the installation process much smoother, while using the correct materials will ensure the durability and longevity of your fence. In this section, we will discuss the specific tools and materials you will need for this project.
Tools:
- Shovel
- Post hole digger
- Level
- Tape measure
Each of these tools plays a crucial role in the installation process. Let’s briefly look at how they contribute to your project:
The shovel is essential for digging the holes where the fence posts will be placed. Make sure your shovel is sturdy and has a sharp edge to penetrate the ground easily.
The post hole digger is a specialized tool designed specifically for digging deep, narrow holes. It allows you to create evenly spaced and properly sized holes, ensuring the stability and alignment of your fence posts.
The level is used to ensure that your fence posts are perfectly vertical. This tool prevents any tilting or leaning, which can compromise the overall stability and appearance of your fence.
The tape measure is crucial for accurately measuring the distances between your fence posts. This ensures that your fence is properly aligned, avoiding any gaps or overlapping sections.
Materials:
- Green metal fence posts
- Concrete mix
- Gravel
- Screws
The materials you use are equally important as the tools. Here’s a brief overview of each material:
Green metal fence posts are specifically designed for outdoor use. They are durable, weather-resistant, and provide excellent support for your fence panels. These posts come in various sizes and can be easily attached to the ground.
Concrete mix is essential for securing the fence posts in the ground. It provides a strong, stable foundation that prevents the posts from shifting or leaning over time. Ensure you choose a high-quality concrete mix to ensure the longevity of your fence.
Gravel acts as a drainage layer that helps to prevent water accumulation around the base of your fence posts. It helps maintain the structural integrity of the concrete and prevents moisture-related issues, such as rotting or rusting.
Screws are necessary for attaching the fence panels to the metal posts securely. Opt for corrosion-resistant screws to ensure they can withstand the outdoor elements and keep your fence panels in place.
Digging The Post Holes
When it comes to installing a green metal fence, the first step is to dig the post holes. This crucial step ensures that your fence will be secure and stable. Follow these guidelines to dig the post holes correctly.
Determining the Appropriate Depth and Width of the Holes
Before grabbing your tools, it’s essential to determine the appropriate depth and width of the post holes. The depth of the holes will depend on the height of your fence and the type of soil you have. As a general rule of thumb, the holes should be at least one-third the height of the fence. For example, if your fence is six feet tall, aim for holes that are two feet deep. This ensures that the fence posts have sufficient stability.
When it comes to the width of the holes, you’ll want to consider the type of soil you have. Soft or sandy soil may require wider holes to provide additional stability. On the other hand, if you have rocky or clay soil, narrower holes may be sufficient. A good starting point is to aim for a hole width that is at least three times the width of the fence post.
Using a Post Hole Digger to Excavate the Holes
Now that you’ve determined the appropriate depth and width of the holes, it’s time to grab your post hole digger and start excavating. A post hole digger is a specialized tool with two handles and sharp, pointed blades. It allows you to dig deep and narrow holes with ease.
Start by positioning the post hole digger at the desired location for the first hole. Firmly grip the handles and push the blades into the soil. Use your body weight to leverage and lift out the soil. Continue this process, working your way down until you reach the desired depth. Remember to check the depth periodically with a measuring tape or a ruler to ensure accuracy.
Ensuring Consistent Spacing Between Holes
To ensure that your fence is evenly spaced, it’s crucial to maintain consistent spacing between each hole. This helps to achieve a uniform look and ensures that the fence panels will align correctly. A simple technique is to use a measuring tape or a long piece of string to mark the desired spacing between the holes.
Measure from the center of one hole to the center of the next and mark the spot. This will act as your guide when digging the subsequent holes. Be sure to check your local building regulations to ensure compliance with the recommended spacing requirements.
By following these steps and adhering to the appropriate depth, width, and spacing, you can ensure a sturdy and visually appealing green metal fence. Remember to take your time and double-check your measurements to ensure accurate results.
Installing The Fence Posts
Properly installing the fence posts is crucial for the stability and longevity of your green metal fence. In this section, we will guide you through the process step by step, ensuring that your fence posts are placed securely and undeniably straight.
Placing the posts in the holes
The first step in installing green metal fence posts is to determine the proper spacing and mark the locations where the posts will be placed. Ideally, the posts should be spaced evenly, ensuring the fence has a uniform appearance. For most fences, a spacing of 6 to 8 feet between posts is recommended.
To dig the holes, use a post hole digger or an auger. Dig the holes deep enough to provide stability and ensure a secure foundation for the fence. The depth of the holes will depend on the height of your fence, but a general rule of thumb is to make them at least one-third the height of the fence above the ground.
Once the holes are dug, carefully place the green metal fence posts into each hole. Ensure that the posts are level with the ground, using a spirit level if necessary. Make any necessary adjustments to ensure the posts are perfectly upright.
Ensuring they are straight and level
It is essential to ensure that the green metal fence posts are perfectly straight and level before moving forward. A crooked or uneven fence will not only be aesthetically displeasing but may also compromise its stability over time.
To check if the posts are level, use a spirit level against the side of each post. Adjust as needed, making small increments until the posts are perfectly level. Pay attention to each individual post, ensuring consistency from one end of the fence to the other.
Securing the posts with gravel or concrete mix
Once the green metal fence posts are in place and perfectly level, the next step is to secure them in the holes. There are two commonly used methods: using gravel or concrete mix.
If you choose to use gravel, pour a few inches of drainage gravel into the hole around the base of the post. This will provide stability and allow for water drainage. Tamp down the gravel using a tamper or the end of a wooden post, ensuring it is compacted and firmly in place.
If you opt for the more secure method of using concrete mix, follow the manufacturer’s instructions for mixing and applying the concrete. Fill the hole with the concrete mix, ensuring the post is held firmly in place and level as the concrete sets. Allow the concrete to cure before proceeding with the installation of the rest of the fence.
Creating Stability For The Fence Posts
Allowing the concrete to cure properly
To ensure the stability and longevity of your green metal fence posts, it is crucial to allow the concrete to cure properly. Curing is the process of ensuring the concrete reaches its maximum strength and durability. By following these steps, you can ensure that your fence posts remain stable:
- Prepare the hole: Dig a hole deep enough to accommodate at least a third of the length of the metal fence post. Ensure that the hole is wider at the bottom than the top, allowing for a bell-shaped base that provides additional stability.
- Insert the metal fence post: Place the green metal fence post into the hole, making sure it is firmly positioned and level. Using a level tool can help to ensure the post is perfectly vertical.
- Pour the concrete: Mix the concrete according to the manufacturer’s instructions and gradually pour it into the hole. Make sure to fill the hole completely and allow the concrete to reach the ground level.
- Smooth the surface: Use a trowel to smooth the surface of the concrete, ensuring it is even and free from any lumps or bumps.
- Let it cure: Allow the concrete to cure undisturbed for the recommended period. This typically takes around 24 to 48 hours, but it is advisable to check the specific curing time provided by the concrete manufacturer.
Adding additional support with braces or reinforcements
In some cases, depending on the height and length of your fence, additional support may be required to create maximum stability for your green metal fence posts. Here are some options to consider:
- Braces: Install braces diagonally from the top of the fence post to the ground, providing additional support and preventing any lateral movement. Secure the braces with screws or nails.
- Reinforcements: For longer fence spans, consider adding reinforcements between the metal fence posts. This can be done using horizontal wooden beams or metal rails, which will provide stability and prevent sagging.
- Concrete collars: Another option is to install concrete collars around the base of each fence post. These collars act as additional support, helping to distribute the load and prevent any sinking or shifting of the posts.
Checking for any signs of instability and making adjustments
Regularly checking for any signs of instability is essential to maintain the longevity of your green metal fence posts. Here’s what you need to do:
- Visually inspect the posts: Take a close look at each metal fence post, paying attention to any signs of leaning, cracking, or movement. Use a level tool to check if the posts are still perfectly vertical.
- Tighten any loose screws or nails: If you notice any loose screws or nails in the braces or reinforcements, tighten them to ensure maximum stability.
- Make necessary adjustments: If you observe any signs of instability, such as leaning or sagging, reinforce the affected area. This might include adding extra braces, tightening the existing ones, or adding concrete around the base of the posts.
- Consult a professional if needed: If you are unsure about how to address the instability or lack the necessary skills, it’s advisable to consult a professional fence installer or contractor for assistance.
By following these steps and taking the necessary precautions, you can ensure that your green metal fence posts are installed with the utmost stability, providing you with a durable and visually appealing fence for years to come.
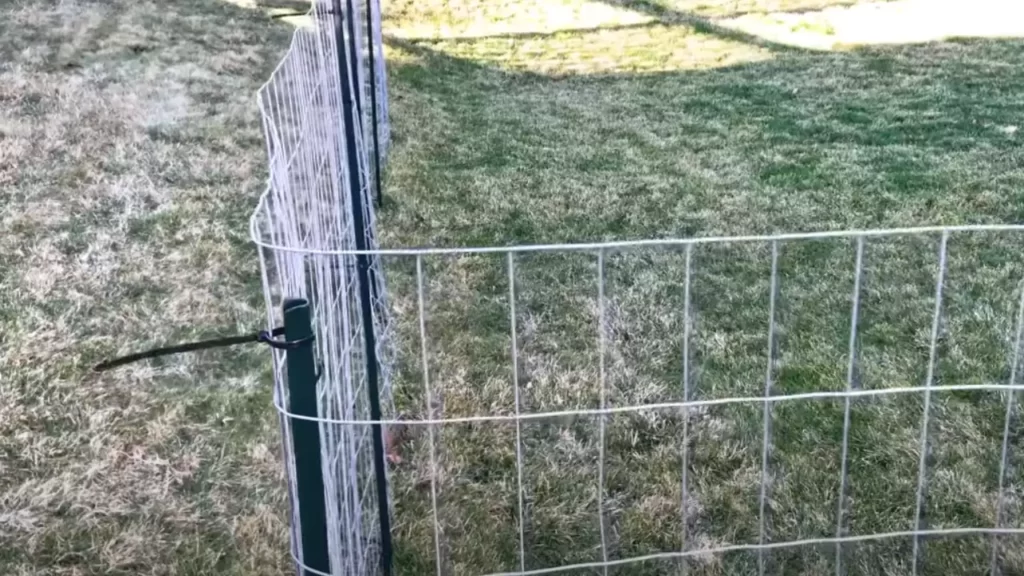
Positioning The Fence Panels
Once you have installed the green metal fence posts securely in the ground, the next step is to align and position the fence panels. This is an important step to ensure a sturdy and visually pleasing fence installation. In this section, we will discuss how to align the panels with the installed posts and leave adequate clearance at the bottom for ground-level changes.
Aligning the Panels with the Installed Posts
Aligning the fence panels with the installed posts is crucial to maintain the structural integrity of the fence. Here are the steps to follow:
- Measure the distance between the installed posts to determine the length of the fence panel you need.
- Place the first panel against the first post, ensuring it is level both horizontally and vertically.
- Use a level to ensure the panel is straight and adjust if necessary.
- Attach the panel securely to the post using screws or nails, depending on the type of panel and post.
- Repeat the process for the remaining panels, checking the alignment with each post as you go along.
Leaving Adequate Clearance at the Bottom for Ground-Level Changes
It is essential to leave sufficient clearance at the bottom of the fence panels to accommodate ground-level changes and prevent any potential issues in the future. Follow these guidelines:
- Leave at least a two-inch clearance between the bottom of the panels and the ground. This ensures that the panels won’t come into direct contact with the soil, reducing the risk of rotting and potential water damage.
- Take into account any slope or unevenness in the ground. You may need to adjust the height of the panels accordingly to maintain a consistent appearance.
- Consider using gravel or an edging material like landscaping timbers or concrete blocks to create a neat and clean border at the base of the fence, while also providing additional stability.
By aligning the fence panels with the installed posts and leaving adequate clearance at the bottom for ground-level changes, you can ensure a professional and durable installation. Following these steps will help create a secure and visually appealing green metal fence that will stand the test of time.
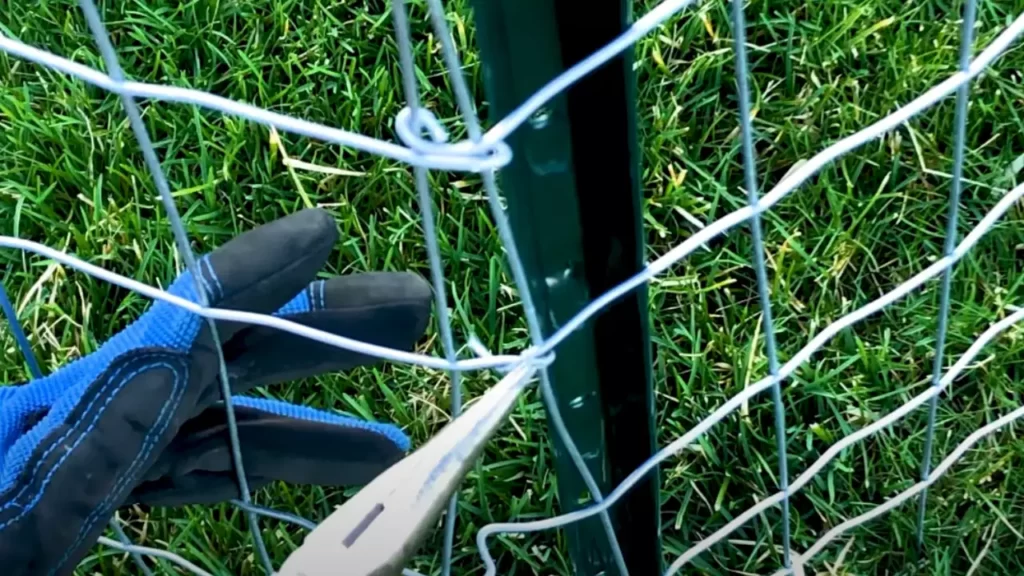
Attaching The Panels To The Posts
Once you have installed your green metal fence posts securely in the ground, the next step is to attach the panels to the posts. This is a critical part of the installation process as it ensures the stability and durability of your fence. In this section, we will discuss two methods for attaching the panels to the posts: using screws and brackets.
Using screws or brackets to secure the panels
When it comes to securing the panels to the posts, you have two options – screws or brackets. Let’s take a closer look at each method:
- Using screws: This method involves directly attaching the panels to the posts using screws. It provides a strong and sturdy connection, ensuring that the panels will not come loose or wobble. To ensure proper installation, follow these steps:
- First, position the panel against the posts, ensuring that it is aligned correctly.
- Using a drill, create pilot holes through the holes in the panel and into the posts. This will prevent the wood from splitting.
- Insert screws into each pilot hole and tighten them securely. Be sure to use weather-resistant screws to prevent rusting over time.
- Repeat this process for each panel, ensuring they are evenly spaced and level.
- Using brackets: If you prefer a method that allows for easy removal or replacement of panels, using brackets is a suitable option. Here’s how you can attach the panels using brackets:
- Start by positioning the panel in place against the posts.
- Place brackets at the top and bottom of the panel, ensuring they are aligned with the posts.
- Secure the brackets to the posts using screws or nails, depending on the type of bracket you are using.
- Slide the panel into the brackets and ensure it sits securely.
- Repeat this process for each panel, ensuring they are properly spaced and level.
Ensuring the panels are level and evenly spaced
After attaching the panels to the posts, it is essential to ensure that they are level and evenly spaced. This not only enhances the aesthetic appeal of your fence but also ensures its structural integrity. Follow these steps to achieve a professional-looking installation:
- Use a level tool to check the alignment of the first panel. Adjust the height and position of the panel as needed to ensure it is perfectly level.
- Continue the process with each subsequent panel, always checking for levelness before securing it to the posts.
- To ensure even spacing between panels, use a measuring tape or a spacer tool. This will help you maintain a consistent gap between the panels throughout the fence line.
Making any necessary adjustments or repairs
Once you have attached the panels and ensured they are level and evenly spaced, take a step back and inspect your fence. Look for any areas that may require adjustments or repairs. Common issues include loose screws, uneven panels, or damaged sections.
- If you notice any loose screws, tighten them securely to ensure stability.
- If any panels are uneven, adjust their position by loosening the screws or brackets and then repositioning them.
- If you find any damaged sections, such as bent panels or broken brackets, replace them promptly to maintain the integrity of your fence.
By following these steps and paying attention to detail, you can ensure a proper and secure installation of your green metal fence panels. Remember to periodically inspect your fence for any signs of wear or damage, and address them promptly to keep your fence looking great for years to come.
Regular Cleaning And Inspection
Removing any debris or vegetation around the posts
Regular cleaning and inspection are essential for maintaining the durability and longevity of your green metal fence posts. One important aspect of this maintenance routine is to remove any debris or vegetation that may have accumulated around the posts. Over time, leaves, grass, and other organic matter can create a damp environment around the posts, promoting rust and corrosion. To prevent this, it’s important to clear away any debris regularly.
Here are a few easy steps to follow when removing debris or vegetation:
- Start by using a broom or brush to sweep away any loose debris from the surrounding area.
- Next, carefully remove any weeds, grass, or small plants that may be growing near the base of the posts. You can either pull them out manually or use a garden tool like a weed trimmer.
- Inspect the area around the posts for any hidden debris or vegetation. Check between the fence panels, underneath the rails, and along the ground. Use a small rake or your hands to clear away any remaining debris.
- Dispose of the debris properly to prevent it from accumulating again in the future.
Checking for signs of rust or damage
Another crucial aspect of regular cleaning and inspection is checking your green metal fence posts for signs of rust or damage. Rust can weaken the structural integrity of the posts, increasing the risk of instability or collapse. By identifying and addressing rust or damage early on, you can prevent further deterioration and ensure the longevity of your fence.
Here’s how you can check for signs of rust or damage:
- Visually inspect the entire surface of each post, paying close attention to areas prone to rusting, such as joints, welds, and bottom edges.
- Look for any reddish-brown spots or discoloration on the metal surface, indicating the presence of rust.
- Run your hand along the post’s surface, feeling for any rough or pitted areas that could be signs of corrosion.
- If you notice any rust or damage, take action immediately to prevent further deterioration. Depending on the severity, you may need to remove the rust using a wire brush or apply a suitable rust treatment.
Applying protective coatings or paint if necessary
To provide an extra layer of protection to your green metal fence posts, you may consider applying protective coatings or paint. These coatings act as a barrier against moisture, sunlight, and other elements that can contribute to rust and corrosion.
If you decide to apply a protective coating or paint, follow these guidelines:
- Thoroughly clean the surfaces of the metal posts using a mild detergent and water. Remove any dirt, oils, or loose particles that could interfere with the adhesion of the coating.
- Allow the posts to dry completely before applying the protective coating or paint. It’s important to ensure that the surface is free from moisture to achieve optimal adhesion.
- Follow the manufacturer’s instructions when applying the protective coating or paint, including the recommended number of coats and drying times. Use a brush or roller to evenly apply the product, covering all exposed surfaces of the posts.
- Allow the coating or paint to cure fully before exposing the fence posts to the elements or touching them.
By regularly cleaning and inspecting your green metal fence posts, you can maintain their appearance, functionality, and durability for years to come. Make it a part of your routine maintenance to remove debris, check for rust or damage, and apply protective coatings as necessary. This will help ensure that your fence remains in excellent condition and provides a secure and aesthetic boundary for your property.
Ensuring Proper Drainage And Soil Conditions
Installing green metal fence posts is an excellent choice for enhancing the appeal and functionality of your property. However, it is essential to focus on proper drainage and soil conditions to ensure the longevity and stability of the fence. Addressing any drainage issues, monitoring soil moisture levels, and taking precautions against soil erosion are key steps in this process. Let’s explore each of these factors in detail:
Addressing Any Drainage Issues That Could Affect the Posts
Before you start the installation process, it is crucial to assess the drainage situation around the intended fence area. Poor drainage can lead to water accumulation, which can adversely affect the stability of the posts. Here are a few steps to take to address any potential drainage issues:
- Inspect the area: Carefully examine the ground where the fence will be installed, looking for any signs of standing water or waterlogged soil.
- Redirect water flow: If there are any natural slopes or uneven surfaces that direct water towards the fence area, consider implementing strategies to redirect water flow, such as installing drainage systems or creating ditches.
- Ensure proper grading: Properly grade the area around the fence to promote water runoff and prevent water pooling. Fill in any low spots to create a more even surface.
Monitoring Soil Moisture Levels and Making Necessary Adjustments
Keeping track of soil moisture levels is essential in maintaining the stability of the fence posts. Excessively dry or overly saturated soil can compromise their integrity. Here are some tips on monitoring and adjusting soil moisture levels:
- Use a moisture meter: Invest in a moisture meter to measure the moisture content of the soil. This tool will help provide accurate readings and determine if adjustments need to be made.
- Watering and drainage balance: Strike a balance between providing adequate water to the soil without overwatering it. Consider the specific needs of the plants in the surrounding area, as they may require different watering schedules.
- Adjusting irrigation systems: If you have an irrigation system in place, make sure it is adjusted to prevent excessive watering, which can lead to soil erosion and instability of the fence posts.
Taking Precautions Against Soil Erosion or Degradation
Soil erosion or degradation can pose a significant threat to the integrity of your fence posts. Taking precautions to prevent erosion will help maintain the stability of the posts and prolong the life of your fence. Consider implementing the following measures:
- Install erosion control measures: Depending on the severity of the erosion risk, measures such as retaining walls, erosion control blankets, or geotextiles can be installed to protect the soil and prevent erosion.
- Plant ground cover: Introducing ground cover plants or grasses in the surrounding area can help stabilize the soil. Their root systems act as anchors, holding the soil in place.
- Mulching: Applying a layer of mulch around the base of the posts can help retain moisture, prevent erosion, and protect the soil from weathering.
By addressing drainage issues, monitoring soil moisture levels, and taking precautions against soil erosion or degradation, you can ensure that your green metal fence posts remain sturdy and secure for years to come.
Repairing And Replacing Green Metal Fence Posts
If you have a green metal fence surrounding your property, it’s essential to keep an eye out for signs of damage or deterioration. Over time, factors such as weather conditions, accidents, or general wear and tear can compromise the stability and functionality of your fence posts. To ensure the longevity of your fence and maintain your property’s security, it’s important to promptly address any issues with the posts. In this section, we will discuss how to identify and address signs of damage or deterioration, proper techniques for replacing individual posts, and the benefits of considering professional assistance for major repairs or replacements.
Identifying and addressing signs of damage or deterioration
Regular inspection of your green metal fence posts is crucial to detect any signs of damage or deterioration. Here are some common indicators to look out for:
- Loose or wobbly posts: If you notice any posts that seem unstable or have excessive movement, it may indicate a problem with the foundation or connections. Quickly addressing this issue can prevent further damage and potential safety hazards.
- Visible rust or corrosion: Metal fences are susceptible to rust and corrosion, especially in humid or coastal areas. Inspect the posts for signs of rust, flaking paint, or corrosion, as this can weaken their structural integrity. Treating rust spots early on can help extend the lifespan of your posts.
- Bent or dented posts: Accidental impacts from vehicles, falling trees, or heavy objects can cause posts to become bent or dented. Such deformities can compromise the strength of the fence and should be addressed promptly to avoid further damage.
- Cracked or split posts: Extreme weather conditions like freezing temperatures or high winds can lead to cracks or splits in metal fence posts. These cracks can widen over time, compromising the stability and appearance of your fence.
If you identify any of these signs, it is important to take action to repair or replace the affected posts and prevent the damage from spreading to the rest of the fence.
Proper techniques for replacing individual posts
Replacing individual green metal fence posts is a task that can be tackled by homeowners with basic DIY skills. Follow these steps to ensure a successful replacement:
- Remove the damaged post: Start by detaching any fencing panels or brackets attached to the damaged post. Use a post puller or dig down around the post to remove it from the ground.
- Prepare the replacement post: Take accurate measurements of the removed post to ensure the replacement post is of the same height and width. If necessary, trim the replacement post to match the required dimensions.
- Install the replacement post: Dig a hole deep enough to support the replacement post securely. Add gravel or concrete to the base of the hole for additional stability. Carefully place the replacement post in the hole, ensuring it is level and plumb. Then, backfill the hole with soil and tamp it down firmly.
- Reattach the fence panels: Once the replacement post is securely in place, reattach the fencing panels or brackets to restore your fence’s overall integrity.
Remember to follow any specific manufacturer instructions or consult a professional if you are unsure about the process.
Considering professional assistance for major repairs or replacements
While replacing individual fence posts can be a DIY project for some, certain repairs or replacements may require professional assistance. Here are situations where it is advisable to seek the help of a fence contractor:
- Extensive damage or deterioration: If your fence has widespread damage, such as multiple posts needing replacement or significant structural issues, a professional can assess the extent of the damage and recommend appropriate solutions.
- Limited DIY experience: If you don’t have experience working with metal fences or lack the necessary tools, it’s safer to entrust the repair or replacement to experts who have the expertise and equipment required.
- Time constraints: Major repairs or replacements can be time-consuming, especially if you have a large fencing area. Hiring professionals can ensure the job is completed efficiently, saving you valuable time and effort.
- Lack of confidence: If you have concerns about your ability to complete the project to a high standard, it’s wise to hire professionals who can guarantee a professional finish and optimal fence performance.
By considering professional assistance for major repairs or replacements, you can have peace of mind knowing that your fence is in capable hands.
Frequently Asked Questions
How Do You Install Metal Fence Posts In The Ground?
To install metal fence posts in the ground, follow these steps: 1. Dig a hole deep enough to hold the post and ensure stability. 2. Place the post in the hole and ensure it is vertical. 3. Use concrete or gravel to fill the hole around the post for added stability.
4. Allow the concrete to cure before attaching the fence panels. 5. Secure the panels to the metal posts using appropriate hardware.
Should Metal Fence Posts Be Set In Concrete?
Yes, metal fence posts should be set in concrete. This ensures stability and prevents posts from leaning or shifting over time. Concrete provides strong support and helps the fence withstand various weather conditions. This method is recommended for durable and long-lasting metal fences.
How Far Should Green Fence Posts Be Apart?
Green fence posts should be spaced apart at a distance of 8 to 10 feet for optimal stability and support. This spacing allows for proper distribution of weight and prevents sagging or leaning.
How Deep Do Metal Fence Posts Need To Be Buried?
Metal fence posts should be buried at least 2 feet deep in the ground for stability.
Conclusion
Implementing green metal fence posts is a practical and eco-friendly choice for enhancing your property’s security and aesthetic appeal. By following the step-by-step installation process detailed in this guide, you can easily transform your outdoor space. Remember to choose the right materials, measure accurately, and securely install the posts for long-lasting durability.
With meticulous planning and careful execution, you’ll soon have a beautiful and reliable fence protecting your property. Enjoy the benefits of a green metal fence as you take pride in your DIY project.