To install a GFCI outlet in a bathroom, follow these steps carefully. The bathroom is one of the most important rooms in a house, and ensuring safety in this space is crucial.
One way to enhance safety is by installing a Ground Fault Circuit Interrupter (GFCI) outlet. GFCI outlets are designed to protect against electrical shocks, making them ideal for wet areas like bathrooms. Installing a GFCI outlet may seem daunting, but with the right guidance, it can be a straightforward process.
We will explain how to install a GFCI outlet in your bathroom, ensuring a safer electrical system and peace of mind. Let’s get started!
Understanding Gfci Outlets
What are GFCI Outlets?
GFCI stands for Ground Fault Circuit Interrupter. It is an electrical device designed to protect you from electric shock and prevent electrical fires caused by ground faults. A ground fault occurs when electricity escapes its intended path and travels through a person’s body or through water, metal, or other conductive materials.
GFCI outlets are specifically designed to detect ground faults and quickly interrupt the flow of electricity to prevent accidents. They are easily recognizable by their unique design, which includes two buttons labeled “test” and “reset” on the faceplate.
Importance of Installing GFCI Outlets in the Bathroom
The bathroom is one of the most important areas in a home where GFCI outlets should be installed. Due to the presence of water and moisture, the risk of electrical accidents in the bathroom is significantly higher compared to other rooms. Traditional outlets are not sensitive enough to detect ground faults in these conditions, which makes GFCI outlets a crucial safety measure.
Here are the key reasons why installing GFCI outlets in the bathroom is of utmost importance:
- Protection against electrical shocks: GFCI outlets constantly monitor the flow of electricity and provide immediate protection by quickly shutting off power in the event of a ground fault. This protects you from potential electric shocks, especially in bathroom areas where water is present.
- Prevention of electrical fires: Water is a conductor of electricity and can easily cause electrical sparks or short circuits. GFCI outlets help prevent electrical fires by cutting off the power supply as soon as a ground fault is detected.
- Compliance with electrical safety regulations: Building codes and electrical safety standards require GFCI outlets to be installed in bathrooms and other areas with a high risk of electrical accidents. Installing GFCI outlets not only ensures your safety but also keeps your home up to code.
- Safe operation of electrical appliances: GFCI outlets are equipped with advanced technology that protects not only you but also your electrical appliances. They can prevent damage to devices caused by faulty wiring or electrical surges.
- Peace of mind: By installing GFCI outlets in your bathroom, you can have peace of mind knowing that you have taken the necessary precautions to protect yourself and your family from electrical hazards. It is a small investment that can potentially save lives.
Overall, GFCI outlets are an essential safety feature in the bathroom due to the high risk of electrical accidents. By investing in these outlets, you ensure the safety of yourself, your loved ones, and your property.

Preparing For The Installation
Installing a GFCI outlet in your bathroom can greatly enhance the safety of your electrical system. Before you begin the installation process, it is important to properly prepare. This involves gathering the necessary tools and materials, turning off the power supply to the bathroom, and removing the existing outlet (if applicable).
Gathering the necessary tools and materials
Before you start the installation, it is important to gather all the tools and materials you will need. This ensures that you have everything on hand and saves you valuable time. Here is a list of the essential tools and materials you will need:
| Tools | Materials |
|
|
Turning off the power supply to the bathroom
Ensuring your safety should be your top priority, so it is crucial to turn off the power supply to the bathroom before starting any electrical work. This prevents any potential accidents and injuries. Follow these steps to turn off the power:
- Locate your main electrical panel.
- Find the circuit breaker that controls the bathroom.
- Flip the circuit breaker to the “off” position.
- Double-check that the power is off by using a voltage tester.
Removing the existing outlet (if applicable)
If you currently have an outlet in the bathroom that needs to be replaced with a GFCI outlet, you will need to remove it before installing the new one. Here’s how you can do it:
- Use a screwdriver to unscrew the outlet cover plate.
- Take out the screws that secure the outlet to the electrical box.
- Carefully pull the outlet out from the box.
- Note the positioning of the wires connected to the outlet.
- Disconnect the wires from the old outlet by removing the wire nuts.
- Remove the old outlet from the electrical box.
Now, you are ready to move on to the next step of installing the GFCI outlet in your bathroom. Stay tuned for the next section of our blog post where we will guide you through the actual installation process.
Installing The Gfci Outlet
The GFCI outlet is an important safety feature that every bathroom should have. It protects you from electrical shocks by immediately shutting off power when it detects a ground fault. Installing a GFCI outlet in your bathroom is a relatively simple task that can be done in a few steps. In this guide, we will walk you through the process of installing a GFCI outlet in your bathroom.
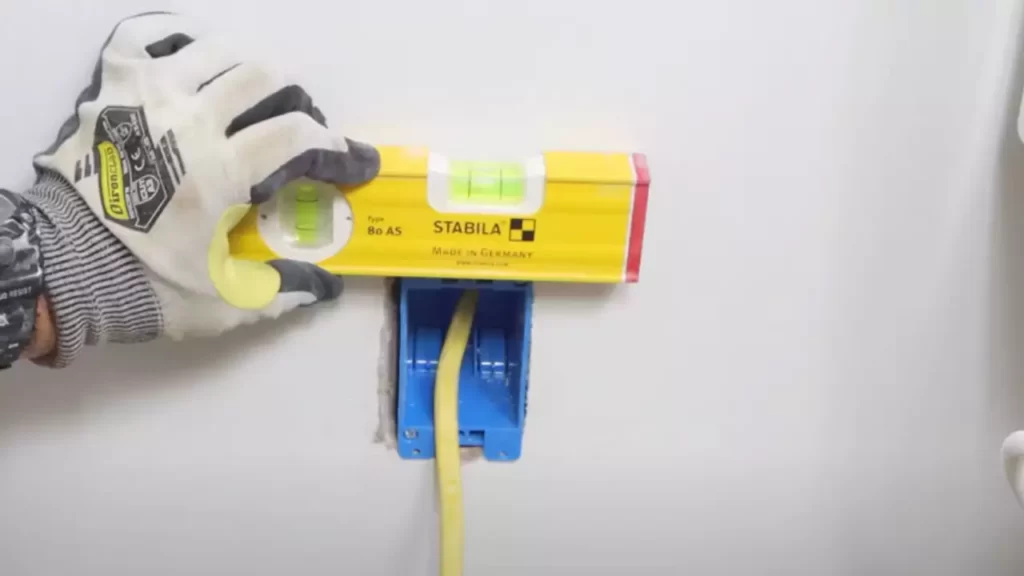
Choosing the correct location for the GFCI outlet
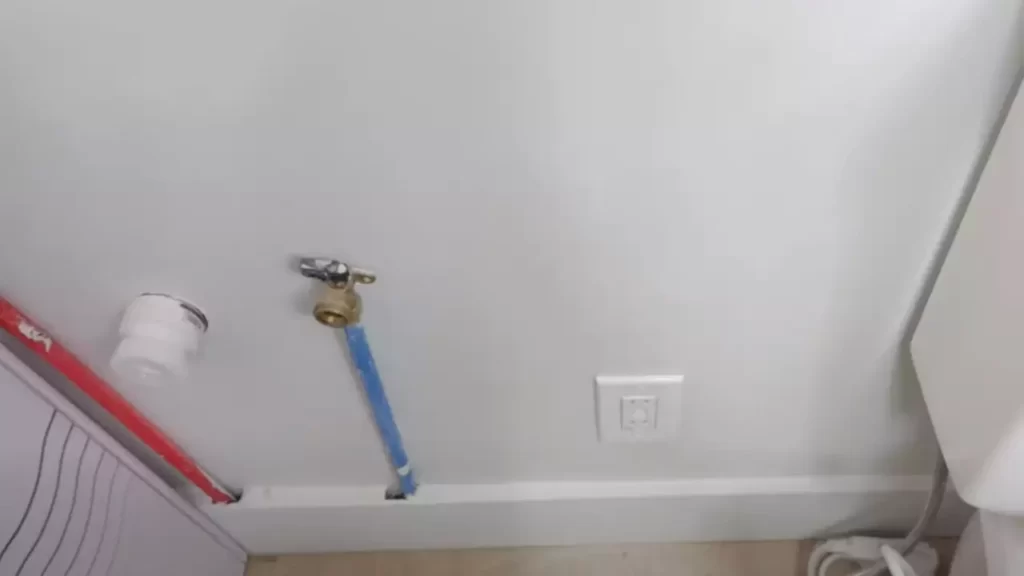
Before you start installing the GFCI outlet, you need to identify the correct location. According to the National Electrical Code, the GFCI outlet should be installed no more than 6 feet from any sink in the bathroom. This ensures that you have easy access to the outlet and provides optimal safety. Additionally, make sure that the outlet is not located near water sources or in damp areas, as this can pose a risk of electrical hazards.
Connecting the wires to the GFCI outlet
Once you have chosen the correct location for the GFCI outlet, you can start connecting the wires. Before you begin, make sure that the power to the bathroom is turned off at the circuit breaker. Remove the existing outlet cover and outlet from the electrical box. Using a voltage tester, double-check that the power is indeed off.
Next, identify the line and load wires. The line wires are the ones that bring power from the electrical panel, while the load wires are the ones that go to other outlets or devices. The line wires usually have black and white insulation, while the load wires may have different colors or be marked with tape. It’s important to distinguish between the two, as connecting them incorrectly can cause the GFCI outlet to trip or not provide protection.
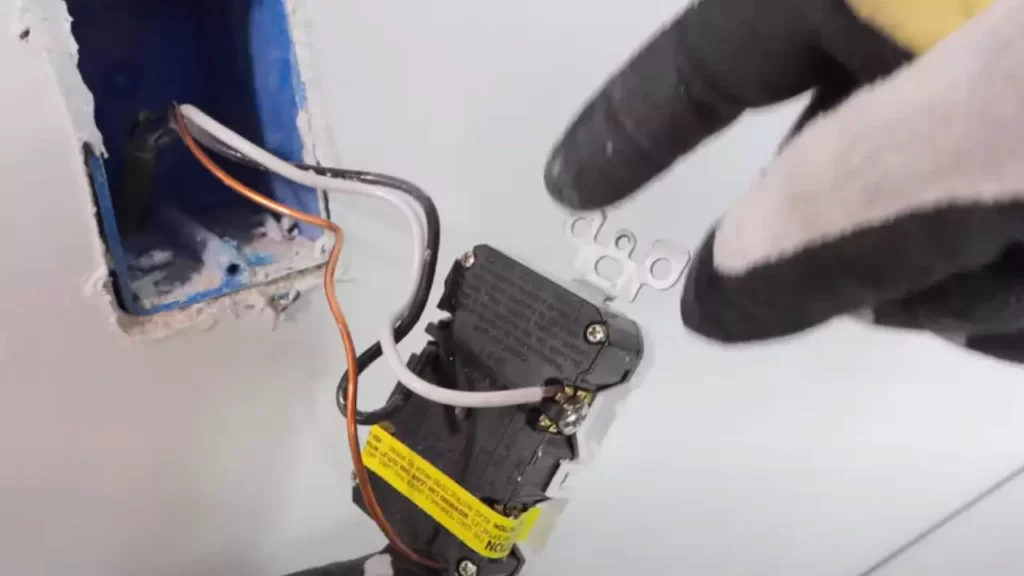
Attaching the wires to the appropriate terminals
Once you have identified the line and load wires, you can attach them to the appropriate terminals on the GFCI outlet. The line wires should be connected to the LINE terminals, which are usually labeled “Line,” “Hot,” or have brass or gold screws. The load wires should be connected to the LOAD terminals, which are usually labeled “Load,” “Load In,” or have silver screws.
To connect the wires, strip about 3/4 inch of insulation from the ends of the wires. Wrapping the wires clockwise around the screws, tighten them securely. Make sure that no bare wire is exposed and that the screws are tightened firmly. Additionally, you can use wire nuts to secure the connections and provide extra protection.
Securing the GFCI outlet to the electrical box
Once the wires are securely attached, you can carefully fold and tuck them into the electrical box. Position the GFCI outlet so that it sits flush with the wall and align the screw holes. Insert the screws through the screw holes and tighten them to secure the outlet to the box. Be careful not to overtighten the screws, as this can damage the outlet or the electrical box.
Testing the GFCI outlet
After the GFCI outlet is securely installed, it’s important to test it to ensure proper functionality. To test the outlet, press the “Test” button on the outlet. This should cause the “Reset” button to pop out, indicating that the GFCI outlet has tripped and the power is shut off. To restore power, simply press the “Reset” button. If the “Reset” button doesn’t pop out or the outlet doesn’t shut off when the “Test” button is pressed, there may be a wiring issue. In this case, consult a qualified electrician to troubleshoot and fix the problem.
Installing a GFCI outlet in your bathroom is an important safety measure that can protect you and your family from electrical hazards. By following these simple steps and ensuring the correct installation, you can have peace of mind knowing that your bathroom is equipped with a reliable GFCI outlet.
Additional Considerations
Additional Considerations
When installing a GFCI outlet in your bathroom, it’s important to not only follow the basic installation steps, but also take into account some additional considerations. These considerations will ensure that the GFCI outlet functions properly and provides the necessary safety features for your bathroom electrical system. Below are some important factors to consider:
Understanding the importance of bubble covers
One of the key considerations when installing a GFCI outlet in the bathroom is the use of bubble covers. These covers are designed to provide extra protection against water and moisture, preventing any accidental contact with the electrical components. Bubble covers typically feature a clear or frosted design that allows for easy visibility of the plug while ensuring adequate protection. Moreover, they are easy to install and can be purchased at any hardware store.
Grounding the GFCI outlet
Proper grounding of the GFCI outlet is crucial for its effective functioning. Grounding helps divert any electrical faults or potential short circuits away from the device and into the ground. To ground a GFCI outlet, you’ll need to ensure a proper grounding wire (usually copper) is connected securely. This grounding wire is typically attached to a metal grounding rod or a cold water pipe, providing a safe path for electrical currents to flow in the event of a fault. Always consult a licensed electrician if you are unsure about the proper grounding process.
Adhering to local electrical codes and regulations
In addition to the basic installation steps, it’s crucial to adhere to the local electrical codes and regulations when installing a GFCI outlet in your bathroom. These codes are designed to ensure the safety and compliance of your electrical system. Some common requirements include the placement of the outlet, maximum distances from water sources, and the use of GFCI-protected circuits for all bathroom outlets. Checking your local building codes or consulting a professional electrician will ensure that your installation meets all the necessary requirements.
Troubleshooting Common Issues
Resetting a tripped GFCI outlet
If your GFCI outlet has tripped, it means that there was a fault detected in the circuit. This could have been caused by a faulty appliance or too much moisture in the bathroom. To reset the outlet, follow these steps:
- Locate the GFCI outlet in your bathroom. It is usually installed near the sink, and it has two buttons – ‘Test’ and ‘Reset’.
- Press the ‘Reset’ button firmly and release it. You should hear a click sound indicating that the GFCI outlet has been reset.
- Once the outlet is reset, test it by plugging in a small appliance or using a voltage tester to ensure it is functioning properly.
- If the GFCI outlet trips again immediately after resetting, there may be a more serious underlying issue. In this case, it’s best to seek professional help to diagnose and fix the problem.
Diagnosing and fixing faulty connections
Faulty connections can also cause GFCI outlets to malfunction. It’s important to check the connections if you are experiencing issues with your outlet. Here’s how:
- Turn off the power to the GFCI outlet by switching off the circuit breaker in your electrical panel.
- Remove the cover plate of the outlet by unscrewing the screws holding it in place.
- Inspect the wiring connections, ensuring they are securely attached. If you notice any loose or damaged wires, carefully reattach or replace them.
- Once the wiring connections are fixed, put the cover plate back on and test the outlet to see if the issue has been resolved.
Seeking professional help when needed
In some cases, troubleshooting common GFCI outlet issues may require the expertise of a professional electrician. If you are unsure about any aspect of the troubleshooting process or if the problems persist after you have tried the above steps, it’s best to consult a qualified electrician. They have the knowledge and tools to diagnose and fix complex electrical issues safely.
Remember, electrical work can be dangerous if not done correctly, so it’s always better to err on the side of caution and seek professional help when needed.
By following these troubleshooting tips, you can effectively address common issues with GFCI outlets in your bathroom. Whether it’s resetting a tripped outlet, diagnosing faulty connections, or seeking professional assistance, you can ensure the safety and functionality of your bathroom’s electrical system.
Maintaining Gfci Outlets
Regular maintenance of GFCI outlets in the bathroom is crucial to ensure the ongoing safety of your electrical system. GFCI outlets are specifically designed to protect against electrical shocks, making them an essential component of any bathroom. In this section, we will discuss two key aspects of maintaining GFCI outlets: regular testing and inspection, and replacing outdated or malfunctioning outlets.
Regular testing and inspection of GFCI outlets
Testing and inspecting GFCI outlets on a regular basis is essential to ensure they are functioning correctly. This should be a simple yet routine task that doesn’t require any expert knowledge. Here are the steps for conducting a regular test:
- Locate the GFCI outlet in your bathroom.
- Press the “TEST” button on the outlet. This should cut off power and the “RESET” button should pop out.
- If the “RESET” button does not pop out, or if pressing it back in does not restore power, the GFCI outlet may be faulty and should be replaced (discussed in the next section).
- If the “RESET” button pops out as expected, press it back in to restore power.
It’s recommended to perform this test at least once a month to ensure the outlet is functioning properly. Additionally, be sure to inspect the outlet for any signs of damage or wear. If you notice any cracks, loose connections, or other issues, it’s best to have a qualified electrician inspect and repair the outlet.
Replacing outdated or malfunctioning GFCI outlets
Over time, GFCI outlets can become outdated or malfunction due to various factors. It’s important to replace any outdated or malfunctioning outlets to maintain electrical safety in your bathroom. Here are the steps for replacing a GFCI outlet:
- Before starting, turn off the power to the outlet at the main electrical panel.
- Remove the cover plate and unscrew the outlet from the electrical box.
- Disconnect the wires from the old outlet, making note of which wire corresponds to which terminal.
- Connect the wires to the new GFCI outlet, ensuring the correct pairing.
- Screw the new outlet back into the electrical box and replace the cover plate.
- Finally, turn the power back on at the main electrical panel and test the new GFCI outlet.
Remember, if you are unsure about any part of replacing a GFCI outlet, it’s best to seek the assistance of a licensed electrician to ensure it is done safely and correctly.
Maintaining GFCI outlets in your bathroom is a simple yet important aspect of electrical safety. By regularly testing and inspecting your outlets, as well as replacing outdated or malfunctioning ones, you can ensure a safe and secure electrical system in your bathroom!
Frequently Asked Questions
Can I Install A Gfci Outlet Myself?
Yes, you can install a GFCI outlet yourself. Follow these guidelines: 1. Turn off power. 2. Remove existing outlet. 3. Connect wires to new GFCI outlet. 4. Attach outlet to wall. 5. Test the outlet. However, it’s recommended to consult an electrician if unsure or uncomfortable with electrical work.
Where Do You Put Gfci In Bathroom?
Install the GFCI outlet in the bathroom near the sink, ensuring it’s easily accessible. The electrical code requires the GFCI outlet to be located within 6 feet of a sink, to prevent electric shocks. Place it away from water sources but within reach for safety.
Do I Need Gfci On Every Bathroom Outlet?
Yes, GFCI (Ground Fault Circuit Interrupter) outlets are required in every bathroom. This is to protect against electrical shock hazards that could occur near water sources. It is an important safety measure to ensure the well-being of individuals using the bathroom.
How Close Can A Gfci Outlet Be To A Shower?
A GFCI outlet should be at least 6 feet away from the shower to ensure safety.
Conclusion
To ensure the safety and functionality of your bathroom, installing a GFCI outlet is crucial. By following these step-by-step instructions, you can easily add this essential electrical feature. Remember, GFCI outlets protect against electric shocks and are specifically designed for areas with moisture, such as bathrooms.
By taking the time to install a GFCI outlet, you’re prioritizing the safety of you and your loved ones. Don’t compromise on electrical safety – follow the process outlined in this guide and enjoy peace of mind in your bathroom.