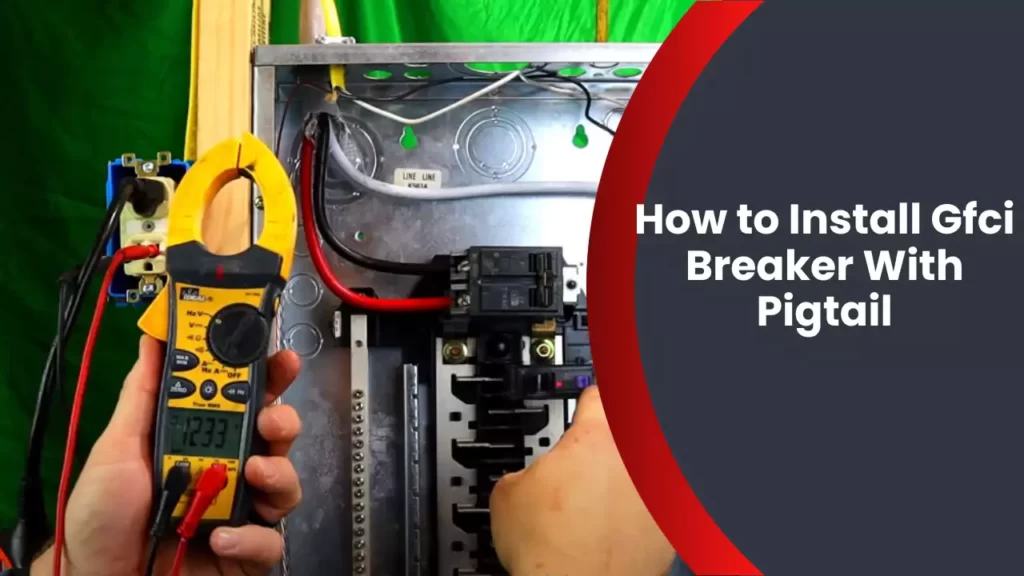
To install a GFCI breaker with a pigtail, attach the pigtail to the neutral bar in your breaker box and connect the breaker to the hot bus bar. The GFCI breaker will provide protection against electrical shocks and should be installed by a licensed electrician.
GFCI breakers are designed to automatically interrupt the electrical circuit in the event of a ground fault, thereby preventing potential electrical hazard. Not only do they offer protection to you and your family, but also to your electrical appliances and devices.
By following the proper installation process, you can ensure the safety of your home’s electrical system and minimize the risk of electrical accidents.
Understanding Gfci Breakers And Their Importance
What is a GFCI breaker?
A Ground Fault Circuit Interrupter (GFCI) breaker is a crucial electrical safety device that ensures protection against electrical shocks and potential hazards. It is designed to monitor the flow of electricity and automatically shut off power in the event of ground faults or electrical leaks. Unlike traditional circuit breakers that only protect against overloads and short circuits, GFCI breakers offer an extra layer of protection by detecting even the tiniest imbalances in current flow.
Why are GFCI breakers important?
GFCI breakers play a vital role in ensuring electrical safety in homes, workplaces, and public areas. They are especially important in areas where water and electricity are present, such as kitchens, bathrooms, and outdoor outlets. The primary purpose of GFCI breakers is to significantly reduce the risk of electrical shock by interrupting the power supply when a fault is detected, preventing possible electrocution or electrical fires.
The benefits of using GFCI breakers
Using GFCI breakers comes with several benefits, making them an essential component of any electrical system:
- Enhanced safety: GFCI breakers provide an added layer of protection against electrical shock, reducing the risk of injuries or fatalities caused by electrical accidents.
- Prevent electrical fires: By quickly interrupting the power supply when a ground fault occurs, GFCI breakers prevent potential electrical fires that can result from faulty wiring or excessive current flow.
- Compliance with electrical codes: GFCI breakers are often required by building codes for specific areas, such as kitchens, bathrooms, garages, and outdoor outlets. Installing them ensures compliance with safety regulations.
- Early detection of faults: GFCI breakers are extremely sensitive devices that detect even slight imbalances in current flow. This early detection capability helps pinpoint potential electrical issues before they escalate into significant problems.
- Easy installation and maintenance: While electrical work should generally be done by professionals, installing a GFCI breaker with a pigtail is relatively straightforward. It can easily replace a regular circuit breaker in most cases.
Investing in GFCI breakers is a crucial step towards maintaining electrical safety in any property. Their ability to detect ground faults and quickly interrupt the power supply can save lives, prevent injuries, and safeguard against property damage resulting from electrical accidents.
Preparing For Installation
Before you begin installing a GFCI breaker with pigtail, it’s important to properly prepare yourself and gather all the necessary tools and materials. By following these steps and taking necessary safety precautions, you can ensure a smooth and hassle-free installation process.
Necessary Tools and Materials
Make sure you have the following tools and materials ready before you start:
- GFCI breaker with pigtail – make sure it matches the amperage and voltage requirements of your circuit
- Wire strippers – for removing the insulation from the wires
- Needle-nose pliers – for manipulating wires and securing connections
- Screwdriver – for removing and installing screws
- Electrical tape – for insulating connections
- Wire connectors – for joining wires securely
- Voltage tester – for checking if the power is off
Safety Precautions
When working with electricity, it’s crucial to prioritize safety. By following these safety precautions, you can prevent accidents and potential hazards:
- Always turn off the power to the circuit you’re working on. This can be done by shutting off the relevant circuit breaker in the main electrical panel.
- Use a voltage tester to double-check if the power is really off before you proceed with any work.
- Avoid working in wet conditions or with damp hands to reduce the risk of electric shock.
- Wear insulated gloves and safety goggles to protect yourself from potential electrical hazards.
- Do not rush the installation process. Take your time and follow the manufacturer’s instructions carefully.
- If you’re unsure about any aspect of the installation, it’s best to consult a licensed electrician.
Shutting off the Power
Before starting the installation process, you must shut off the power to the circuit you’ll be working on. Here’s how you can do it:
- Locate the main electrical panel in your home.
- Identify the circuit breaker that controls the specific circuit you’ll be working on.
- Turn the circuit breaker to the “off” position.
- Double-check that the power is indeed off by using a voltage tester.
Once you’ve completed these steps, you can proceed with the installation of the GFCI breaker with pigtail, confident in the knowledge that you have taken necessary safety precautions.
Step 1: Identifying The Circuit
Before you can begin installing a GFCI breaker with a pigtail, it’s crucial to identify the specific circuit you’ll be working on. This will ensure the safety and proper functioning of your electrical system. In this step, we’ll guide you through locating the circuit breaker panel and determining the circuit to install the GFCI breaker.
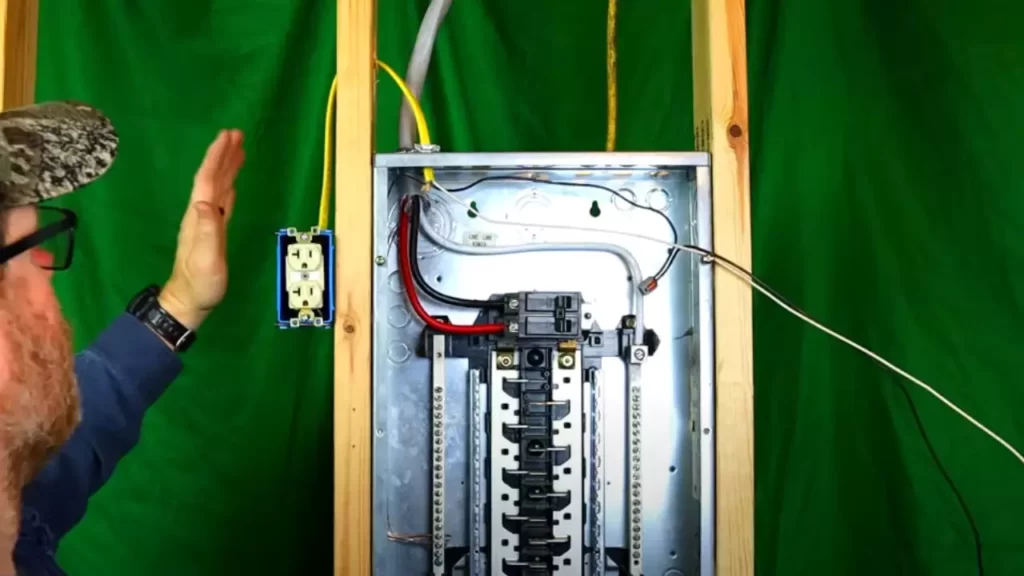
Locating the Circuit Breaker Panel
The first task in identifying the circuit is finding the circuit breaker panel. This is usually located in a basement, utility room, garage, or outside your home. When you locate the panel, be sure to keep safety in mind and follow these steps:
- Wear safety goggles and insulated gloves to protect yourself from any potential electrical hazards.
- Open the panel door by removing the screws or latches holding it in place.
- Use a flashlight to get a clear view of the breakers inside the panel.
Now that you’ve found the circuit breaker panel, it’s time to determine which circuit you’ll be installing the GFCI breaker on.
Determining the Circuit to Install the GFCI Breaker
Identifying the circuit to install the GFCI breaker on ensures that you select the right breaker and prevent any potential electrical mishaps. Follow these steps to determine the circuit:
- Trace the electric wires from the GFCI outlet to the circuit breaker panel. This can usually be done visually or by using a wire tracer tool.
- Turn off the circuit breaker that corresponds to the GFCI outlet. This will help with the installation process and ensure no power is flowing through the wires.
- Double-check the power by using a non-contact voltage tester. This will confirm that no electricity is present in the wires.
- If there are multiple circuits connected to the GFCI outlet, label each wire with the circuit number for future reference.
By diligently following these steps, you have successfully identified the specific circuit you’ll be working on. This will allow you to proceed with confidence to the next steps of installing a GFCI breaker with a pigtail. Stay tuned for the upcoming sections of this blog post!
Step 2: Removing The Existing Breaker
Once you have turned off the main breaker and ensured that the power is cut off, it’s time to proceed with removing the existing breaker. This is an important step in installing a GFCI breaker with a pigtail because you need to replace the old breaker with the new one.
Turning off the main breaker
Before you start working with any electrical components, always turn off the main breaker to avoid any electrical shock or injury. It is crucial to prioritize safety during this process. To turn off the main breaker, follow these steps:
- Locate the main electrical panel in your home.
- Open the panel cover by unscrewing the screws that hold it in place. Refer to the next heading for detailed instructions on removing the panel cover.
- Inside the panel, find the main breaker, which is usually larger in size compared to the other breakers.
- Switch the main breaker to the “off” position by pushing it to the opposite direction of the “on” position. This will cut off the power supply to the entire panel and protect you from any electrical hazards.
Removing the panel cover
With the main breaker turned off, you can now safely remove the panel cover. The panel cover protects the electrical components inside the panel and may vary in terms of the type of attachment.
To remove the panel cover, follow these instructions:
- Locate the screws that secure the panel cover in place. These screws are typically located at the corners or edges of the panel.
- Using a suitable screwdriver, carefully unscrew the screws counterclockwise. Be cautious not to drop the screws inside the panel.
- Set the screws aside in a safe place to prevent them from getting lost.
- Gently lift the panel cover upward and away from the panel, ensuring not to damage any wires or components.
Identifying the breaker to replace
Now that you have removed the panel cover, you need to identify the specific breaker that needs to be replaced with the GFCI breaker pigtail. It is essential to locate the correct breaker to ensure a proper installation and functionality of the GFCI breaker.
To identify the breaker to replace, follow these steps:
- Take note of the breaker’s arrangement and labeling inside the panel. This will help you understand the electrical circuit distribution in your home.
- If the breakers are not labeled, you may need to identify the correct one through a process of trial and error.
- One way to identify the breaker is by shutting off appliances or lights connected to each breaker one by one and checking if any power is disrupted.
- Keep in mind that some breakers may control multiple outlets or fixtures, so ensure that no power is flowing to the specific circuit by testing it using a voltage tester.
Safely removing the existing breaker
Now that you have identified the breaker to replace, it’s time to safely remove the existing breaker from the panel. This involves disconnecting the wires connected to it without causing any damage to yourself or the electrical system.
To safely remove the existing breaker, follow these steps:
- Make sure you are wearing protective gloves and safety goggles to shield yourself from any potential harm.
- Using an appropriate screwdriver, loosen the screws that secure the wires connected to the existing breaker.
- Once the screws are loosened, carefully detach the wires from the breaker terminals.
- Ensure that there is no tension or stress on the wires and that they are free from any connection once removed from the breaker.
- Set the existing breaker aside in a safe place, as it may be needed for reference or if it’s still in usable condition.
With the existing breaker safely removed, you can now proceed with the next step of installing the GFCI breaker with a pigtail.
Step 3: Connecting The Pigtail
Now that you have a good understanding of the pigtail and why it is important, it’s time to move on to the actual connection process. This step is crucial for the proper installation of your GFCI breaker. Follow these simple guidelines to ensure a secure and successful connection.
Understanding the pigtail
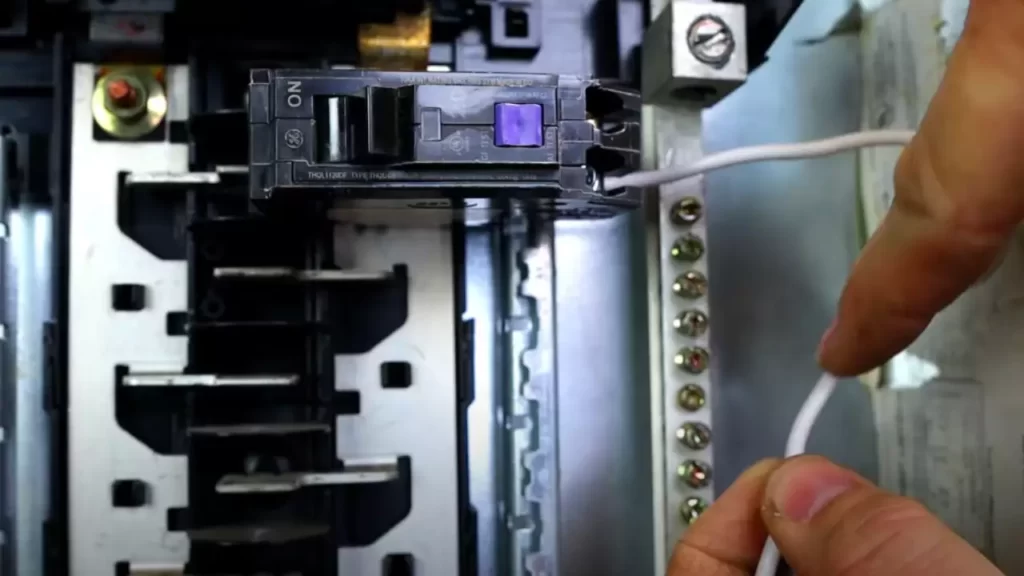
Before you start connecting the pigtail, it’s essential to have a clear understanding of what it is and how it works. The pigtail is a short length of wire with a pre-installed connector on one end. This connector is specifically designed to fit into the corresponding slot on your GFCI breaker.
Connecting the pigtail to the GFCI breaker
Now that you have the pigtail in hand, it’s time to connect it to the GFCI breaker. Follow these simple steps:
- Identify the slot on the GFCI breaker designated for the pigtail connection. Refer to the manufacturer’s instructions or the markings on the breaker for guidance.
- Gently insert the pigtail’s connector into the designated slot on the GFCI breaker. Make sure it fits snugly to ensure a proper electrical connection.
- Double-check that the pigtail is securely connected by giving it a gentle tug. It should not come loose or disconnect easily. A loose connection can lead to electrical hazards and unreliable GFCI protection.
Properly securing the connections
Now that you have successfully connected the pigtail to the GFCI breaker, it’s important to ensure that the connections are properly secured. Follow these steps:
- Inspect the connection point between the pigtail and the GFCI breaker. Look for any signs of loose wires, exposed strands, or improper alignment.
- If necessary, use electrical tape or wire nuts to secure and protect the connection point. This step is crucial for minimizing the risk of electrical shocks and maintaining a reliable GFCI circuit.
- Finally, tidy up the connections by organizing the wires and ensuring they are neatly secured to prevent accidental disconnections.
By following these steps, you can confidently connect the pigtail to your GFCI breaker. Remember that proper installation is essential for the safety and effectiveness of your GFCI circuit. Ensure that all connections are secure, and if you have any doubts, don’t hesitate to seek professional assistance.
Step 4: Installing The Gfci Breaker
Now that you have prepared the panel and connected the pigtail, it’s time to install the GFCI breaker. This step ensures the proper functioning and safety of your electrical circuit. Follow these simple steps to complete the installation process.
Inserting the GFCI breaker into the panel
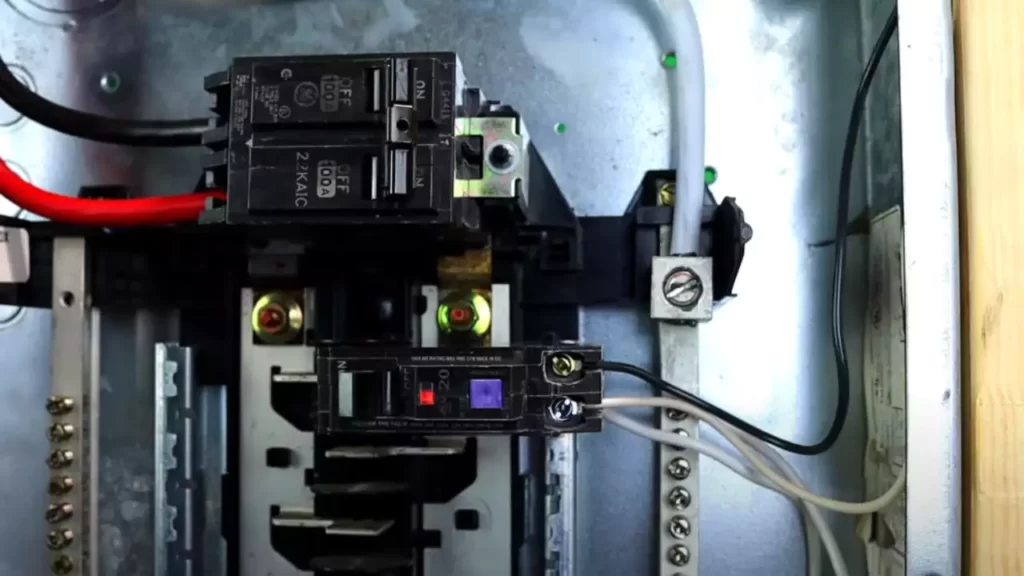
Begin by carefully inserting the GFCI breaker into the panel. The breaker is designed to fit into a specific slot in the panel. Locate the slot designated for the GFCI breaker and align the breaker with the bus bar. Make sure the breaker’s connection points face the bus bar. Slowly push the breaker into the slot until it is fully inserted. A firm but gentle push will ensure its proper placement.
Ensuring a proper fit
Once the GFCI breaker is inserted, it’s essential to double-check for a proper fit. Take a moment to inspect the breaker and ensure that it is fully engaged with the bus bar. Look for any signs of misalignment or loose connection. A loose breaker can cause electrical issues and compromise the circuit’s safety. To avoid any potential problems, make sure the breaker is securely and correctly positioned within the panel.
Tightening the breaker into place
With the GFCI breaker in the correct position, it’s time to secure it into place. Using a screwdriver, gently tighten the breaker’s screws until they are snug against the panel. Ensure that each screw is tightened evenly to avoid any imbalance or loose connection. Be careful not to overtighten, as it may damage the breaker or the panel. A secure and firm connection will promote optimal functionality and safety for your GFCI breaker installation.
Congratulations! You have successfully installed the GFCI breaker with a pigtail. This important step ensures electrical safety in your home or workspace. Remember to double-check your work and perform a final inspection to ensure everything is properly connected before restoring power to the circuit.
Step 5: Testing The Gfci Breaker
Congratulations on successfully installing the GFCI breaker with a pigtail! Now it’s time to ensure it’s working properly and providing the necessary protection. Follow the below steps to test the functionality of your GFCI breaker:
Turning on the main breaker
Before you begin testing the GFCI breaker, make sure you have turned on the main breaker of your electrical panel. This will provide power to the entire circuit, including the GFCI breaker.
To turn on the main breaker:
- Locate the main breaker switch in your electrical panel. It is usually located at the top or bottom, with a larger handle or switch compared to the other breakers.
- Make sure the main breaker switch is in the “Off” position, which is usually downward or to the side.
- Now, firmly push or flip the main breaker switch to the “On” position. You should feel a slight resistance as you do this.
- Once the main breaker is turned on, power will flow to all the branch circuits, including the one protected by the GFCI breaker.
Testing the GFCI breaker functionality
Now that the main breaker is on, it’s time to test if the GFCI breaker is functioning properly. Follow these steps to test its functionality:
- Locate the test and reset buttons on the GFCI breaker. These buttons are usually labeled accordingly.
- Make sure all electrical devices connected to the GFCI-protected circuit are turned off.
- Press the test button firmly. You should hear a click, and the GFCI breaker should trip, cutting off power to the circuit.
- Now, check that all the devices connected to the GFCI-protected circuit are no longer receiving power.
- If the devices are still receiving power, the GFCI breaker is not functioning properly and should be replaced.
Resetting the breaker if necessary
If the devices connected to the GFCI-protected circuit are no longer receiving power after pressing the test button, it means the GFCI breaker has tripped successfully. To restore power, follow these steps:
- Locate the reset button on the GFCI breaker, usually labeled accordingly.
- Press the reset button firmly. You should feel a click, indicating that the GFCI breaker has been reset.
- Once the breaker is reset, power should be restored to the GFCI-protected circuit, and the devices should receive power again.
- If the breaker trips immediately after resetting or continues to trip frequently, there may be an electrical fault. In this case, consult a qualified electrician to diagnose and resolve the issue.
By following these steps, you can ensure that your GFCI breaker is in proper working condition and providing the necessary protection against electrical hazards. Remember to test the GFCI breaker periodically to ensure continued functionality and safety in your electrical system.
Additional Considerations And Troubleshooting
Once you have successfully installed a GFCI breaker with a pigtail, there are a few additional considerations and troubleshooting steps you should keep in mind. By paying attention to these factors, you can ensure the proper functioning of your GFCI breaker and enhance the safety of your electrical system. In this section, we will discuss common installation issues and their solutions, proper grounding and wiring techniques, as well as tips for maintaining GFCI breakers.
Common Installation Issues and Their Solutions
During the installation of a GFCI breaker with a pigtail, you may encounter a few common issues that can potentially affect its performance. Here are some solutions to these issues:
- Improper Wiring: Make sure you have followed the manufacturer’s instructions and wired the GFCI breaker correctly. Double-check the connections to ensure they are secure and properly tightened.
- Faulty Wiring: If the GFCI breaker keeps tripping or doesn’t work at all, inspect the wiring connected to the breaker. Look for any signs of damage, loose connections, or exposed wires. If you find any issues, fix them immediately or consult a qualified electrician.
- Incompatible Load: It’s essential to ensure that the GFCI breaker is suitable for the specific electrical load it is managing. If the breaker is repeatedly tripping, it may be due to an overload or mismatched load. Consider upgrading to a higher-rated breaker or distribute the load across multiple circuits.
Proper Grounding and Wiring Techniques
For the GFCI breaker to function correctly, proper grounding and wiring techniques should be employed. Here are some tips to adhere to:
- Grounding: Ensure that your electrical system has a proper grounding pathway. This helps in diverting any stray electrical currents away from people or property.
- Wiring: Use the appropriate wire size and type according to the electrical code. Avoid using any damaged or worn-out wires during the installation process.
- Tight Connections: Make sure all connections, including the pigtail connection, are securely fastened. Loose connections can lead to issues such as overheating and can cause the breaker to trip frequently.
- Labeling: It is crucial to label the GFCI breaker in the electrical panel accordingly. This will help you and others identify the protected circuits easily.
Tips for Maintaining GFCI Breakers
Maintaining your GFCI breakers regularly is essential for their long-term performance and safety. Here are some tips to help you keep your GFCI breakers in optimum condition:
- Monthly Testing: Test your GFCI breaker by pressing the “TEST” button monthly. This ensures that it is still capable of detecting ground faults and interrupting the circuit.
- Visual Inspection: Regularly inspect the pigtail connection, wiring, and overall condition of the GFCI breaker. Look for any signs of wear, loose wires, or damage. If any issues are found, address them promptly.
- Regular Resetting: Occasionally resetting the GFCI breaker can help keep it in good working order. Simply turning the breaker off and then on again can help reset any tripped conditions or minor glitches.
- Professional Service: If you encounter persistent issues with the GFCI breaker or suspect underlying electrical problems, it is advised to seek professional help. Qualified electricians can troubleshoot and service the breaker to ensure its proper functioning.
Frequently Asked Questions
Where Does Pigtail On Gfci Breaker Go?
The pigtail on a GFCI breaker should be connected to either a ground bus bar or to a ground connection on the circuit panel.
Why Do Some Gfci Breakers Have A Pigtail?
Some GFCI breakers have a pigtail because it allows for easier installation and replacement. The pigtail is connected to the line and load wires, providing a secure and stable connection. It simplifies the process and ensures optimal functionality of the GFCI breaker.
Can You Pigtail A Gfci Breaker?
No, you cannot pigtail a GFCI breaker. It is not safe or recommended to do so. GFCI breakers have specific wiring requirements that must be followed to ensure their proper functioning. Always consult a qualified electrician for any electrical installations or modifications.
How Do You Install A Pigtail Breaker?
To install a pigtail breaker, first turn off the power supply. Remove the panel cover and locate an available slot for the breaker. Connect the pigtail wire to the breaker and insert it into the slot. Ensure a secure fit and reattach the panel cover.
Test the breaker to ensure it’s working properly.
Conclusion
To sum up, installing a GFCI breaker with a pigtail is a simple and effective way to enhance electrical safety in your home. By following the step-by-step instructions and ensuring proper electrical connections, you can provide protection against electrical shocks and potential fire hazards.
Taking the time to install GFCI breakers ensures the safety of your family and property. So why wait? Upgrade your electrical system today for a worry-free and secure environment.