To install a generator transfer switch, first, turn off the main electrical panel, then remove the cover and locate the knockout hole. Install a conduit connector and run the conduit from the hole to the generator’s location.
Installing a generator transfer switch is necessary to safely and easily switch between utility power and generator power during an outage. This switch ensures that only one power source is connected to your home’s electrical system at a time and protects both your generator and utility workers.
By following a few simple steps, you can install a generator transfer switch and enjoy peace of mind knowing that you have a reliable backup power solution in place. We will provide a step-by-step guide to installing a generator transfer switch to help you navigate the installation process smoothly.
What Is A Generator Transfer Switch?
Definition and Purpose of a Generator Transfer Switch
A generator transfer switch is a critical component of a backup power system, allowing you to safely and conveniently switch between utility power and generator power during an outage. It acts as a bridge between your home’s electrical panel and the generator, ensuring the smooth transition of power without any disruptions.
The primary purpose of a generator transfer switch is to isolate your home from the grid during a power outage. This eliminates any risk of backfeeding, where power from your generator flows into the utility lines, potentially endangering line workers or damaging appliances when the main power is restored. By disconnecting from the grid, the transfer switch protects your generator, home, and those working on the line, ensuring the safe and efficient operation of your backup power system.
Importance of Installing a Transfer Switch for Generator Safety
Installing a transfer switch for your generator is an essential safety measure that should not be overlooked. While it may be tempting to use extension cords and plug various appliances into your generator during an emergency, this approach is not only inconvenient but also potentially hazardous.
Here’s why a transfer switch is crucial for generator safety:
- Safeguards against backfeeding: Backfeeding occurs when the electricity flows from the generator into the utility lines, posing a serious safety risk to utility workers. With a transfer switch, you can completely isolate your home from the grid, preventing any accidental backfeeding.
- Ensures proper power management: A transfer switch allows you to choose specific circuits in your home that you want to power during an outage. This enables you to prioritize essentials such as refrigerators, heating systems, and lighting, while preventing overload on the generator.
- Provides convenience and ease of use: With a transfer switch, you no longer need to juggle multiple extension cords and manually connect appliances to the generator. The switch automates the process, enabling you to start the generator with ease and ensure a seamless transition of power throughout your home.
By installing a transfer switch, you are not only safeguarding your electrical system but also protecting the safety of yourself, your family, and utility workers. It’s a small investment that provides peace of mind and ensures that you can efficiently and safely power your home during an outage.
Types Of Generator Transfer Switches
When it comes to installing a generator transfer switch, there are different types available, each with its own set of benefits and functionalities. In this section, we will discuss the three main types of generator transfer switches: manual transfer switches, automatic transfer switches, and the comparison between the two.
Manual Transfer Switches
Manual transfer switches, as the name suggests, require manual intervention to transfer the power source from the utility grid to the generator. These switches often come with a lever or a toggle switch that the user needs to flip to make the switch.
One of the advantages of a manual transfer switch is its simplicity. It doesn’t rely on any additional sensors or circuits to detect a power outage. These switches are relatively easy to install and usually come with clear instructions. Additionally, they are cost-effective compared to automatic transfer switches.
However, it’s important to note that manual transfer switches require active monitoring and physical presence to operate. This means that someone must be present to switch the power source during an outage, making it less convenient. Also, there’s a higher risk of human error with manual switches, which can lead to potential safety hazards.
Automatic Transfer Switches
Automatic transfer switches, on the other hand, offer a more seamless and convenient power transfer process. These switches are designed to automatically detect a power outage and switch to the backup generator without any manual intervention.
Automatic transfer switches use built-in sensors that constantly monitor the utility power supply. When a power outage is detected, these switches immediately disconnect the utility power and connect the generator power, ensuring a continuous power supply to your home or business.
One of the significant advantages of automatic transfer switches is their ability to provide uninterrupted power during an outage, even if you’re away from your property. These switches eliminate the need for manual switching, giving you peace of mind during power interruptions or emergencies.
Comparison of Manual and Automatic Transfer Switches
Here’s a quick comparison between manual and automatic transfer switches:
| Manual Transfer Switches | Automatic Transfer Switches |
|---|---|
| Requires manual intervention to switch power source | Automatically detects power outage and switches to generator power |
| Lower cost | Higher cost |
| Active monitoring and physical presence required | No manual switching required |
| Potential for human error | No risk of human error |
Ultimately, the choice between a manual transfer switch and an automatic transfer switch depends on your specific needs, preferences, and budget. If you prioritize convenience and uninterrupted power supply, an automatic transfer switch might be the best option for you. However, if cost is a significant consideration and you don’t mind active monitoring, a manual transfer switch could be a suitable choice.
Step-By-Step Guide To Installing A Manual Transfer Switch
Installing a manual transfer switch is an essential step to ensure a seamless transition of power supply from your main electrical grid to a backup generator during power outages. By following this step-by-step guide, you’ll be able to install a manual transfer switch and have peace of mind knowing that your home or business will stay powered up when you need it the most.
Safety Precautions before Installation
Before starting the installation process, it is crucial to take necessary safety precautions to protect yourself and avoid any potential mishaps. Here are a few safety tips to keep in mind:
- Ensure the main power supply is turned off to avoid any electrical accidents.
- Wear appropriate safety gear like goggles and gloves to protect yourself from possible electrical hazards.
- Read and understand the manufacturer’s instructions and follow them carefully.
Gathering Necessary Tools and Materials
Before you begin the installation process, gather all the tools and materials you’ll need. Having everything organized and readily available will help streamline the installation process. Here are some tools and materials you will require:
| Tools | Materials |
|---|---|
| Screwdriver | Transfer switch |
| Wire strippers | Transfer switch wires |
| Drill | Mounting brackets |
| Level | Mounting screws |
| Nut driver | Grounding wire |
Shutting off the Main Power Supply
Before you can install the manual transfer switch, you must first shut off the main power supply to your property. To do this:
- Locate the main electrical panel in your home or business.
- Identify the switch or circuit breaker that controls the main power supply.
- Switch the breaker to the “off” position.
Mounting and Wiring the Transfer Switch
Once the power supply is turned off, you can now proceed with mounting and wiring the transfer switch. Follow these steps:
- Choose the desired location for the transfer switch and secure the mounting brackets.
- Mount the transfer switch onto the brackets using the provided screws.
- Strip the ends of the transfer switch wires and connect them to the appropriate terminals, following the wiring diagram provided by the manufacturer.
- Tighten the terminal screws to ensure a secure connection.
Connecting the Generator to the Transfer Switch
After mounting and wiring the transfer switch, it’s time to connect your generator. Here’s how:
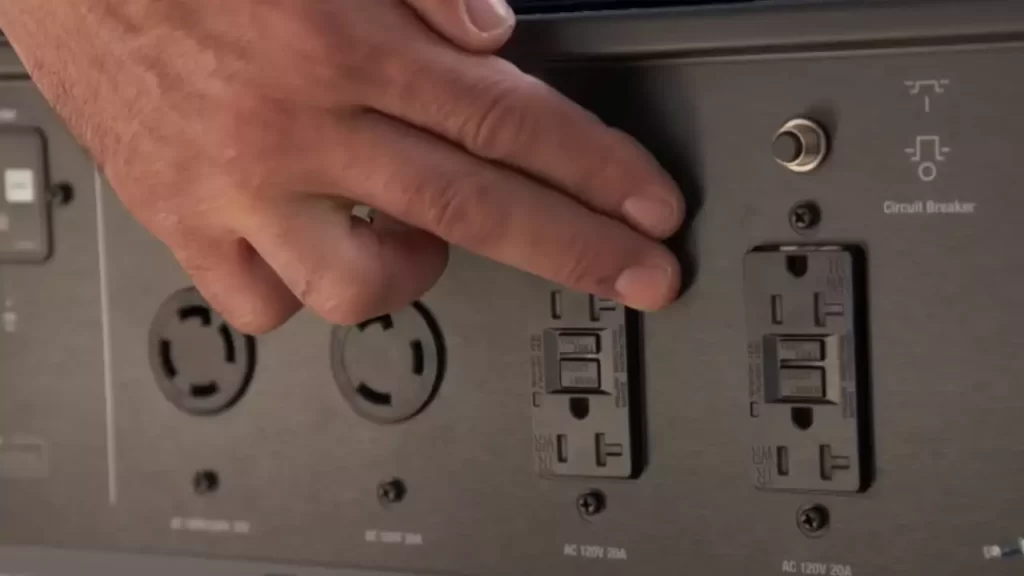
- Locate the generator inlet box and connect the provided cord to it.
- Connect the other end of the cord to the transfer switch in the designated input terminal.
- Ensure a tight connection to prevent any power loss or electrical issues.
Testing the Transfer Switch
Once the installation is complete, it’s important to test the transfer switch to ensure it functions properly. Follow these steps:
- Switch off the main power supply.
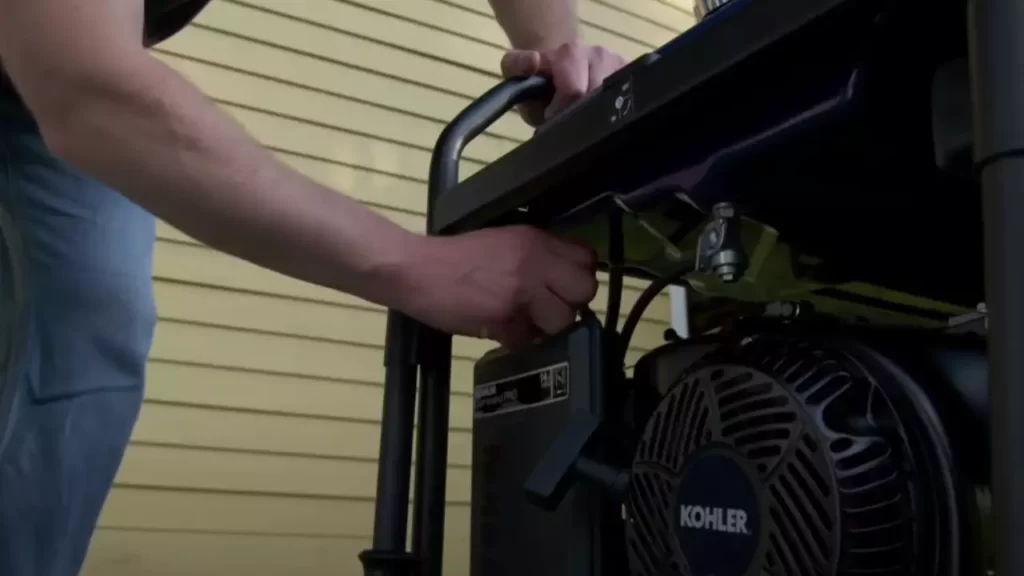
- Start the generator and let it run for a few minutes to stabilize.
- Flip the transfer switch to “generator” mode and monitor the power supply to your property.
- Make sure all essential appliances and circuits are receiving power.
Congratulations! You have successfully installed a manual transfer switch. With this crucial piece of equipment in place, you can now enjoy a reliable and uninterrupted power supply during unexpected outages.
Benefits Of Installing A Manual Transfer Switch
When it comes to ensuring uninterrupted power supply during unexpected outages, installing a manual transfer switch in your property provides several significant advantages. This simple device not only gives you flexibility and control over your power supply but also offers cost-effectiveness compared to automatic transfer switches. With its suitability for smaller properties and infrequent power outages, a manual transfer switch guarantees that you stay powered up when you need it the most.
Flexibility and control over power supply
With a manual transfer switch installed, you gain the flexibility and control to decide which circuits or appliances in your home or business receive backup power during an outage. By manually switching on and off specific circuits, you can prioritize essential devices such as lights, heating systems, refrigerators, and medical equipment. This direct control enables you to tailor your power supply to meet your specific needs and minimize unnecessary power usage.
Cost-effectiveness compared to automatic transfer switches
While automatic transfer switches offer convenience by automatically transferring power from the utility grid to the generator during an outage, they come at a higher cost. On the other hand, manual transfer switches provide a cost-effective alternative that still ensures a smooth transition to backup power. With its simplified design and manual operation, a manual transfer switch is more affordable to purchase and maintain, making it an excellent choice for those looking to stay within budget while safeguarding their power supply.
Suitable for smaller properties or infrequent power outages
A manual transfer switch is particularly suitable for smaller properties or those that experience infrequent power outages. If you live in an apartment, condominium, or a small house, a manual transfer switch offers a practical solution. Its compact size and simplified installation make it an ideal option for properties with limited space availability. Additionally, if your area rarely experiences power outages, opting for a manual transfer switch gives you the peace of mind that you can still power essential devices and appliances until utility power is restored.
To summarize, installing a manual transfer switch provides you with the flexibility and control to prioritize your power supply, as well as cost-effectiveness compared to automatic transfer switches. This reliable device is suitable for smaller properties or infrequent power outages, ensuring that you remain powered up and unaffected during unexpected interruptions in your electricity supply.
Step-By-Step Guide To Installing An Automatic Transfer Switch
Safety Precautions Before Installation
Before you start installing an automatic transfer switch, it is important to prioritize safety. By adhering to these safety precautions, you can ensure a smooth and secure installation process:
- Turn off all power: Before you begin any work, make sure to turn off the main power supply to avoid any accidents.
- Wear protective gear: It is essential to wear safety glasses, gloves, and other protective equipment to minimize the risk of injury.
- Check for electrical hazards: Inspect the area for any potential electrical hazards such as exposed wires, water leaks, or faulty outlets.
- Work in a well-ventilated space: Ensure that the area where you’re installing the transfer switch is well-ventilated to prevent the buildup of toxic fumes.
- Follow manufacturer’s instructions: Always refer to the instruction manual provided by the transfer switch manufacturer to ensure proper installation.
Gathering Necessary Tools and Materials
Once you’ve taken the necessary safety precautions, gather the following tools and materials:
- Automatic transfer switch: Purchase an automatic transfer switch that suits your power needs and generator capacity.
- Electrical wiring: Ensure you have the appropriate electrical wiring and connectors required for the installation.
- Screwdriver and drill: Have a screwdriver and drill on hand to mount the transfer switch securely.
- Wire stripper: A wire stripper will be required to strip the insulation off the wires and make connections.
- Electrical tape: Use electrical tape to secure wire connections and provide insulation.
Shutting Off the Main Power Supply
Before you begin mounting and wiring the transfer switch, you need to shut off the main power supply to ensure safety.
- Locate the main circuit breaker: Find the main circuit breaker panel in your home or building.
- Turn off all individual circuit breakers: Flip the individual circuit breakers to the “Off” position.
- Locate the main circuit breaker: Locate the main circuit breaker and switch it to the “Off” position.
- Test for power: Use a non-contact voltage tester to verify that no power is flowing to the circuit before proceeding.
Mounting and Wiring the Transfer Switch
Once the main power supply is disconnected, it’s time to mount and wire the transfer switch:
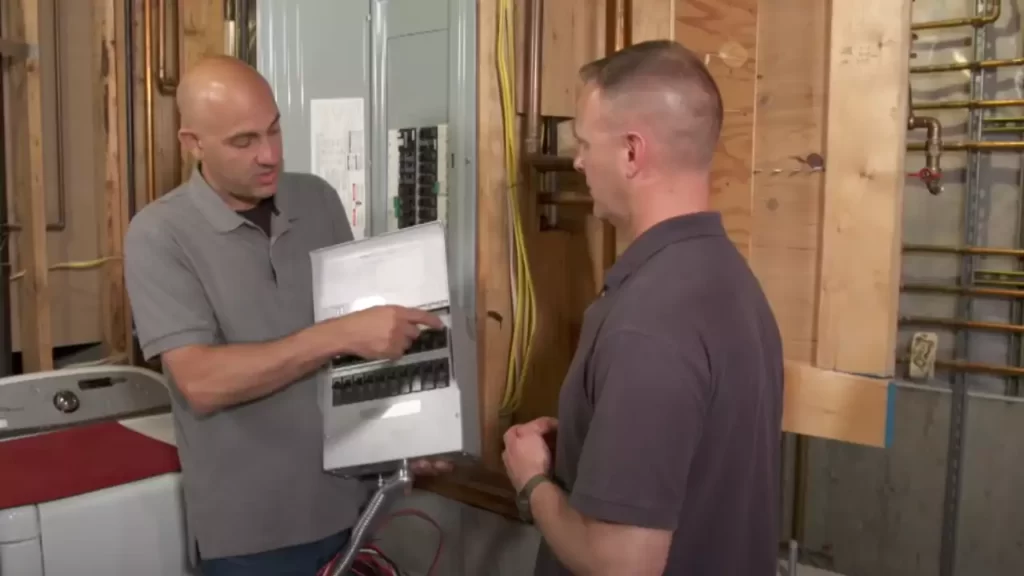
- Choose a suitable location: Select a wall near the main electrical panel to mount the transfer switch.
- Mount the transfer switch: Use a drill and screws to securely mount the transfer switch on the wall.
- Connect the wires: Following the manufacturer’s instructions, connect the wires from the main electrical panel to the transfer switch.
- Secure the connections: Use wire connectors and electrical tape to secure all wire connections and prevent any loose connections.
Connecting the Generator to the Transfer Switch
Now that the transfer switch is mounted and wired, it’s time to connect the generator:
- Locate the generator inlet box: Find the generator inlet box, which is typically installed on an exterior wall.
- Connect the power cord: Plug in the power cord from the generator into the generator inlet box.
- Connect the power cord to the transfer switch: Connect the other end of the power cord to the corresponding inlet on the transfer switch.
- Secure the connections: Double-check all the connections and ensure they are tightened securely.
Testing the Transfer Switch
Once all the connections are in place, it’s important to test the transfer switch to ensure everything is functioning correctly:
- Turn on the generator: Start the generator and let it run for a few minutes to establish power.
- Activate the transfer switch: Flip the transfer switch to the “Generator” position to transfer power from the main electrical panel to the generator.
- Verify power transfer: Check if the power is successfully being transferred to essential circuits in your home or building.
- Test each circuit: Test each individual circuit connected to the transfer switch to verify proper functioning.
By following this step-by-step guide, you can efficiently install an automatic transfer switch and ensure a reliable backup power system for your home or building.
Benefits Of Installing An Automatic Transfer Switch
Installing an automatic transfer switch can provide several benefits, making it an essential component for any property owner who wants to ensure continuity of power supply during outages. Whether you live in an area prone to frequent power disruptions or simply want the convenience of seamless and automatic power restoration, an automatic transfer switch offers a reliable solution. Let’s explore some of the key advantages of installing an automatic transfer switch below.
Convenience and automatic power restoration during outages
One of the primary benefits of installing an automatic transfer switch is the convenience it offers during power outages. With a manual transfer switch, homeowners have to manually start the generator, connect it to the electrical panel, and transfer the load from the utility power to the generator. This process can be time-consuming, especially during unfavorable weather conditions or when you’re away from home.
However, an automatic transfer switch eliminates the need for manual intervention. Once a power outage is detected, the transfer switch automatically disconnects your home from the utility grid and transfers the power load to the generator. This means that you won’t have to rush outside in the dark to start the generator or manually switch between power sources. The automatic restoration of power ensures that your essential appliances and systems continue to function seamlessly without interruption.
Seamless transition between utility and generator power
Another advantage of an automatic transfer switch is the seamless transition it facilitates between utility power and generator power. When the utility power is restored, the transfer switch automatically senses the return of power and switches the load back to the utility supply. This eliminates the need for manual reconnection and ensures a smooth transition without any interruptions in power supply. It also prevents the possibility of back-feeding electricity to the grid, which can be dangerous for utility workers.
This automatic switching feature guarantees that your property remains connected to the most reliable source of power at all times. Whether you’re present or away, the transfer switch takes care of the power transfer process, providing peace of mind and convenience.
Suitable for larger properties or frequent power outages
Automatic transfer switches are particularly beneficial for larger properties or areas that experience frequent power outages. If you have a substantial energy demand or rely heavily on electrical appliances and systems, an automatic transfer switch can handle the transition seamlessly, ensuring uninterrupted power supply.
Furthermore, if you live in an area where power outages are common, an automatic transfer switch offers a reliable solution. It saves you from the inconvenience of manually starting the generator and transferring the load every time the utility power goes out. With an automatic transfer switch, you can have peace of mind knowing that your home will automatically switch to generator power as soon as an outage is detected.
In summary, the benefits of installing an automatic transfer switch are evident. From convenience and automatic power restoration during outages to seamless transitions between utility and generator power, these devices provide a reliable and hassle-free solution. Whether you have a large property or experience frequent power outages, an automatic transfer switch ensures that your essential appliances and systems operate smoothly, with minimal disruption. Consider installing an automatic transfer switch today for uninterrupted power supply and peace of mind.
Regular Maintenance Of Transfer Switches
Regular maintenance of transfer switches is vital to ensure their optimal performance and longevity. By taking care of your transfer switch, you can minimize the risk of malfunctions during power outages and keep your essential appliances protected. This section will outline some essential maintenance tasks you should perform on your transfer switch to keep it running smoothly.
Cleaning and Inspecting the Transfer Switch
Regularly cleaning and inspecting your transfer switch is crucial to remove any debris or dirt that may hinder its operation. Here are the steps you can follow:
- Turn off the power to the transfer switch.
- Using a soft cloth or brush, gently clean the exterior of the transfer switch, removing any dust or grime.
- Inspect the switch for any signs of damage, such as loose connections or corrosion.
- Tighten any loose connections and clean any corrosion using a wire brush or sandpaper.
- Ensure that the circuit breaker and fuses are in good condition and replace them if necessary.
Testing the Transfer Switch Periodically
Regularly testing your transfer switch is vital to ensure its proper functionality during a power outage. Here are the steps you can follow:
- Notify all members of your household or business that a transfer switch test will be conducted.
- Start by simulating a power outage by turning off the main power supply.
- Switch on the generator and allow it to stabilize.
- Manually activate the transfer switch to transfer power from the generator to the designated circuits.
- Verify that power is being supplied to the desired circuits and ensure that the transfer switch operates smoothly.
- Once the test is complete, switch off the generator and restore the main power supply.
Replacing Worn-Out Components
Over time, certain components of your transfer switch may wear out and require replacement. It’s essential to identify and replace these worn-out components promptly to maintain the transfer switch’s functionality. Here’s what you need to do:
- Carefully inspect the transfer switch and look for any signs of wear or damage.
- If you notice any worn-out components like worn contacts or broken wires, replace them with compatible parts obtained from a trusted supplier.
- Refer to the manufacturer’s guidelines or consult a professional electrician if you are uncertain about the replacement process.
By following these maintenance procedures, you can ensure that your transfer switch is always in top-notch condition, ready to provide you with seamless power transfer during unexpected outages.
Troubleshooting Common Issues With Transfer Switches
While a generator transfer switch can provide a reliable solution during power outages, it’s crucial to understand that like any other electrical device, transfer switches can experience problems. In this section, we will explore common issues that may arise with transfer switches and provide you with troubleshooting steps to help you overcome these challenges. Remember, safety should always be a top priority when dealing with electrical equipment, so consult a professional electrician if you’re unsure or intimidated by any troubleshooting steps.
Identifying potential problems with the transfer switch
If you’re experiencing issues with your transfer switch, the first step is to identify the potential problems. Here are some common signs that may indicate a problem with your transfer switch:
- Power not transferring properly between the utility and the generator
- Strange buzzing or humming sounds coming from the transfer switch
- Failure of the switch to operate automatically during a power outage
- Tripped circuit breakers or blown fuses
- Flickering lights or other electrical anomalies
By being attentive to these warning signs, you can quickly identify potential issues and take appropriate action.
Troubleshooting steps for common issues
Once you’ve identified a problem with your transfer switch, it’s time to start troubleshooting. Follow these steps carefully, ensuring your safety at all times:
- Inspect and tighten all electrical connections: Loose or corroded connections can lead to power transfer issues. Check all wiring connections in the transfer switch and tighten any loose connections.
- Check the circuit breakers and fuses: Examine the circuit breakers and fuses associated with your transfer switch. If a breaker has tripped or a fuse is blown, replace it with a new one of the correct rating.
- Examine the transfer switch for damage: Inspect the transfer switch for any signs of physical damage such as burnt or melted components. If you spot damage, it’s essential to consult a professional electrician for repair or replacement.
- Test the automatic operation: Make sure the transfer switch is set to “Automatic” mode and simulate a power outage to verify if it transfers power from the utility to the generator properly. If it fails to do so, seek professional assistance.
- Inspect the generator: While transfer switches are often the culprit, it’s important to ensure your generator is working correctly. Check fuel levels, oil levels, and any error codes displayed on the generator. Address any generator issues before further troubleshooting the transfer switch.
When to consult a professional electrician
While troubleshooting your transfer switch, it’s crucial to know when to seek professional assistance. Consider calling a qualified electrician in the following situations:
- If you’re uncertain about any troubleshooting steps or feel uncomfortable working with electrical equipment
- If you’re unable to identify the root cause of the problem and require expert advice
- If you detect physical damage or suspect that the transfer switch needs repair or replacement
- If you want to ensure the safety and proper functioning of your transfer switch, even after resolving the issue
Remember, your safety is paramount, and it’s always better to seek professional help when in doubt.
Frequently Asked Questions
Can A Homeowner Install A Generator Transfer Switch?
Yes, homeowners can install a generator transfer switch. However, it’s crucial to hire a licensed electrician for safety and compliance with local building codes. The electrician will ensure proper installation and connection between the switch and generator, enabling the switch to transfer power automatically during a power outage.
Do You Need An Electrician To Install A Generator Transfer Switch?
Yes, you need an electrician to install a generator transfer switch.
How Is A Generator Transfer Switch Installed?
A generator transfer switch is installed by a professional electrician. They connect the switch to the main electrical panel and generator. This ensures a safe and efficient power transfer during an outage. Follow local building codes and get a permit before installation.
How To Install Manual Transfer Switch For Portable Generator?
To install a manual transfer switch for a portable generator: 1. Choose a location near your electrical panel. 2. Turn off the main power and ensure safety. 3. Mount the transfer switch on the wall. 4. Connect the switch to your electrical panel.
5. Connect the portable generator to the transfer switch.
Conclusion
Installing a generator transfer switch is a crucial step in ensuring a seamless power supply during outages. By following the steps outlined in this blog post, you can confidently set up your transfer switch and protect your household appliances. From understanding the necessary tools to connecting the wires correctly, this guide equips you with the knowledge needed to install a generator transfer switch efficiently.
Don’t let power disruptions leave you in the dark; take control with a properly installed transfer switch.