To install F connectors, first strip the cable, then fold back the braid and attach it to the connector, finally screw the connector onto the cable end. Installing F connectors involves three simple steps: stripping the cable, attaching the braid, and screwing on the connector.
By following these steps, you can easily connect F-type connectors to your cables. F connectors are commonly used for coaxial cables in various applications, including television antennas, satellite dishes, and cable modems. Whether you are a professional installer or a DIY enthusiast, learning how to install F connectors will allow you to make secure and reliable connections for your coaxial cables.
In this guide, we will walk you through the step-by-step process of installing F connectors to ensure optimal performance and signal transmission.
What Are F Connectors?
In the world of audio and video systems, F connectors play a crucial role. These connectors are widely used for creating secure connections between coaxial cables and devices like televisions, DVD players, and satellite receivers. Whether you’re setting up a home entertainment system or a professional audio/video setup, understanding the definition and purpose of F connectors is essential.
Definition and Purpose of F Connectors
F connectors, also known as coaxial connectors, are small metallic fittings that ensure a strong and stable connection between coaxial cables and various audio and video devices. These connectors are characterized by their distinctive threaded design, which allows for easy installation and secure connections. Their primary purpose is to effectively transfer high-frequency signals with minimal interference.
Explanation of How They are Used in Audio and Video Systems
In audio and video systems, F connectors are used in several key areas to ensure seamless signal transfer and optimal audio/video quality. Here’s a breakdown of their common applications:
- TV Antenna Connections: F connectors are commonly used to connect TV antennas to televisions, allowing for reliable reception of over-the-air channels.
- Satellite and Cable TV: F connectors are used to connect coaxial cables to satellite receivers and cable boxes, enabling clear reception of digital TV signals.
- Audio/Video Distribution Systems: F connectors are crucial in audio/video distribution systems, facilitating the transmission of signals from one device to another with minimal loss or distortion.
- Surveillance Systems: F connectors are used in surveillance systems to connect coaxial cables to security cameras, ensuring a clear and stable video feed.
- Home Theater Systems: F connectors are utilized in home theater systems to connect devices such as DVD players, Blu-ray players, and audio receivers, allowing for immersive audio and high-definition video playback.
Overall, understanding how to install F connectors is pivotal for anyone looking to establish reliable connections between audio and video devices. From TV antennas to home theaters, these connectors play a vital role in ensuring optimal signal performance.
Tools And Materials Needed
When it comes to installing F connectors, having the right tools and materials is crucial. Not only does it make the installation process smoother, but it also ensures a secure and reliable connection. In this section, we will discuss the various tools and materials you will need to complete the F connector installation successfully.
List of Tools
Below is a comprehensive list of the tools required for installing F connectors:
| Tools | Description |
|---|---|
| RG6 Cable Cutter | A specialized cutter designed to cleanly cut the RG6 coaxial cable without damaging the internal wires. |
| Coaxial Cable Stripper | A precision tool used to strip the outer insulation layer of the coaxial cable. |
| Coaxial Cable Crimper | An essential tool for crimping the F connector onto the coaxial cable securely. |
| Compression Tool | Used to compress the connector onto the cable, ensuring a tight and reliable connection. |
| Wire Cutters | Used for cutting and trimming excess wires during the installation process. |
| Coaxial Cable Tester | A handy device to test the continuity and signal strength of the cable after installation. |
List of Materials
Here is a list of materials you will need for the F connector installation:
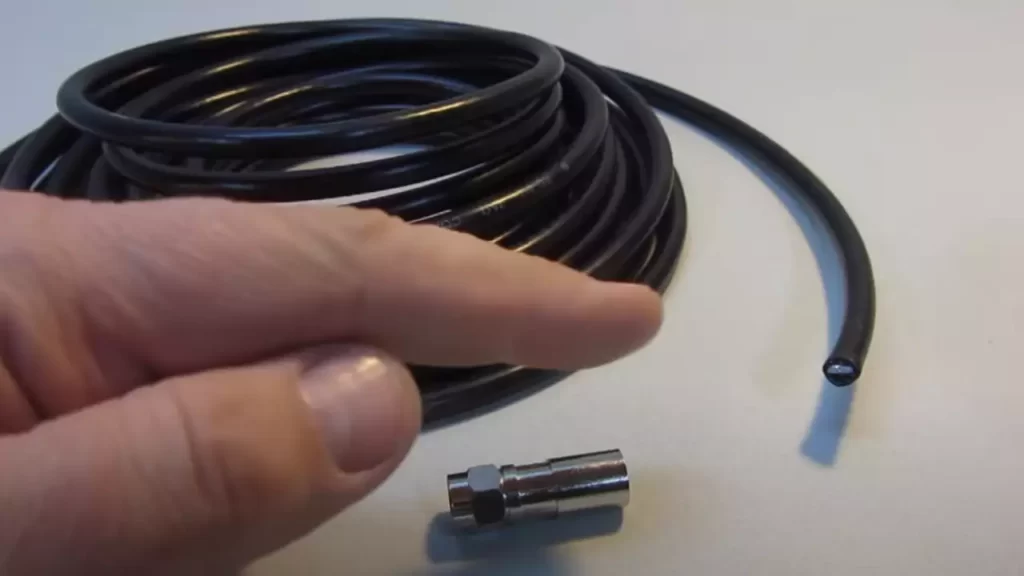
- RG6 Coaxial Cable: The type of cable suitable for your specific application. Ensure it is of high quality for optimal signal transmission.
- F Connectors: Make sure to choose connectors that are compatible with the RG6 cable and offer a secure and reliable fit.
- Connectors Boots: These small rubber boots are essential for providing additional protection and strain relief to the connectors.
By having all the necessary tools and materials ready before starting the installation process, you will save time and ensure a successful connection. Investing in high-quality tools and materials is a wise decision that guarantees a reliable and long-lasting F connector installation.
Step-By-Step Guide To Installing F Connectors
Installing F connectors may seem daunting at first, but with the right tools and a step-by-step approach, it can be a straightforward process. In this guide, we’ll walk you through each stage, from gathering the necessary tools to testing the final connection, ensuring a secure and reliable installation.
Preparation: Gathering all the necessary tools and materials
Before diving into the installation process, it’s crucial to gather all the tools and materials needed to complete the job efficiently. Here’s a list of items you’ll need:
- Coaxial cable
- F connectors
- Cable stripper or utility knife
- Cable crimping tool
- Adjustable wrench or pliers
- F connector installation tool (optional but recommended)
Having these tools readily available will save you time and frustration, ensuring a smooth installation process.
Removing the existing connector: How to disconnect the old connector
First, you need to remove the existing connector from the coaxial cable. Follow these steps:
- Locate the outer metal ring of the connector.
- Using a cable cutter or pliers, gently twist and pull the outer ring to loosen it.
- Once the outer ring is loose, unscrew it by hand and set it aside.
- Next, remove the plastic insulator from the cable, exposing the inner metal wire.
- If you encounter any adhesive or glue, use a utility knife to carefully remove it.
By following these steps, you’ll have successfully removed the old F connector, preparing the cable for the next stage.
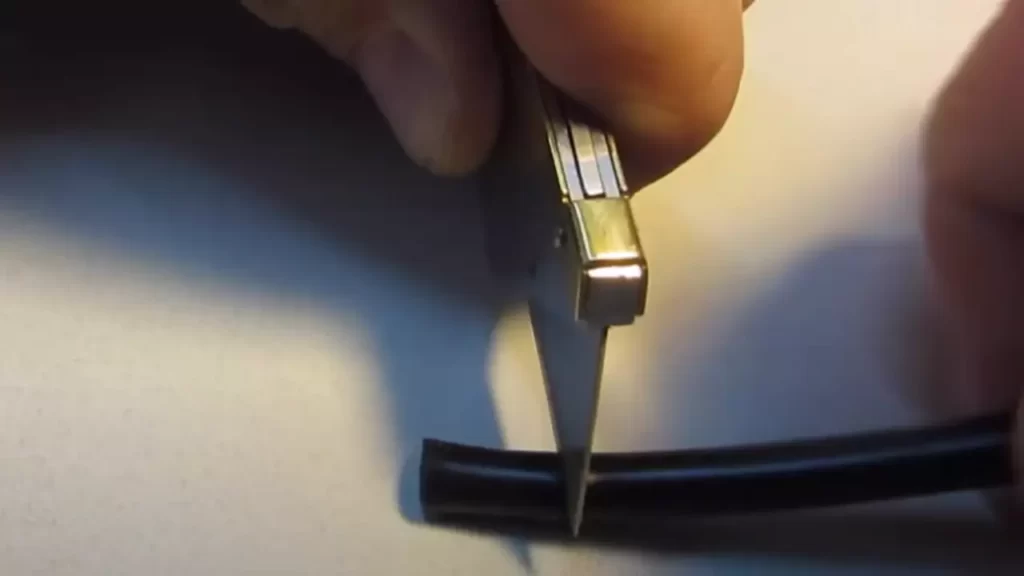
Stripping the cable: Proper method to strip the cable insulation
Stripping the cable insulation is a crucial step to ensure a clean connection. Here’s how to do it correctly:
- Measure approximately 1 inch (2.5 cm) from the end of the cable, and mark this point with a pen or marker.
- Using a cable stripper or utility knife, cut around the marked point, being careful not to cut too deeply into the cable.
- Gently twist the cable stripper or utility knife around the cable to score the outer insulation.
- Once scored, pull the outer insulation away, revealing the inner conductor.
- Remove any excess insulation, making sure the exposed conductor is clean and free from any debris.
By following these steps, you’ll successfully strip the cable, preparing it for the next stage of connector installation.
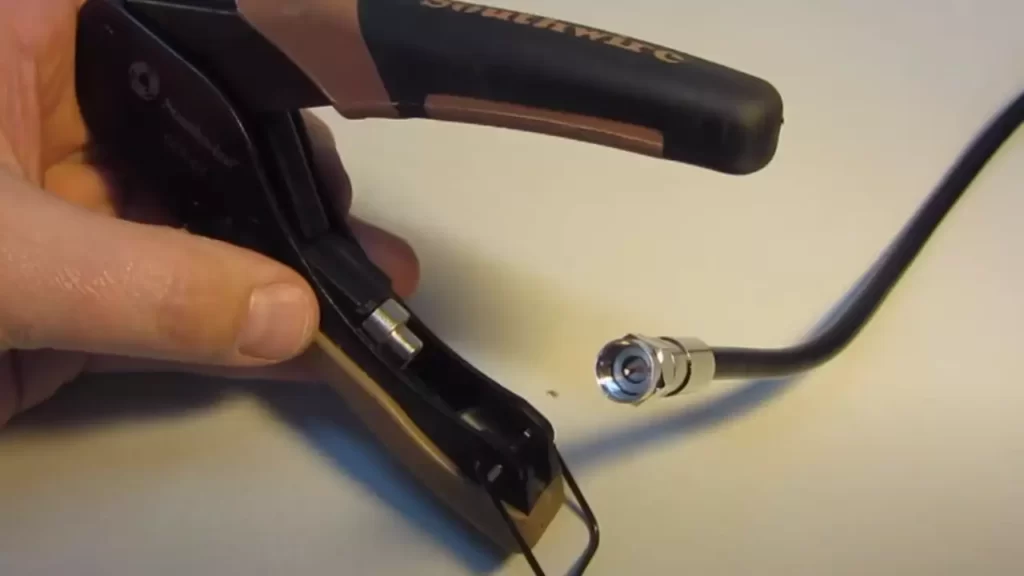
Connector placement: Step-by-step instructions for attaching the F connector to the cable
Now it’s time to attach the F connector to the cable. Follow these step-by-step instructions:
- Slide the F connector onto the stripped end of the cable, making sure the inner conductor is fully inserted into the center pin of the connector.
- Hold the connector firmly in place with one hand, ensuring it doesn’t slip off while you proceed.
- Using a cable crimping tool, align the tool’s crimping section with the outer ring of the connector.
- Apply firm pressure to the crimping tool, securing the connector to the cable and creating a tight connection.
Following these steps will result in a properly attached F connector, ensuring a reliable connection for your coaxial cable.
Tightening the connection: Ensuring a secure connection without damaging the cable
Once the F connector is in place, it’s essential to tighten the connection firmly without damaging the cable. Here’s how:
- Using an adjustable wrench or pliers, grip the outer ring of the F connector.
- With a gentle but firm grip, rotate the connector clockwise until it is tightly secured to the cable. Be careful not to overtighten, as this can damage the cable.
By following these steps, you’ll achieve a secure connection that ensures optimal signal transmission without compromising the integrity of the cable.
Testing the connection: How to check if the F connector is properly installed
After completing the installation, it’s crucial to test the connection to ensure it was installed correctly. Here’s how:
- Connect your cable to the appropriate device, such as a television or modem.
- Check the signal strength or picture quality on the device.
- If the signal is clear and the quality is high, you have successfully installed the F connector. Congratulations!
However, if you notice any signal issues, such as poor quality or loss of signal, double-check your installation steps and ensure the F connector is securely attached to the cable.
Following this step-by-step guide will enable you to install F connectors with confidence, ensuring a reliable connection and optimal performance for your coaxial cable.
Troubleshooting Common Issues
Installing F connectors for your cable connections can be a simple and straightforward process, but sometimes issues may arise. In this section, we will discuss common problems that you might encounter during the installation process and provide you with tips to fix them effectively. By following these troubleshooting techniques and implementing preventive measures, you can ensure a smoother installation and avoid potential connection issues and signal loss.
Identifying and fixing common problems during the installation process
When it comes to installing F connectors, it is essential to be aware of potential problems that might arise and know how to address them. Here are some common issues you may encounter during the installation process:
- Poorly crimped connectors: If your connectors are not crimped properly, you might experience signal loss or a weak connection. To fix this issue, use a crimping tool specifically designed for F connectors to ensure a secure and tight crimp.
- Improper cable preparation: Ensuring the cable is correctly prepared is crucial for establishing a reliable connection. If the cable is not stripped carefully or the inner conductor is damaged, it can lead to poor signal quality. To avoid this, use a cable stripper designed for the specific cable type and carefully strip the outer jacket and insulating layer without damaging the inner conductor.
- Loose connectors: If your F connectors become loose after installation, it can result in signal loss and intermittent connection. To fix this issue, tighten the connectors securely using a wrench or pliers. However, be cautious not to overtighten them, as it can damage the connectors.
- Improper grounding: Grounding is crucial for maintaining a stable and reliable connection. If your F connectors are not properly grounded, it can lead to signal interference and weakened reception. Ensure that the grounding block or grounding wire is firmly connected and properly grounded to your system.
- Incorrect cable routing: If the cable is routed improperly or bent sharply, it can cause signal degradation and potential damage to the cable. Ensure that the cable is routed in a gentle curve, avoiding sharp bends or kinks.
Tips for avoiding connection issues and signal loss
Preventing connection issues and signal loss starts with proper installation techniques. Here are some tips to help you ensure a reliable and long-lasting connection:
- Use high-quality connectors: Investing in good-quality F connectors increases the likelihood of a secure and stable connection.
- Choose the right cable: Selecting the appropriate cable for your specific application, such as RG6 or RG11, can significantly improve signal quality.
- Avoid excessive cable length: Longer cable lengths can result in signal loss. Whenever possible, use the shortest cable length necessary to reach your desired destination.
- Properly seal connections: Protect your connectors from moisture and other environmental factors by using weatherproofing materials, such as silicone sealant or self-amalgamating tape.
- Perform regular maintenance: Check your connectors periodically for any signs of wear, corrosion, or damage. Replace any faulty connectors promptly to maintain optimal signal strength.
By following these troubleshooting techniques and implementing preventive measures, you can ensure a successful installation and enjoy uninterrupted signal quality for your cable connections. Remember to be meticulous in your installation process, paying attention to details, and addressing any issues promptly to achieve optimum performance.
Best Practices For F Connector Installation
Installing F connectors might seem like a simple task, but it requires precision and attention to detail to ensure optimal performance. In this section, we will discuss the best practices for F connector installation, covering tips and techniques to ensure a successful installation and ways to guarantee a proper connection for the best possible performance.
Tips and Techniques for Ensuring a Successful Installation
Proper installation of F connectors is crucial to maintain signal quality and minimize potential issues. To ensure a successful installation, follow these tips and techniques:
- Use high-quality connectors: Invest in high-quality F connectors that are specifically designed for the type of cable you are using. Cheap or substandard connectors may cause signal loss and ultimately affect performance.
- Prepare the cable properly: Strip the cable insulation using a quality cable stripper, carefully removing the outer layer without damaging the inner conductor. Use a cable jacket stripper if necessary.
- Choose the right connector: Make sure you select the appropriate connector type that matches your cable and application. F connectors come in various sizes and types, such as RG6, RG59, or RG11.
- Clean the cable ends: Before attaching the connector, clean the cable ends using a high-quality cable cleaning solution. This will remove any residue or debris that could hinder the connection.
- Properly thread the connector: When attaching the connector to the cable, make sure to thread it smoothly and evenly. Avoid over-tightening, as it may damage the connector or the cable.
- Terminate with the correct tool: Use a compression tool specifically designed for F connectors to ensure a secure and reliable connection. Avoid using pliers or improper tools, as they might result in a poor connection.
- Test the connection: After installation, test the connection using a signal tester or a cable continuity tester. This will help identify any potential issues or signal loss.
Ways to Ensure a Proper Connection for Optimal Performance
A proper connection is essential for optimal performance and signal quality. Consider the following techniques to guarantee a proper connection:
- Proper alignment: Ensure that the connector is properly aligned with the terminal device or equipment. Misalignment can cause signal loss and reduce performance.
- Secure the connector: After attaching the connector, ensure it is securely fastened to the device or equipment. A loose connector may result in signal loss or intermittent signal disruptions.
- Apply weatherproofing: If the installation is outdoors or in a humid environment, apply weatherproofing measures to protect the connector from moisture and corrosion. This will prolong the lifespan of the connection.
- Keep cable bends gentle: Excessive bending or kinking of the cable may damage the inner conductor and affect signal quality. Keep cable bends gentle and avoid sharp angles.
- Secure cable tie-down: Use cable tie-downs or adhesive clips to secure the cable and prevent any strain or undue stress. This will minimize the risk of cable damage or connection issues.
- Regular maintenance: Periodically inspect and clean the connectors, as well as check for any signs of damage or wear. Regular maintenance ensures long-term performance and reduces the likelihood of signal loss.
Frequently Asked Questions
How Do You Screw An F Connector?
To screw an F connector, align it with the socket and twist it clockwise until it is securely tightened. Make sure it is snug but not overly tight to avoid damaging the connection.
What Tool Do You Use To Attach An F Connector To A Cable?
The tool used to attach an F connector to a cable is called an F connector compression tool.
How Do You Install A Crimp On An F Connector?
To install a crimp on an F connector, follow these steps: 1. Strip the coaxial cable to expose the inner conductor and insulation. 2. Slide the crimp sleeve onto the cable. 3. Insert the cable into the F connector until the inner conductor touches the pin.
4. Use a crimping tool to compress the crimp sleeve onto the connector. 5. Ensure the connection is secure and test for signal strength.
What Does An F Connector Connect To?
An F connector connects to coaxial cables, commonly used in TV and audiovisual equipment for seamless signal transmission.
Conclusion
To sum up, installing F connectors is a simple process that requires proper preparation and attention to detail. By following the steps outlined in this blog post, you can ensure a secure and reliable connection for your cables. Remember to use the right tools and take your time to ensure a successful installation.
With these tips in mind, you’ll be able to confidently tackle your next F connector installation project. Happy connecting!