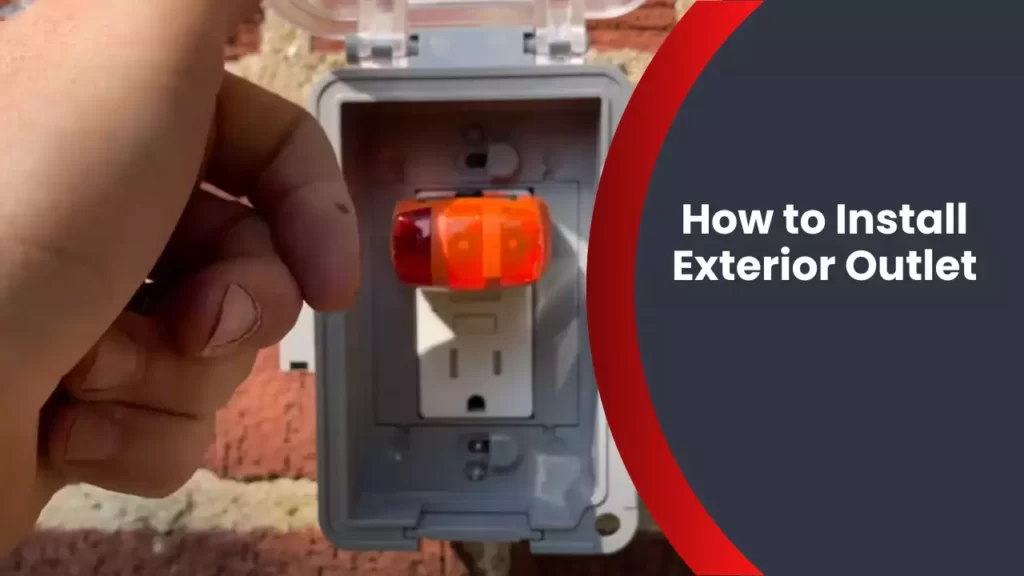
To install an exterior outlet, first turn off the power at the breaker box. Then, mount the outlet box, run conduit from the box to the power source, connect the wires, and secure the outlet to the box.
Welcome to the world of outdoor electrical installations! Whether you need an outlet for your backyard, patio, or garage, installing an exterior outlet can provide a convenient and safe power source for various activities. From powering your electrical tools to plugging in decorative lights, an exterior outlet can be a game-changer.
However, before you dive into this project, it’s important to ensure you have the necessary skills and knowledge to do it safely. In this guide, we will take you through the step-by-step process of how to install an exterior outlet, allowing you to enjoy the benefits of outdoor power without any hassle. So, let’s get started!
Why Install An Exterior Outlet?
Benefits of having an exterior outlet
Installing an exterior outlet can be a game-changer for your outdoor living spaces. Not only does it provide a convenient power source for a variety of outdoor activities, but it also ensures that you can stay connected and make the most of your time spent outside. In this section, we will highlight some of the key benefits of having an exterior outlet.
- Increased convenience for outdoor activities: One of the primary reasons to install an exterior outlet is the added convenience it brings to your outdoor activities. Whether you’re hosting a backyard barbecue, working on a DIY project, or enjoying a relaxing evening on your patio, having a reliable power source at your fingertips can make all the difference. With an exterior outlet, you can easily plug in and power tools, string lights, speakers, and other devices without the hassle of running extension cords from inside your home.
- Enhanced functionality of outdoor spaces: Another significant benefit of installing an exterior outlet is the enhanced functionality of your outdoor spaces. It allows you to create a fully equipped outdoor entertainment area with the ability to power appliances such as grills, refrigerators, and sound systems. You can also conveniently charge your electronic devices, ensuring that they are always ready to use when you need them.
- Increased safety: Having an exterior outlet can also improve the safety of your outdoor areas. Instead of relying on multiple extension cords crisscrossing your yard, which can pose tripping hazards, an exterior outlet allows you to neatly connect and power your devices. Additionally, outdoor outlets are designed to be weather-resistant and equipped with ground fault circuit interrupters (GFCIs) to protect against electrical shocks, giving you peace of mind as you enjoy your outdoor activities.
- Expanded options for holiday decorations: When it comes to decorating your home for the holidays, an exterior outlet provides ample opportunities. You can easily connect and power outdoor lights, inflatables, and other festive decorations to create a stunning display that will impress your neighbors and passersby. With a dedicated outlet, you won’t have to worry about draining power from inside your home or limiting the extent of your decorations.
- Increased property value: Lastly, installing an exterior outlet can improve the value of your property. Potential homebuyers appreciate the convenience and versatility that an exterior outlet offers, making your home more appealing in the competitive real estate market. It’s a simple yet effective upgrade that can set your property apart from others.
With all these benefits, it’s clear that installing an exterior outlet is a worthwhile investment. Whether you want to enhance your outdoor experiences, increase the functionality of your spaces, improve safety, or boost your property’s value, having an exterior outlet can make a significant difference.
Planning The Installation
Before you start installing an exterior outlet, it is important to plan the process carefully. This will ensure that the installation is safe, compliant with local electrical codes, and meets your specific electrical needs. Here are the key steps to consider when planning the installation:
Assessing the Electrical Needs
Start by assessing your electrical needs. Determine why you need an exterior outlet and what type of devices or equipment you want to connect to it. Consider the power requirements, such as voltage and amperage, of the devices you plan to use. This will help you determine the appropriate wiring and electrical capacity for your outlet.
Make a list of the devices that will be connected to the exterior outlet. Consider factors such as their power usage, whether they require a dedicated circuit, and any special considerations for outdoor use. Assessing your electrical needs in advance will help you choose the right type and capacity of the outlet.
Choosing the Location
Next, choose the location for your exterior outlet. Consider convenience, accessibility, and safety when selecting the spot. Here are some factors to keep in mind:
- Proximity to where the devices or equipment will be used
- Protection from the elements, such as rain or snow
- Avoidance of obstructive objects or structures
- Access to an existing electrical source or circuit
Selecting an optimal location will make it easier to use the outlet and minimize the risk of damage or accidents related to weather exposure or obstruction. Take your time to choose the best spot, and consider consulting an electrician if you are unsure.
Checking Local Electrical Codes and Regulations
Before you proceed with the installation, check your local electrical codes and regulations to ensure compliance. Each jurisdiction may have specific requirements for installing exterior outlets, and it is important to adhere to these guidelines for safety and legality.
Research and familiarize yourself with the regulations governing exterior outlet installations in your area. Pay attention to requirements related to wiring, grounding, protection against moisture, and any special considerations for outdoor installations. This will help you plan and execute the installation in accordance with the applicable codes.
In Conclusion
Planning the installation of an exterior outlet is a crucial step to ensure a safe and efficient electrical setup. By assessing your electrical needs, choosing the right location, and checking local electrical codes, you can lay the foundation for a successful installation project. Remember, if you are unsure about any aspect of the process, it is always wise to consult a qualified electrician for assistance.
Gathering The Tools And Materials
Before you start installing an exterior outlet, it’s important to gather all the necessary tools and materials. Having everything on hand will make the installation process much smoother and more efficient. In this section, we’ll go through the list of necessary tools and materials, as well as the safety equipment required to ensure a safe and successful installation.
List of necessary tools and materials
Here’s a comprehensive list of all the tools and materials you’ll need for installing an exterior outlet:
| Tools | Materials |
|---|---|
|
|
Safety equipment required
Ensuring your safety during the installation process is crucial. It’s important to have the following safety equipment on hand:
- Safety glasses: Protect your eyes from any debris or flying objects.
- Work gloves: Provide a good grip and protect your hands from sharp edges or potential electrical shocks.
- Ear protection: If you’re using power tools, it’s essential to protect your hearing by wearing earplugs or earmuffs.
- Dust mask: Prevent inhaling dust or debris while drilling or cutting.
- Protective clothing: Wear appropriate clothing to protect your body from any environmental factors, such as extreme heat or cold.
It’s always better to be safe than sorry, so make sure you have all the necessary safety equipment at hand before starting the installation process. Taking the time to gather these tools, materials, and safety equipment will ensure a successful and secure installation of your exterior outlet.
Preparing The Installation Area
Preparing the Installation Area
When it comes to installing an exterior outlet, proper preparation is crucial to ensure a safe and efficient installation process. Taking the time to prepare the installation area will help prevent any accidents or damage down the line. In this section, we will discuss two important steps for preparing the installation area: clearing the workspace and turning off the power supply.
Clearing the workspace
Before you begin the installation process, it’s important to clear the workspace of any obstacles that may hinder your progress or pose a safety risk. Remove any furniture, plants, or other objects that may be in the way. By creating a clear and open workspace, you will have better access to the area and be able to move around freely.
Turning off the power supply
Before proceeding with any electrical work, it is vital to turn off the power supply to ensure your safety. Working with live electrical wires can be extremely dangerous, so it’s crucial to take the necessary precautions. To turn off the power supply:
1. Locate the electrical panel in your home. This is usually found in the basement, garage, or utility room.
2. Open the electrical panel cover by removing the screws or latches.
3. Inside the electrical panel, you will find a series of switches or circuit breakers. These control the power supply to different areas of your home.
4. Identify the switch or circuit breaker that controls the area where you will be installing the exterior outlet.
5. Flip the switch or push the circuit breaker to the “off” position. This will cut off the power supply to the designated area.
6. Use a voltage tester to verify that the power is indeed off before proceeding with the installation. This simple step can help prevent electrical accidents.
Remember, working with electricity can be dangerous, and it’s always best to err on the side of caution. If you are unsure about any aspect of the installation process, it is highly recommended to seek the assistance of a licensed electrician.
By following these steps and taking the time to prepare the installation area, you can ensure a smooth and safe installation of your exterior outlet.
Installing The Junction Box
Installing the junction box is an essential first step when adding an exterior outlet to your outdoor space. This junction box will serve as the main connection point for your outlet, ensuring safe and secure electrical wiring. To make sure you install the junction box correctly, follow the steps outlined below.
Determining the Box Type and Size
The first step in installing the junction box is to determine the type and size that is suitable for your specific needs. For outdoor installations, it is important to choose a junction box that is weatherproof and designed to withstand the elements. The National Electrical Code (NEC) provides guidelines on the minimum box size based on the number and size of wires that will be connected.
Consider the number of outlets and other electrical devices that will be connected to the junction box to determine the appropriate box size. It is always better to choose a slightly larger box than you think you might need to allow for any additional wiring in the future. This will prevent the need for replacing the box later on.
Mounting the Junction Box Securely
Once you have selected the appropriate junction box, the next step is to mount it securely to the desired location. Choose a spot that is easily accessible but also out of the way, ensuring the box is protected from any potential damage. Common locations for exterior junction boxes include walls, posts, or even underground.
Before mounting the box, ensure that the area is free from any obstructions that may hinder the installation. Use a strong and secure mounting method that will keep the box in place, even in harsh weather conditions. Depending on the mounting surface, this could involve using screws, brackets, or other suitable hardware.
Make sure to follow the manufacturer’s instructions on how to properly secure the junction box. This will ensure that the box remains firmly in place and can support the weight and pressure of the wires and any exterior cover that will be installed later on.
It is also important to consider the depth of the box. The NEC provides guidelines on the minimum depth required based on the size and type of wires that will be connected. Installing a deeper box will allow for easier wiring and prevent any overcrowding of wires, ensuring proper air circulation and reducing the risk of overheating.
Once the junction box is securely mounted, it is ready for the next step in the installation process, which involves connecting the wires and installing the exterior outlet. Stay tuned for our next blog post on how to complete these steps and enjoy the convenience of an exterior outlet in your outdoor space.
Running The Electrical Wiring
Running the electrical wiring is a crucial step in installing an exterior outlet. This process involves choosing the appropriate cable type and properly routing the cable to the junction box. By following these steps, you can ensure a safe and efficient installation of your exterior outlet.
Choosing the appropriate cable type
When it comes to selecting the cable type for your exterior outlet installation, it’s important to consider the specific requirements of your project. One commonly used cable type is the UF-B cable. This type of cable is ideal for outdoor applications as it is resistant to moisture and sunlight, making it perfectly suited for use in outdoor environments. Another option is MC-Lite aluminum armored cable, which provides enhanced protection against physical damage.
Before making a decision, calculate the length of cable required for the installation. It’s advisable to add a few extra feet to compensate for any unforeseen circumstances or changes during the installation process. Consult with a professional electrician if you are unsure about the appropriate cable type for your exterior outlet.
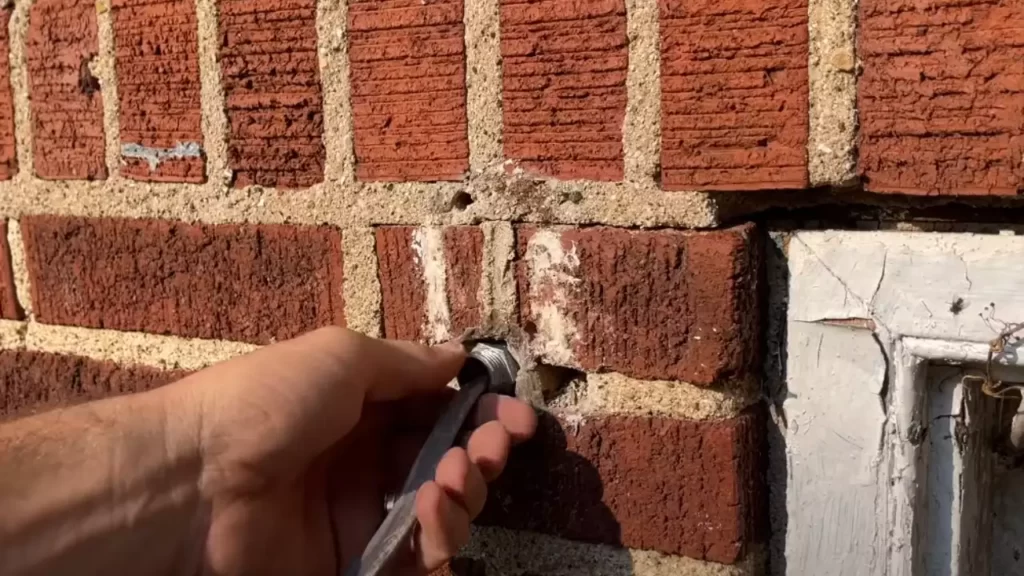
Properly routing the cable to the junction box
Once you have chosen the appropriate cable type, it’s time to route the cable to the junction box. Here are the steps to ensure proper routing:
- Begin by identifying the shortest and most direct path from the junction box to the location where the outlet will be installed. This will minimize the length of cable required and reduce the risk of any potential hazards.
- If your installation involves running the cable through walls or conduits, you may need to drill holes to accommodate the cable. Make sure to choose an appropriate size drill bit that matches the diameter of the cable to ensure a snug fit.
- When routing the cable, it’s important to avoid any areas where it may be vulnerable to physical damage. This includes sharp corners, edges, or areas with heavy foot traffic. Protect the cable by using conduit, cable clips, or metal plates where necessary.
- Ensure that the cable is securely fastened to the walls or other surfaces using appropriate fasteners. This will prevent any future sagging or movement that may compromise the integrity of the installation.
- Finally, double-check that the cable is long enough to comfortably reach both the exterior outlet and the junction box. Avoid stretching the cable too tightly, as this can cause damage and impede the function of the outlet.
By following these guidelines for choosing the appropriate cable type and properly routing the cable to the junction box, you can ensure a successful installation of your exterior outlet. Always prioritize safety and consult with a professional if you have any doubts or concerns about the electrical wiring process.
Connecting The Outlet
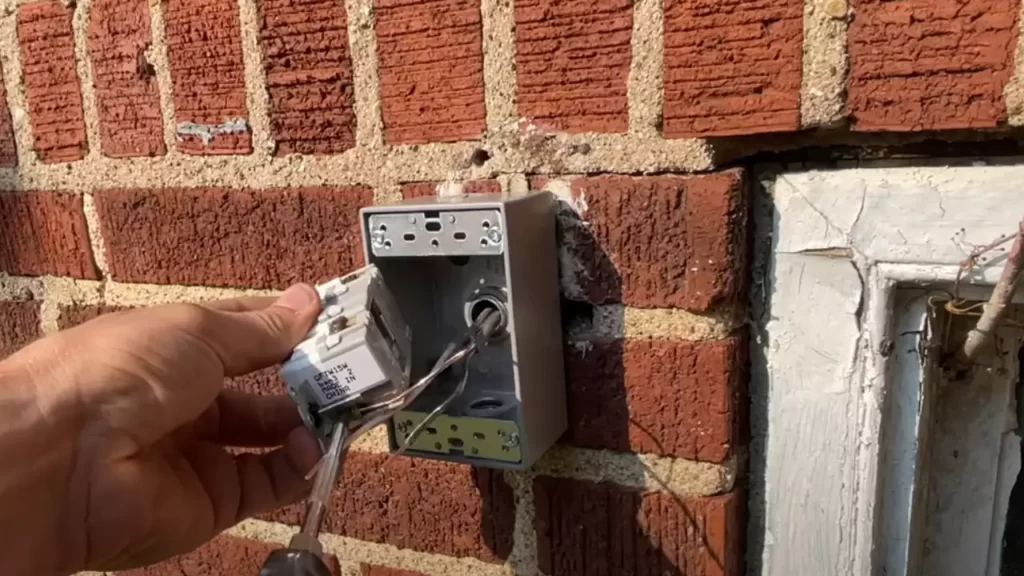
Wiring the Outlet
Before you can connect your exterior outlet, you need to wire it properly. Here’s a step-by-step guide on how to do it:
- Turn off the power: Start by turning off the power to the area where you’ll be working. Locate the breaker in your electrical panel and switch it off.
- Prepare the wires: Strip around 3/4 inch of insulation from the end of each wire. You should have a black (hot) wire, a white (neutral) wire, and a green or bare copper (ground) wire.
- Connect the wires: Start by connecting the black wire to the brass or copper-colored screw on the outlet. Tighten the screw securely. Next, connect the white wire to the silver-colored screw and the green or bare copper wire to the green screw. Ensure each wire is securely fastened.
- Secure the connection: Once the wires are connected, gently push them into the electrical box. Make sure there is no loose wiring and everything is neatly placed inside the box.
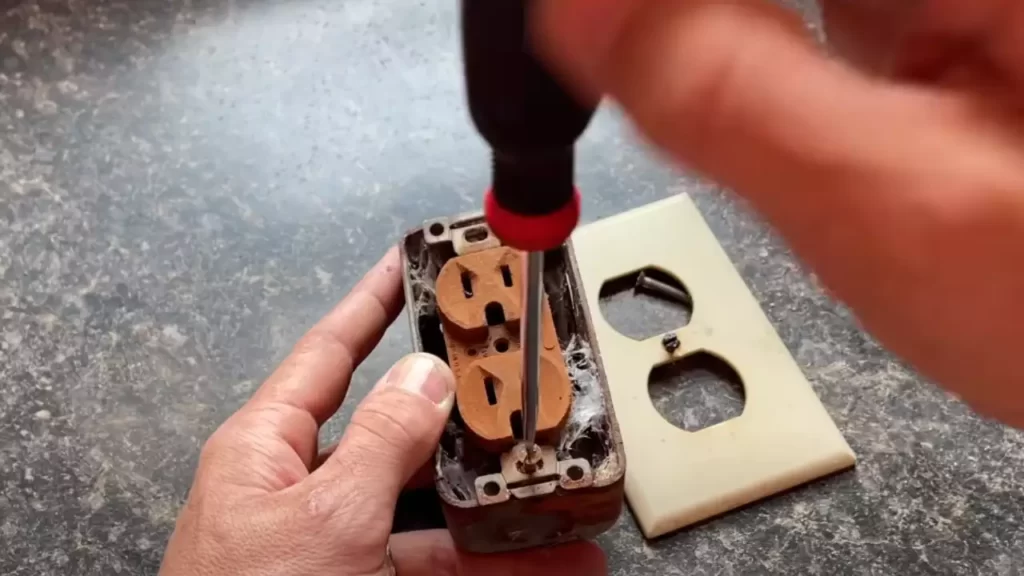
Securing the Outlet to the Junction Box
Now that you have properly wired the outlet, it’s time to secure it to the junction box. Follow these steps:
- Place the outlet over the junction box: Carefully position the outlet over the junction box, ensuring the wires and screws align properly with the corresponding openings.
- Screw the outlet into place: Using screws provided with the outlet, attach it to the junction box. Make sure the screws are tightened securely, but be cautious not to over-tighten them, as this can damage the outlet or the box.
- Check for stability: Once the outlet is secured, give it a gentle tug to ensure it is firmly in place. If it feels loose, tighten the screws a bit more.
With the outlet properly connected and secured to the junction box, you’ve successfully installed an exterior outlet. Remember to always take necessary precautions and follow electrical safety guidelines when working with electricity.
Testing And Finalizing The Installation
Once you have completed the wiring and connected the new exterior outlet, it’s time to ensure that everything is working as it should. This crucial step involves checking the wiring for any issues and then restoring power and testing the outlet to make sure it is functioning correctly.
Checking the wiring for any issues
Before restoring power to the outlet, it is essential to inspect the wiring for any potential issues that could compromise the safety and functionality of the outlet. Follow these steps to check the wiring:
- Turn off the power supply to the outlet from the main electrical panel.
- Visually inspect the wiring connections, ensuring that all wires are securely connected.
- Verify that there are no exposed wires or loose connections that could cause a short circuit or electrical damage.
- Use a voltage tester to confirm that the wires are not carrying any current. This is a crucial step to prevent electric shock.
If you encounter any issues during this inspection, it is crucial to address them before proceeding to restore power to the outlet. Failure to do so could result in serious electrical problems or even hazardous situations.
Restoring power and testing the outlet
Once you are confident that the wiring is safe and properly connected, it’s time to restore power and test the outlet. Follow these steps:
- Go to the main electrical panel and locate the circuit breaker that corresponds to the exterior outlet.
- Switch the circuit breaker to the “on” position, restoring power to the outlet.
- Grab a multimeter or a outlet tester tool to test the outlet. Insert the probes into the slots of the outlet and check for the presence of voltage.
- If the multimeter or outlet tester displays a voltage reading, it means the outlet is functioning correctly.
- For added assurance, plug in a known working electrical device, such as a lamp or phone charger, into the outlet and ensure it powers on.
Once you have tested the outlet and confirmed that it is working correctly, you can proceed to finalize the installation. This may involve sealing any gaps around the outlet, securing it to the wall, and adding an outlet cover for protection against the elements.
By following these steps and thoroughly testing the outlet, you can ensure a safe and reliable installation of your new exterior outlet.
Maintaining The Exterior Outlet
Maintaining the exterior outlet is crucial for ensuring its longevity, functionality, and safety. Regular inspection and cleaning, as well as ensuring proper functionality and safety, are essential aspects of maintaining the exterior outlet. By following these guidelines, you can keep your exterior outlet in optimum condition and provide a safe power source for your outdoor activities.
Regular Inspection and Cleaning
Regular inspection and cleaning of the exterior outlet are vital to prevent any potential issues or hazards. Here are a few key points to keep in mind when inspecting and cleaning your exterior outlet:
- Check for any visible damage or signs of wear and tear, such as cracks, loose connections, or exposed wiring.
- If you notice any damage, it’s important to repair or replace the outlet promptly to avoid any electrical hazards.
- Remove any dirt, debris, or cobwebs that may have accumulated around the outlet. You can use a soft brush or a damp cloth for cleaning.
- Ensure that the outlet cover is secure and in good condition, providing protection against the elements.
- Inspect the surrounding area for any potential obstructions or hazards that could affect the outlet’s functionality or accessibility.
Ensuring Proper Functionality and Safety
Ensuring the proper functionality and safety of your exterior outlet is of utmost importance. To achieve this, consider the following:
- Double-check that the outlet is securely mounted and properly grounded to prevent electrical shock.
- Regularly test the outlet to ensure it is providing a consistent power supply without any fluctuations.
- Ensure that the outlet is protected from moisture and moisture-related damage by using weatherproof covers or enclosures.
- Consider installing a ground fault circuit interrupter (GFCI) outlet, especially in areas where water exposure is common, to provide an additional layer of protection against electrical shock.
- Keep the surrounding area clear of any combustible materials or potential fire hazards to prevent accidents.
By following these maintenance tips, you can prolong the life of your exterior outlet, reduce the risk of electrical issues, and ensure a safe and reliable power source for your outdoor needs. Remember, regular inspection, cleaning, and ensuring proper functionality and safety are essential for preserving the integrity of your exterior outlet.
Additional Tips And Considerations
Installing an exterior outlet can be a useful addition to your outdoor living space. However, there are some additional tips and considerations to keep in mind to ensure the safety and longevity of your new outlet. In this section, we will discuss two important factors to consider: weatherproofing the outlet and using GFCI outlets for added protection.
Weatherproofing the Outlet
When it comes to outdoor electrical installations, weatherproofing is of utmost importance. Exposed to the elements, your exterior outlet must be protected from rain, snow, and other environmental factors to prevent electrical hazards and ensure the safety of anyone using the outlet.
One effective way to weatherproof your exterior outlet is by using a weatherproof outlet cover. These covers are designed to add an extra layer of protection, keeping moisture and debris out of the outlet. It is important to choose a cover that is specifically rated for outdoor use and compatible with your outlet’s design.
- Make sure the weatherproof cover is made of durable and UV-resistant materials that can withstand extreme temperatures and sunlight exposure.
- The cover should also have a tight seal to prevent water from seeping in.
- Consider using a bubble cover or an in-use cover especially if you plan to leave devices plugged in while in use.
Weatherproofing your exterior outlet not only enhances its usability but also helps prevent costly electrical repairs and ensures the safety of your outdoor space.
Using GFCI Outlets for Added Protection
GFCI (Ground Fault Circuit Interrupter) outlets are designed to protect against electrical shock caused by ground faults. They provide an extra layer of safety by quickly cutting off power if an electrical imbalance is detected, preventing potential injury or electrocution.
Installing a GFCI outlet for your exterior outlet is highly recommended, as outdoor areas are more prone to ground faults due to the exposure to moisture. It is important that the GFCI outlet you choose is specifically designed for outdoor use and has a weatherproof cover.
Here are some key considerations when using GFCI outlets for your exterior installation:
- Ensure the GFCI outlet is properly wired and tested before use, following the manufacturer’s instructions.
- Test the GFCI outlet regularly to ensure it is still functioning correctly.
- If the GFCI outlet trips frequently, it may indicate an electrical problem that requires professional attention.
By installing a GFCI outlet for your exterior installation, you can enjoy added protection against ground faults and minimize the risk of electrical accidents in your outdoor space.
Frequently Asked Questions
How Do I Install An Exterior Electrical Outlet?
To install an exterior electrical outlet, start by selecting a suitable location and turning off the power. Then, trace the outlet’s shape on the wall, cut a hole, and install an electrical box. Connect the wires, attach the outlet, and secure it in place.
Finally, restore the power and test the outlet.
Can I Install An Exterior Outlet Without A Permit?
In most cases, it is required to obtain a permit before installing an exterior electrical outlet. This ensures that the installation is done safely and up to code. Check with your local building department for specific permit requirements in your area.
How Do I Weatherproof An Exterior Electrical Outlet?
To weatherproof an exterior electrical outlet, purchase an outdoor-rated, weatherproof outlet cover. Turn off the power, remove the existing cover, and replace it with the weatherproof cover. Ensure the cover is securely tightened to create a seal and protects the outlet from moisture and other outdoor elements.
Conclusion
Installing an exterior outlet can be a simple and efficient way to enhance the functionality of your outdoor space. By following the step-by-step instructions outlined in this blog post, you can easily complete this project on your own. Remember to prioritize safety, consult local regulations, and gather the necessary tools and materials before starting.
So go ahead, embrace the convenience and versatility offered by an exterior outlet, and enjoy the benefits it brings to your outdoor activities. Happy installing!