To install an exterior door with brickmold, start by measuring the rough opening, then remove the existing door and frame. Install the new door, aligning it with the brickmold, and secure it using screws.
Finally, seal the door and brickmold joints with caulk to prevent water infiltration and ensure a tight fit.
Preparing For Installation
To ensure a successful installation of an exterior door with brickmold, proper preparation is crucial. This involves measuring the door frame and opening, obtaining the necessary tools and materials, and removing the old door and hardware. By following these steps, you can ensure a smooth installation process and a secure, weather-tight door.
Measuring the Door Frame and Opening
Before installing a new exterior door, it is essential to measure the door frame and opening accurately. This step ensures that the new door will fit properly and eliminates any potential issues during installation.
To measure the door frame and opening:
- Begin by measuring the width of the door frame from side to side. Take measurements at the top, middle, and bottom of the frame to account for any variations.
- Next, measure the height of the door frame from the floor to the top of the frame. Again, take measurements at multiple points to ensure accuracy.
- Note any variations or irregularities in the measurements, as these may require adjustments or modifications during installation.
By taking precise measurements, you can ensure a seamless installation that aligns perfectly with your door frame and opening.
Obtaining the Necessary Tools and Materials
Before beginning the installation process, it is essential to gather all the necessary tools and materials. This will help streamline the process and prevent delays.
The tools and materials required for installing an exterior door with brickmold include:
| Tools | Materials |
|---|---|
|
|
Having these tools and materials readily available will ensure a smooth installation process, allowing you to complete the project efficiently and effectively.
Removing the Old Door and Hardware
Before installing the new exterior door, the old door and hardware must be carefully removed. This step ensures a clean slate for the installation and allows for necessary adjustments to the door frame.
To remove the old door and hardware:
- Start by removing any screws or nails securing the door frame to the wall.
- Use a screwdriver or drill to remove the hinges from the frame.
- Gently pry the old door away from the frame using a hammer and chisel if necessary.
- Remove the old weatherstripping and any remaining hardware.
Ensure that the door frame is free from any debris or obstructions before proceeding with the installation of the new door.
By following these steps and adequately preparing for the installation, you can ensure a successful and stress-free process. Taking accurate measurements, gathering the necessary tools and materials, and removing the old door and hardware are essential steps that lay the foundation for a secure and durable exterior door installation.
Installing The Brickmold
As you embark on the installation process of your exterior door, one crucial step is the installation of the brickmold. The brickmold not only enhances the aesthetic appeal of your door but also provides functional benefits such as weather resistance and structural support. In this section, we will guide you through the process of installing the brickmold.
Understanding the purpose and benefits of brickmold
The brickmold serves as a decorative trim that surrounds the door frame, creating a seamless transition between the door and the surrounding brickwork. It not only adds visual appeal but also helps to prevent water infiltration and provides structural support to the door frame. By properly installing the brickmold, you can enhance the longevity and performance of your exterior door.
Choosing the right type and size of brickmold for your door
When selecting the brickmold for your door, it is important to consider the type and size that best suits your needs. There are various types of brickmold available, including wood, vinyl, and composite materials. Each type has its own advantages and considerations. Additionally, you’ll want to ensure that the size of the brickmold matches the dimensions of your door frame to ensure a proper fit.
To determine the appropriate size, measure the width and height of your door frame, accounting for any desired reveal or spacing between the brickmold and the door frame. This will ensure that the brickmold aligns perfectly with the door frame, creating a seamless and professional finish.
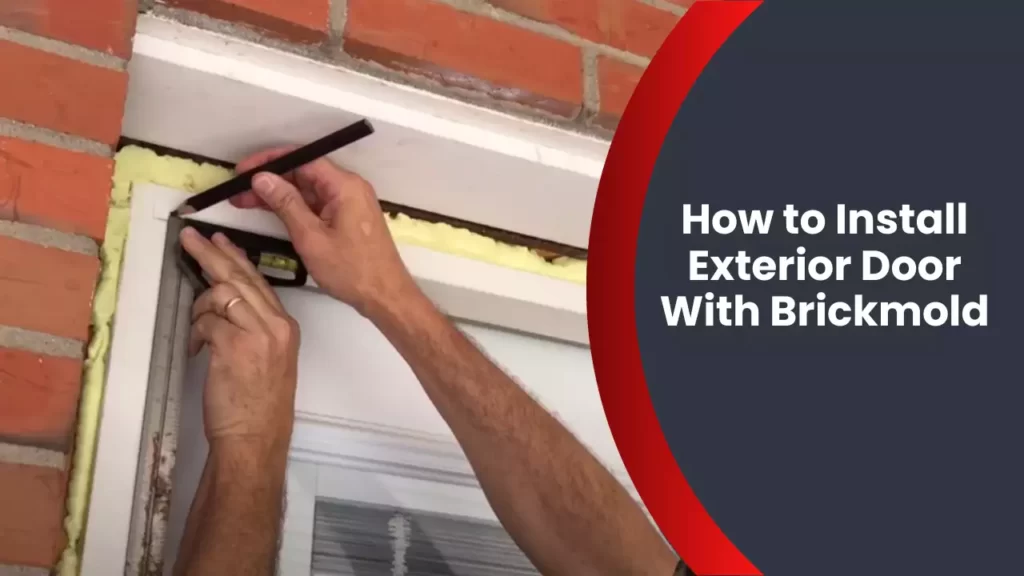
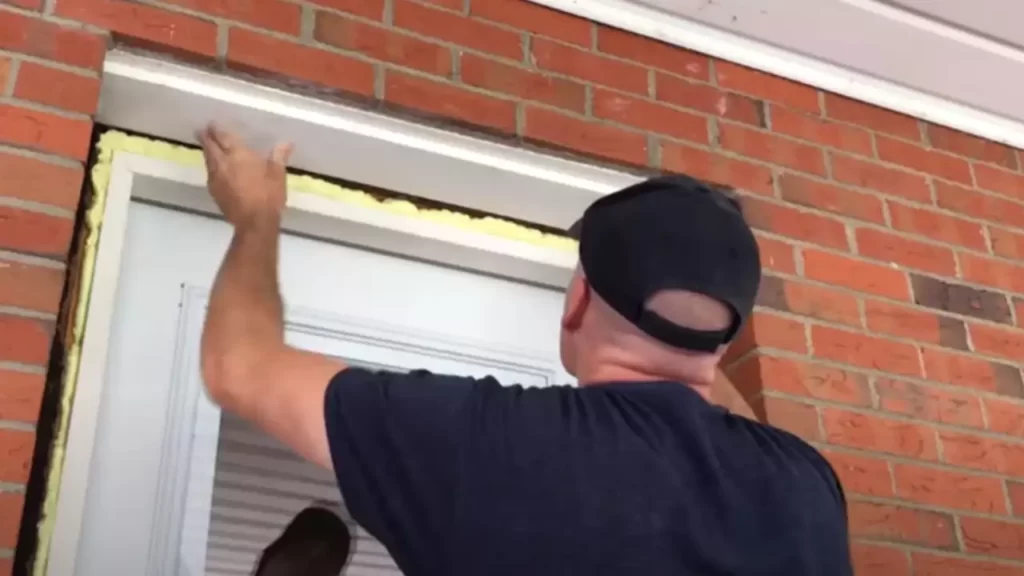
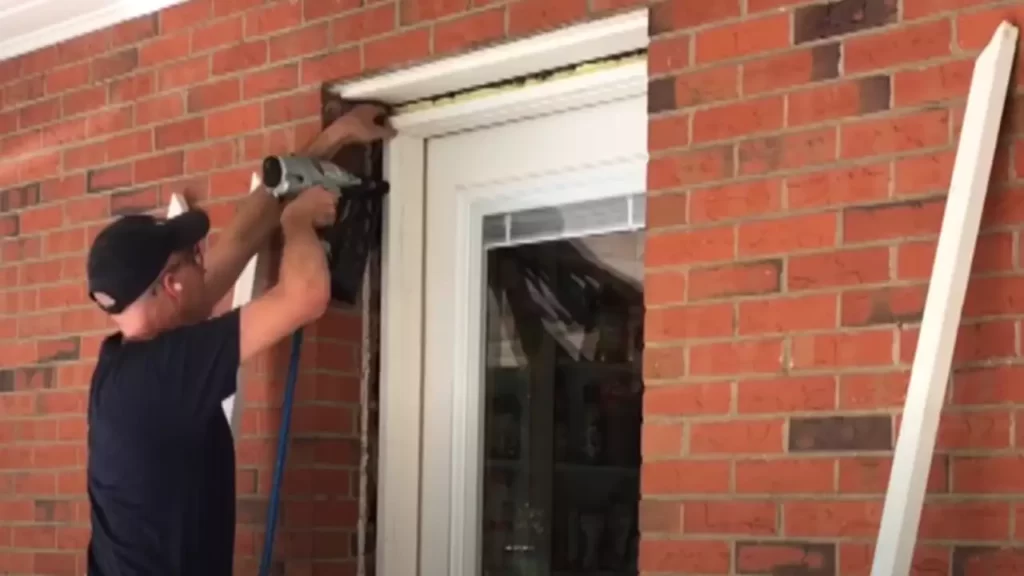
Aligning and attaching the brickmold to the door frame securely
Once you have selected the appropriate type and size of brickmold, it’s time to align and attach it securely to the door frame. Here is a step-by-step guide to help you with the process:
- Start by positioning the brickmold against the door frame, ensuring it is flush and aligned with the edges of the frame.
- Using a level, check that the brickmold is plumb and square to the door frame. Make any necessary adjustments to ensure proper alignment.
- Once you are satisfied with the alignment, secure the brickmold to the door frame using screws or nails. Be sure to use appropriate fasteners that are suitable for the material of the brickmold and the door frame.
- Space the fasteners evenly along the length of the brickmold, ensuring a secure and uniform attachment.
- Repeat the process for each side of the door frame, paying attention to maintain consistent alignment and spacing.
By following these steps, you can install the brickmold effectively, providing a professional finish to your exterior door. Remember to refer to the manufacturer’s instructions for any specific considerations or recommendations related to your chosen brickmold type.
Installing The Exterior Door
When it comes to installing an exterior door with brickmold, proper technique and attention to detail are essential for a successful and long-lasting installation. In this section, we will guide you through the step-by-step process of installing your exterior door. From selecting the appropriate door for your needs and preferences to preparing the door for installation and setting it in the opening, we will cover each aspect of the installation process.
Selecting the Appropriate Door for Your Needs and Preferences
Before you begin the installation process, it is crucial to select the right door that suits your needs and preferences. Consider factors such as the size, material, and style of the door to ensure it complements the overall look and functionality of your home. Here are a few key points to keep in mind:
- Measure the opening accurately to determine the door size you need. This will help you avoid any fitting issues later on.
- Choose a door material that provides durability and security. Common options include wood, fiberglass, and steel.
- Select a style that matches the architectural design of your home. Whether you prefer a traditional or modern look, there are various options available to suit your taste.
Preparing the Door for Installation, Including Drilling Holes for Hardware
Once you have selected the appropriate door, the next step is to prepare it for installation. This involves prepping the door for hardware installation, as well as ensuring it is ready to fit into the opening. Follow these steps:
- Remove any packaging materials and protective coverings from the door.
- Inspect the door for any damage or defects. It is crucial to address these issues before proceeding with the installation.
- Drill holes for the door hardware, such as the doorknob and deadbolt. Refer to the manufacturer’s instructions for precise measurements and placement.
- Make sure to create pilot holes before drilling, especially for screws and other hardware. This will prevent any splitting or cracking of the door material.
- Once the necessary holes have been drilled, sand any rough edges or surfaces to ensure a smooth finish.
Setting the Door in the Opening and Ensuring Proper Alignment
With the door prepared, it’s time to place it in the opening and achieve proper alignment. Follow these steps to ensure a secure and level installation:
- Have a helper assist you in positioning the door in the opening. It can be heavy and cumbersome, so an extra set of hands will be beneficial.
- Insert shims between the door frame and the opening to ensure even spacing and proper alignment.
- Use a level to check the vertical and horizontal alignment of the door. Adjust the shims as needed until the door is perfectly level.
- Secure the door in place by screwing through the hinges and shims into the door frame.
- Double-check the alignment and operation of the door, making sure it opens and closes smoothly.
By following these steps, you can successfully install an exterior door with brickmold. Taking the time to select the appropriate door, properly prepare it for installation, and ensure accurate alignment will result in a secure and aesthetically pleasing entrance to your home.
Securing The Door And Brickmold
Installing hinges and attaching the door to the frame
Once you have properly prepared the door and brickmold for installation, it’s time to secure the door to the frame. This step is crucial as it ensures that your exterior door is properly attached and functions smoothly.
To start, gather the necessary tools such as a screwdriver, screws, and a level. Begin by positioning the hinges in the designated locations on both the door and the frame. Make sure the hinges are aligned properly and at the right height. Once you are satisfied with their placement, attach the hinges using screws, ensuring that they are tightened securely.
Next, it’s important to check the alignment of the door. Use a level to ensure that the door is straight and not slanted in any way. Adjust the placement of the hinges if needed to achieve a perfect alignment.
Ensuring proper weatherstripping around the door
Weatherstripping is crucial for maintaining energy efficiency and protecting your home from the elements. It helps to seal any gaps between the door and the frame, preventing drafts and moisture from entering your home.
To ensure proper weatherstripping, start by measuring the length of the top, bottom, and sides of the door frame. Using these measurements, cut the weatherstripping material accordingly. Apply the weatherstripping along the edges of the frame, using adhesive or screws to secure it in place. Be thorough and ensure that there are no gaps or overlaps in the weatherstripping.
Sealing gaps and applying finishing touches for a professional look
To achieve a professional and polished look for your exterior door with brickmold, it is essential to seal any gaps that may exist between the door, brickmold, and the frame. This not only enhances the aesthetics but also prevents air and moisture from seeping in.
Inspect the entire perimeter of the door and brickmold for any noticeable gaps or spaces. If you find any, use a suitable sealant that is compatible with your door and brickmold material to fill these gaps. Ensure that you apply the sealant evenly and remove any excess for a seamless finish.
To complete the installation, take a step back and assess the overall appearance of the door and brickmold. Make any necessary adjustments to achieve a clean and uniform look. Finally, wipe away any dirt or debris, and ensure that the door opens and closes smoothly.
By following these steps to secure the door and brickmold, ensuring proper weatherstripping, and sealing any gaps, you can install your exterior door with brickmold confidently and enjoy the benefits of a well-protected and energy-efficient entryway.
Maintaining And Troubleshooting
Regular maintenance and care for your exterior door with brickmold
Regular maintenance and care are essential to ensure the longevity and optimal performance of your exterior door with brickmold. By following a few simple steps, you can keep your door looking great and functioning smoothly for years to come.
1. Clean and lubricate the hinges
Over time, dust and debris can accumulate in the hinges of your door, causing it to squeak or become stiff. To remedy this, gently wipe away any dirt using a soft cloth and apply a small amount of lubricant to the hinges. This will help to keep them working smoothly and prevent unnecessary strain on the door.
2. Inspect weatherstripping regularly
Weatherstripping plays a crucial role in keeping your door insulated and protected from the elements. It can, however, wear out over time. Regularly inspect the weatherstripping for any cracks, gaps, or signs of wear. If you notice any issues, replace the weatherstripping promptly to maintain the energy efficiency of your door.
3. Keep the door clean
Exposure to the elements can cause dirt, grime, and mildew to accumulate on your door’s surface. Cleaning the door with a mild detergent and water solution will help remove these unwanted substances. Be sure to rinse thoroughly and dry the door completely to prevent any water damage.
Common issues and troubleshooting tips for door installation
While installing an exterior door with brickmold can be a rewarding project, it’s not without its challenges. Here are some common issues that may arise during installation along with troubleshooting tips:
1. Uneven gaps around the door
If you notice uneven gaps between the door and the frame, there may be an issue with the installation. The most likely cause is that the door frame was not properly leveled. To fix this, you can try adjusting the shims or tightening the screws in the hinges. If the problem persists, it’s best to consult a professional for further assistance.
2. Difficulty in opening or closing the door
If you’re having trouble operating your door, it could indicate a sizing issue. Check if the door is too tight or too loose in the frame. Adjust the strike plate or hinges accordingly to ensure a proper fit. Lubricating the hinges can also help resolve any sticking or squeaking problems.
3. Drafts or air leaks
If you feel drafts or notice air leaks around your door, it could be due to gaps in the weatherstripping or inadequate sealing. Double-check the weatherstripping to ensure it is properly installed and in good condition. Apply weatherstripping adhesive as needed, or consider adding a door sweep to enhance the sealing of the bottom of the door.
Enhancing the longevity and performance of your door with brickmold
To maximize the lifespan and performance of your exterior door with brickmold, consider the following tips:
1. Use quality materials
Investing in high-quality materials for your door and brickmold will go a long way in ensuring durability and longevity. Opt for doors made from sturdy materials such as fiberglass or solid wood, and choose a brickmold that is resistant to moisture, rot, and pests.
2. Proper installation
Proper installation is crucial to the optimal performance of your door with brickmold. Ensure the door is installed according to the manufacturer’s instructions or consult a professional for assistance. This will help avoid potential issues and ensure a tight fit that offers optimal insulation and security.
3. Regular inspections
Perform regular inspections of your door and brickmold to identify any signs of damage, wear, or deterioration. Promptly address any issues to prevent them from worsening and compromising the integrity of the door.
By following these maintenance, troubleshooting, and longevity-enhancing tips, you can keep your exterior door with brickmold looking pristine and functioning smoothly for years to come.
Frequently Asked Questions
What Does It Mean When A Door Comes With Brickmold?
A door with brickmold means it comes with a trim or molding attached to its frame. It provides a clean and finished look, making installation easier and enhancing the door’s overall appearance.
How Do You Attach Brickmold?
To attach brickmold, first, measure and cut it to the desired length. Then, align it with the edges of the door or window frame and secure it in place using screws or nails. Repeat the process for all sides, ensuring a snug fit.
Finally, fill any gaps or seams with caulk for a sealed finish.
Can You Remove Brick Mold From Prehung Door?
Yes, you can remove brick mold from a Prehung door. Just take necessary precautions and use appropriate tools to carefully remove the brick mold.
What Is Exterior Brick Molding?
Exterior brick molding is a decorative trim used to enhance the appearance of brick exteriors. It is installed around windows, doors, and other openings to provide a finished look, improving the overall aesthetic appeal of the building. The molding is typically made of wood or PVC and comes in various styles and sizes.
Conclusion
Installing an exterior door with brickmold may seem daunting, but with these steps, it can be a manageable project. From measuring and preparing the opening to attaching the door and brickmold, we’ve covered the essential tips and techniques. Remember to prioritize safety, use suitable tools, and follow the instructions closely.
With proper planning and attention to detail, your exterior door installation will turn out successful, enhancing the security and aesthetics of your home. Get started on this rewarding project today!