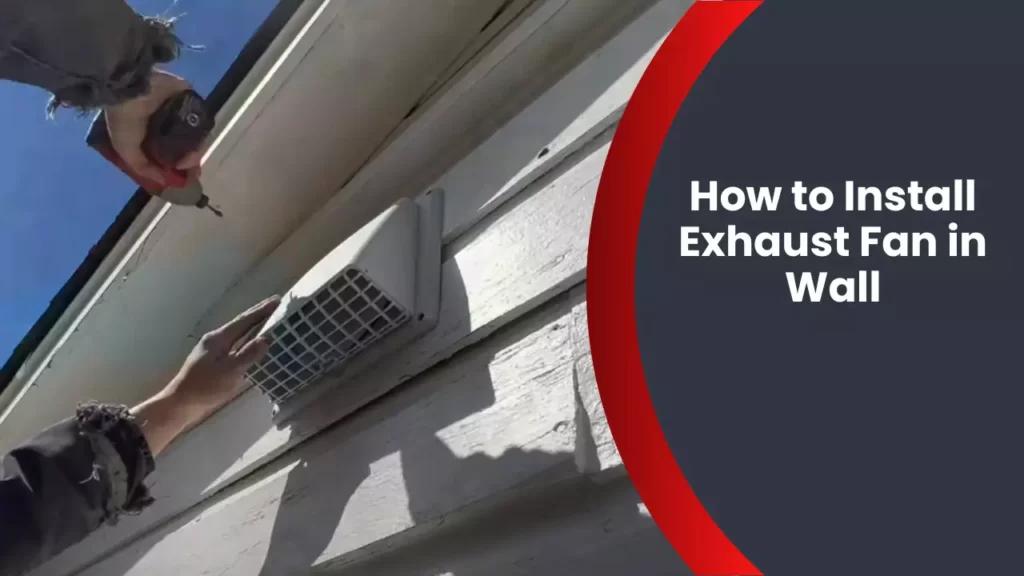
To install an exhaust fan in a wall, measure and mark the desired location, cut an opening in the wall, insert the fan into the opening, and secure it in place. Connect the wiring and ductwork, then turn on the power to test the fan.
Introducing proper ventilation into your home is crucial for maintaining good indoor air quality. An exhaust fan in the wall can effectively remove excess moisture, odors, and pollutants from enclosed spaces. Whether it’s a bathroom, laundry room, or kitchen, installing an exhaust fan is a relatively simple task that can be completed in a few steps.
We will guide you through the process of installing an exhaust fan in a wall, ensuring proper ventilation and enhancing the comfort and well-being of your home.
Understanding The Importance Of Proper Ventilation In Your Home
The importance of proper ventilation in your home cannot be overstated. Ventilation plays a vital role in maintaining a healthy and comfortable living environment. It helps to remove moisture, unpleasant odors, and indoor air pollutants, while also preventing the buildup of harmful substances that can pose a risk to your health and the longevity of your home.
Benefits of Proper Ventilation
Proper ventilation offers numerous benefits that go beyond just freshening up the air in your living space. Here are some of the key advantages:
- Improves Indoor Air Quality: Ventilation ensures a continuous flow of fresh air, reducing the concentration of indoor pollutants such as volatile organic compounds (VOCs), allergens, and mold spores. This is particularly important for people with respiratory conditions, allergies, or sensitive immune systems.
- Prevents Excessive Moisture: Excessive moisture in your home can lead to mold growth, which can cause respiratory issues, allergies, and even structural damage. Proper ventilation helps to control moisture levels, preventing the conditions necessary for mold and mildew to thrive.
- Enhances Comfort: Effective ventilation allows for the removal of stuffy, humid air, making your home more comfortable to live in. It helps with temperature regulation, preventing hot, stale air from accumulating and improving air circulation throughout your living areas.
- Energy Efficiency: Installing exhaust fans in walls or other ventilation systems can help to reduce your energy consumption. By expelling excess heat or cool air, you won’t have to rely heavily on heating or cooling appliances, thus lowering your energy bills.
Common Problems Caused by Inadequate Ventilation
Inadequate ventilation can lead to a range of problems that compromise both your health and the structure of your home. Here are some of the common issues associated with poor ventilation:
- Poor Indoor Air Quality: Without proper ventilation, indoor air can become stale, filled with pollutants, allergens, and irritants. This can result in respiratory problems, headaches, allergies, and an overall uncomfortable living environment.
- Excessive Condensation: Inadequate ventilation contributes to excessive condensation in your home, which can lead to moisture damage to walls, ceilings, and window frames. Condensation can also promote mold growth, causing structural issues and health hazards.
- Unpleasant Odors: A lack of proper ventilation can allow unpleasant odors to linger and permeate your home. This can be particularly problematic in areas such as bathrooms, kitchens, or laundry rooms, where strong odors tend to accumulate.
- Formation of Ice Dams: In colder regions, inadequate ventilation can lead to the formation of ice dams on roofs. These ice dams can cause damage to the roof and gutters, leading to leaks and water infiltration into your home.
Understanding the importance of proper ventilation in your home is crucial for creating a healthy and comfortable living environment. By installing an exhaust fan in a wall or investing in other ventilation systems, you can improve air quality, prevent moisture-related issues, and enhance overall comfort. Don’t overlook this vital aspect of your home’s maintenance and well-being.
Choosing The Right Exhaust Fan For Your Wall
Installing an exhaust fan in your wall can greatly improve air circulation and help remove unwanted odors and moisture from your space. However, selecting the right exhaust fan for your wall is essential to ensure optimal performance. In this article, we will explore the factors you should consider and the steps you should take to determine the appropriate fan size for your space.
Factors to Consider When Selecting an Exhaust Fan
Before purchasing an exhaust fan for your wall, there are several factors you should consider. Taking these factors into account will help you choose a fan that is both efficient and suitable for your specific needs. Let’s dive into these factors:
- Room Size: The first factor to consider is the size of the room you plan to install the exhaust fan in. The larger the room, the more powerful the fan should be in order to effectively circulate the air.
- Noise Level: Some exhaust fans can be quite noisy, which may be undesirable in certain settings. If noise level is a concern for you, look for a fan that is specifically designed to operate quietly.
- Energy Efficiency: Energy efficiency is an important consideration when selecting any electrical appliance. Look for an exhaust fan with a high energy-efficiency rating to help reduce your energy consumption and lower your utility bills.
- Features: Consider the additional features that an exhaust fan may offer. For example, some fans come with built-in timers, humidity sensors, or even motion sensors. These features can add convenience and improve the functionality of your fan.
- Budget: Finally, it’s important to consider your budget when selecting an exhaust fan. Determine how much you are willing to spend and look for a fan that offers the best value within your price range.
Determining the Appropriate Fan Size for Your Space
Once you have considered the factors mentioned above, you can move on to determining the appropriate fan size for your space. Proper ventilation is crucial, and choosing the right fan size will ensure that the air is effectively circulated. Here’s how you can do it:
- Calculate the Room’s Volume: Measure the length, width, and height of the room. Multiply these three measurements to get the room’s volume in cubic feet.
- Determine the Air Exchange Rate: The air exchange rate refers to how many times the air in the room needs to be replaced per hour. The generally recommended rate is eight times per hour for residential spaces and 15 times per hour for bathrooms.
- Calculate the Required Airflow: Multiply the room’s volume by the air exchange rate to calculate the required airflow in cubic feet per minute (CFM).
- Select a Fan with Adequate CFM Rating: Look for an exhaust fan that has a CFM rating that meets or exceeds the required airflow calculated in the previous step. This will ensure that the fan is capable of properly ventilating your space.
By considering the factors mentioned above and determining the appropriate fan size for your space, you can confidently choose the right exhaust fan for your wall. This will help improve air quality and create a more comfortable living environment.
Tools And Materials Required For The Installation Process
Installing an exhaust fan in your wall can help improve the air circulation and eliminate unwanted odors and moisture in your home. To successfully install an exhaust fan, you will need to gather the necessary tools and materials. Having everything ready before you begin the installation process will ensure a smoother and more efficient experience. Here are the essential tools and necessary materials you will need:
Essential tools for the installation
To install an exhaust fan in the wall, you will need the following tools:
- Screwdriver
- Tape measure
- Pencil or marker
- Jigsaw or reciprocating saw
- Stud finder
- Drill with a hole saw attachment
- Wire stripper and cutter
- Electrical tape
- Adjustable wrench
- Level
Necessary materials for a successful installation
Before you start the installation process, make sure you have the following materials on hand:
- Exhaust fan unit
- Ductwork
- Wall cap or vent
- Mounting bracket
- Screws or nails
- Electrical wire
- Wire connectors
- Electrical box
- Grommet
- Metal duct tape
Ensure you choose an exhaust fan that is suitable for the size of your room and meets any local building codes. The ductwork should be rated for use with exhaust fans and be the appropriate size for the fan. The wall cap or vent should also be compatible with the exhaust fan and provide proper ventilation to the outside.
Having all the necessary tools and materials ready before starting the installation will save you time and avoid interruptions during the process. It is important to follow the manufacturer’s instructions and any local building codes to ensure a safe and effective installation.
Preparing For The Installation
When it comes to improving ventilation in your home, installing an exhaust fan in the wall can make a world of difference. Not only does it help remove stale air and odors, but it also helps reduce moisture levels in the room, preventing the growth of mold and mildew. However, before you can enjoy the benefits of an exhaust fan, you need to prepare for the installation. This involves measuring and marking the location for the fan, as well as removing any obstacles or obstructions that may impede the installation process.
Measuring and Marking the Location for the Exhaust Fan
To ensure that your exhaust fan is properly positioned and functions optimally, it’s crucial to measure and mark the location for installation. Here’s a step-by-step guide to help you:
- Gather the necessary tools: measuring tape, pencil, and level.
- Identify the area where you want to install the exhaust fan. Ideally, it should be in a central location within the room to maximize its effectiveness.
- Measure the dimensions of the exhaust fan. Take note of its width, height, and depth.
- Using the pencil and measuring tape, mark the exact position where the fan will be installed. Make sure the marks align with the measurements taken earlier.
- Use a level to ensure the markings are straight and aligned with the floor or ceiling, depending on the placement of the fan.
By following these steps, you’ll be able to accurately measure and mark the location for your exhaust fan, ensuring a proper fit and efficient operation.
Removing Any Obstacles or Obstructions
Prior to installing the exhaust fan, it’s important to clear the area of any obstacles or obstructions that may interfere with the installation process. Here are some steps to help you prepare the space:
- Remove any furniture, decor, or other items that may impede access to the wall where the fan will be installed.
- Check for electrical wires, plumbing pipes, or other utilities that may be present in the wall. If necessary, hire a professional to relocate or reroute these to avoid potential risks during the installation process.
- Clean the wall surface to ensure a smooth and even installation. Remove any dirt, dust, or debris that may prevent the exhaust fan from adhering properly.
By taking these simple steps to remove obstacles and obstructions, you’ll create a clear and safe space for the exhaust fan installation, making the process smoother and more efficient.
Installing The Exhaust Fan In The Wall
Installing the exhaust fan in the wall is a crucial step in ensuring proper ventilation in your home. A well-installed exhaust fan helps remove stale air and unpleasant odors, while also preventing the build-up of excess moisture that can lead to mold and mildew growth. In this section, we will discuss the steps for mounting the fan housing onto the wall and wiring and connecting the fan to the electrical system.
Steps for Mounting the Fan Housing onto the Wall
To begin with, let’s take a look at the steps involved in mounting the fan housing onto the wall. Follow these instructions closely for a seamless installation:
1. Choose the Ideal Location: Determine the optimal location on the wall where you want to install the exhaust fan. Keep in mind that it should be near a power source and have sufficient clearance for the fan to function properly.
2. Prepare the Hole: Using a stud finder, locate the nearest wall stud and mark its position on the wall. Next, use a pencil to draw an outline of the exhaust fan’s housing on the wall. Double-check the dimensions to ensure accuracy.
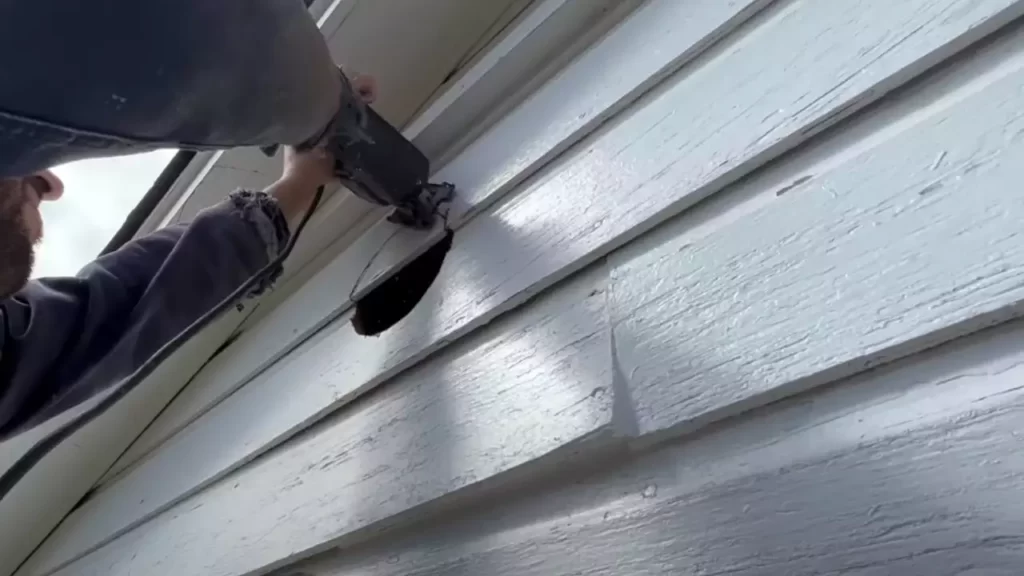
3. Cut the Opening: With a drywall saw or reciprocating saw, carefully cut along the outline you drew on the wall. Take caution not to damage any electrical wires or plumbing lines that may be hidden behind the wall.
4. Mount the Housing: Insert the fan housing into the hole you created, making sure it fits snugly. Use screws or nails to secure the housing to the wall studs, ensuring stability. If necessary, use a level to verify that the housing is perfectly straight.
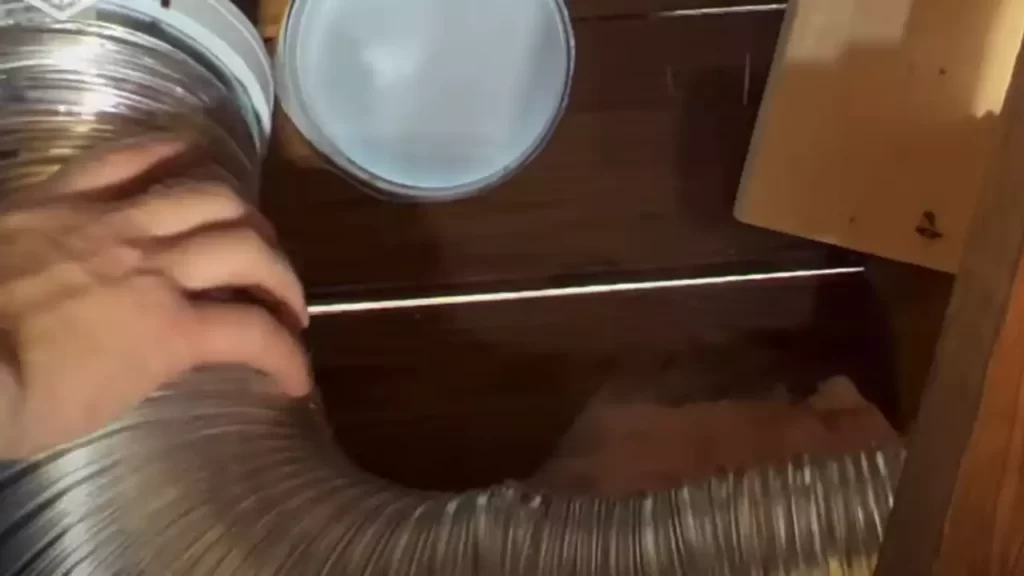
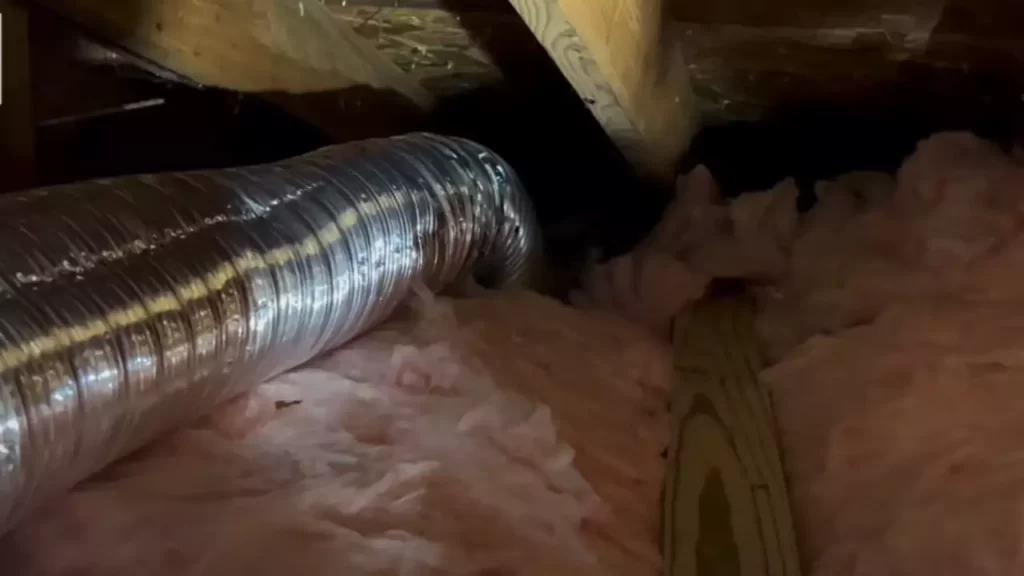
5. Attach the Ductwork: Connect the exhaust fan’s ductwork to the housing, ensuring a tight seal. This will direct the air flow from the fan to the outside of your home, preventing it from circulating back indoors.
Wiring and Connecting the Fan to the Electrical System
Now, let’s move on to the crucial step of wiring and connecting the exhaust fan to the electrical system. Here’s what you need to do:
1. Turn Off the Power: Head to your home’s electrical panel and turn off the power supply to the area where you will be working. This will ensure your safety while working with electrical connections.
2. Run the Wires: Run electrical wires from the nearest electrical outlet or junction box to the exhaust fan’s location. If needed, consult an electrician to ensure proper wiring and adherence to local electrical codes.
3. Make the Connections: At this stage, you need to connect the wires from the electrical system to the exhaust fan. It’s essential to follow the manufacturer’s instructions and adhere to electrical safety standards. Typically, you will connect the black wires (hot) and white wires (neutral) together using wire nuts, and the green or copper wire (ground) to the ground screw inside the fan’s housing.
4. Secure the Connections: After making the electrical connections, use electrical tape or wire connectors to secure the wire nuts. This will prevent any accidental disconnections and ensure the safety and reliability of your exhaust fan.
5. Test the Exhaust Fan: Once all the wiring is complete, carefully turn the power back on and test the exhaust fan. Use the fan switch or wall controls to activate the fan and verify that it is running smoothly and effectively.
By following these steps, you can successfully install an exhaust fan in the wall of your home. It’s important to note that if you’re not confident in your electrical or handyman skills, it’s best to consult a professional for assistance. Proper installation is key to ensuring optimal airflow, ventilation, and overall air quality in your living space.
Testing And Adjusting The Exhaust Fan
Ensuring proper functioning of the fan
To ensure that your newly installed exhaust fan is working effectively, there are a few key steps you need to take. Testing the fan is crucial to verify its performance and proper installation. Follow these steps to ensure the proper functioning of your exhaust fan:
1. Power check: Start by checking if the fan is receiving power. Flip the switch or turn on the device connected to the fan. Listen for any noise or movement indicating that it is running smoothly.
2. Observation: Observe the fan’s rotation to confirm it is spinning in the right direction. Typically, you want the fan to move air from the inside to the outside of your home, removing unwanted odors and humidity.
3. Airflow test: Place your hand or a tissue near the vent where the exhausted air should be flowing. Feel for any airflow coming out. If no air movement is detected, you may need to double-check the installation to ensure everything is properly connected and sealed.
4. Noise level: Listen for any unusual or excessive noise coming from the fan. While some noise is expected, any grinding, rattling, or squeaking sounds could indicate a problem that needs to be addressed.
5. Timer and switch check: If your exhaust fan comes with a built-in timer or switch, test their functionality. Make sure the timer accurately controls the fan’s operation and that the switch operates smoothly without any glitches.
Adjusting fan settings for optimal performance
To achieve optimal performance from your exhaust fan, you may need to adjust its settings. Here are a few tips to help you maximize the efficiency and effectiveness of your exhaust fan:
1. Fan speed adjustment: Some exhaust fans come with variable speed settings that allow you to adjust the rotational speed of the fan blades. Experiment with different speed settings to find the perfect balance between airflow and noise level. Keep in mind that higher speeds may result in increased noise.
2. Timer settings: If your fan has a built-in timer, adjust it according to your needs. The timer allows you to program the fan’s operation for a specified duration, ensuring it runs only when necessary. Set the timer based on the average time it takes to eliminate odors or humidity in your space.
3. Sensitivity adjustments: If your exhaust fan has a humidity or motion sensor, adjust the sensitivity settings to match your preferences. Higher sensitivity may result in the fan activating more frequently, while lower sensitivity may require higher levels of humidity or motion to trigger its operation.
4. Regular maintenance: Remember to clean and maintain your exhaust fan regularly to ensure optimal performance. Dust, dirt, and debris can accumulate on the fan blades and hinder airflow. Clean the blades and vents periodically to keep the fan functioning effectively.
By testing and adjusting your exhaust fan, you can ensure its proper functioning and optimize its performance. Following these steps will help you enjoy a well-ventilated and comfortable living space. Remember, proper installation and maintenance are key to a functional exhaust fan.
Maintaining And Troubleshooting Your Exhaust Fan
Once you’ve successfully installed an exhaust fan in your wall, it’s essential to regularly maintain it to ensure optimal performance and longevity. In this section, we’ll explore some valuable tips for cleaning and maintaining your exhaust fan, as well as common issues you may encounter and how to resolve them.
Regular Cleaning and Maintenance Tips
Regular cleaning is vital for keeping your exhaust fan running efficiently. Dirt, dust, and grime can accumulate over time, hindering the fan’s performance. Here are some simple yet effective tips to help you maintain a clean and functional exhaust fan:
- Before cleaning, turn off the power supply to avoid any accidents.
- Gently remove the fan cover or grille by unscrewing or unclipping it.
- Use a soft brush or vacuum cleaner to remove dust and debris from the blades, motor, and surrounding areas. Avoid using water on electrical components.
- Wipe the fan cover or grille with a damp cloth and mild detergent to remove accumulated grease and dirt.
- Allow all components to dry completely before reassembling.
By following these cleaning and maintenance tips at regular intervals, you can ensure that your exhaust fan operates smoothly and efficiently, preventing any potential issues.
Common Issues and How to Resolve Them
Even with proper maintenance, you may encounter some issues with your exhaust fan. Here are some common problems and simple troubleshooting steps to help you resolve them:
| Issue | Resolution |
|---|---|
| The fan is not working |
|
| Loud or vibrating noise |
|
| Low airflow |
|
By identifying these common issues and following the corresponding troubleshooting steps, you can address them promptly and restore your exhaust fan to optimal functionality. However, if the problem persists or requires extensive repairs, it is recommended to consult a professional.
Maintaining and troubleshooting your exhaust fan is essential for its longevity and efficiency. By implementing regular cleaning practices and addressing common issues promptly, you can enjoy a well-functioning exhaust fan that effectively eliminates odors and improves air circulation in your home.
Frequently Asked Questions
Can You Install Exhaust Fan In Wall?
Yes, you can install an exhaust fan in the wall. It is a simple process that can help improve air circulation and remove odors in your home.
How Do You Install An Exhaust Vent In The Wall?
To install an exhaust vent in the wall, follow these steps: Choose the vent location, mark it on the wall, and cut a hole using a reciprocating saw. Attach the vent to the wall using screws. Connect the vent duct to the back of the vent and seal with foil tape.
Lastly, connect the other end of the duct to the exhaust fan.
Where Should A Wall Exhaust Fan Be Placed?
A wall exhaust fan should be placed in a strategic location, preferably near the source of air pollutants or moisture. Consider placing it opposite to the bathroom or kitchen area to effectively remove odors and steam. Ensure proper ventilation by placing it at least 6-8 feet above the floor and away from obstructions.
Is It Better To Vent Bathroom Fan Through Wall Or Roof?
Venting a bathroom fan through the roof is generally better since it allows hot air and moisture to rise and escape more effectively. Wall vents can trap air and moisture, leading to potential damage and mold growth.
Conclusion
To conclude, installing an exhaust fan in the wall is a simple and effective way to improve ventilation in your space. By following the step-by-step guide provided in this blog post, you can successfully complete the installation process. Remember to choose the right fan size, gather the necessary tools, and ensure proper wiring for optimal performance.
With a well-ventilated space, you can enjoy fresher air and a more comfortable environment. Start the installation today and reap the benefits of a properly functioning exhaust fan.