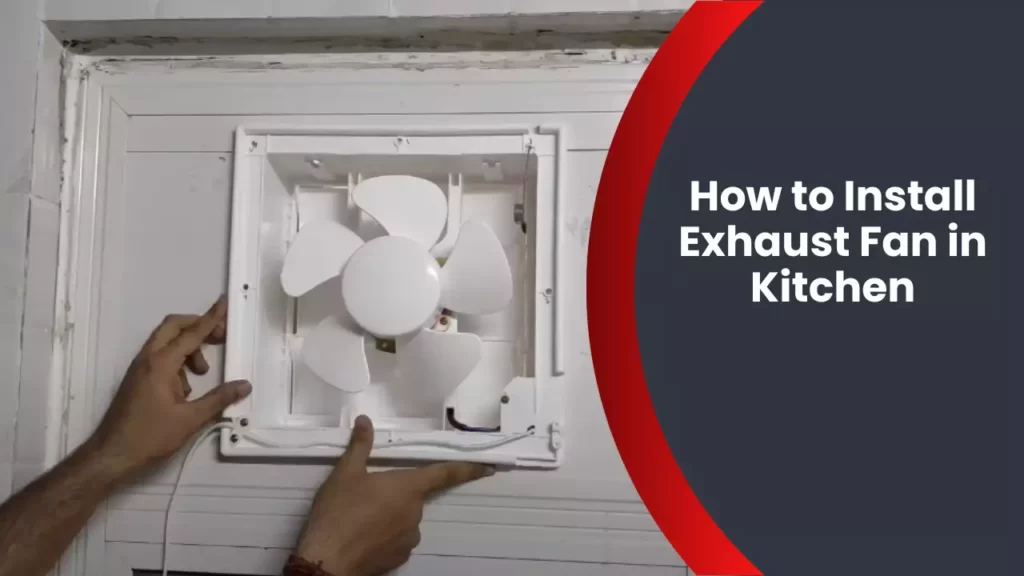
To install an exhaust fan in the kitchen, follow these steps: 1. Choose a suitable location for the fan on the wall or ceiling.
2. Cut a hole for the exhaust fan. Once the hole is prepared, you can begin the installation process. Exhaust fans are essential in kitchens to remove smoke, odors, and excess moisture, ensuring a clean and fresh environment. By installing an exhaust fan, you can improve the air quality in your kitchen and prevent the buildup of harmful substances.
We will guide you through the process of installing an exhaust fan in your kitchen.
Understanding The Importance Of Exhaust Fans In The Kitchen
Installing an exhaust fan in your kitchen is not only a matter of convenience but also an essential component of maintaining a healthy and functional cooking space. The kitchen is an area prone to accumulating heat, humidity, and cooking odors, which can impact the overall air quality and comfort level in your home. However, with the installation of a reliable exhaust fan, you can effectively eliminate these issues and create a more enjoyable environment for cooking and entertaining.
Key Benefits of Installing an Exhaust Fan
Proper ventilation plays a crucial role in keeping the air clean and fresh in your kitchen. Let’s delve into the key benefits that an exhaust fan can provide:
- Removal of Odors: One of the primary reasons to install an exhaust fan in your kitchen is to mitigate unpleasant cooking odors. Whether you’re frying fish or simmering curry, strong odors can permeate your living space and linger for hours. An exhaust fan effectively captures and eliminates these odors, keeping your kitchen and home smelling fresh.
- Improved Air Quality: Cooking releases various airborne pollutants, including smoke, grease particles, and volatile organic compounds (VOCs). These contaminants can adversely affect indoor air quality, leading to respiratory issues and allergic reactions. By constantly circulating and venting the air, an exhaust fan helps remove these pollutants, providing a healthier environment for you and your family.
- Reduced Heat and Humidity: Cooking often generates heat and increases the humidity level in your kitchen. This excess heat and moisture can make the space uncomfortable and promote the growth of mold and mildew. With an exhaust fan in place, you can effectively remove the excess heat and humidity, creating a cooler and drier kitchen environment.
- Prevention of Grease Buildup: Over time, cooking grease can accumulate on surfaces such as cabinets, countertops, and walls, creating an unsightly and sticky mess. An exhaust fan helps capture grease particles before they settle on surfaces, reducing the need for extensive cleaning and prolonging the longevity of your kitchen fixtures.
The Need for Proper Ventilation in the Kitchen
When it comes to kitchen design and functionality, proper ventilation should never be overlooked. Adequate ventilation not only improves air quality but also prevents damage caused by excess moisture and promotes overall comfort. Without proper ventilation, your kitchen can become a breeding ground for mold, mildew, and even structural issues. Additionally, cooking in a poorly ventilated kitchen can be a stifling and uncomfortable experience.
By installing an exhaust fan in your kitchen, you proactively address these issues and create a healthier and more enjoyable cooking space. Don’t overlook the importance of proper ventilation – it’s a small investment that offers significant long-term benefits.
Evaluating The Size And Power Requirements
Calculating the Airflow Needs for Your Kitchen
When it comes to installing an exhaust fan in your kitchen, it is crucial to first evaluate the size and power requirements of your space. This will help you determine the right fan size and airflow needs for efficient ventilation. Calculating the airflow needs involves considering the size of your kitchen, the type of cooking you typically do, and the layout of your kitchen area.
One way to calculate the airflow needs is by using the square footage of your kitchen. A general guideline is to have a minimum of 1 CFM (cubic feet per minute) of airflow for every square foot of kitchen area. However, if you frequently cook with high heat or strong odors, you may require a higher CFM rating.
Determining the Ideal Fan Size for Your Kitchen Space
Once you have determined the required airflow for your kitchen, the next step is to determine the ideal fan size that can effectively handle the ventilation needs. Fan size is measured in terms of diameter, typically ranging from 8 inches to 12 inches, although larger fans are available for commercial kitchens.
To determine the ideal fan size, consider the height of your kitchen ceiling. A general rule of thumb is to select a fan with a diameter that corresponds with your ceiling height. For example, if your kitchen ceiling is 8 feet high, a fan with an 8-inch diameter is suitable. However, if you have a higher ceiling, you may need a larger fan to ensure adequate ventilation.
It is also important to note that the layout and configuration of your kitchen can impact the effectiveness of the fan. For instance, if you have a kitchen island or a large cooking range in the middle of the room, you may require additional ventilation options to ensure proper airflow in those areas.
Note: It is recommended to consult with a professional or refer to the manufacturer’s specifications to ensure accurate sizing for your specific kitchen space.
In conclusion, evaluating the size and power requirements is a crucial step in installing an exhaust fan in your kitchen. By calculating the airflow needs and determining the ideal fan size, you can ensure efficient ventilation and a healthy kitchen environment free from cooking odors and moisture buildup.
Exploring Different Types Of Exhaust Fans
When it comes to keeping your kitchen well-ventilated, installing an exhaust fan is a wise choice. Not only does it help eliminate odors and smoke, but it also helps remove excess moisture and keeps the air fresh. When exploring different types of exhaust fans, you will come across two popular options: wall-mounted exhaust fans and ceiling-mounted exhaust fans. Let’s take a closer look at each type to help you make an informed decision for your kitchen.
Understanding Wall-Mounted Exhaust Fans
Wall-mounted exhaust fans are an excellent choice if you want to save space in your kitchen. These fans are typically installed directly into the wall, and they efficiently remove cooking fumes and air pollutants from your kitchen. They are designed to be compact yet powerful, ensuring effective ventilation even in smaller kitchens. Wall-mounted exhaust fans are often equipped with adjustable speed settings, allowing you to control the airflow according to your needs.
When installing a wall-mounted exhaust fan, it is crucial to choose the right location. You should place it near the cooking area or stove to capture fumes effectively. Ideally, it should be installed at a height which is comfortable for you to operate without any obstruction. Make sure the fan is positioned in a way that allows for smooth airflow without any restrictions.
Considering Ceiling-Mounted Exhaust Fans
Ceiling-mounted exhaust fans are another popular choice for kitchens, especially those with higher ceilings or limited wall space. These fans are mounted directly on the ceiling and effectively remove hot air, steam, and odors from your kitchen. They are often larger in size compared to wall-mounted fans, providing powerful ventilation for larger cooking spaces.
When installing a ceiling-mounted exhaust fan, make sure to choose a location that allows for optimum air circulation in your kitchen. Position the fan in a central area where it can evenly distribute air throughout the space. Additionally, pay attention to the distance between the fan and the cooking area to ensure efficient capture of fumes and smoke.
Now that you have a better understanding of the two types of exhaust fans, it’s time to choose the one that suits your kitchen layout and needs the best. Consider factors such as space availability, kitchen size, and your ventilation requirements to make an informed decision. Whether you opt for a wall-mounted exhaust fan or a ceiling-mounted one, both options will undoubtedly contribute towards maintaining a clean and fresh kitchen environment.
Factors To Consider When Selecting An Exhaust Fan
Installing an exhaust fan in your kitchen is an excellent way to improve ventilation and maintain a fresh and odor-free environment. However, with numerous options available in the market, it’s crucial to consider various factors before making a decision. These factors will not only determine the fan’s effectiveness but also ensure that it operates efficiently and meets your needs. Let’s explore some important factors to consider when selecting an exhaust fan for your kitchen.
Noise Levels and Fan Performance
When it comes to exhaust fans, noise levels play a significant role in providing a comfortable and peaceful kitchen environment. Look for fans with low noise ratings, typically measured in sones. The lower the sone rating, the quieter the fan will be. This is especially important if you have an open-concept kitchen or prefer a quieter atmosphere while cooking or entertaining guests.
However, noise levels should not be the sole consideration. Fan performance is equally vital to effectively remove smoke, steam, and odors. Check the fan’s airflow capacity, measured in cubic feet per minute (CFM). Ensure that the CFM rating is appropriate for the size of your kitchen. As a general rule of thumb, a fan should be able to extract the kitchen’s air volume at least eight times per hour for optimal ventilation.
Energy Efficiency and Power Consumption
Energy efficiency is essential not only to reduce your carbon footprint but also to save on electricity bills. Look for exhaust fans with an Energy Star certification. These fans are designed to operate at lower power consumption levels while maintaining effective performance. With an Energy Star fan, you can ensure efficient airflow without compromising on energy savings.
In addition, consider the fan’s power consumption. Fans with lower wattage consume less electricity. Look for fans that are energy-efficient and provide excellent performance, striking the right balance between power consumption and airflow capacity. Not only will this help to reduce your energy costs, but it will also contribute to a greener and more sustainable kitchen environment.
Additional Features to Look for in an Exhaust Fan
While noise levels, performance, and energy efficiency are crucial factors, there are a few additional features you should consider when selecting an exhaust fan for your kitchen:
- Lighting: Some exhaust fans come with built-in lighting options, providing extra illumination for your kitchen workspace.
- Timer Function: A fan with a built-in timer can be highly convenient, allowing you to set the fan to run for a specific duration and automatically shut off, ensuring energy-efficient ventilation.
- Humidity Sensor: Fans equipped with a humidity sensor can detect high moisture levels and automatically activate to reduce humidity and prevent mold and mildew growth.
- Easy Maintenance: Look for fans with removable and washable filters, making maintenance hassle-free and ensuring optimal performance over time.
Consider these additional features based on your specific needs and preferences. They can enhance the overall functionality and convenience of your exhaust fan, making it an invaluable addition to your kitchen.
Gathering The Necessary Tools And Materials
Installing an exhaust fan in your kitchen can greatly improve the air quality and remove unwanted odors. However, before you dive into the installation process, it’s essential to gather all the necessary tools and materials. This will ensure a smooth and efficient installation. In this section, we will outline the essential tools you’ll need and the materials required for proper ventilation.
Essential Tools for the Installation Process
Before you begin, make sure you have the following essential tools handy:
| Tools | Description |
|---|---|
| Screwdriver | A screwdriver will be used to remove any screws or fasteners during the installation process. |
| Drill | A drill is necessary for making holes in the wall or ceiling to mount the exhaust fan. |
| Measuring tape | Accurate measurements are crucial, so ensure you have a measuring tape on hand to measure the dimensions of the fan and the installation area. |
| Pencil | A pencil will be used to mark the locations for drilling and cutting. |
| Wire cutters/strippers | If the exhaust fan requires electrical wiring, wire cutters and strippers will be essential for preparing the wiring. |
| Level | Using a level will help ensure that the exhaust fan is installed straight and level. |
| Hacksaw | If the installation requires cutting through a wall or ceiling, a hacksaw will be necessary. |
| Gloves and safety goggles | Protect your hands and eyes by wearing gloves and safety goggles throughout the installation process. |
Materials Required for Proper Ventilation
Besides the tools, you’ll also need the following materials to ensure proper ventilation:
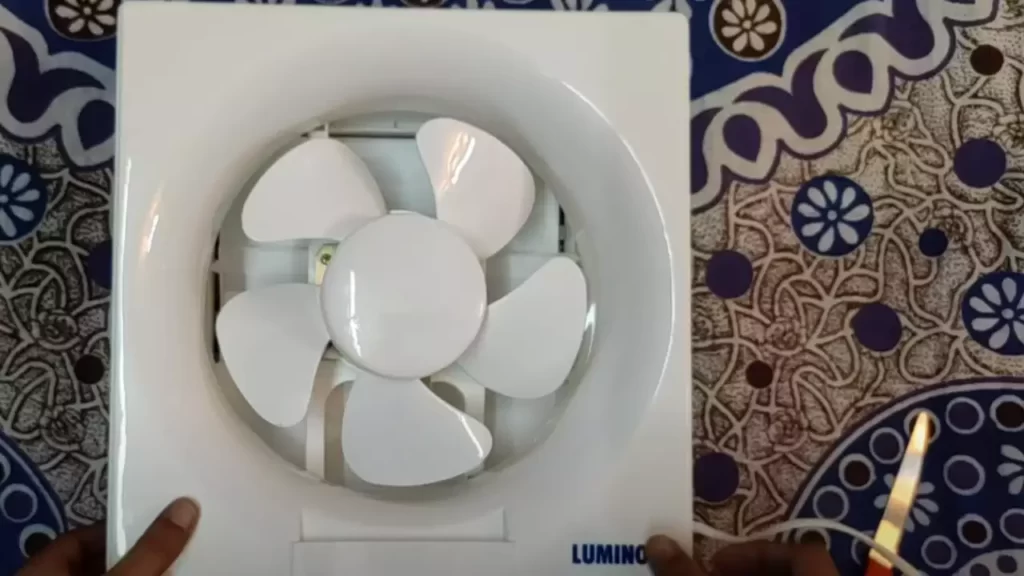
- Exhaust fan: Choose an exhaust fan that suits the size of your kitchen and has the required airflow capacity.
- Ductwork: Ductwork is necessary to connect the exhaust fan to the outside. Ensure the ductwork is made of suitable material, such as aluminum or galvanized steel, to prevent rusting or damage.
- Flexible duct hose: If your installation requires a flexible connection between the exhaust fan and the ductwork, a flexible duct hose is necessary. Make sure it is the appropriate size for the exhaust fan and the ductwork.
- Roof vent or wall cap: Depending on the location of your kitchen, you’ll need a roof vent or a wall cap to provide the exhaust air with an escape route.
- Foam tape or caulk: To seal any gaps or leaks in the installation, use foam tape or caulk to ensure proper airflow and insulation.
- Screws and fasteners: Secure the exhaust fan, ductwork, and any other components using screws and fasteners suitable for the materials you’re working with.
- Electrical wiring and connectors: If your exhaust fan requires electrical connections, make sure you have the necessary wiring and connectors.
By having all the essential tools and materials ready before you start the installation process, you can ensure a successful and efficient installation of your kitchen exhaust fan. Now that you’re equipped with everything you need, let’s move on to the next step: Preparing the Installation Area.
Identifying The Ideal Location For The Exhaust Fan
Identifying the Ideal Location for the Exhaust Fan
When it comes to maintaining a clean and odor-free kitchen, installing an exhaust fan is crucial. Not only does it help remove unwanted odors and smoke, but it also improves the overall air quality in your kitchen. However, finding the right spot to install your exhaust fan is essential to ensure its effectiveness. In this section, we will discuss two important factors that will help you identify the ideal location for your kitchen exhaust fan: analyzing your kitchen layout and airflow patterns, and determining the best spot for effective ventilation.
Analyzing Kitchen Layout and Airflow Patterns
In order to determine the ideal location for your exhaust fan, it is important to first analyze your kitchen’s layout and airflow patterns. By understanding how air circulates in your kitchen, you can strategically place the exhaust fan to maximize its efficiency. Here are a few key points to consider:
- Take note of your kitchen’s windows and doors. These openings can affect the airflow in your kitchen, and placing the exhaust fan near them can help in directing air flow efficiently.
- Observe the positioning of your cooking appliances. Most kitchens have a stove or cooktop, and having the exhaust fan near these appliances can effectively remove smoke and odors that are generated during cooking.
- Study the layout of your kitchen cabinets. If your cabinets are mounted close to the ceiling, it may restrict the airflow and hinder the effectiveness of the exhaust fan. Consider installing the fan in a location that allows for unobstructed airflow.
Determining the Best Spot for Effective Ventilation
Now that you have analyzed your kitchen’s layout and airflow patterns, it’s time to determine the best spot for effective ventilation. Here are a few tips to help you:
- Install the exhaust fan as close to the source of smoke and odors as possible. This will help capture and remove the pollutants efficiently.
- Consider the existing ventilation system in your kitchen. In some cases, it may be beneficial to place the exhaust fan near an existing vent or duct to improve air circulation.
- Choose a location that is easily accessible for maintenance and cleaning. Regular cleaning of the exhaust fan is essential to ensure its optimal performance.
By carefully analyzing your kitchen layout and airflow patterns, and considering the tips provided above, you can identify the ideal location for your exhaust fan. Remember, a well-placed exhaust fan will not only improve the air quality in your kitchen but also enhance your overall cooking experience.
Ventilation Duct Installation And Configuration
When it comes to installing an exhaust fan in your kitchen, proper ventilation duct installation and configuration are crucial. Without a well-designed and correctly installed duct system, your exhaust fan won’t effectively remove smoke, odor, and excess moisture from your kitchen. In this section, we will discuss the basics of ventilation ducts, how to measure and cut them to the appropriate size, and how to secure and connect them properly.
Understanding the Basics of Ventilation Ducts
Ventilation ducts are essential components of any exhaust fan system in the kitchen. They are responsible for carrying the pollutants, smoke, and moisture away from your cooking area, promoting a healthier and more comfortable environment. Before you start installing your exhaust fan, it’s important to have a good understanding of the basics of ventilation ducts.
A ventilation duct is typically made of metal, such as aluminum or galvanized steel, as it offers durability and resistance to heat and moisture. The size of the duct is determined by the fan’s airflow capacity and the distance it needs to cover to reach the outside. Make sure to choose a duct size that matches the specifications of your exhaust fan.
Measuring and Cutting Ducts to Size
To ensure an efficient ventilation system, it’s crucial to measure and cut the ducts accurately. Here’s a step-by-step guide:
- Start by measuring the distance from your exhaust fan to the outside vent. This will determine the length of the duct you need.
- Using a measuring tape, measure the diameter or dimensions of the fan’s outlet and the outside vent.
- Next, transfer these measurements to your ventilation duct, making sure to add a couple of inches to allow for connection fittings.
- Use a suitable cutting tool, such as tin snips, to cut the duct to the appropriate size. Take caution to make straight and clean cuts to ensure proper airflow.
Securing and Connecting Ducts Properly
Securing and connecting the ventilation ducts properly is essential to maintain the integrity and functionality of your exhaust fan system. Here are the steps you should follow:
- Make sure both ends of the duct are clean and free from any debris.
- Attach the appropriate connectors or fittings to the ends of the duct, ensuring a secure and airtight connection.
- Secure the duct to the fan and the outside vent using metal clamps or tape specifically designed for ductwork.
Remember to avoid any kinks or sags in the ductwork, as they will disrupt the airflow and reduce the effectiveness of your exhaust fan.
By understanding the basics of ventilation ducts, measuring and cutting them to size accurately, and securing and connecting them properly, you can ensure an efficient and functional exhaust fan installation in your kitchen. Take the time to plan and execute these steps carefully for optimal performance and a healthier indoor environment.
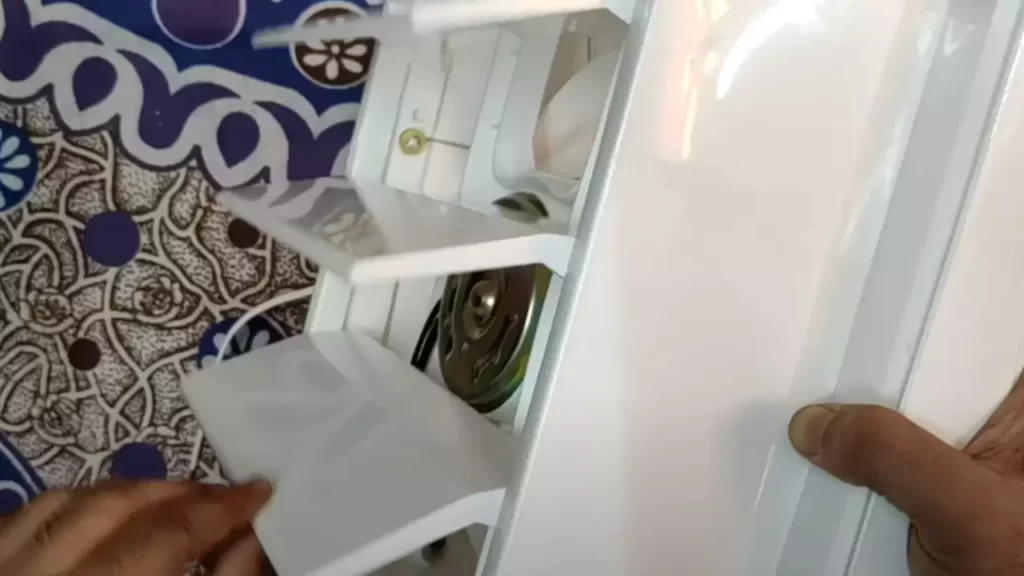
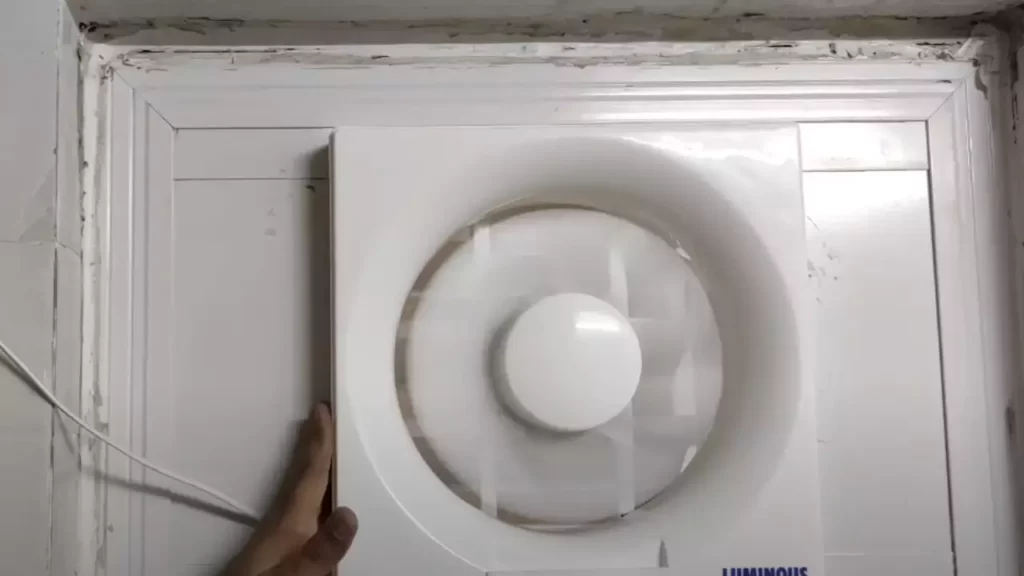
Mounting And Wiring The Exhaust Fan
If you’re tired of a steamy kitchen, installing an exhaust fan is a great solution. Not only will it keep your kitchen well-ventilated, but it will also remove cooking odors and control excess moisture. Mounting and wiring the exhaust fan correctly is crucial to ensure its effective operation. In this guide, we will walk you through the step-by-step process.
Installing the Exhaust Fan in the Chosen Location
The first step is to determine the optimal location for your exhaust fan. Choose an area that is close to the source of odors and steam. Generally, the best position is on the wall or ceiling, above your stove or cooktop. Once you have selected the location, follow these steps to install the exhaust fan:
- Measure and mark the position of the fan on the wall or ceiling.
- Using a stud finder, locate the nearest wall studs or ceiling joists for secure mounting.
- Align the fan’s mounting bracket with the marked position and attach it using screws.
- Ensure the bracket is level and secure before proceeding.
- Next, attach the fan housing to the mounting bracket securely.
The mounting process may vary depending on the specific fan model. Always refer to the manufacturer’s instructions for detailed guidance.
Electrical Wiring and Connection
After mounting the fan, it’s time to handle the electrical wiring and connect the fan to a power source. Follow these steps to ensure a safe and reliable connection:
- Shut off the power supply to the kitchen at the circuit breaker box.
- Remove the faceplate from the electrical junction box where you will connect the exhaust fan.
- Carefully connect the electrical wiring from the fan to the corresponding wires in the junction box.
- Secure the connections with wire nuts and ensure they are snug and free of any exposed wires.
- Replace the faceplate and ensure it covers the junction box completely.
- Turn on the power supply and verify that the fan receives electricity.
Testing the Fan for Proper Operation
Once the exhaust fan is mounted and wired, it’s crucial to test its functionality before considering the installation complete. Here’s how you can ensure the fan operates properly:
- Turn on the fan and let it run for a few minutes to ensure the motor is functioning smoothly.
- Check for any unusual noises, vibrations, or irregularities in the operation.
- Verify that the fan effectively removes steam, odors, and moisture from the kitchen.
If you notice any issues during the testing phase, double-check the mounting and wiring, and refer to the fan’s manual for troubleshooting tips. Otherwise, congratulations, you have successfully installed and tested your kitchen exhaust fan!
Regular Cleaning And Maintenance
Regular cleaning and maintenance of your kitchen exhaust fan is essential to ensure its optimal functioning and to maintain a healthy environment in your kitchen. Neglecting this important task can result in the accumulation of grease, dirt, and debris, which not only affects the efficiency of the fan but also poses a fire hazard. In this section, we will discuss the two key aspects of regular maintenance: keeping the exhaust fan clean and free from debris, and cleaning the ventilation ducts and filters.
Keeping the Exhaust Fan Clean and Free from Debris
To keep your exhaust fan clean and free from debris, follow these simple steps:
- Begin by disconnecting the power supply to the exhaust fan. This will ensure your safety during the cleaning process.
- Remove the outer cover of the fan by unscrewing the fasteners. The cover may be attached with clips, screws, or a combination of both.
- Once the cover is removed, carefully clean it using a damp cloth or sponge. You can also use a mild detergent or kitchen cleaner to remove stubborn stains or grease buildup. Ensure the cover is thoroughly dry before reattaching it.
- Using a vacuum cleaner or a brush, remove any loose dirt or debris from the fan blades and the interior of the fan housing. Pay close attention to the areas around the motor, as these tend to accumulate more dirt.
- Boldly clean the fan blades and housing with a mixture of warm water and dish soap. This will help eliminate any grease or oil residues. Rinse with clean water and pat dry.
- Inspect the fan blades for any signs of damage or wear and replace them if necessary. Damaged or worn blades can affect the performance of the fan and lead to increased noise levels.
- Finally, reattach the outer cover of the fan and ensure that all fasteners are securely tightened. Reconnect the power supply to the fan and test its operation.
Cleaning the Ventilation Ducts and Filters
Regularly cleaning the ventilation ducts and filters is crucial to maintain the efficiency and effectiveness of your kitchen exhaust fan. Here’s how you can do it:
- Start by turning off the power to the fan and disconnecting it from the power source.
- Detach the vent cover by removing the screws or clips that hold it in place. Set aside the cover for cleaning.
- Inspect the exhaust ducts for any blockages or debris. Use a flashlight to ensure thorough visibility. If you notice any obstruction, use a vacuum cleaner or a brush to remove it. Avoid using water unless absolutely necessary.
- Next, focus on the filters. Remove them carefully and inspect for any signs of dirt, grease, or damage. If reusable, wash them with warm soapy water or in a dishwasher. If disposable, replace them with new ones.
- Clean the vent cover using a mild detergent and warm water. Scrub any stubborn stains or grease buildup gently. Rinse the cover thoroughly and let it dry completely before reattaching.
- Finally, reinstall the clean filters and securely attach the vent cover. Connect the power supply to the fan and test its operation to ensure everything is working efficiently.
Regularly cleaning and maintaining your kitchen exhaust fan not only prolongs its lifespan but also promotes a healthier kitchen environment. By following these simple steps for cleaning the fan and ducts, you can ensure the optimal functioning of your kitchen exhaust fan and enjoy cooking in a clean and safe atmosphere.
Troubleshooting Common Issues
Installing an exhaust fan in your kitchen can help eliminate unwanted odors, reduce humidity levels, and improve overall air quality. However, like any other electrical appliance, exhaust fans may encounter common issues that can hinder their effectiveness. In this section, we will discuss how to troubleshoot some of these common issues, including identifying and fixing noisy exhaust fans, dealing with poor airflow and inefficiency, and addressing electrical problems.
Identifying and Fixing Noisy Exhaust Fans
Noisy exhaust fans can be not only irritating but also a sign of a potential problem. Here’s how you can identify and fix the noise issue:
- Checking for loose parts: Carefully inspect the fan blades, motor mountings, and any other components that might be loose. Tighten or replace any parts that are not securely fastened.
- Cleaning the fan blades: Over time, dust and debris can accumulate on the fan blades, causing them to make noise. Gently clean the blades using a soft cloth or brush to remove any build-up.
- Lubricating moving parts: Lack of lubrication can also contribute to noise. Use a few drops of lubricating oil on the motor bearings to reduce friction and noise.
- Replacing worn-out parts: If the noise persists, it might be necessary to replace worn-out components, such as the motor or fan blades, to restore optimal functionality.
Dealing with Poor Airflow and Inefficiency
If your exhaust fan is not providing adequate airflow or seems inefficient, the following steps can help address the issue:
- Cleaning or replacing the air filter: A clogged or dirty air filter can restrict airflow. Clean or replace the filter regularly to ensure maximum ventilation efficiency.
- Checking the ductwork: Inspect the ductwork for any obstructions or blockages that might impede airflow. Clear any debris and ensure the ducts are properly connected and sealed.
- Verifying fan size and placement: Ensure that the exhaust fan is appropriately sized for your kitchen and that it is installed in the correct location. Consult the manufacturer’s guidelines for optimal placement.
- Adjusting fan speed: Some exhaust fans have adjustable speed settings. Check if your fan has this feature and adjust the speed accordingly to improve airflow.
Addressing Electrical Problems
In the event of electrical problems with your exhaust fan, the following steps can help resolve the issue:
- Checking the power supply: Ensure that the exhaust fan is properly connected to a functioning power source. Check the circuit breaker or fuse to ensure it has not been tripped or blown.
- Testing the switch: If the fan does not turn on, the switch may be faulty. Use a voltage tester to check if power is reaching the switch and replace it if necessary.
- Inspecting the wiring: Inspect the fan’s wiring to make sure there are no loose connections, frayed wires, or other signs of damage. If any issues are found, consult a qualified electrician for repairs.
By troubleshooting these common issues, you can ensure that your kitchen exhaust fan operates smoothly, providing effective ventilation and enhancing your culinary experience.
Ensuring Longevity And Optimized Performance
Installing an exhaust fan in your kitchen not only improves air circulation but also helps to eliminate odors, smoke, and excess moisture, creating a healthier cooking environment. But simply installing the exhaust fan is not enough; you also need to take certain measures to ensure its longevity and optimized performance. Regular inspection and maintenance are crucial in keeping your exhaust fan functioning efficiently for years to come. In this section, we will discuss some essential tips and practices to help you prolong the lifespan of your exhaust fan.
Tips for Prolonging the Lifespan of Your Exhaust Fan
1. Regular Inspection
Inspecting your exhaust fan at regular intervals is key to identifying and addressing any issues before they worsen. Perform a visual inspection to check for any signs of wear and tear, loose screws, or damaged components. Additionally, pay attention to any unusual noises or vibrations when the fan is in operation. Catching such issues early on will prevent further damage and potentially costly repairs down the line.
2. Proper Cleaning
Keeping your exhaust fan clean is vital for its optimal performance. Over time, grease, dust, and other debris can accumulate on the fan blades and housing, hindering airflow and reducing efficiency. Regularly clean the fan blades with a mild detergent and warm water solution, ensuring that the power source is disconnected beforehand. Additionally, wipe down the housing and the surrounding area to remove any built-up grime or dirt.
3. Lubrication
Lubricating the exhaust fan motor and bearings will help to reduce friction and enhance its performance. Refer to the manufacturer’s instructions for the appropriate lubricant to use and the frequency of lubrication. It’s important to note that over-lubrication can cause issues, so follow the guidelines provided.
4. Replace Filters
If your exhaust fan has a filter, it is essential to replace it regularly. The filters trap grease, smoke particles, and other airborne contaminants, preventing them from accumulating inside the fan and ductwork. A clogged or dirty filter can impede airflow and decrease the fan’s efficiency. Check the manufacturer’s recommendations for the recommended frequency of filter replacement.
Regular Inspection and Maintenance Practices
In addition to the specific tips mentioned above, there are some general practices you should follow to maintain your exhaust fan’s longevity and optimize its performance:
- Ensure that the fan is properly installed, securely mounted, and well-balanced for smooth operation.
- Check the exhaust ductwork for any obstructions, such as debris or bird nests, that may hinder airflow. Clear any blockages to maintain optimum ventilation.
- Inspect the fan’s electrical connections periodically to ensure they are secure and free from fraying or damage.
- If you notice any unusual issues with your exhaust fan, such as persistent loud noises or a decrease in performance, it’s essential to contact a professional for a thorough inspection and possible repair.
By following these tips for prolonging the lifespan of your exhaust fan and practicing regular inspection and maintenance, you can ensure that your kitchen remains well-ventilated and enjoy the benefits of optimized performance for years to come.
Frequently Asked Questions
Do Kitchen Exhaust Fans Need To Be Vented Outside?
Yes, kitchen exhaust fans need to be vented outside. Venting them outside helps to remove cooking odors, smoke, and excess moisture from the kitchen effectively. It also prevents the buildup of grease and contaminants, improving indoor air quality and reducing the risk of fire hazards.
How Much Does It Cost To Install An Exhaust Fan In A Kitchen?
The cost of installing an exhaust fan in a kitchen varies depending on several factors, such as the size and type of fan, labor charges, and any additional wiring or ductwork required. On average, it can range from $200 to $1000.
Can I Install An Exhaust Fan In Kitchen?
Yes, you can install an exhaust fan in the kitchen. It helps remove odors, smoke, and heat while improving air quality. Proper ventilation is essential for a healthier and more comfortable cooking environment. A professional can install the fan efficiently and ensure it meets safety standards.
What Do I Do If My Kitchen Doesn’T Have An Exhaust Fan?
If your kitchen doesn’t have an exhaust fan, there are alternative options to control smoke and odors. Consider using a range hood, opening windows for ventilation, or installing a recirculating air purifier. These solutions can help keep your kitchen air clean and fresh.
Conclusion
Installing an exhaust fan in your kitchen is a simple yet important step to improve air quality. By following the step-by-step guide mentioned above, you can easily install the exhaust fan yourself. Remember to choose the right size and location for optimal performance.
Proper ventilation in the kitchen not only removes odors and smoke but also keeps your space fresh and healthy. Take charge of your kitchen’s air quality with this easy installation process.