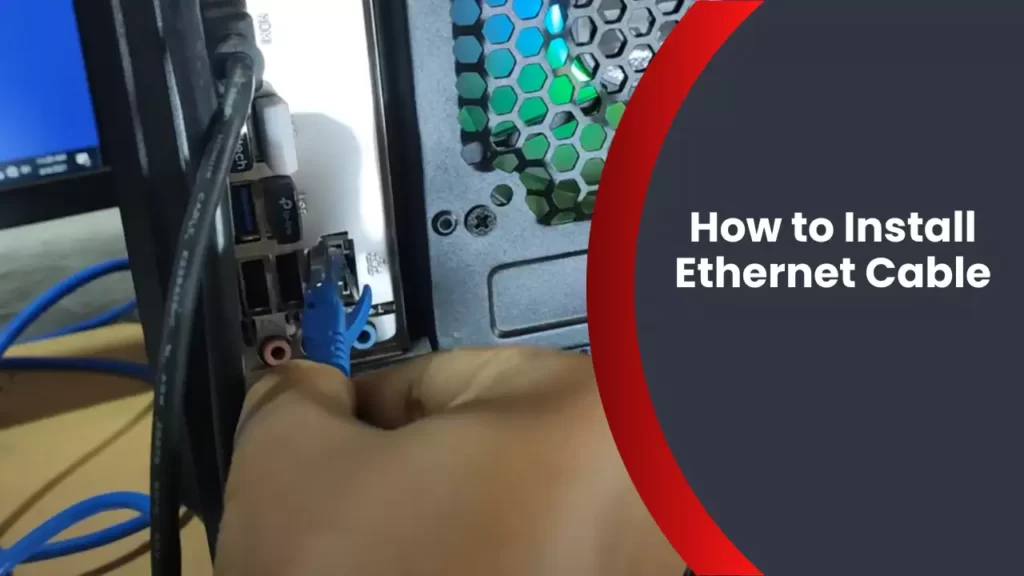
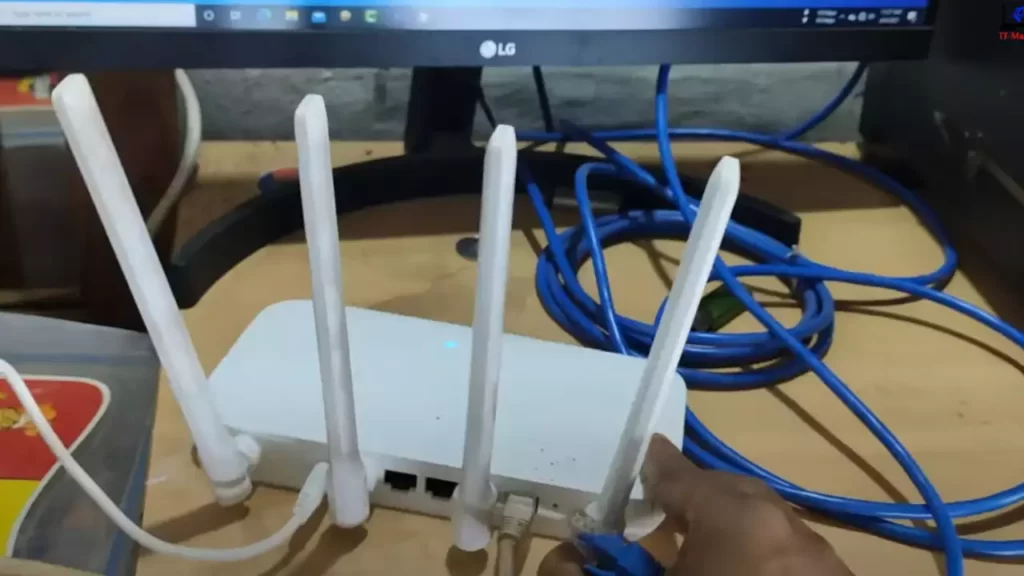
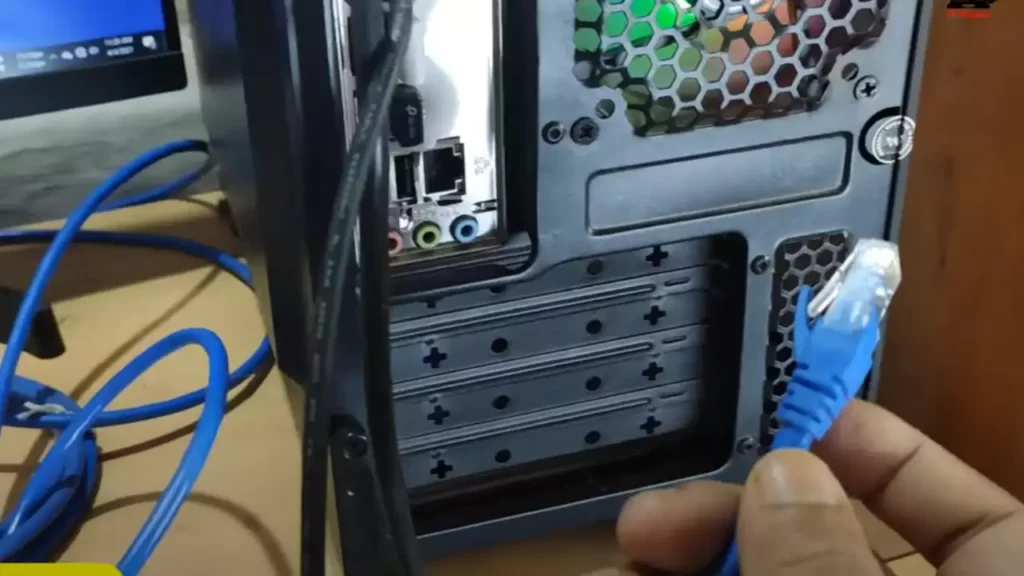
To install an Ethernet cable, carefully connect one end of the cable to your computer’s Ethernet port and the other end to your modem or router. This will establish a wired connection between your device and the network.
In today’s fast-paced digital world, having a reliable internet connection is crucial. Whether you are setting up a new office network or simply want to improve your internet speed at home, installing an Ethernet cable can make a significant difference.
Unlike a Wi-Fi connection, Ethernet provides a wired connection that offers faster and more stable internet access. We will walk you through the steps of installing an Ethernet cable to help you get started quickly and easily. By the end of this guide, you will be able to enjoy seamless internet connectivity without any hassle.
Choosing The Right Ethernet Cable For Your Needs
Installing an Ethernet cable can greatly improve your internet connectivity and provide a faster and more reliable network connection. However, with various types, lengths, and categories of Ethernet cables available, it’s essential to choose the right one for your specific needs. In this section, we will walk you through the factors to consider when selecting an Ethernet cable, so you can make an informed decision for your installation.
Consider the different types of Ethernet cables available
Before diving into the specific types of Ethernet cables, it’s important to understand that there are two main connector types: the RJ45, which is commonly used for Ethernet connections, and the newer and smaller RJ45SFP connector, which is typically used for faster networks like 10Gb.
When it comes to Ethernet cable types, the two most commonly used are Cat5e and Cat6. Cat5e cables are suitable for most home networks and offer speeds up to 1 Gigabit per second (Gbps). On the other hand, Cat6 cables are designed for faster and more demanding networks, capable of supporting speeds up to 10 Gbps.
Additionally, there are specialty Ethernet cables like flat Ethernet cables, which are ideal for running under carpets or along walls, and outdoor Ethernet cables, which are designed to withstand harsh weather conditions.
Determine the appropriate cable length for your installation
The length of the Ethernet cable you choose will depend on the distance between your devices that need to be connected. It’s important to measure and account for the exact length needed to avoid excessive cable lengths that could lead to signal loss or interference.
When selecting the cable length, always add a little extra to ensure flexibility for future adjustments. It’s better to have a slightly longer cable that can be neatly looped or secured than to have a cable that falls short and limits your connectivity options.
Understand the different categories of Ethernet cables
Ethernet cables are categorized based on their performance capabilities. The most common categories are Cat5, Cat5e, Cat6, and Cat6a. The higher the category number, the more advanced the cable performance.
Here’s a breakdown of the different categories:
| Category | Maximum Bandwidth | Maximum Frequency |
|---|---|---|
| Cat5 | 100 MHz | 100 Mbps |
| Cat5e | 100 MHz | 1 Gbps |
| Cat6 | 250 MHz | 1 Gbps |
| Cat6a | 500 MHz | 10 Gbps |
When choosing an Ethernet cable, consider the maximum speed and bandwidth requirements of your network to ensure optimal performance. For example, if you have a gigabit internet connection, a Cat5e cable would be sufficient, but if you require faster and more reliable speeds, a Cat6 or Cat6a cable would be a better choice.
By considering the different types, lengths, and categories of Ethernet cables, you can confidently select the right cable that meets your specific needs and maximizes your network performance.
Gathering The Necessary Tools And Materials
Identify the tools required for the installation process
To successfully install an Ethernet cable, it is essential to gather all the necessary tools. These tools will enable you to complete the installation process smoothly and efficiently. Here are the key tools you will need:
- Cable stripper: A cable stripper is a must-have tool for removing the outer insulation from the Ethernet cable. It ensures proper connectivity and allows for a clean and efficient installation.
- Cable cutter: A cable cutter is required to trim and cut the Ethernet cable to the desired length. This tool ensures precision and accuracy in the cable installation process.
- Wire stripper: Similar to a cable stripper, a wire stripper is used to remove the insulation from the individual wires within the Ethernet cable. It helps expose the copper wires for proper termination.
- Crimping tool: A crimping tool is essential for attaching connectors to the Ethernet cable. It allows you to securely fasten the connectors and ensures a reliable connection for efficient data transmission.
- Punch-down tool: If you are using a wall plate with keystone jacks, a punch-down tool will be necessary. It helps secure the wires into the jack, ensuring a secure and proper connection.
- Drill and drill bits: If you plan to mount wall plates or need to create holes for routing the Ethernet cable, a drill and suitable drill bits will come in handy. Make sure to have the right size drill bit for the job.
Gather the materials needed, such as connectors and wall plates
Along with the necessary tools, you will also need various materials to complete the Ethernet cable installation. Here are the important materials you should gather:
- Ethernet cable: Choose the appropriate type and length of Ethernet cable for your installation needs. Consider factors such as desired speed, distance, and whether you need a shielded or unshielded cable.
- Connectors: Depending on your installation requirements, you will need Ethernet connectors, such as RJ45 connectors. These connectors allow you to terminate the Ethernet cable, ensuring reliable and secure connections.
- Wall plates: Wall plates provide a clean and organized appearance for your Ethernet cable installation. They allow you to connect the Ethernet cable to a wall outlet, making it easily accessible for your devices.
- Screws and wall anchors: If you are mounting wall plates, ensure you have the necessary screws and wall anchors to securely fasten them to the wall surface. This ensures stability and durability for your Ethernet cable installation.
Consider additional equipment like cable testers and crimping tools
While not essential, considering additional equipment can greatly assist in ensuring a successful Ethernet cable installation. Here are two additional equipment options you may want to include:
- Cable tester: A cable tester is a handy tool for verifying the integrity and functionality of your Ethernet cable installation. It allows you to detect any wiring faults, such as short circuits or open circuits, ensuring optimal performance.
- Crimping tools: In addition to the crimping tool mentioned earlier, having extra crimping tools on hand is beneficial, especially when working with multiple Ethernet cables simultaneously. It helps to streamline the installation process and ensures consistency in connector termination.
Remember, having the right tools and materials will make the Ethernet cable installation process smoother and more efficient. By gathering these essentials, you’ll be well-prepared to complete the installation successfully.
Preparing For The Installation
Preparing for the Installation
Measure and plan the cable route
Before embarking on installing an Ethernet cable, it’s essential to measure and plan the route where the cable will be laid. This step ensures that you have a clear idea of the exact length of cable required and the most efficient pathway for running it. Measure the distance between the starting point (your router or modem) and the endpoint (the device you wish to connect), considering any twists and turns along the way.
Ensure the area is free of obstructions and hazards
When preparing for the Ethernet cable installation, it’s crucial to ensure that the area where the cable will be laid is free of any obstructions or hazards that could impede the installation process. This includes removing any furniture, rugs, or debris that could be in the way. By creating a clear and unobstructed path, you minimize the risk of damaging the cable or encountering difficulties during the installation.
Identify the necessary wall openings and access points
To properly lay an Ethernet cable, it’s necessary to identify the wall openings and access points where the cable will enter and exit. Carefully examine the wall to determine the most strategic locations for these points, ensuring they are conveniently positioned for both the cable routing and the devices you plan to connect. Mark these areas with tape or a pencil so that you can easily locate them during the installation process.
Now that you have the measurements, a clear pathway, and identified wall openings and access points, you are ready to proceed with the installation of your Ethernet cable. These preparations will enable a smoother and more efficient installation process, allowing you to enjoy a seamless wired internet connection.
Drilling Holes And Running The Cable Through Walls
One of the most important steps in installing Ethernet cable is drilling holes and running the cable through walls. This process involves determining the best locations for wall openings, using proper drilling techniques for different wall materials, and running the Ethernet cable through the drilled holes. In this section, we will discuss each of these steps in detail.
Determine the Best Locations for Wall Openings
Before starting the drilling process, it is crucial to determine the best locations for wall openings. This step ensures that the Ethernet cable can be easily accessed and connected to devices. To determine the ideal locations:
- Identify the rooms or areas where you need the Ethernet connection.
- Consider the distance and accessibility between these areas and your router or network switch.
- Check the layout of your house or office to identify the most efficient route for the cable.
- Take note of any obstacles or obstructions that may affect the cable installation.
- Plan for sufficient slack in the cable to allow for movement and maintenance.
Use Proper Drilling Techniques for Different Wall Materials
Now that you have determined the locations for wall openings, it is important to use proper drilling techniques based on the type of wall material you are working with. Different materials require different drilling methods to minimize damage and ensure a secure installation. Consider the following guidelines:
| Wall Material | Drilling Technique |
|---|---|
| Drywall or Plaster | Use a drywall or plaster bit to drill carefully, avoiding studs or electrical wires. |
| Wood or Paneling | Use a regular drill bit suitable for wood, ensuring not to split or damage the material. |
| Brick or Concrete | Use a masonry bit and a hammer drill to penetrate the tough surface. Keep the speed low to prevent overheating. |
Run the Ethernet Cable Through the Drilled Holes
Once the holes are drilled, it is time to run the Ethernet cable through them. Follow these steps to ensure a proper installation:
- Starting from the router or network switch, feed the cable through the first hole.
- Carefully guide the cable through the walls, ensuring it stays away from electrical wires or sharp objects.
- Use cable clips or adhesive hooks to secure the cable along the walls or baseboards.
- Continue feeding the cable through each drilled hole until you reach the desired location.
- Trim any excess cable, leaving enough slack for easy connection.
- Connect the Ethernet cable to the appropriate ports on your devices.
By carefully drilling holes at the optimal locations and running the cable through walls, you can successfully install Ethernet cable in your home or office. Following these guidelines ensures a reliable and secure connection for your network.
Installing Wall Plates And Terminating The Cable
Installing wall plates and terminating the cable is an essential step in setting up your Ethernet network. Wall plates provide a clean and professional finish, while proper termination ensures a reliable connection. In this section, we will guide you through the process of attaching wall plates at the termination points, stripping the Ethernet cable, and following the correct wiring standards for terminating the cable.
Attach wall plates at the termination points
The first step is to attach wall plates at the termination points in your home or office. These termination points are typically located where you want to connect your devices to the network. To attach the wall plates:
- Choose the appropriate wall plate that fits your needs, such as a single gang or double gang plate, depending on the number of Ethernet cables you wish to terminate.
- Align the wall plate over the hole in the wall and secure it using screws provided with the wall plate.
- Ensure the wall plate is tightly secured to the wall to prevent any movement or misalignment.
Strip the Ethernet cable and prepare it for termination
Before terminating the Ethernet cable, you need to strip it and prepare it for termination. Follow these steps:
- Using a cable stripper or a sharp utility knife, carefully remove about 1.5 inches of the outer jacket of the Ethernet cable. Be cautious not to cut or damage the internal wires.
- After removing the outer jacket, you will see four twisted pairs of wires. Untwist them carefully and straighten each pair.
- Trim any excess wires to ensure they are of the same length.
Follow the correct wiring standards for terminating the cable
Proper wiring standards are crucial to ensuring a functional Ethernet connection. Adhering to the correct wiring standards, such as the T568A or T568B standard, is essential for compatibility and reliable performance. To terminate the Ethernet cable correctly:
- Refer to the wiring standard of your choice, either T568A or T568B, before proceeding with the termination process.
- Identify the color-coded pairs of wires according to the chosen wiring standard.
- Carefully insert each wire into the appropriate slot or terminal on the wall plate or keystone jack, ensuring they are fully inserted and tightly secured.
- Double-check the wiring connections to ensure accuracy and consistency.
By following these steps, you will successfully install wall plates and terminate the Ethernet cable, allowing you to enjoy a reliable and high-speed network connection.
Testing And Ensuring A Successful Connection
Testing and ensuring a successful connection is a crucial step when it comes to the installation of Ethernet cables. By following a few simple steps, you can verify the integrity of the cable, troubleshoot any connectivity issues, and test the speed and reliability of the Ethernet connection. This ensures that you have a stable and efficient connection for your networking needs. In this section, we will explore how to perform these tests and make sure your Ethernet connection is working optimally.
Verify the integrity of the cable using a cable tester
The first step in testing your Ethernet cable is to verify its integrity using a cable tester. A cable tester is a handy tool that allows you to check the continuity of the wires inside the cable and ensures that there are no breaks or faults. To use a cable tester, you simply need to plug each end of the cable into the corresponding ports on the tester and observe the results. If the cable is intact, the tester will indicate a successful connection. However, if there are any faults or breaks, the tester will indicate the specific location of the issue.
Troubleshoot any connectivity issues
If you encounter any connectivity issues after verifying the cable integrity, it’s essential to troubleshoot the problem. Start by checking the connections on both ends of the cable to ensure they are securely plugged in. Inspect the Ethernet ports, making sure they are clean and free from any debris or dust that may hinder proper connectivity. Next, restart your networking devices, such as routers or switches, as sometimes a simple reboot can resolve minor connectivity issues. If the problem persists, try using a different Ethernet cable to see if the issue lies with the cable itself. By following these troubleshooting steps, you can pinpoint and resolve any connectivity issues that may arise.
Test the speed and reliability of the Ethernet connection
Once you have verified the cable integrity and resolved any connectivity issues, it’s crucial to test the speed and reliability of your Ethernet connection. This will ensure that you are getting the optimal performance out of your network. One way to test the speed is by using an online speed testing tool, which measures the upload and download speeds of your connection. Simply visit a speed testing website, click the “Start Test” button, and wait for the results. Additionally, you can test the reliability of your connection by performing tasks such as streaming videos, downloading files, or playing online games. If you experience any lag or buffering, it may indicate a problem with your Ethernet connection.
In conclusion, testing and ensuring a successful Ethernet connection is vital to establish a stable and efficient network. By using a cable tester to verify cable integrity, troubleshooting any connectivity issues, and testing the speed and reliability of the connection, you can ensure optimal performance for all your networking needs.
Frequently Asked Questions
How Do I Setup An Ethernet Cable?
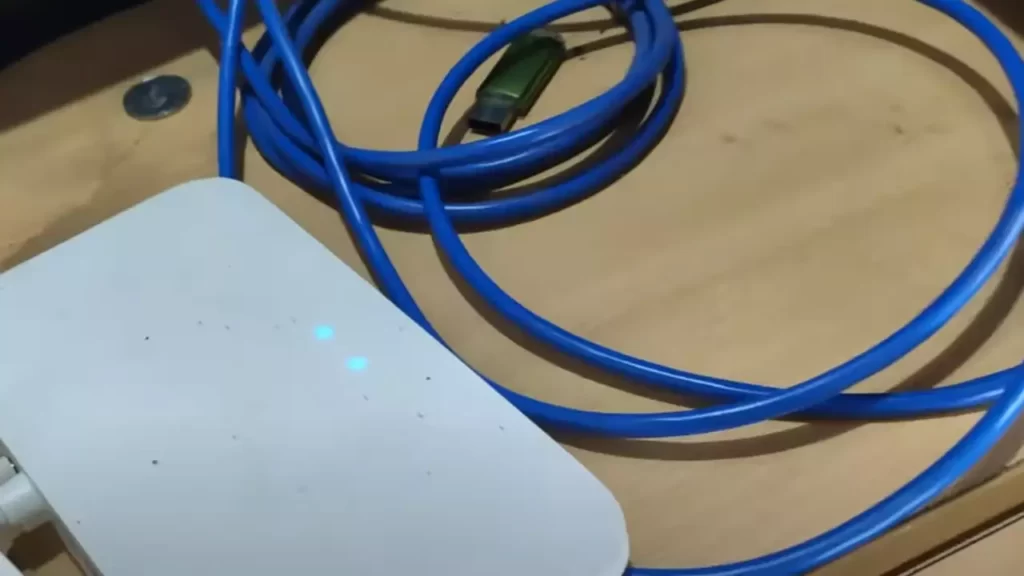
To set up an Ethernet cable, follow these steps: 1. Connect one end of the cable to your computer or device, and the other end to your modem or router. 2. Make sure both ends are securely plugged in. 3. Check the lights on your router to ensure a successful connection.
4. If needed, configure network settings on your computer or device. 5. Test the connection by opening a web browser to ensure internet access.
Can You Install Your Own Ethernet Cable?
Yes, you can install your own Ethernet cable. It is a simple process that can be done by following the instructions provided with the cable. Just ensure you have the necessary tools and knowledge to handle it correctly.
How Do I Connect To Ethernet Wifi?
To connect to Ethernet WiFi, plug one end of an Ethernet cable into your router and the other end into your device’s Ethernet port. Access your device’s WiFi settings, find your network name, and enter the password if prompted. Ensure you have an Ethernet cord and a compatible device.
Does The Ethernet Cable Go To The Router Or Modem?
The Ethernet cable should be connected to the router for internet access.
Conclusion
To sum up, installing Ethernet cables is a relatively simple process that can greatly enhance your internet connection’s reliability and speed. By following the step-by-step guide provided in this blog post, you can ensure a seamless installation experience. Remember to plan and measure correctly, use the appropriate tools, and secure the cables properly.
By doing so, you’ll have a stable and efficient network connection in no time. Don’t hesitate to reach out if you need any further assistance. Happy installing!