To install an electric socket, turn off the power supply, remove the socket cover, connect the wires to the terminal screws, and secure the socket to the electrical box. It is important to follow safety precautions and consult a licensed electrician if needed.
Now, let’s discuss the step-by-step process of installing an electric socket in more detail. Installing an electric socket can be a simple task if you know the correct procedure. Whether you are replacing an old socket or installing a new one, it is essential to ensure a safe and secure connection.
By following a few guidelines and taking the necessary precautions, you can successfully complete the installation. In this guide, we will walk you through the process, covering everything you need to know to install an electric socket. So, let’s get started and learn how to install an electric socket safely and effectively.
Factors To Consider When Selecting An Electric Socket
Factors to Consider When Selecting an Electric Socket
When it comes to installing an electric socket, there are several important factors to consider. Selecting the right socket for your needs is crucial to ensure the safe and efficient use of electrical devices in your home or office. In this section, we will discuss the key factors you should take into account when choosing an electric socket. These include power requirements, socket types and configurations, as well as safety ratings and certifications.
Power Requirements
The power requirements of your electrical devices play a significant role in determining the type of electric socket you should choose. Before making a selection, you need to determine the maximum power load that will be connected to the socket. This can be done by checking the wattage or amperage requirements of your devices. It is essential to choose a socket that can handle the power demand without overloading or causing any electrical hazards.
Socket Types and Configurations
There are various socket types and configurations available, each designed for specific purposes. The most common type is the standard three-pin socket, which is suitable for general-purpose usage. However, you may also come across specialized sockets, such as those for high-powered appliances or industrial equipment. It’s important to choose a socket type that matches the specific needs of your devices to ensure proper compatibility and functionality.
Safety Ratings and Certifications
When selecting an electric socket, safety should be a top priority. Look for sockets that meet recognized safety standards and have undergone certification processes. These certifications ensure that the socket has undergone rigorous testing to guarantee its safety and reliability. Common safety certifications include CE marking, UL listing, and RoHS compliance. Choosing a socket with the appropriate safety ratings and certifications will provide peace of mind knowing that your electrical devices are protected from potential hazards.
In conclusion, selecting the right electric socket involves considering multiple factors such as power requirements, socket types and configurations, as well as safety ratings and certifications. By carefully evaluating these factors and making an informed decision, you can ensure the safe and efficient use of electrical devices in your home or workplace.
Where To Buy Electric Sockets
If you’re planning to install electric sockets in your home or office, it’s essential to know where to buy the right equipment. There are several options available, depending on your preferences and convenience. In this section, we will explore three main places to purchase electric sockets: local hardware stores, online retailers, and specialty electrical suppliers. Read on to discover which option suits you best.
Local hardware stores
Local hardware stores are a popular choice for purchasing electric sockets. These stores offer a wide selection of electrical supplies and tools, making it convenient to find what you need. Plus, you can see the products in person before making a purchase. Most often, hardware stores have knowledgeable staff who can assist you in finding the best electric socket for your specific needs.
When visiting a local hardware store, remember to take note of the following:
- Check if they have the specific type or model of electric socket you require.
- Ask about any ongoing promotions or discounts to save money on your purchase.
- If you’re unsure about compatibility or installation, don’t hesitate to ask for advice from the store’s experts.
Online retailers
Internet shopping has become increasingly popular in recent years, and you can find almost anything online, including electric sockets. Online retailers offer a vast range of options, making it easy to compare prices, brands, and features in one go. You can conveniently browse product descriptions, customer reviews, and specifications to make an informed decision from the comfort of your own home.
Here are some aspects to consider when buying electric sockets online:
- Make sure to choose a reputable online retailer known for their quality products and reliable customer service.
- Check if the website provides detailed product descriptions, including dimensions and specifications, to ensure the electric socket meets your requirements.
- Read customer reviews to gain insights about the product’s performance and durability.
- Compare prices from different online retailers to find the best deal.
- Confirm the delivery timeframe and shipping fees before making a purchase.
Specialty electrical suppliers
If you are looking for a specific type or brand of electric socket, specialty electrical suppliers might be your best bet. These suppliers offer a wide variety of specialized electrical supplies, including unique or harder-to-find electric sockets. Although these suppliers may have a smaller physical presence, they often have a comprehensive selection available for online purchase.
Consider the following when dealing with specialty electrical suppliers:
- Research and make a list of specialty electrical suppliers that carry the electric socket you need.
- Check their website or contact them directly to confirm availability.
- Ask about any additional technical information or specifications that may be relevant for your installation.
- Compare prices and determine if any exclusive offers or discounts apply.
- Consider the reputation and customer reviews of the supplier to ensure a reliable purchase.
Whether you choose to visit a local hardware store, explore online retailers, or seek out specialty electrical suppliers, it’s crucial to find a reliable source for your electric sockets. Taking the time to research and evaluate your options will help ensure you purchase the right product to meet your electrical needs.
Essential Tools
When it comes to installing an electric socket, having the right tools is essential. Without the proper equipment, the installation process can become difficult and time-consuming. In this blog post, we will discuss the essential tools you need to successfully install an electric socket in your home or office.
Screwdriver
A screwdriver is an indispensable tool when it comes to installing an electric socket. It is used to remove and tighten screws that hold the socket and its cover in place. Without a screwdriver, you won’t be able to secure the socket properly. Make sure to use the appropriate type of screwdriver, such as a flat-head or Phillips-head, depending on the screws used in your socket installation.
Wire Stripper
Another crucial tool for installing an electric socket is a wire stripper. This tool allows you to remove the insulation from the electrical wires without damaging the wires themselves. It is important to ensure that the wires are stripped properly to make a secure and reliable connection. Using a wire stripper simplifies the process and reduces the risk of accidentally cutting or damaging the wires.
Voltage Tester
Prior to installing an electric socket, it is essential to check the voltage of the power supply. A voltage tester is a handy tool that allows you to determine if the wires are live or not. This step is crucial for your safety as working with live wires can be extremely dangerous. By properly using a voltage tester, you can ensure that the power supply is disconnected before proceeding with the installation process.
Pliers
Pliers are a versatile tool that can come in handy during the installation of an electric socket. They can be used for various tasks such as bending wires, holding small objects, or tightening screws. With a good pair of pliers, you can have better control and grip while working on the socket installation. This tool is particularly useful when dealing with electrical wires that need to be twisted together securely.
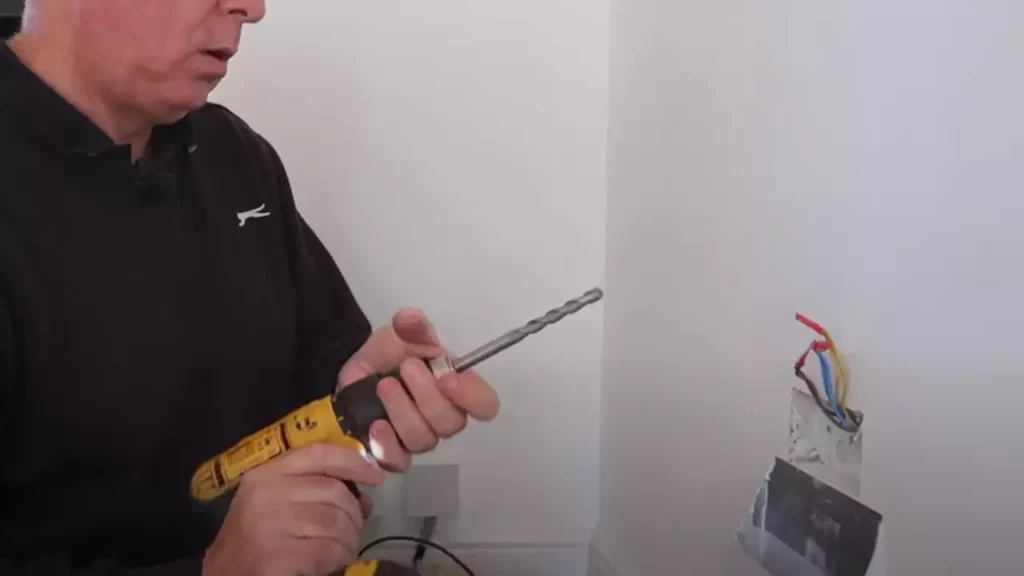
Electric Drill
An electric drill is essential for creating the necessary holes in the wall or mounting surface to install the electric socket. It saves time and effort compared to manual methods. With the right drill bit, you can easily make precise holes for the socket screws or conduit. Having an electric drill ensures that the installation process is efficient and accurate.
In conclusion, having the essential tools for installing an electric socket is vital to ensure a successful installation process. Screwdrivers, wire strippers, voltage testers, pliers, and electric drills all play a significant role in making the installation process much smoother and safer. By using these tools correctly, you can install an electric socket in no time.
Required Materials
Before you start with the installation of an electric socket, it is essential to gather all the necessary materials. Having the right tools at hand saves time and ensures a smooth installation process. Below is a list of the required materials for installing an electric socket.
Electric socket
An electric socket is the primary component required for the installation. It serves as a connection point between the electrical device and the power supply. Make sure to choose a socket that suits your specific needs and complies with safety standards.
Electric wires
High-quality electric wires are crucial for a safe and reliable connection. It is recommended to use wires that are of the appropriate gauge, considering the power requirements of the devices that will be plugged into the socket. Ensure that the wires are long enough to reach the power source without any tension or strain.
Junction box
A junction box provides a secure enclosure for joining electrical wires together. It protects them from damage caused by moisture, dust, or accidental contact. Ensure that the junction box is of suitable size and material to accommodate all the necessary wire connections.
Mounting screws
Mounting screws are used to firmly attach the electric socket to the wall or mounting surface. It is crucial to choose the right size and type of screws that are appropriate for the walls you are working with. Using the wrong screws can result in a loose or unstable socket.
Wire connectors
Wire connectors are essential for joining multiple wires together securely. They enable a proper electrical connection and prevent any loose or exposed wires. Using high-quality wire connectors ensures a safe and reliable electrical installation.
Ensure Safety
When it comes to installing an electric socket, ensuring safety should be your top priority. Working with electrical systems can be dangerous if proper precautions are not taken. Therefore, it is crucial to follow safety measures to protect yourself and avoid any mishaps. In this section, we will discuss two essential steps to ensure safety while installing an electric socket: cutting off the power supply and using safety gloves and goggles.
Cut off the power supply
The first step to ensure safety when installing an electric socket is to cut off the power supply. This is a crucial step that should never be skipped. By disconnecting the power supply, you can eliminate the risk of getting an electric shock or causing a short circuit during the installation process.
Here’s how you can cut off the power supply:
- Locate the main electrical panel in your house.
- Open the panel cover using a screwdriver.
- Identify the circuit breaker or fuse that controls the power supply to the location where you want to install the electric socket.
- Switch off the circuit breaker or remove the fuse to cut off the power supply.
Remember to double-check that the power is off before proceeding with the installation. This can be done by using a non-contact voltage tester, which will detect the presence of electricity in the wires.
Use safety gloves and goggles
Another important safety measure when installing an electric socket is to use safety gloves and goggles. These protective gears will shield you from any potential injuries or accidents that may occur during the installation process.
Here are some tips on using safety gloves and goggles:
- Choose gloves that offer protection against electrical shock and have a good grip.
- Put on the gloves before starting the installation process and make sure they fit properly.
- Wear safety goggles to protect your eyes from debris or sparks.
- Inspect the gloves and goggles for any damages before using them.
By wearing safety gloves and goggles, you can minimize the risk of electrical injuries and ensure a safe installation process.
Remember, safety should never be compromised when working with electrical systems. By following these safety measures, you can confidently proceed with the installation of an electric socket while keeping yourself protected.
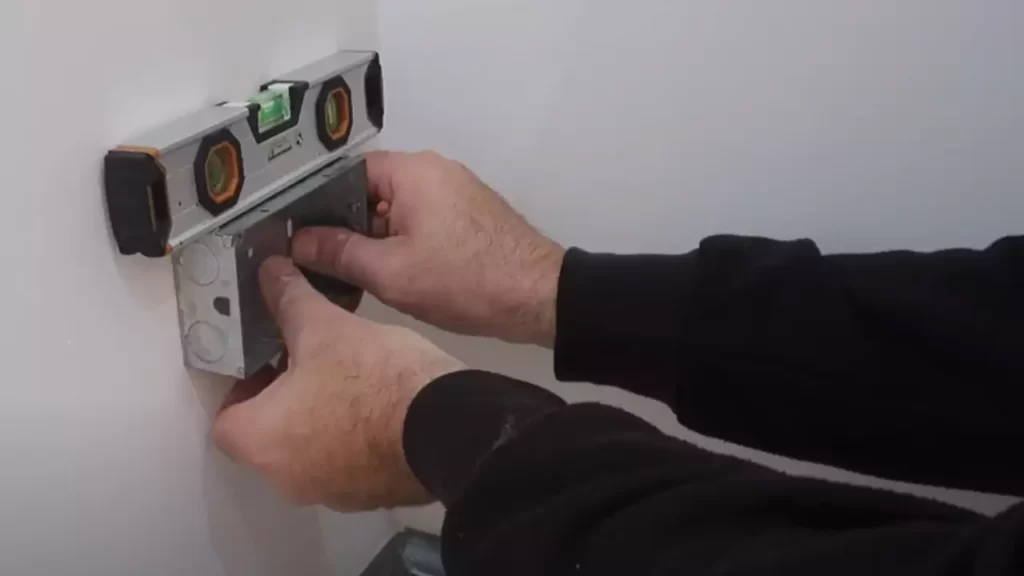
Prepare The Work Area
Before installing an electric socket, it’s essential to prepare the work area adequately. Taking the necessary safety precautions and ensuring everything is in order will help create a smooth and efficient installation process. In this section, we’ll cover the important steps to take when preparing the work area.
Turn off the circuit breaker
Before you start working on any electrical project, the first step is to ensure the power to the socket is switched off. This can be achieved by turning off the circuit breaker associated with the socket you’ll be working on. The circuit breaker box typically consists of several switches, each controlling a different area or set of outlets in your home.
To turn off the circuit breaker:
- Locate the circuit breaker box in your home. It is usually located in a basement, garage, or utility room.
- Open the circuit breaker box by flipping up the cover.
- Identify the switch that controls the power to the socket you are working on. This is typically labeled and may be marked with the corresponding room or area.
- Flip the switch to the “off” position. You should hear a click, indicating that the power is now off.
Remove the existing socket cover
Once the power is turned off, you can safely remove the existing socket cover. This cover protects the inner workings of the socket and ensures its longevity. To remove the cover:
- Inspect the cover for any visible screws or fasteners holding it in place. These screws are usually located at the top and bottom of the cover.
- Using a screwdriver, unscrew the screws in a counterclockwise direction. Be sure to set the screws aside in a secure location to avoid misplacing them.
- Gently pull the cover away from the wall, exposing the socket and its wiring.
With the socket cover removed, you’re ready to proceed with the installation process. It’s important to handle the exposed wiring with care and ensure all connections are secure and properly insulated.
Disconnect And Remove The Old Socket
Disconnecting and removing the old electric socket is a crucial step in any installation process. By following these simple steps, you can ensure a smooth transition to your new socket.
Identify the wires
The first step in disconnecting the old socket is to identify the different wires connected to it. Start by turning off the power supply to the socket from the main circuit breaker. This will ensure your safety during the process. Once the power is off, remove the socket cover using a screwdriver.
Inside the socket, you will find two or three wires connected to terminal screws. These wires are typically color-coded, with the live wire being red or brown, the neutral wire being blue or black, and the earth wire being green or yellow. Make a note of which wire is connected to which terminal, as you will need this information when connecting the new socket later on.
Loosen the terminal screws
Once you have identified the wires, it’s time to loosen the terminal screws. Use a screwdriver to gently loosen the screws one by one, taking care not to damage the wires or the terminal itself. Loosening the screws will free the wires, allowing you to detach the old socket.
Detach the old socket
With the terminal screws loosened, you can now detach the old socket from the wall. Carefully pull the socket away from the wall, exposing the wires completely. Take note of the position of each wire and double-check your earlier notes to ensure accuracy.
If there are any additional screws securing the socket to the wall, remove them using a screwdriver. Once all the screws have been removed, gently pull the socket away from the wall, ensuring that the wires do not get tangled or disconnected in the process.
It’s important to handle the old socket with care and dispose of it properly. If it is damaged or no longer functional, consider recycling or disposing of it in accordance with local regulations.
Now that the old socket has been disconnected and removed, you are ready to proceed with the installation of the new electric socket. Follow the next steps in our guide to complete the process seamlessly.
Install The New Socket
Once you have prepared the necessary tools and turned off the power, it’s time to install the new electric socket. Follow these steps to ensure the installation process goes smoothly:
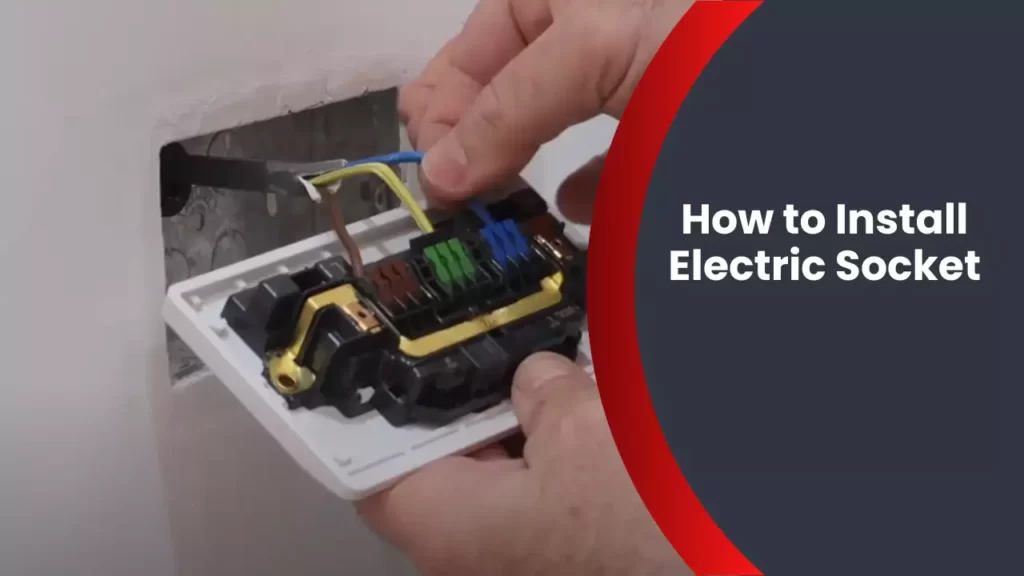
Connect the wires to the new socket
Begin by attaching the wires to the appropriate terminals on the new electric socket. The socket will typically have three terminals – live (L), neutral (N), and earth (E). To make the connection, strip the wires’ insulation and insert them into the corresponding terminals:
- Connect the live wire (usually red or brown) to the live terminal (L) of the socket.
- Connect the neutral wire (usually blue or black) to the neutral terminal (N).
- Connect the earth wire (usually green or yellow-green) to the earth terminal (E).
Double-check that the wires are securely fastened to the terminals. A loose connection can cause electrical issues, so take the time to ensure each wire is snugly attached.
Tighten the terminal screws
With the wires connected, use a screwdriver to tighten the terminal screws. This will secure the wires in place and prevent any accidental loosening. Make sure the screws are tightened firmly but avoid overtightening, as this could damage the socket.
Attach the socket cover
Once the wires are securely connected and the terminal screws are tightened, it’s time to attach the socket cover. The cover will provide protection for the socket and give it a finished look. Simply align the cover with the socket and use a screwdriver to secure it in place. Ensure the cover is firmly attached and there are no gaps or loose parts.
That’s it! You have successfully installed the new electric socket. Remember to turn the power back on and test the socket to ensure it’s working correctly. If you encounter any issues during the installation process, it’s always best to consult a professional electrician.
Test The Socket
In order to ensure the safety and functionality of your newly installed electric socket, it is crucial to test it before use. By testing the socket, you can verify that it is receiving power correctly and is ready for use. Testing the socket is a simple process that involves a few steps. This section will walk you through the necessary steps to test the socket effectively.
Turn on the circuit breaker
The first step in testing the electric socket is to ensure that the circuit breaker supplying power to the socket is turned on. This is a vital safety measure to prevent any electrical accidents during the testing process. Locate the circuit breaker panel in your home and find the corresponding switch for the socket you want to test. Flip the switch in the “ON” position, allowing electricity to flow to the socket.
Use a voltage tester to check for power
Once you have turned on the circuit breaker, you will need to use a voltage tester to check if the socket is receiving power. A voltage tester is a handheld device that detects the presence of electricity. It is a simple and effective tool for testing electrical outlets. To use a voltage tester, follow these steps:
-
Ensure the voltage tester is working properly by testing it on a known live power source, such as another functioning socket.
-
Insert one end of the voltage tester into the socket’s slots to make contact with the live wires.
-
Observe the indicator on the voltage tester. If it lights up or beeps, it means the socket is receiving power and is ready for use.
-
If the voltage tester does not indicate any power, it means that the socket may have a faulty connection or there may be an issue with the circuit. In such cases, it is recommended to seek professional assistance for further inspection and repairs.
Testing the electric socket is a crucial step to ensure its functionality and safety. By following the steps mentioned above, you can easily determine if the socket is receiving power correctly. Remember to always exercise caution when dealing with electricity, and if in doubt, consult a professional electrician for assistance.
Socket Not Receiving Power
One of the common issues homeowners face when it comes to electrical sockets is a socket not receiving power. This can be frustrating, especially if you need to use the socket for various appliances and devices. However, there are a few troubleshooting steps you can take to identify and fix the problem. Let’s explore them below.
Check the circuit breaker
The first step in troubleshooting a socket that is not receiving power is to check the circuit breaker. The circuit breaker is designed to protect the electrical circuit from overload or short circuits. If the breaker has tripped, it can cut off power to the socket. Here’s how you can check:
- Locate your electrical panel or fuse box.
- Open the panel or box door.
- Look for the breaker labeled for the circuit that controls the problematic socket.
- If the breaker is in the “off” position or in between “off” and “on,” switch it to the “on” position.
- If the breaker immediately trips back to the “off” position, there may be a short circuit or overload on the circuit. In this case, it’s best to call a professional electrician for further inspection and repair.
Inspect the wiring
If the circuit breaker is not the issue, the next step is to inspect the wiring. Over time, wiring can become loose or damaged, which can cause a socket to lose power. Here’s what you can do:
- Turn off the power to the circuit by switching off the breaker.
- Remove the faceplate of the problematic socket.
- Check the wiring connections inside the socket.
- If any wires are loose or disconnected, carefully reattach them to their respective terminals, ensuring they are securely fastened.
- If you notice any frayed or damaged wires, they will need to be replaced. It’s recommended to consult a professional electrician for this task.
Test the socket connections
If the wiring appears to be in good condition, the next step is to test the socket connections. Sometimes, the issue may be with the socket itself. Here’s how you can test:
| Socket Testing Procedure | |
|---|---|
| 1. | Use a voltage tester and carefully insert it into the socket. Ensure it’s set to the appropriate voltage range. |
| 2. | If the tester lights up, it means the socket is receiving power. The problem could be with the device or appliance you’re trying to use with the socket. |
| 3. | If the tester doesn’t light up, it suggests the socket is not receiving power. In this case, it’s best to call a professional electrician to diagnose and repair the issue. |
By following these troubleshooting steps, you can identify the cause behind a socket not receiving power and take appropriate action to resolve the issue. However, it’s essential to prioritize safety and consult a professional electrician if you’re unsure or uncomfortable handling electrical repairs. Remember, electricity can be dangerous if mishandled, so it’s always better to have an expert handle complex electrical problems.
Socket Overheating
Socket overheating can be a serious problem that needs to be addressed promptly to avoid potential hazards. Overheating occurs when the flow of electric current through the socket exceeds the load capacity it is designed to handle. This can lead to melting of the socket, damage to electrical appliances, and even electrical fires.
Verify the load capacity
One of the first steps in preventing socket overheating is to verify the load capacity of the socket. Each socket comes with a specified maximum load it can handle, measured in amps. Exceeding this load can result in overheating. To check the load capacity:
- Locate the socket and find the manufacturer’s label usually placed on the back or side of the socket.
- Look for specifications such as “maximum load” or “maximum current” mentioned on the label.
- Compare the specification with the appliances connected to the socket to ensure they fall within the safe limit.
Check for loose connections
Loose connections can also contribute to socket overheating. When the connections inside the socket are not secure, they can create resistance, resulting in heat generation. Here’s how to check for loose connections:
- Switch off the power supply to the socket to ensure your safety.
- Remove the cover plate from the socket using a screwdriver.
- Inspect the wiring and connections to ensure they are tight and properly secured.
- If any loose or damaged wires are found, consult a qualified electrician to fix the issue.
Install a higher-rated socket
If you frequently find yourself plugging in appliances that draw a high amount of current, it may be necessary to install a higher-rated socket. This will ensure that the socket can handle the increased load without overheating. Consider the following steps when installing a higher-rated socket:
- Consult with an electrician to determine the appropriate socket rating for your needs.
- Purchase a socket that matches the higher rating recommended by the electrician.
- Switch off the power supply to the socket and remove the old socket using a screwdriver.
- Connect the wires from the new socket to the appropriate terminals, following the manufacturer’s instructions.
- Screw the new socket into place and replace the cover plate.
- Finally, switch on the power supply and test the socket to ensure it is functioning properly.
By following these precautions and taking the necessary steps, you can minimize the risk of socket overheating and ensure the safety of your electrical system.
Socket Sparking
Socket sparking can be a common issue that homeowners may come across while using electrical outlets. Sparking in a socket, whether it’s a small spark or a larger one, should never be ignored. It could be a sign of an underlying problem that requires attention. Ignoring sparking sockets can lead to electrical hazards, including electrical shock or even a fire. Therefore, it is important to address this issue promptly to ensure the safety of your home and loved ones. In this section, we will explore the steps to take when dealing with sparking sockets, including confirming proper wiring, inspecting for loose connections, and replacing if necessary.
Confirm Proper Wiring
When dealing with a sparking socket, the first step is to confirm whether the wiring is properly installed. Faulty or incorrect wiring can cause arcing, resulting in sparks when electrical current flows. To confirm proper wiring:
- Ensure the power to the socket is turned off.
- Use a voltage tester to verify that there is no electricity flowing through the socket.
- Inspect the wiring inside the socket box for any loose or damaged connections.
- If any issues are found, consult a qualified electrician to correct the wiring.
Inspect for Loose Connections
Loose connections in an electrical socket can also lead to sparking. Loose connections can cause arcing and heat buildup, eventually leading to a dangerous situation. To inspect for loose connections:
- Turn off the power to the socket.
- Remove the cover plate and carefully inspect the wiring connections.
- Tighten any loose screws or connections using a screwdriver.
- If any wires are damaged or frayed, they should be replaced immediately.
- Once all the connections are secure, replace the cover plate.
Replace if Necessary
If confirming proper wiring and inspecting for loose connections does not resolve the sparking issue, it may be necessary to replace the socket. This should only be done by a qualified electrician to ensure proper installation and compliance with electrical codes:
- Turn off the power to the socket.
- Remove the cover plate and disconnect the wiring from the socket.
- Install a new socket by connecting the wiring according to the manufacturer’s instructions.
- Secure the new socket in place and replace the cover plate.
- Turn the power back on and test the socket for any signs of sparking.
Remember, dealing with electrical issues can be dangerous, and it’s always best to consult a professional electrician if you are unsure or uncomfortable performing any of these steps. By addressing sparking sockets promptly, you can ensure the safety of your home and prevent potential hazards.
Frequently Asked Questions
Can I Install An Electrical Outlet Myself?
Yes, you can install an electrical outlet yourself if you have the necessary knowledge and expertise. However, it is crucial to prioritize safety and follow electrical codes and regulations. It is recommended to consult a professional electrician to ensure proper installation and minimize the risk of electrical hazards.
How Do I Install A New Power Socket?
To install a new power socket: 1. Turn off the power source. 2. Determine the location and mark the area. 3. Cut a hole for the socket using a saw. 4. Connect the wiring following electrical codes. 5. Secure the socket inside the hole and restore power.
Remember to hire a qualified electrician for safe installation.
Do You Need To Be An Electrician To Change A Socket?
No, you don’t need to be an electrician to change a socket. However, it is important to follow safety precautions and ensure the power is turned off before attempting any electrical work. If you are unsure, it is recommended to consult a professional electrician for assistance.
Does It Matter Which Wire Goes Where On An Outlet?
Yes, it matters which wire goes where on an outlet. The black wire connects to the brass terminal, while the white wire connects to the silver terminal. This ensures proper electrical flow and prevents potential hazards. Ensure you follow safety guidelines and consult an electrician if unsure.
Conclusion
To summarize, installing an electric socket can be a relatively simple task if you follow the right steps. From ensuring safety precautions to choosing the appropriate socket and wiring it correctly, this guide has provided you with all the necessary information.
By taking your time, double-checking your work, and seeking professional help if needed, you can successfully install an electric socket in your home.