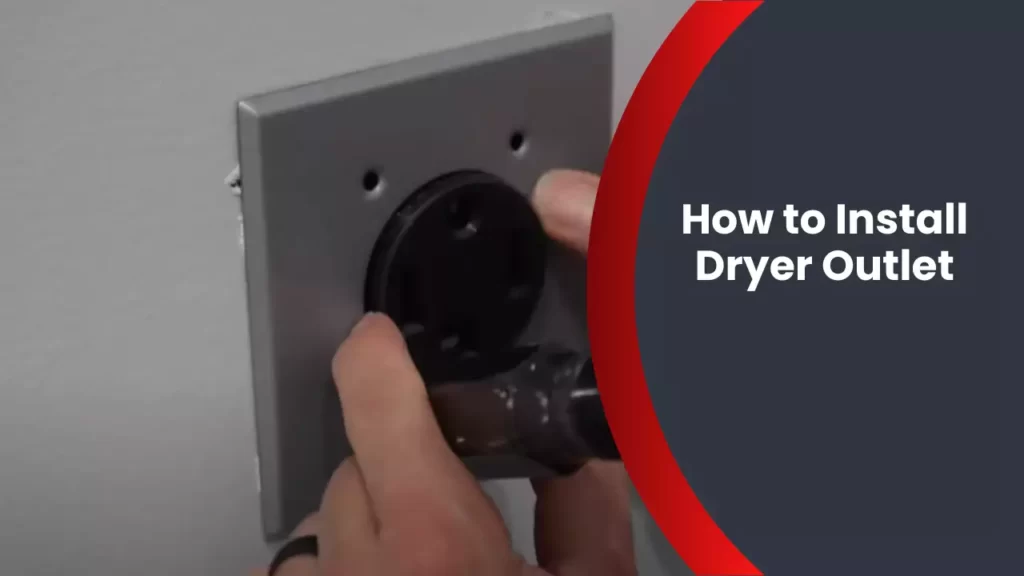
To install a dryer outlet, first turn off the power at the breaker, then remove the electrical cover plate, connect the wires to the outlet, and secure the outlet to the wall. Installing a dryer outlet requires following safety precautions and using the right tools and materials.
Here’s a step-by-step guide to help you properly install a dryer outlet.
What Is A Dryer Outlet?
Definition of a Dryer Outlet
A dryer outlet, also known as a dryer receptacle or dryer socket, is an electrical device that allows you to connect your electric dryer to the power supply in your home. It provides the necessary electrical connection for your dryer to function properly and safely.
Importance of a Proper Dryer Outlet
A proper dryer outlet is crucial for the safe and efficient operation of your electric dryer. It ensures that the dryer receives the correct voltage and amperage required for optimal performance. Without a proper outlet, your dryer may not function at its full potential and can even pose a safety hazard.
Here are a few reasons why having a proper dryer outlet is important:
- Electrical Safety: A properly installed and grounded outlet reduces the risk of electrical shocks and fires. It provides a secure connection to the power supply, minimizing the chance of electrical issues.
- Optimal Performance: A dryer outlet that matches the voltage and amperage requirements of your dryer ensures that it functions at its best. It allows your dryer to run efficiently, with faster drying times and lower energy consumption.
- Appliance Longevity: Using the correct outlet prevents overloading or damaging your dryer’s electrical components. This helps extend the lifespan of your appliance, reducing the need for costly repairs or replacements.
Installing a dryer outlet may seem like a challenging task, but with the right knowledge and guidance, it can be done safely and efficiently. In the next section, we will walk you through the step-by-step process of installing a dryer outlet, ensuring you have the necessary electrical connection for your dryer.
Tools And Materials Needed
Before you can install a dryer outlet, it’s important to gather all the necessary tools and materials. This ensures that the installation process goes smoothly and efficiently. Here is a list of tools and materials you will need:
List of tools required for installation
When it comes to installing a dryer outlet, specific tools are required to ensure a successful installation. Here is a list of the tools you will need:
- Screwdriver: A screwdriver is essential for removing the outlet cover and securing the wires.
- Wire strippers: You will need wire strippers to remove the insulation from the wires and expose the copper.
- Utility knife: A utility knife comes in handy when you need to make precise cuts.
- Wire nuts: Wire nuts are used to secure the connections between the wires.
- Electrical tape: Electrical tape is used to insulate the connections and prevent any accidental contact.
- Needle-nose pliers: Needle-nose pliers are useful for bending and shaping wires.
- Voltage tester: A voltage tester is necessary to ensure that there is no electrical current before starting the installation.
- Hammer: A hammer is needed to secure the outlet box to the wall.
- Level: A level ensures that the outlet box is installed properly and straight.
- Drill: A drill will be used to create holes for mounting the outlet box.
List of materials required for installation
In addition to the tools mentioned above, you will also need certain materials to complete the installation of a dryer outlet. Here is a list of the materials required:
- Dryer outlet: The outlet itself is necessary to provide power to your dryer.
- Electrical wire: You will need electrical wire to connect the outlet to the circuit breaker.
- Outlet box: The outlet box provides a safe and secure housing for the outlet.
- Mounting hardware: Mounting hardware such as screws and anchors are needed to secure the outlet box to the wall.
- Wire connectors: Wire connectors are used to join the wires together securely.
- Circuit breaker: A circuit breaker is responsible for providing the necessary power to the outlet.
By having all the required tools and materials on hand, you can ensure a smooth and successful installation of your dryer outlet. Gather everything you need beforehand to prevent any delays or interruptions during the installation process.
Step-By-Step Installation Process
Safety Precautions
Before attempting to install a dryer outlet, it’s crucial to prioritize safety. This prevents accidents, electrical shocks, and potential damage to your electrical system. Here are some essential safety precautions to keep in mind:
- Make sure to turn off the power supply to the dryer outlet before starting any work. This eliminates the risk of electric shock and short circuit.
- Wear protective gloves, safety goggles, and appropriate clothing to safeguard yourself during the installation process.
- Ensure that the work area is well-lit and free from any clutter or obstacles, reducing the chances of accidents.
- If you’re not confident in your electrical skills or experience, it’s advisable to seek professional help. They have the expertise to handle electrical installations safely and effectively.
Shutting off the Power
The next step is to shut off the power supply to the existing dryer outlet to avoid any electrical mishaps. Follow the steps below to safely disconnect the power:
- Locate the circuit breaker box or fuse panel for your home.
- Identify the specific circuit breaker or fuse that controls the power supply to the dryer outlet.
- Flip the circuit breaker switch or remove the corresponding fuse to cut off the power.
- Verify that the power is indeed off by using a voltage tester or consulting a professional electrician.
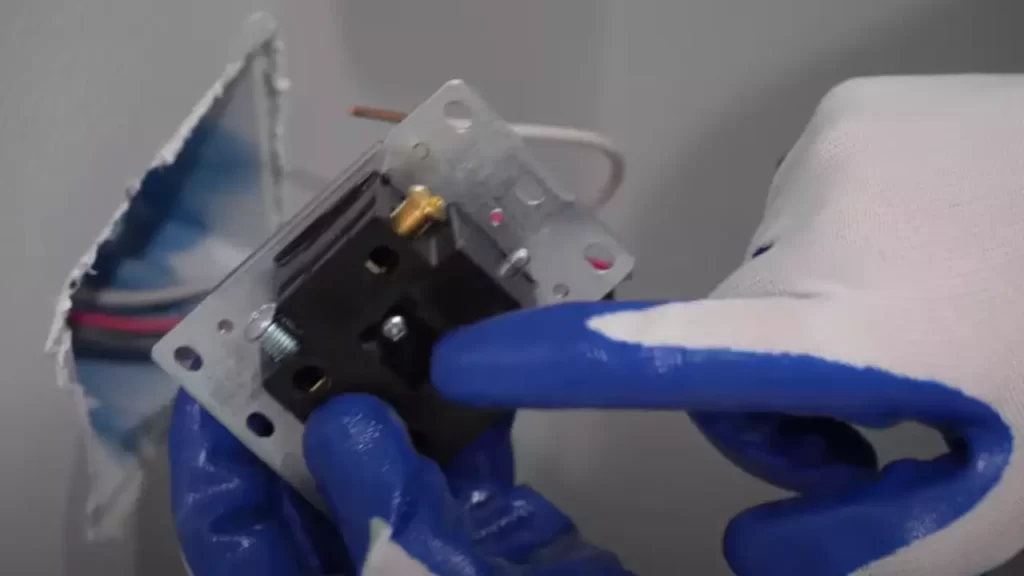
Removal of the Old Outlet
Once you have ensured the power supply is off, it’s time to remove the old dryer outlet. Follow these steps for a seamless removal:
- Use a screwdriver to loosen and remove the screws holding the dryer outlet cover plate in place.
- Gently pull the cover plate away from the wall, exposing the outlet.
- Using a screwdriver, remove the screws securing the wires to the outlet terminals.
- Carefully disconnect and remove the wires from the old outlet.
- Once the wires are disconnected, unscrew and remove the old outlet from the wall.
Verification of Electrical Connections
Before installing the new dryer outlet, it’s crucial to verify the electrical connections. This ensures that the wiring is correct and minimizes the chances of electrical issues in the future. Here’s what you need to do:
- Inspect the wires for any damage or wear. Replace any damaged wires before proceeding.
- Double-check that the wires are connected securely to the appropriate terminals on the new outlet.
- Ensure that the black wire is connected to the brass terminal, the white wire to the silver terminal, and the green or bare wire to the green terminal (for a grounding wire).
- Tighten the screws on each wire to ensure a strong and secure connection.
Installation of the New Outlet
With the verification of electrical connections complete, it’s time to install the new dryer outlet. Follow these steps for a successful installation:
- Hold the new outlet against the wall, aligning the screw holes with those on the electrical box.
- Secure the outlet onto the wall by tightening the screws with a screwdriver.
- Insert the wires into the appropriate terminals on the new outlet.
- Ensure that each wire is securely fastened and tightened in its corresponding terminal.
- Double-check that the outlet is flush against the wall and there are no loose wires.
Securing and Testing the Outlet
Now that the new dryer outlet is installed, it’s important to secure it properly and test its functionality. Follow these steps for a secure and functional outlet:
- Attach the outlet cover plate by screwing it into the outlet, ensuring a snug fit.
- Turn on the power supply to the dryer outlet by flipping the circuit breaker switch or installing the fuse.
- Use a voltage tester or consult a professional electrician to verify that the power supply is restored.
- Plug in your dryer and test it by turning it on to ensure it receives power and functions correctly.
- Check for any signs of overheating or unusual noise. If any issues arise, consult a professional electrician to rectify the problem.
Remember, safety is paramount during the entire installation process. If you’re unsure about any step, consult a professional electrician for assistance. By following this step-by-step installation process, you can successfully install a new dryer outlet and ensure seamless dryer functionality.
Choosing The Right Dryer Outlet
Understanding different types of dryer outlets
Before you begin the installation process for your dryer outlet, it’s important to understand the different types of outlets available. The type of outlet you choose will depend on the specifications of your dryer and the electrical configuration in your home. Here are some commonly used dryer outlets:
| Outlet Type | Description |
|---|---|
| NEMA 14-30 | This is a 4-prong outlet used for most electric dryers. It provides 240 volts of power and is compatible with most modern dryers. |
| NEMA 10-30 | This is a 3-prong outlet that was commonly used in older homes. It provides 240 volts of power, but lacks a grounding wire. |
| NEMA 14-50 | This is a 4-prong outlet commonly used for electric ranges and recreational vehicles (RVs). It provides 240 volts of power and has a higher current rating. |
These are just a few examples of the different types of dryer outlets available. It’s important to check the specifications of your dryer to determine which outlet is required.
Matching the outlet to the dryer specifications
Once you’ve gained an understanding of the different types of dryer outlets, the next step is to match the outlet to the specifications of your dryer. This information can usually be found in the owner’s manual or on the manufacturer’s website. You’ll want to pay attention to the voltage, amperage, and plug type required by your dryer.
For example, if your dryer requires 240 volts of power and has a 4-prong plug, you’ll need to choose a NEMA 14-30 outlet. On the other hand, if you have an older dryer with a 3-prong plug, you’ll need to select a NEMA 10-30 outlet.
Ensure that there is a proper match between the outlet and your dryer’s specifications to avoid any electrical issues or damage to your appliance.
Consulting a professional if unsure
If you’re unsure about which dryer outlet to choose or how to install it, it’s always a good idea to consult a professional electrician. They have the expertise and knowledge to ensure that the installation is done correctly and safely.
Installing a dryer outlet involves working with electrical wiring and it’s important to adhere to local building codes and safety regulations. A professional will be able to guide you through the process and provide the necessary assistance to ensure a successful installation.
Remember, safety should always be the top priority when it comes to electrical work, so don’t hesitate to seek professional help if you’re uncertain.
Electrical Wiring And Circuit Requirements
Understanding the electrical wiring and determining the circuit requirements for a dryer outlet is crucial when it comes to installing one in your home. Proper electrical wiring ensures a safe and efficient operation of your dryer, preventing any potential hazards or damage. In this section, we will discuss the key aspects of electrical wiring and circuit requirements that you need to consider when installing a dryer outlet.
Understanding the electrical wiring
To install a dryer outlet, it is important to have a basic understanding of the electrical wiring involved. The dryer outlet typically requires a 240-volt circuit with a designated neutral wire and grounding connection. The wiring must be capable of handling the electrical load of the dryer to prevent any overloading or electrical malfunctions. Additionally, being familiar with the different wire types, such as copper or aluminum, is essential for ensuring compatibility and safety.
Determining the circuit requirements for the outlet
Before installing a dryer outlet, you need to determine the circuit requirements to ensure that your electrical system can support it. This involves assessing the electrical capacity of your home’s circuit breaker panel and understanding the amperage and voltage requirements of your dryer. Consulting the manufacturer’s specifications or seeking the assistance of a professional electrician can help you determine the appropriate circuit requirements for your specific dryer model.
Taking necessary measures for electrical safety
Ensuring electrical safety is of utmost importance when installing a dryer outlet. Here are some measures to take:
- Turn off the power: Before starting any electrical work, make sure to turn off the power to the circuit and double-check that it is properly shut off.
- Proper grounding: Ensure that the outlet is properly grounded to prevent electrical shocks and hazards. Use a grounding wire and connect it securely to the grounding terminal.
- Secure connections: Make sure all wire connections are secure, using wire connectors or terminal blocks as necessary.
- Use appropriate tools: Use insulated tools specifically designed for electrical work to minimize the risk of electrical accidents.
- Check for code compliance: Familiarize yourself with the electrical code requirements in your area and ensure that your installation adheres to these guidelines.
By following these necessary measures for electrical safety, you can minimize the risk of electrical hazards and ensure a safe installation of your dryer outlet.
In conclusion, understanding the electrical wiring and determining the circuit requirements are vital for installing a dryer outlet. By following the necessary measures for electrical safety, you can complete the installation with confidence, knowing that your dryer will operate safely and efficiently.
Installing The Dryer Outlet Box
Selecting the Appropriate Location for the Outlet Box
Before you can install a dryer outlet, it is crucial to select an appropriate location for the outlet box. The location must meet a few specific criteria to ensure safety and functionality.
- Choose a location that is easily accessible and within reach of the dryer’s power cord.
- Ensure the location is at least 6 inches off the ground to avoid potential water damage.
- Avoid placing the outlet box near flammable materials or highly combustible areas.
By following these guidelines, you can ensure that the dryer outlet box is conveniently and safely located.
Mounting the Outlet Box Securely to the Wall
Once you have determined the appropriate location for the dryer outlet box, it is time to mount it securely to the wall. This step is essential to ensure the integrity and stability of the installation.
- Begin by gathering the necessary tools for the installation, including a screwdriver, screws, and anchors.
- Position the outlet box on the wall at the selected location and mark the screw hole positions.
- Using the appropriate anchor, drill holes into the wall at the marked positions.
- Insert the anchors into the drilled holes and align the outlet box with the anchors.
- Secure the outlet box to the wall by inserting screws through the screw holes and tightening them with a screwdriver.
- Ensure the outlet box is level and firmly attached to the wall before proceeding.
By following these steps to mount the outlet box securely, you can ensure its stability and longevity.
Running the Electrical Wires to the Box
Now that the outlet box is securely mounted, it is time to run the electrical wires to the box. This step involves connecting the dryer’s power cord to the outlet box.
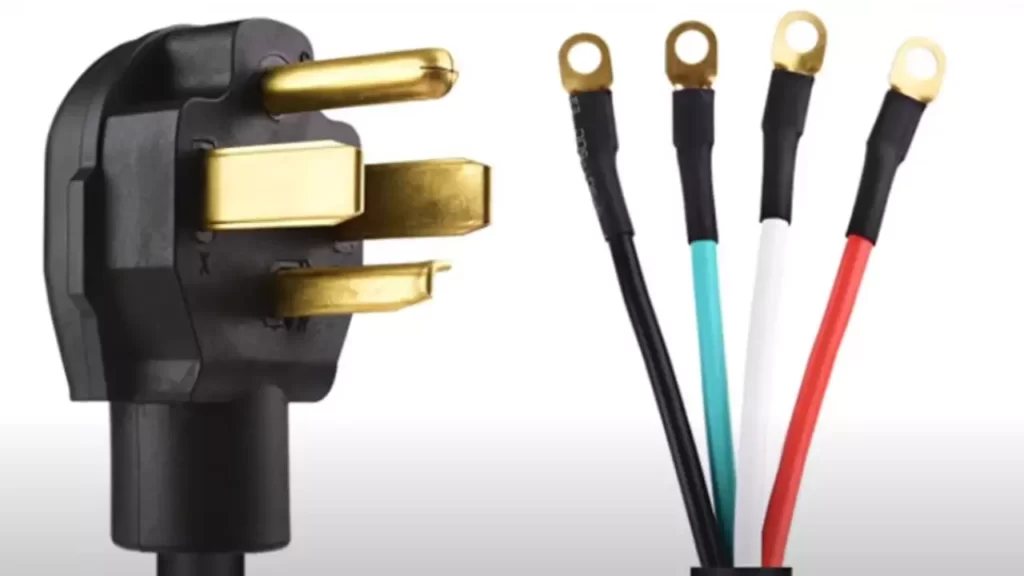
| Dryer Wire Color | Outlet Box Screw Terminal |
|---|---|
| Black | Brass (L1) |
| Red | Brass (L2) |
| White | Silver (N) |
| Green/Yellow | Green (G) |
Refer to the dryer and outlet box manufacturer’s instructions for specific guidance on wire connections. Make sure to follow the appropriate wire color coding to prevent electrical accidents.
Once the wires are securely connected, use electrical tape or wire caps to cover the exposed wire ends. This step ensures safety and prevents accidental contact with live wires.
By carefully running the electrical wires to the outlet box and making the appropriate wire connections, you can complete the installation process and have your dryer outlet ready for use.
Remember, if you are not confident in performing electrical work, it is always best to consult a professional electrician to ensure the installation is done correctly and safely.
Connecting The Dryer Outlet
Once you have properly installed the dryer outlet and made the necessary electrical connections, you are now ready to connect your dryer to the outlet. This step is crucial to ensure that your dryer is safely and securely connected, allowing it to function properly while reducing the risk of electrical hazards. Let’s go through the three main steps in connecting the dryer outlet.
Proper grounding of the outlet
The first step in connecting your dryer outlet is to ensure proper grounding. Grounding is essential for the safety of your electrical appliance and its users. To achieve proper grounding, follow these steps:
- Locate the grounding screw on the dryer outlet. It is usually colored green or labeled with the letter “G.”
- Attach the grounding wire from the cable to the grounding screw on the outlet.
- Tighten the screw securely, ensuring a solid connection.
- Check that the grounding wire is securely connected to the metal box or the ground wire in your electrical system.
Proper grounding is crucial to prevent electrical shocks and protect your dryer from electrical surges.
Connecting the wires to the outlet terminals
Now that the outlet is properly grounded, the next step is to connect the wires to the outlet terminals. Follow these steps:
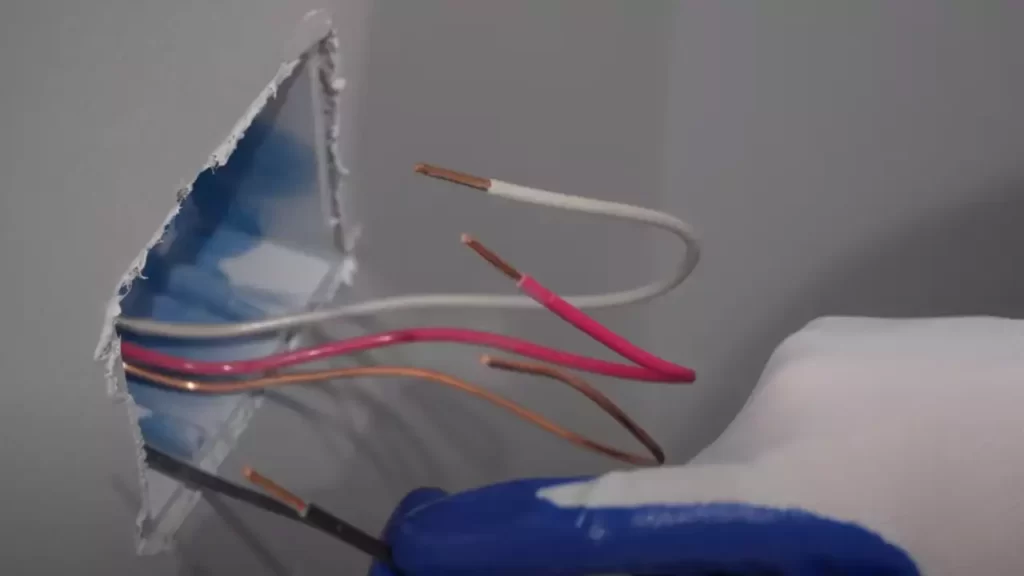
- Identify the hot wires, which are usually black or red, and the neutral wire, which is typically white or gray. If there is a fourth wire, it will be the grounding wire.
- Strip off about 1/2 inch of insulation from the ends of each wire using a wire stripper. This will expose the bare copper wire.
- Insert the end of each wire into its corresponding terminal. The hot wires go into the brass terminals, the neutral wire into the silver terminal, and the grounding wire into the green terminal.
- Tighten the terminal screws to secure the wires in place, ensuring a tight connection.
Securing the connections with wire nuts
After connecting the wires to the outlet terminals, it is essential to secure the connections with wire nuts to prevent accidental disconnections or loose connections. Follow these steps:
- Twist a wire nut onto each set of connected wires, ensuring all exposed copper wire is covered.
- Tug gently on each wire to ensure it is securely connected.
By securing the connections with wire nuts, you ensure that the wires remain tightly connected, reducing the risk of electrical hazards or malfunctioning.
Now that you have successfully connected the dryer outlet, you can proceed to test your dryer to ensure it is working correctly and efficiently. Remember to always prioritize safety and follow the manufacturer’s instructions when installing electrical appliances.
Ensuring Proper Ventilation
Proper ventilation is essential for the efficient operation of your dryer. Without it, your dryer could be prone to overheating, decreased drying performance, and even potential fire hazards. Ensuring proper ventilation not only extends the lifespan of your dryer but also improves its overall efficiency. In this section, we will discuss the importance of proper ventilation for the dryer and guide you on how to install a vent duct for efficient airflow.
Importance of Proper Ventilation for the Dryer
Proper ventilation is crucial for your dryer’s performance and safety. When your dryer operates, it generates hot air along with moisture and lint. Without an adequate outlet to expel this hot air, it can accumulate inside the dryer and cause it to overheat. This can not only damage the dryer but also increase the risk of fire. Additionally, insufficient ventilation can result in longer drying times, as the moist air is not efficiently expelled.
Improper venting can also lead to a buildup of lint, which poses another safety hazard. Lint is highly flammable and can easily ignite if it accumulates near the heating element or exhaust duct. This can lead to a dangerous dryer fire, putting your home and loved ones at risk.
Moreover, proper ventilation ensures that your dryer operates at its optimum efficiency. When hot, moist air is effectively ventilated, it allows fresh, dry air to circulate within the dryer, facilitating faster and more effective drying of laundry. This not only saves you time but also cuts down on energy consumption, ultimately reducing your utility bills.
Installing a Vent Duct for Efficient Airflow
Now that you understand the importance of proper ventilation for your dryer, let’s proceed to the installation of a vent duct. A vent duct acts as a conduit for the hot air and moisture generated by the dryer, directing it outside your home. Here’s a step-by-step guide to ensure efficient airflow:
- Locate the ideal spot for your dryer vent outlet. It should be placed in an exterior wall, preferably near the dryer unit, to minimize the length of ductwork required.
- Once you’ve determined the location, mark it with a pencil and use a 4-inch hole saw to create a hole in the wall. Ensure the hole is level and free from any obstructions.
- Next, attach the vent hood to the exterior wall using screws appropriate for your wall material, ensuring a secure fit.
- Inside your home, measure the distance between the dryer and the newly created hole. Purchase a rigid or semi-rigid metal vent duct of the appropriate length.
- Connect one end of the vent duct to the back of your dryer, securing it tightly with a clamp. Ensure that the connection is secure and free from any kinks.
- Thread the other end of the vent duct through the hole in the wall, extending it until it reaches the vent hood on the exterior.
- Trim off any excess duct length, if necessary, and connect the duct to the vent hood outside, securing it with another clamp. Ensure that the connection is tight and properly sealed.
- Lastly, test the airflow by running your dryer and checking for any leaks or obstructions. Make sure the vent hood flap opens freely, facilitating the flow of hot air outside.
By following these steps, you will have successfully installed a vent duct that ensures efficient airflow for your dryer. Remember, proper ventilation is key to safe and effective drying, so take the time to ensure your dryer has the proper outlet it needs.
Testing The Dryer Outlet
Restoring the power
After successfully installing the dryer outlet, it is essential to restore the power before testing its functionality. To do this, locate the circuit breaker panel in your home. Open the panel door and identify the breaker that corresponds to the dryer outlet. Flip the breaker switch from the “off” position to the “on” position. This will restore the power to the outlet, allowing you to test it.
Testing the functionality of the outlet
Once the power is restored, it is time to test the functionality of the dryer outlet. Here are the steps to follow:
- Plug in a lamp or any other electrical device that you know works into the outlet. This will help you determine if there is power flowing through the outlet.
- Turn on the device you plugged in. If the lamp or device powers on, it indicates that the outlet is functioning correctly.
- Try plugging in the dryer into the outlet. Ensure that it fits securely and that there are no loose connections. Any issues with the fit may indicate a problem with the installation that needs to be addressed.
- Turn on the dryer and run it for a few minutes. Pay attention to any strange sounds, burning smells, or other signs of malfunction. If everything appears to be working correctly, the outlet is successfully installed.
Ensuring safety with a professional inspection
While testing the functionality of the dryer outlet yourself is a good way to ensure it works properly, it is also important to have a professional inspection. A qualified electrician can provide a comprehensive evaluation, testing the connections, and ensuring that the installation adheres to safety standards.
A professional inspection can give you peace of mind, knowing that the dryer outlet is not only functioning correctly but also safe for use. If any issues are detected during the inspection, the electrician can make the necessary repairs or adjustments, avoiding potential hazards.
Troubleshooting Common Issues
Installing a dryer outlet may seem like a straightforward task, but there are times when common issues arise during the process. These issues can range from problems with the electrical connections to more complex problems that require the assistance of a professional. In this section, we will discuss how to troubleshoot these common issues and ensure a smooth installation process.
Identifying common issues during installation
During the installation of a dryer outlet, there are a few common issues that may crop up. By identifying these issues early on, you can prevent any potential problems down the line.
- Improper outlet placement: It is important to ensure that the outlet is installed at the correct height and location. Placing it too low or in an inconvenient spot can make it difficult to connect the dryer.
- Damaged or worn-out wiring: Before proceeding with the installation, it is crucial to inspect the wiring for any signs of damage or wear. This can include frayed wires, loose connections, or melted insulation.
- Incompatible outlet type: Not all dryers use the same type of outlet. Make sure to check the manufacturer’s specifications to ensure that the outlet is compatible with your specific dryer model.
Troubleshooting the electrical connections
Proper electrical connections are essential for the safe and efficient operation of your dryer. If you encounter any issues with the electrical connections during installation, follow these steps to troubleshoot the problem:
- Check for power supply: Ensure that the power supply to the outlet is turned off before working with the electrical connections. This will help prevent any electrical shock or accidents.
- Inspect wiring connections: Carefully examine the wiring connections to ensure that they are secure and properly tightened. Loose connections can lead to power interruptions or even electrical hazards.
- Test the outlet voltage: Use a multimeter to test the voltage between the different terminals of the outlet. The voltage should align with the manufacturer’s specifications. If it doesn’t, there may be an issue with the wiring or electrical supply.
- Replace faulty components: If you discover any faulty components during the troubleshooting process, such as damaged wires or connectors, replace them with new ones to ensure a reliable electrical connection.
Seeking professional assistance for complex problems
In some cases, the issues encountered during the installation of a dryer outlet may be more complex and require the expertise of a professional electrician. It is important to recognize your limitations and seek assistance when needed to avoid any potential safety risks or further damage.
A professional electrician can diagnose and resolve complex problems such as faulty wiring, insufficient electrical capacity, or incompatible circuit breakers. Their experience and knowledge ensure that the installation is done correctly and in compliance with electrical codes.
Remember, when it comes to the installation of a dryer outlet, it’s always better to be safe than sorry. By troubleshooting common issues and knowing when to seek professional help, you can have peace of mind knowing that your dryer is installed properly and will function safely and efficiently.
Maintenance And Safety Tips
Regular maintenance of the dryer outlet and taking the necessary safety precautions are crucial for the smooth functioning and longevity of your dryer. By following these maintenance and safety tips, you can ensure the safety of your home and prevent any electrical hazards.
Regular maintenance of the dryer outlet
Maintaining your dryer outlet is essential to uphold its efficiency and prevent potential risks. Here are a few key maintenance tips to follow:
- Clean the outlet: Regularly inspect the dryer outlet for any dust or debris accumulation. Use a soft brush or vacuum to remove any dirt that might obstruct the proper airflow.
- Check for loose connections: Over time, the wires connected to the outlet may become loose, increasing the risk of electrical issues. Regularly inspect for any loose connections and tighten them if necessary.
- Inspect the cord: Examine the power cord for any signs of wear and tear, such as frayed or damaged wires. If you notice any damage, it is crucial to replace the cord before it poses a safety hazard.
- Keep the area clear: Ensure the area around the dryer outlet is clear of any flammable materials, such as lint, fabric, or paper, to minimize the risk of fire hazards.
Safety precautions when working with electrical components
Working with electrical components can be dangerous if not done with caution. Follow these safety precautions to reduce the risk of accidents:
- Turn off the power: Before performing any maintenance or repair tasks, always disconnect the power supply to the dryer outlet. This will prevent any potential electric shocks or short circuits.
- Wear protective gear: When working with electrical components, wearing appropriate protective gear, such as gloves and safety goggles, is essential to shield yourself from any potential hazards.
- Avoid water contact: Keep water away from electrical components to prevent electrical shocks or damage to the outlet. Ensure your hands are dry before touching any electrical connections.
- Consult a professional: If you are unsure about any maintenance or repair tasks related to the dryer outlet, it is always advisable to seek assistance from a qualified electrician to avoid any unnecessary risks.
By regularly maintaining your dryer outlet and following necessary safety precautions, you can enjoy the efficient and safe operation of your dryer. Don’t compromise on safety when it comes to handling electrical components, as even a small mistake can have severe consequences. Ensure the safety of your home and loved ones by prioritizing maintenance and adhering to proper safety guidelines.
Frequently Asked Questions
How Do I Install A Dryer Outlet?
To install a dryer outlet, turn off the power supply, locate the circuit breaker panel, remove the knockout plate, connect the wires to the terminals, secure the outlet to the wall, and test it with a voltage tester. Make sure to follow all safety precautions and consult with a licensed electrician if needed.
What Is The Correct Voltage For A Dryer Outlet?
The correct voltage for a dryer outlet is 240 volts. It is important to ensure that the outlet is properly wired and grounded to prevent any electrical hazards. Use a voltage tester to verify the voltage before connecting your dryer.
Can I Install A Dryer Outlet Myself?
Yes, you can install a dryer outlet yourself if you have the necessary electrical knowledge and experience. However, it is always recommended to consult with a licensed electrician to ensure proper installation, wiring, and safety. Incorrect installation can lead to electrical hazards and damage to your appliances.
Conclusion
Installing a dryer outlet may seem daunting at first, but with the right steps and precautions, it can be done easily. By following the instructions provided in this guide, you can ensure a safe and efficient installation. Remember to always turn off the power before working on electrical connections and consult a professional if you are unsure.
With a little patience and the right tools, you’ll have your dryer up and running in no time. Start enjoying the convenience of freshly dried clothes with your newly installed dryer outlet. Happy drying!