To install a downrod on a ceiling fan, follow these steps: Secure the downrod to the fan motor, attach the fan canopy, and carefully mount the fan to the ceiling using the downrod. Now, let’s dive into the details on how to install a downrod on a ceiling fan.
Gathering The Required Tools And Materials
Before you dive into installing a downrod on your ceiling fan, it’s important to gather all the necessary tools and materials. This will ensure a smooth and hassle-free installation process. Here is a list of items you need:
Downrod
The downrod is an essential component that connects the ceiling fan to the mounting bracket. It extends the fan’s height, allowing it to hang at the desired level from the ceiling. Make sure to choose the correct length of the downrod based on the height of your ceiling.
Ceiling fan
The ceiling fan itself is, of course, a fundamental requirement for this installation. Ensure that you have all the necessary components of the ceiling fan, including the motor housing, fan blades, canopy, and mounting bracket.
Screwdriver
A screwdriver is an indispensable tool for this installation process. It allows you to secure and tighten various screws and bolts. A flathead or Phillips head screwdriver is typically suitable for most ceiling fan installations.
Wrench
Having a wrench handy is crucial for tightening nuts and bolts. It is particularly useful for securing the downrod to the mounting bracket. Make sure the wrench you use matches the size of the nuts and bolts provided with your ceiling fan.
Electrical tester
Safety is of utmost importance when dealing with electrical installations. An electrical tester helps you ensure that the power is safely turned off before you begin your installation. Make sure to use a voltage tester or an electrical multimeter to check for live wires.
By gathering these essential tools and materials, you will be well-prepared to install a downrod on your ceiling fan. Let’s move on to the next steps in this installation guide.
Understanding Safety Precautions
Before you begin the installation of a downrod on your ceiling fan, it is crucial to prioritize safety. By understanding and following the necessary safety precautions, you can ensure both your own well-being and the successful completion of the installation. Let’s take a look at some key safety measures you should keep in mind.
Turning off the power supply
Before starting any electrical work, it is essential to turn off the power supply to the ceiling fan. This will prevent any accidental electricity-related mishaps or injuries. Locate the main circuit breaker for your home and switch off the corresponding one for the ceiling fan. Consider using a voltage tester to double-check that the power supply is firmly disconnected.
Ensuring stability of the ladder
Working at heights always comes with risks. To ensure your safety while installing the downrod, make sure the ladder you use is stable and secure. Place it on an even surface, lock the ladder’s supports, and ensure it is at the optimal height to reach the fan. Avoid placing the ladder on slippery or uneven surfaces that may compromise stability. Furthermore, always maintain a firm grip and balance while climbing and working on the ladder.
Avoiding loose clothing or jewelry
Loose clothing and dangling jewelry pose a significant risk when working with machinery or electrical components. To ensure your safety, it is crucial to avoid wearing any loose clothing or jewelry that could get caught in the moving fan parts. Tuck in loose shirttails, remove necklaces or bracelets, and secure long hair to prevent accidents or injury.
Keeping hands and tools away from moving parts
This safety precaution is of utmost importance for your well-being. Be vigilant and ensure that your hands and tools are kept well away from any moving parts of the ceiling fan. Even when the power is turned off, the fan may still have residual movement that can cause injury. Always exercise caution and use appropriate tools and equipment, keeping your hands clear at all times.
By adhering to these safety measures, you can significantly reduce the risks associated with installing a downrod on your ceiling fan. Remember, safety should never be compromised, and taking the necessary precautions will lead to a successful and injury-free installation process.
Switching Off The Power Supply
Identifying the Correct Breaker
Before you can begin installing a downrod on your ceiling fan, it is crucial to switch off the power supply to ensure your safety. The first step in this process is to identify the correct breaker that controls the electricity flow to your ceiling fan.
To identify the correct breaker, you can follow these simple steps:
- Locate your home’s electrical panel or circuit breaker box.
- Open the panel or box and carefully examine the breakers.
- Look for a breaker labeled with the room or area where your ceiling fan is installed.
- If you are unsure which breaker is the right one, you can turn off the main power supply to the entire house to ensure complete safety.
Confirming the Power is Off with an Electrical Tester
Once you have identified the correct breaker, it is important to confirm that the power is off before you proceed with any installation work. To do this, you can use an electrical tester to check for the presence of electricity.
Follow these steps to confirm that the power is off:
- Select an electrical tester appropriate for the voltage of your home’s power supply.
- Turn on the electrical tester and carefully touch the exposed wires with the tester’s probes.
- If the tester indicates the presence of electricity, the power is still on. In this case, you should switch off the main power supply to the house for further safety.
- If the tester does not detect any electricity, you can proceed with confidence knowing that the power is off.
Remember, working with electricity can be dangerous, so always take the necessary precautions to ensure your safety. Switching off the power supply is an essential step when installing a downrod on your ceiling fan, and by correctly identifying the breaker and confirming the power is off, you can proceed with the installation process confidently.

Unscrewing And Disconnecting The Old Fan
Before you can install a new downrod on your ceiling fan, you need to properly unscrew and disconnect the old fan. This step-by-step guide will walk you through the process, ensuring a smooth transition to your new fan.
Removing the canopy and exposing the wiring
To begin, locate the canopy, which is the decorative covering on the ceiling that hides the fan’s wiring. Use a ladder or step stool to reach the fan safely. Most canopies are secured with screws or a decorative plate that twists off.
Important: Make sure the fan is turned off and the circuit breaker is switched off before proceeding.
Once you have removed the canopy, you will have access to the wiring. Take extra care when dealing with electrical connections to ensure your safety.
Disconnecting the wires
You will notice several wires connected to the fan. Before disconnecting them, it’s helpful to create a diagram or take a photo to remember which wires go where. This step will make it easier when installing the new fan.
Tip: If the wires are held together with wire nuts, use a pair of pliers to gently twist the nuts counterclockwise until they come loose. This will allow you to separate the wires.
Removing the mounting bracket
To remove the mounting bracket that holds the fan in place, you will need to unscrew it from the ceiling. Typically, there will be several screws securing the bracket. Use a screwdriver or a power drill to carefully remove them.
Note: It’s essential to have someone assist you during this step, as the fan may be heavy and require support as it is being removed.
Lowering the old fan and dissembling it (optional)
If you plan to reuse the fan or need to disassemble it for any reason, now is the time to do so. Carefully lower the old fan from the bracket and place it on a safe surface. Take note of any tabs or clips that may be holding the fan together and carefully remove them.
Important: Always refer to the manufacturer’s instructions when disassembling the fan to avoid damaging any components.
By following these steps to unscrew and disconnect the old fan, you are now ready to proceed with installing your new downrod. Remember, safety should always be your top priority when working with electrical components. Stay tuned for our next blog post, where we will guide you through the installation process.
Measuring The Ceiling Height
Using a tape measure
Before installing a downrod on your ceiling fan, it is important to measure the height of your ceiling accurately. Using a tape measure is the easiest and most accurate way to get an exact measurement.
To start, stand directly under the ceiling fan location and hold one end of the tape measure against the floor. Extend the tape measure upwards until it reaches the ceiling. Make sure the tape measure is straight and not twisted, as this could lead to an inaccurate measurement.
Read the measurement on the tape measure at eye level to ensure accuracy. Take note of the measurement, as you will need it later when selecting the appropriate downrod length.
Accounting for any sloped ceilings
If your ceiling is sloped, it is important to account for this when measuring the ceiling height. Sloped ceilings can impact the hanging height of your ceiling fan and may require additional adjustments.
The easiest way to measure a sloped ceiling is to use a measuring device with an inclinometer. This device will provide you with the angle of the slope, allowing you to calculate the vertical height accurately.
Once you have the angle of the slope, measure the vertical height from the floor to the sloped ceiling at the point where you plan to install the ceiling fan. This measurement will be used when determining the appropriate downrod length.
Determining The Desired Fan Height
Considering functionality and aesthetics
Determining the desired fan height when installing a ceiling fan is crucial for both functionality and aesthetics. The fan should be positioned at an optimal height to ensure proper air circulation while also complementing the overall design of the room. When considering functionality, it is important to ensure that the fan blades are at least 7 feet from the floor. This helps prevent any potential accidents and allows for efficient airflow.
Additionally, a proper fan height enhances the cooling effect and makes the room more comfortable during hot summer months. But functionality is not the only factor to consider. Aesthetics also play a significant role in determining the desired fan height. The fan should be positioned at a height that blends seamlessly with the room’s decor, creating a visually appealing focal point. To achieve the perfect balance between functionality and aesthetics, several factors need to be taken into account during the installation process.
Ensuring the fan blades are at least 7 feet from the floor
To ensure the fan blades are at least 7 feet from the floor, it is important to measure the height of your ceiling. This measurement will help determine the appropriate downrod length for your ceiling fan. A downrod is a metal rod that extends from the ceiling mount to the top of the fan motor.
It allows you to adjust the height of the fan according to your ceiling height. Using a downrod that is too short can result in the fan being too close to the floor, posing a safety risk. On the other hand, using a downrod that is too long can reduce the effectiveness of the fan’s airflow. To determine the correct downrod length for your ceiling fan, follow these steps:
- Start by measuring the distance from the floor to the ceiling.
- Subtract 7 feet from this measurement to determine the maximum length of the downrod.
- Select a downrod length that is closest to this maximum length without exceeding it.
For example, if your ceiling height is 10 feet, subtracting 7 feet will give you a maximum downrod length of 3 feet. In this case, you would select a downrod that is 3 feet long or slightly shorter.
Summary
Determining the desired fan height is an important step in the installation process of a ceiling fan. By considering both functionality and aesthetics, you can ensure that the fan is positioned at an optimal height to provide efficient airflow while enhancing the overall design of the room.
Measure your ceiling height accurately and select the appropriate downrod length to ensure that the fan blades are at least 7 feet from the floor. This will not only promote safety but also improve the cooling effect of the fan and create an aesthetically pleasing atmosphere in your space. Remember to follow these guidelines to enjoy the full benefits of your ceiling fan installation.
Choosing The Correct Downrod Length
Following Manufacturer’s Recommendations
When it comes to choosing the correct downrod length for your ceiling fan installation, it’s essential to follow the manufacturer’s recommendations. Each ceiling fan manufacturer provides specific guidelines to help you achieve optimal performance and aesthetics. Paying attention to these recommendations ensures that your fan operates efficiently and looks visually appealing in your space.
Adjusting for the Desired Fan Height
One crucial factor to consider when choosing the correct downrod length is the desired height of your ceiling fan. The height at which you mount your fan can impact both its efficiency and functionality. A properly installed ceiling fan should be positioned at least 7 feet above the floor and 8-9 feet for optimum airflow, especially in rooms with high ceilings. Keep in mind that if your ceiling is unusually high, additional downrod length will be required to achieve the desired height.
Selecting the Appropriate Downrod Finish
After determining the recommended length based on the fan height, it’s time to consider the downrod finish. The downrod is the pipe-like extension that connects the fan motor to the mounting bracket. It’s available in various finishes, including brushed nickel, bronze, white, black, and more. Selecting the appropriate downrod finish allows you to seamlessly integrate your ceiling fan into your existing decor. Choose a finish that complements other fixtures and hardware in the room for a cohesive look.
In conclusion, choosing the correct downrod length for your ceiling fan installation is crucial. By following the manufacturer’s recommendations and adjusting for the desired fan height, you can ensure optimal performance and aesthetics. Additionally, selecting the appropriate downrod finish allows for a cohesive and visually appealing integration into your space. With these considerations in mind, you’ll be well on your way to a successful ceiling fan installation.
Assembling The Fan With The Downrod
Once you have decided to install a downrod on your ceiling fan, the next step is to assemble the fan with the downrod. This process involves attaching the downrod to the motor housing and securing it with the provided screws. Following the correct steps will ensure that your ceiling fan is properly assembled and ready to provide you with a cool breeze in no time.
Attaching the Downrod to the Motor Housing
To begin assembling your fan with the downrod, you need to attach the downrod to the motor housing. Before you start, make sure you have the necessary tools and equipment, such as a ladder, a screwdriver, and the downrod itself. Follow these step-by-step instructions:
- Turn off the power to the ceiling fan at the circuit breaker.
- Place the ladder beneath the ceiling fan, ensuring it is stable and secure.
- Remove any decorative canopy or cover that may be covering the mounting bracket.
- Locate the hole in the motor housing for the downrod, which is usually at the top.
- Insert the downrod into the hole, aligning the holes in the downrod with the holes in the motor housing.
- Ensure the downrod is securely in place before proceeding to the next step.
Securing it with the Provided Screws
Now that the downrod is attached to the motor housing, the next step is to secure it with the provided screws. This will ensure that the downrod is tightly in place and the ceiling fan is stable. Follow these simple instructions:
- Take the provided screws and insert them through the holes in the downrod and into the corresponding holes in the motor housing.
- Tighten the screws using a screwdriver, ensuring they are firmly secured but not overtightened.
- Check the stability of the downrod and make any adjustments if necessary.
- Double-check that all screws are securely tightened to prevent any wobbling or movement of the downrod.
Once you have completed these steps, your ceiling fan is now assembled with the downrod, ready to be mounted to the ceiling. Remember to turn on the power and test the fan before finalizing the installation. Enjoy the cool breeze that your newly assembled ceiling fan with downrod will provide!
Wiring The Fan With The Downrod
Properly wiring your ceiling fan with the downrod is essential to ensure safe and efficient operation. In this section, we will guide you through the process step by step, so you can confidently complete this crucial task.
Identifying the fan wires and corresponding house wires
Before you begin connecting the wires, it’s important to identify the different wires on both the ceiling fan and your house’s electrical system. This will enable a proper and secure connection.
Typically, a ceiling fan will have three different wires: a black (hot) wire, a white (neutral) wire, and a green or bare copper (ground) wire. These wires may be identified by their color or a label on the fan itself.
Now, let’s identify the corresponding house wires:
| Fan Wire | House Wire |
|---|---|
| Black (Hot) | Black or Red (Ceiling Junction Box) |
| White (Neutral) | White (Ceiling Junction Box) |
| Green or Bare Copper (Ground) | Green or Bare Copper (Ceiling Junction Box) |
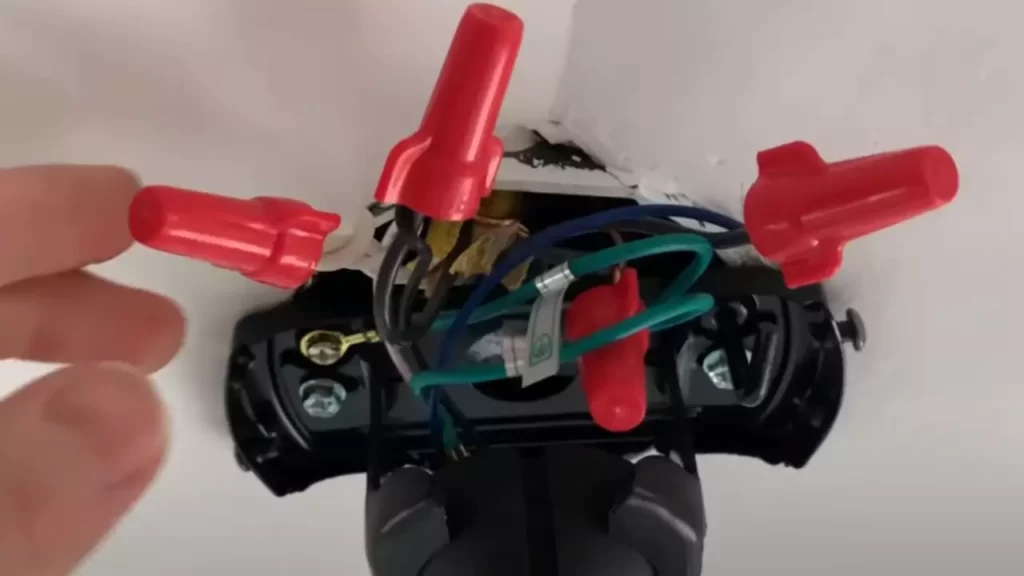
Connecting the wires using wire connectors
Now that you have identified the fan and house wires, it’s time to connect them. Follow these steps to ensure a secure connection:
- Start by stripping the insulation off the end of each wire, leaving about half an inch of bare wire exposed.
- Twist the exposed ends of the corresponding fan and house wires together, matching the colors.
- Once the wires are twisted together, secure each connection with a wire connector. Make sure the connector is tight and holds the wires firmly in place.
- Repeat this process for each pair of wires (black to black or red, white to white, green or bare copper to green or bare copper).
Securing the wire connections with electrical tape
While wire connectors provide a secure connection, it’s always a good idea to give the connections some additional protection. Follow these steps to secure the wire connections with electrical tape:
- After the wire connectors are in place, wrap electrical tape around each individual connection, covering the exposed wires and the connectors.
- Ensure that the electrical tape wraps around the wires tightly, forming a waterproof seal.
- Trim any excess tape to ensure a neat and clean appearance.
By following these steps and ensuring a proper and secure connection, you can confidently install the downrod on your ceiling fan. Remember to double-check all connections and consult a professional electrician if you are unsure about any aspect of the wiring process.
Attaching The Mounting Bracket
When installing a downrod on a ceiling fan, one of the essential steps is attaching the mounting bracket. This bracket is what holds the fan to the ceiling, ensuring it is secured and stable. The process involves positioning the bracket on the ceiling, aligning it with the electrical box, and securing it with screws.
Positioning the bracket on the ceiling
The first step is positioning the mounting bracket on the ceiling. It is essential to determine the ideal location for the fan, considering factors such as room layout, height, and proximity to the electrical box. Once the placement is decided, mark the center of the bracket’s location on the ceiling using a pencil or marker.
Aligning it with the electrical box
Next, align the mounting bracket with the electrical box. Ensure that the holes in the bracket match up with the screw holes in the box. This alignment is crucial for proper installation and stability. Correct alignment will also help ensure smooth airflow and minimize any potential wobbling or noise issues.
Securing it with screws
Once the bracket is correctly aligned with the electrical box, it’s time to secure it with screws. Use the appropriate screws provided with the fan to attach the bracket firmly to the ceiling. Make sure to tighten the screws securely, but be careful not to overtighten and damage the ceiling or the electrical box.
After securing the mounting bracket, double-check its stability and adjust if needed. Ensure that it is firmly attached and does not wobble. This step is crucial to prevent any issues while installing the downrod and the ceiling fan itself.
In conclusion, attaching the mounting bracket is a fundamental step in installing a downrod on a ceiling fan. By positioning the bracket accurately on the ceiling, aligning it with the electrical box, and securing it with screws, you lay the foundation for a secure and stable installation. Take your time with this step to ensure that the fan will operate smoothly and efficiently once installed.
Lifting The Fan Into Position
Enlisting the help of a friend if needed
When it comes to installing a ceiling fan, having an extra pair of hands can be extremely helpful. Enlisting the help of a friend or family member can make the process smoother and safer. Not only will having an extra person assist in lifting and positioning the fan, but they can also provide valuable assistance in holding the fan in place while you secure it. Additionally, having someone to help can make the installation process more enjoyable and less overwhelming.
Aligning the fan with the mounting bracket
After gathering your tools and carefully reading the manufacturer’s instructions, it’s time to align the fan with the mounting bracket. This step ensures that the fan is securely attached to the ceiling and will function properly. To align the fan correctly:
1. Start by attaching the mounting bracket to the ceiling according to the instructions provided. Be sure to use the appropriate screws and ensure the bracket is securely fastened.
2. Carefully lift the fan and align it with the mounting bracket. It’s important to note that ceiling fans can be heavy, so be cautious and use proper lifting techniques to avoid strain or injury.
3. Once the fan is aligned with the mounting bracket, ensure that it is centered and level. Using a level tool can help you ensure that the fan is perfectly balanced.
4. Check that the wiring from the fan is properly threaded through the canopy and downrod, and that it is not twisted or pinched. Taking the time to double-check these details will ensure that the fan operates smoothly and safely.
5. After confirming the alignment and wiring, use the provided hardware to secure the fan to the mounting bracket. Refer to the manufacturer’s instructions for the specific steps and fasteners required for your particular fan model.
By carefully aligning the fan with the mounting bracket, you are setting the foundation for a secure and properly functioning ceiling fan installation. Taking the time to align the fan correctly will enhance its performance and longevity.
In conclusion, whether you are installing a ceiling fan for the first time or replacing an existing one, enlisting the help of a friend and aligning the fan with the mounting bracket are essential steps. Following these guidelines will ensure a successful installation and allow you to enjoy the benefits of a well-functioning ceiling fan in your space. Remember to always refer to the manufacturer’s instructions for specific installation details and safety precautions.
Securing The Fan To The Bracket
Once you have attached the downrod to your ceiling fan and the bracket is securely installed on the ceiling, the next step is to secure the fan to the bracket. This crucial step ensures that your fan is stable and safe to use. Let’s go through the process step by step.
Inserting the provided screws into the bracket
Before you begin, familiarize yourself with the different screws provided with your ceiling fan. Typically, you will find two types of screws: the longer screws and the shorter screws.
Begin by identifying the screw holes in the bracket. These are typically located near the outer edge of the bracket, spaced at equal intervals. Take one of the longer screws and insert it into one of the screw holes, ensuring that the screw head is facing downwards. Repeat this step for each screw hole, inserting the longer screws.
Next, if your ceiling fan comes with an optional safety cable, fix one end of the cable to the bracket using another screw hole. This safety cable is an additional precautionary measure to enhance the stability of the fan. If your fan does not come with a safety cable or if you choose not to use it, skip this step.
Tightening them to securely hold the fan
Once all the screws are inserted into the bracket, it’s time to tighten them to securely hold the fan in place. Using a screwdriver or the provided Allen wrench, gently tighten each screw. Be careful not to overtighten, as this could damage the bracket or the fan itself.
Go through each screw, tightening it until the fan feels secure and there is no movement. You can test the stability of the fan by giving it a slight push or wiggle. If you notice any wobbling or shaking, double-check the screws and retighten them if necessary.
It’s essential to ensure that each screw is tightened evenly to maintain balance and prevent any strain on the fan.
Once you have tightened all the screws, check the fan one more time to ensure it is securely fastened to the bracket. If everything looks good, you are now ready to move on to the next step of completing the installation process.
Remember, securing the fan to the bracket is a crucial step to ensure the safety and functionality of your ceiling fan. Taking the time to properly tighten each screw will provide a sturdy and reliable fan that you can enjoy for years to come.
Installing The Fan Blades
Attaching each blade to the motor housing
Once you have successfully installed the downrod on your ceiling fan, the next step is to attach the fan blades to the motor housing. This step is crucial in ensuring proper functionality and efficient airflow. Follow these steps to attach each blade securely:
- Place the motor housing on a flat surface, ensuring the wires are safely tucked away.
- Align the screw holes on the blade with the corresponding holes on the motor housing.
- Gently position the blade onto the motor housing, ensuring it fits snugly.
- Using a screwdriver, insert the provided screws into the holes and tighten them firmly. Make sure not to overtighten as this may damage the housing or the blade.
- Repeat the process for each blade, securing them to the motor housing.
Fastening the screws to secure the blades
After attaching the blades to the motor housing, the next crucial step is to fasten the screws properly to ensure the blades are securely in place. Follow these steps to fasten the screws:
- Verify that the blades are aligned correctly and balanced evenly.
- Start with the first blade and tighten the screws partially, allowing some flexibility for adjustments.
- Move to the second blade and repeat the process, ensuring it is aligned and balanced with the other blades.
- Proceed to the remaining blades, tightening the screws partially.
- Once all the blades are partially tightened, recheck their alignment and balance.
- Finally, tighten the screws fully, making sure each blade is securely fastened to the motor housing.
Installing The Canopy
When it comes to installing a downrod on a ceiling fan, one of the crucial steps is installing the canopy. The canopy not only covers the wiring and motor housing but also aligns with the mounting bracket, providing a secure and finished look to your ceiling fan installation. In this section, we will guide you through each step of installing the canopy, ensuring that your ceiling fan is ready to provide you with a comfortable breeze.
Covering the wiring and motor housing
Before aligning the canopy with the mounting bracket, it is essential to cover the wiring and motor housing securely. This step ensures safety and prevents any accidental damage to the electrical components. Follow the simple steps listed below to cover the wiring and motor housing effectively:
- Start by carefully bunching up the wires together, making sure they are neatly tucked away.
- Slide the canopy cover over the wires and motor housing, ensuring it fits snugly in place.
- Double-check that the wires are properly seated within the canopy cover without any visible gaps.
Aligning the canopy with the mounting bracket
Once you have covered the wiring and motor housing, the next step is to align the canopy with the mounting bracket. Proper alignment ensures a secure and stable installation. Follow these steps to align the canopy correctly:
- Hold the canopy in one hand and position it just below the ceiling fan.
- Align the openings in the canopy with the screws on the mounting bracket.
- Carefully rotate the canopy clockwise until it locks into place on the mounting bracket.
Securing it with the provided screws
After aligning the canopy with the mounting bracket, the final step is to secure it using the provided screws. This step provides additional stability to your ceiling fan installation. Follow these steps to secure the canopy:
- Locate the screw holes on the canopy and ensure they align with the screw holes on the mounting bracket.
- Insert and tighten the screws provided, using a suitable screwdriver or drill.
- Ensure each screw is securely tightened, but be careful not to overtighten as it could damage the ceiling fan or the canopy.
By following these steps, you can successfully install the canopy on your ceiling fan. Remember to always refer to the manufacturer’s instructions for your specific ceiling fan model, as the installation process may vary. A properly installed canopy enhances the overall look and functionality of your ceiling fan, providing you with a cooling breeze and added comfort in your living space.
Restoring The Power Supply
Turning on the breaker
Once you have successfully installed the downrod on your ceiling fan, the next step is to restore the power supply. Turning on the breaker is an important task that should be done carefully to ensure the safety of both yourself and your fan.
To turn on the breaker, follow these steps:
- Locate the circuit breaker panel in your home. It is typically found in the basement, garage, or utility room. If you’re unsure of its location, consult your home’s blueprints or ask a qualified electrician for assistance.
- Open the circuit breaker panel door.
- Scan the circuit breakers to find the one labeled for your ceiling fan. It may be labeled as “Ceiling Fan” or have a specific room or area designation. If you’re unable to locate the specific breaker, turn off the main power switch to ensure complete isolation of the electrical circuit.
- Ensure that the breaker switch for your ceiling fan is in the “Off” position. It should be in line with the other switches in the panel.
- To turn on the breaker, firmly push the switch to the “On” position. You may hear a click or feel a slight resistance when you do this.
- Close the circuit breaker panel door securely.
- Now that the power supply has been restored, you can move on to testing the fan to ensure proper functionality.
Testing the fan to ensure proper functionality
After restoring the power supply, it’s important to test your ceiling fan to ensure that it’s working correctly. Testing the fan will help you identify any potential issues and allow you to address them before relying on the fan for cooling or air circulation.
To test the fan, follow these steps:
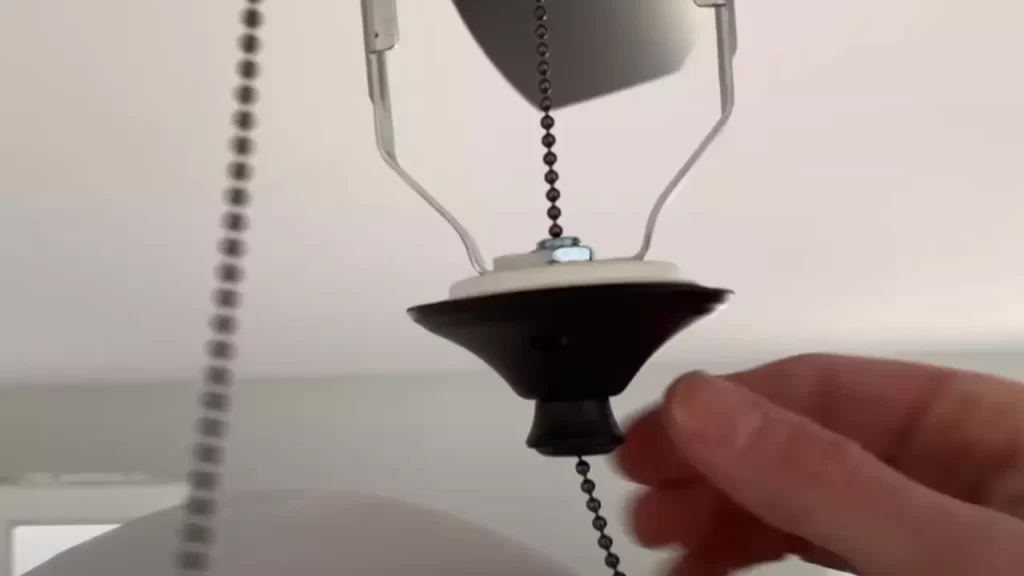
- Ensure that the fan’s pull chains are in the “Off” position.
- Using the wall switch or remote control, turn on the fan.
- Listen for any unusual sounds coming from the fan. A properly functioning fan should operate quietly without any squeaks, rattles, or grinding noises.
- Observe the fan blades as they rotate. They should spin smoothly and evenly without wobbling or shaking excessively. Any imbalances could indicate loose or improperly installed blades.
- Check the fan’s speed settings by adjusting the pull chain, wall switch, or remote control. Ensure that all speed settings are functioning as intended.
- If your fan includes a light fixture, test the light by turning it on and off. Make sure the light illuminates properly and that the on/off switch operates smoothly.
- Test any additional features or functions of your specific ceiling fan, such as a reverse function or programmable timer.
By following these steps and testing your ceiling fan after installing the downrod, you can ensure that your fan is working properly and ready to provide you with comfort and airflow in your space.
Addressing Common Installation Issues
When it comes to installing a downrod on a ceiling fan, there are certain common issues that may arise. Addressing these installation issues properly is essential to ensure optimal performance and functionality of your ceiling fan. In this section, we will discuss three common installation issues you may encounter and provide solutions on how to overcome them.
Fan wobbling or uneven operation
If your ceiling fan wobbles or operates unevenly, it can be a frustrating experience. However, there are a few simple steps you can take to address this issue:
- Check the ceiling fan blades: Ensure that all the fan blades are securely fastened to the motor housing. Tighten any loose screws or bolts using a screwdriver or an Allen wrench. This will help eliminate any imbalance in the fan.
- Balance the fan blades: Fan blade balancing kits are readily available in most home improvement stores. These kits typically include adhesive weights that can be applied to the blades to correct any imbalance. Follow the instructions provided with the kit to properly balance the fan blades.
- Verify proper installation: Double-check that the downrod is securely attached to both the ceiling mounting bracket and the fan motor. Loose connections can lead to wobbling or uneven operation. Use a level to ensure the fan is perfectly horizontal.
Inadequate air circulation
If your ceiling fan is not providing adequate airflow, it may be due to incorrect installation. Here are some steps you can take to improve air circulation:
- Check the direction of the fan blades: Ceiling fans usually have a switch that allows you to change the direction of the fan blades. In the summer, set the blades to rotate counterclockwise to create a cooling breeze. In winter, set the blades to rotate clockwise to circulate warm air.
- Adjust the downrod length: The height at which the fan hangs from the ceiling can also affect its performance. Ensure that the downrod length is appropriate for the height of your ceiling. A general rule of thumb is to hang the fan at least 7 feet above the floor for optimal air circulation.
- Check for obstructions: Make sure that there are no objects obstructing the airflow around the fan. Remove any furniture, plants, or other items that may be blocking the path of the air.
Noise issues
If your ceiling fan is making noise during operation, it can be quite bothersome. Fortunately, there are a few troubleshooting steps you can take to eliminate or reduce the noise:
- Tighten loose parts: Check all the screws, bolts, and fittings on the fan to ensure they are securely tightened. Loose parts can vibrate and create noise. Use a screwdriver or wrench to tighten any loose connections.
- Inspect the fan blades: Examine the blades for any signs of damage or warping. If you notice any bent or damaged blades, replace them with new ones. Warped blades can cause the fan to produce noise.
- Lubricate moving parts: Apply a few drops of lubricating oil to the motor bearings and any other moving parts of the fan. This will help reduce friction and noise caused by dry components. Refer to the fan’s user manual for specific instructions on lubrication.
By addressing these common installation issues, you can ensure smooth and effective operation of your ceiling fan. If you continue to experience problems, it may be helpful to consult a professional electrician or contact the manufacturer for further assistance.
Seeking Professional Assistance
When faced with complicated electrical wiring
Installing a downrod on a ceiling fan may seem like a simple task, but it can quickly become complicated when you encounter tricky electrical wiring. If you find yourself unsure about how to navigate the complex web of wires, seeking professional assistance is highly recommended. A licensed electrician will have the expertise and knowledge to handle any electrical issues that may arise during the installation process.
If unable to troubleshoot and resolve issues
Even if you consider yourself a handy person, there may be instances where you encounter obstacles or issues that are beyond your troubleshooting capabilities. Electrical systems can be complex, and any mistakes or missteps during the installation process can lead to serious consequences. By seeking professional assistance, you can ensure that any issues are promptly resolved, preventing any potential hazards or damages.
Add a code section here if needed
Remember, safety should always be your top priority when dealing with electrical systems. If you find yourself uncertain about any aspect of the downrod installation process, it is best to leave it to the professionals. They have the expertise and experience to take care of the installation efficiently and effectively.
Cleaning The Ceiling Fan
Using a Soft Cloth or Brush
When it comes to cleaning your ceiling fan, using a soft cloth or brush is essential. These gentle cleaning tools will help you effectively remove dust and dirt without damaging the fan blades or motor. Start by turning off the fan and allowing it to come to a complete stop. Then, take a soft microfiber cloth or a clean, soft-bristled brush and gently wipe or brush each fan blade, working from the center of the blade outwards. This will prevent dust from flying around the room.
Avoiding Abrasive Cleaners or Solvents
Avoid using abrasive cleaners or solvents on your ceiling fan. These harsh cleaning agents can cause damage to the fan blades, housing, or motor. Instead, opt for a mild cleaning solution made of water and a small amount of gentle dish soap. Mix it in a spray bottle and lightly spritz the solution onto your soft cloth or brush before wiping or brushing the fan blades. Remember to wring out any excess liquid to prevent it from dripping onto the motor or electrical components.
Additionally, when cleaning your ceiling fan, never spray any cleaning solution directly onto the fan blades or motor. The moisture can seep into the motor and potentially cause electrical issues.
Points to Remember:
- Turn off the fan and allow it to come to a complete stop before cleaning.
- Use a soft microfiber cloth or soft-bristled brush to gently wipe or brush the fan blades.
- Opt for a mild cleaning solution made of water and a small amount of gentle dish soap.
- Lightly spritz the cleaning solution onto the cloth or brush, avoiding direct contact with the fan motor.
- Wring out any excess liquid to prevent it from dripping onto the motor or electrical components.
By following these guidelines, you can keep your ceiling fan clean and in optimal condition. Regular cleaning not only enhances the fan’s performance but also helps to maintain air quality in your home. Remember, a clean ceiling fan is not only functional but also a stylish addition to any room.
Regular Maintenance Tips
Regular maintenance is crucial to ensure the optimal performance and longevity of your ceiling fan. By incorporating a few simple steps into your routine, you can keep your fan running smoothly and efficiently. In this section, we will discuss three important aspects of regular maintenance: checking for loose screws, lubricating moving parts, and inspecting electrical connections. Let’s dive in!
Checking for Loose Screws
Over time, the constant rotation of your ceiling fan can cause screws to loosen. Loose screws not only affect the stability of the fan but also create annoying rattling noises. To ensure your fan is securely fastened to the ceiling, periodically check for loose screws. Here’s what you need to do:
- Turn off the fan and let it come to a complete stop.
- Using a ladder or step stool, carefully climb up to the fan.
- Inspect each screw, including those securing the downrod to the motor housing and the blades to the brackets.
- Using a screwdriver, tighten any loose screws by turning them clockwise.
By performing this quick check and tightening any loose screws, you can prevent potential issues and enjoy a quieter and more stable ceiling fan.
Lubricating Moving Parts
Just like any other mechanical appliance, your ceiling fan’s moving parts require proper lubrication to operate smoothly. Over time, the lubricant can dry out, resulting in increased friction and wear. To keep your fan’s components in optimal condition, follow these simple steps to lubricate the moving parts:
- Ensure the fan is turned off and completely stopped.
- Locate the oiling points on the motor housing and/or the downrod.
- Apply a few drops of non-detergent motor oil or fan lubricant to each oiling point. Be careful not to over-lubricate, as excessive oil can attract dust and dirt.
- Rotate the fan blades manually to help distribute the lubricant evenly.
Regular lubrication can minimize friction, reduce noise, and enhance the overall performance of your ceiling fan.
Inspecting Electrical Connections
As your ceiling fan relies on electricity to function, it is essential to inspect its electrical connections regularly. Loose or faulty connections can lead to performance issues and even pose safety hazards. Follow these steps to ensure your fan’s electrical connections are in good condition:
- Switch off the fan’s power supply at the circuit breaker.
- Remove the fan’s canopy cover or housing cover to access the electrical connections.
- Inspect each wire for signs of fraying, damage, or loose connections.
- If you detect any issues, consult a licensed electrician to address the problem.
- Ensure all wire connections are secure and tightly fastened.
Properly maintained electrical connections are vital for the safe and efficient operation of your ceiling fan.
Regular maintenance of your ceiling fan can significantly extend its lifespan and performance. By checking for loose screws, lubricating moving parts, and inspecting electrical connections, you can keep your ceiling fan running smoothly and enjoy its benefits for years to come.
Extending The Lifespan Of Your Fan
A ceiling fan serves as both a functional and decorative addition to your home. It keeps the air circulating, providing comfort during hot summer months and helping to distribute warmth in the winter. By taking proper care of your ceiling fan, you can extend its lifespan and ensure consistent performance over the years. In this article, we will explore some essential maintenance tips, including keeping the fan and motor clean, avoiding excessive use, and replacing worn-out parts as necessary.
Keeping the fan and motor clean
Regular cleaning is a vital aspect of maintaining your ceiling fan and preventing dust and dirt buildup from compromising its performance. Here are some quick and easy steps to keep your fan and motor clean:
- First, turn off the fan and unplug it from the power source to ensure safety.
- Use a soft microfiber cloth or a feather duster to gently wipe down the blades, removing any visible dust or debris. Avoid using harsh chemicals or abrasive materials that could damage the fan’s finish.
- If the blades are more heavily soiled, you can lightly dampen the cloth with a mixture of mild soap and water. Be sure to dry the blades thoroughly after cleaning to prevent moisture damage.
- Next, focus on cleaning the motor housing. Use a handheld vacuum with a brush attachment to remove any dust or dirt that may have accumulated.
- For difficult-to-reach areas or stubborn dirt, a can of compressed air can be used to blow away debris without causing any harm.
By keeping your fan and motor clean, you can maintain optimal performance and prevent the accumulation of dust and dirt that can lead to mechanical issues.
Avoiding excessive use
While it’s tempting to leave your ceiling fan running continuously, it’s advisable to avoid excessive use to extend its lifespan. Running a fan non-stop can put unnecessary strain on the motor and other components, potentially leading to premature wear and tear. Here are some tips to help you avoid excessive use:
- During moderate weather conditions, consider using the fan on a timer or for shorter durations to give it a break.
- Remember to turn off the fan when you leave a room to conserve energy and reduce wear on the motor.
- Use the fan’s speed settings to adjust airflow according to your comfort level without overworking the motor.
- If you have air conditioning or heating, using the fan in conjunction with these systems can help distribute conditioned air more effectively, reducing the need for prolonged fan use.
By using your ceiling fan wisely and avoiding excessive use, you can help prolong its lifespan and ensure efficient operation for years to come.
Replacing worn-out parts as necessary
Over time, certain parts of your ceiling fan may wear out or become damaged. To maintain optimal performance and prevent further damage, it’s crucial to replace worn-out parts as necessary. Here are some signs that indicate it may be time to replace certain components:
- If you notice excessive wobbling or shaking, it may be a sign of worn-out bearings or loose screws. Check the fan’s manual for instructions on how to tighten screws or replace bearings.
- If the fan makes unusual noises, such as grinding or squeaking sounds, there may be issues with the motor or other internal components. Consult a professional or refer to the fan’s manual to identify the source of the problem.
- If the fan fails to turn on or experiences intermittent operation, it could indicate a faulty capacitor or wiring connection. In such cases, it’s best to seek professional assistance for repair or replacement.
- Inspect the fan blades for cracks or warping, as these can affect performance and create unsafe conditions. Replace damaged blades promptly to ensure the fan operates smoothly.
By promptly addressing and replacing worn-out parts, you can prevent further damage to your ceiling fan and ensure its continued functionality.
By following these maintenance tips, you can extend the lifespan of your ceiling fan and enjoy its comfort and efficiency for years to come. Regularly cleaning the fan and motor, avoiding excessive use, and replacing worn-out parts as necessary will help keep your fan in optimal condition, promoting longevity and reliable performance.
Frequently Asked Questions
Can You Add A Downrod To Any Ceiling Fan?
Yes, you can add a downrod to any ceiling fan. A downrod helps to lower the fan from the ceiling, improving air circulation and providing proper clearance.
Does A Downrod Increase Airflow?
Yes, a downrod can increase airflow. It helps to lower the ceiling fan, allowing it to circulate air more effectively in the room. This can result in better cooling and ventilation.
How Long Of A Downrod Do I Need For A 20 Foot Ceiling?
For a 20-foot ceiling, you will need a downrod that is approximately 36 inches long.
How Do You Install A Ceiling Fan Without A Downrod?
To install a ceiling fan without a downrod, first, turn off the power supply. Attach the mounting bracket to the ceiling with screws. Connect the fan wires to the ceiling wires and secure them with wire nuts. Then, attach the fan blades and tighten them.
Finally, turn on the power and test the fan.
Conclusion
Installing a downrod on your ceiling fan is a simple yet crucial step to maximize its functionality and aesthetics. By following the step-by-step process outlined in this guide, you can easily complete the installation on your own, saving time and money.
Remember to ensure the proper sizing and secure attachment for the best performance. So don’t hesitate, enhance your ceiling fan’s performance and refresh your living space today!