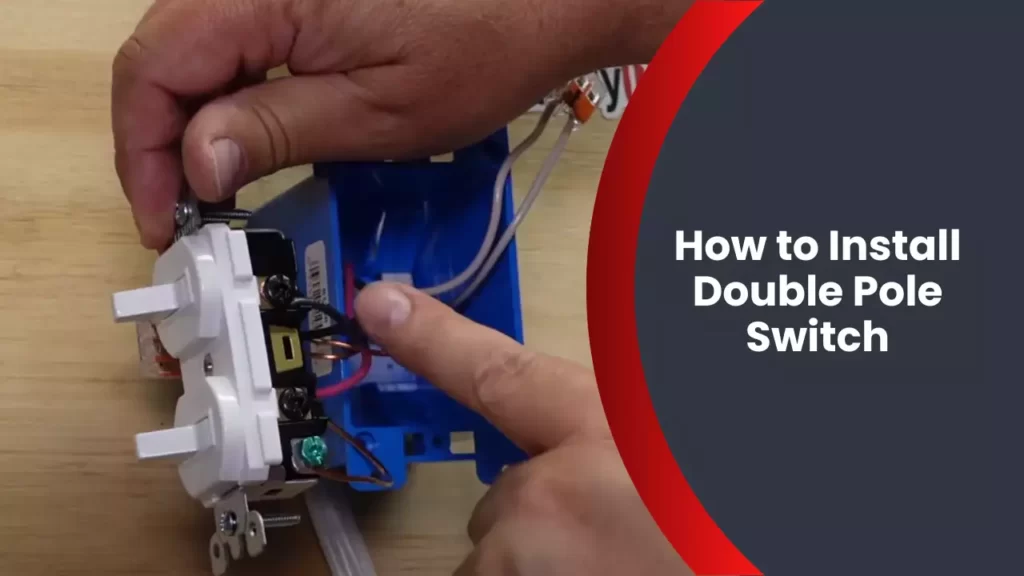
To install a double pole switch, turn off the power, remove the old switch, connect the new switch wires, secure the switch to the wall, and restore power. Installing a double pole switch involves a few simple steps to ensure a safe and efficient switch replacement.
By following these steps, you can easily install a double pole switch and have it up and running in no time. Remember to always turn off the power before beginning any electrical work to prevent accidents or injuries.
Selecting The Right Double Pole Switch
When it comes to installing a double pole switch, selecting the right one is crucial to ensure proper functionality and safety. With different types of double pole switches available and various considerations to keep in mind, it is important to make an informed decision. In this article, we will discuss the different types of double pole switches, as well as the considerations you should take into account when choosing the correct switch.
Different Types of Double Pole Switches
Before selecting a double pole switch, it is important to understand the different types available. This will help you choose the appropriate switch for your specific needs. Here are some common types:
| Switch Type | Description |
|---|---|
| Toggle Switch | This is the most common type of switch that features a simple on/off mechanism. |
| Rocker Switch | Unlike a toggle switch, a rocker switch has a flat surface that is pressed on one side to turn on and the other side to turn off. |
| Push Button Switch | These switches have a button that needs to be pressed to turn on or off the circuit. |
Considerations for Choosing the Correct Switch
When selecting a double pole switch, there are several important considerations to keep in mind:
- Amperage rating: Double pole switches come with different amperage ratings. It is crucial to choose a switch that can handle the electrical load of the circuit it will be controlling. Make sure to check the amperage requirements of your appliances or devices.
- Switch design: Consider the design and style of the switch that will seamlessly blend with your interior. Whether you prefer a toggle, rocker, or push button switch, choose one that suits your aesthetic preferences.
- Switch durability: Look for switches made from high-quality materials that can withstand frequent use and last for a long time. Cheap switches may deteriorate quickly, leading to potential safety hazards.
- Safety features: Ensure that the switch you choose has proper safety features such as grounding terminals, properly insulated wires, and protection against electrical shocks. These features are essential for the safe operation of the switch.
- Installation requirements: Consider the installation requirements of the switch. Some switches are easier to install than others, and it is important to choose one that matches your level of expertise and available tools.
By considering these factors and understanding the different types of double pole switches available, you can confidently select the right switch for your specific needs. Always prioritize safety and functionality when making your decision, and ensure that the chosen switch meets all the necessary requirements.
Tools And Materials Needed For Installation
Before you start installing a double pole switch, it’s essential to gather the necessary tools and materials to ensure a smooth and successful installation process. In this section, we will provide you with a comprehensive list of tools and materials required for the installation of a double pole switch. By having all the necessary items prepared in advance, you will be well-equipped to complete the installation without any delays or interruptions.
List of necessary tools
A double pole switch installation requires a specific set of tools to ensure precision and efficiency. Here is a list of the tools you will need:
- Screwdriver (flathead or Phillips, depending on the screws used in your switch)
- Wire stripper
- Wire cutter
- Needle-nose pliers
- Voltage tester
These tools are commonly found in most households or can be easily purchased at your local hardware store. Having these tools readily available will make the installation process much simpler and save you time and effort.
Required materials for installation
In addition to the necessary tools, you will also need certain materials to install a double pole switch. These materials ensure the safe and secure functioning of the switch. Here are the materials you will require:
| Materials | Description |
|---|---|
| Double pole switch | A device that controls the flow of electricity to a specific circuit or device by opening or closing the circuit. |
| Mounting box | A sturdy container that houses the switch and provides support to prevent it from being damaged. |
| Wire connectors | These connectors ensure a secure and reliable connection between wires. |
| Electrical tape | Used to insulate wires and provide protection against electrical shock. |
| Wire nuts | These small caps are used to connect and secure wires together, preventing them from coming loose. |
By having these materials on hand, you will be well-prepared to install the double pole switch efficiently and effectively.
Now that you have a clear understanding of the tools and materials needed for the installation of a double pole switch, you can proceed to the next steps with confidence. By having everything at your disposal, your installation process will be hassle-free, ensuring a successful outcome.

Step-By-Step Guide On Installing A Double Pole Switch
Installing a double pole switch in your home can be a simple and straightforward process. In this step-by-step guide, we will walk you through each stage, from turning off the power supply to testing the switch, ensuring a safe and successful installation.
Turning off the power supply
The first and most crucial step in any electrical installation is to turn off the power supply to the area where you will be working. This ensures your safety and prevents any electrical accidents.
Removing the old switch
Once the power supply is off, you can proceed to remove the old switch. Use a flathead screwdriver to unscrew the switch cover plate and carefully remove it. Next, unscrew the screws holding the switch in place and gently pull the switch out of the wall.
Identifying the wires
Before connecting the new switch, it is essential to identify the wires and understand their functionality. Start by examining the wires coming out of the wall and differentiate between the hot wire (usually black), the neutral wire (typically white or gray), and the ground wire (usually green or bare copper).
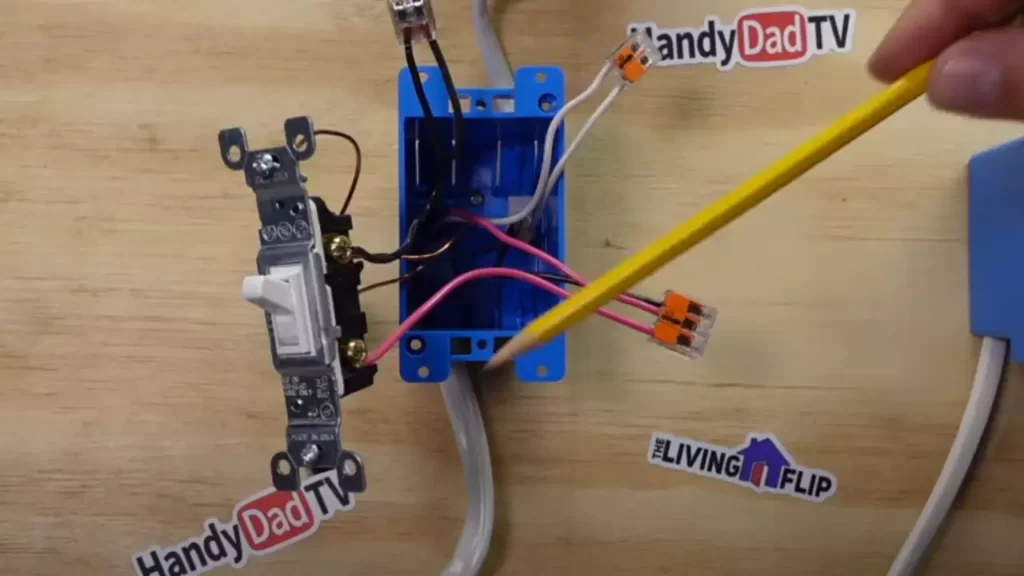
Connecting the wires to the new switch
Now that you have identified the wires, it’s time to connect them to the new double pole switch. Begin by connecting the hot wire to one of the switch terminals, usually indicated with a “L” or a brass screw. Then, connect the corresponding neutral wire to the other terminal marked with an “N” or a silver screw. Lastly, attach the ground wire to the green screw or ground terminal on the switch.
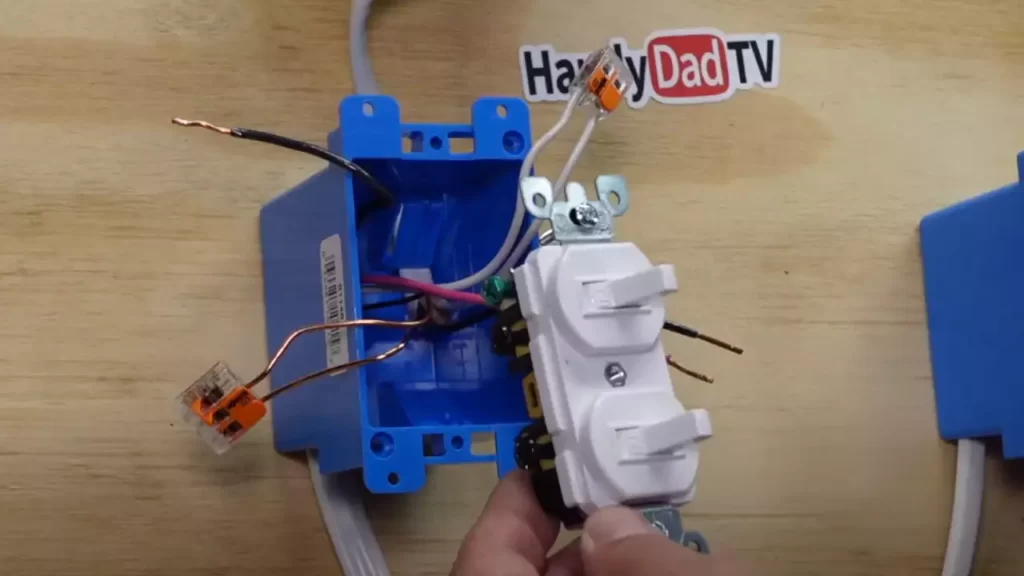
Securing the switch in place
After the wires are securely connected, carefully push the switch back into the wall and align it with the screw holes. Use screws to fasten the switch into place, ensuring it is stable and properly aligned with the wall surface.
Testing the switch
With the installation complete, it is crucial to test the switch to ensure it is functioning correctly. Turn the power supply back on and carefully switch the double pole switch on and off. Verify that it controls the desired electrical circuit(s) and that there are no issues or malfunctions.
Congratulations! You have successfully installed a double pole switch in your home. Remember that if you are unsure about any step or encounter any difficulties during the installation process, it is always wise to consult a qualified electrician for assistance.
Turning Off The Power Supply
Before you start installing a double pole switch, it is crucial to properly turn off the power supply to avoid any accidents or electrical hazards. Taking safety precautions is of utmost importance. This section will guide you through the necessary steps to safely turn off the power supply before beginning your installation process.
Importance of Safety Precautions
Safety should be your top priority when working with electrical components. Taking the necessary precautions can help prevent potential accidents and electrical mishaps. Always remember, electricity is dangerous and even a small mistake can have serious consequences. Follow these safety precautions to ensure your well-being during the installation process:
- Wear protective gear such as safety glasses and insulated gloves to protect yourself from potential electrical shocks.
- Make sure all your tools and equipment are in good condition; faulty tools can increase the risk of accidents.
- Disconnect any appliances or devices that may be connected to the circuit in question to avoid any issues.
Locating the Circuit Breaker
The first step in turning off the power supply is locating the circuit breaker. The circuit breaker is a safety device that automatically cuts off the electrical supply in case of an overload or fault. Here’s how you can find it:
- Start by checking the main electrical panel in your home.
- Typically, the panel is located in the basement, garage, or utility room.
- Once you locate the panel, open the door or cover to reveal the circuit breakers.
- Each circuit breaker is labeled, indicating which area or device it controls.
- Look for the circuit breaker that corresponds to the area where you plan to install the double pole switch.
If you’re unsure which breaker controls the desired circuit, you can enlist the help of a voltage meter or consult an electrician for guidance.
Switching Off the Power Supply
After locating the correct circuit breaker, it’s time to switch off the power supply. Follow these steps carefully:
- Identify the circuit breaker handle corresponding to the circuit you’re working on.
- Using a firm grip, pull the handle firmly towards the “off” position.
- You should hear a distinct click sound, indicating that the power supply to that circuit has been successfully cut off.
- Now, double-check to ensure the power is indeed turned off by testing a nearby light switch or any other electrical device.
- If the light or device remains off, you can proceed with the installation process with peace of mind.
Keep in mind that even after turning off the power supply, it is still advisable to handle all electrical components with caution. Now that you’ve safely turned off the power supply, you’re ready to move on to the next steps of installing the double pole switch.
Removing The Old Switch
When you’re ready to install a double pole switch, the first step is to remove the old switch. This might seem like a daunting task, but with the right instructions, it can be a straightforward process. In this guide, we’ll go through the step-by-step process of removing the old switch, starting with removing the switch cover plate.
Removing the switch cover plate
The switch cover plate is the visible part of the switch that protects the internal components. To remove it, follow these simple steps:
- Start by switching off the power to the switch from the electrical panel. This ensures your safety during the installation process.
- Use a screwdriver to unscrew the screws holding the switch cover plate in place.
- Gently pull the switch cover plate away from the wall, using caution not to damage the surrounding area.
Once you have successfully removed the switch cover plate, you’re ready to move on to unscrewing the switch itself from the electrical box.
Unscrewing the switch from the electrical box
The switch is secured to the electrical box with screws. To remove the switch from the box, follow these steps:
- Double-check that the power to the switch is turned off from the electrical panel.
- Use a screwdriver to unscrew the screws holding the switch in place.
- Gently pull the switch away from the electrical box, exposing the wires behind it.
Now that you have successfully removed the switch from the electrical box, the final step is to disconnect the wires.
Disconnecting the wires
Disconnecting the wires from the old switch is an essential step in preparing for the installation of the double pole switch. Follow these steps to disconnect the wires:
- Identify the different colored wires connected to the switch.
- Using a screwdriver, unscrew the wire connectors holding the wires in place.
- Gently pull apart the wires, ensuring they are disconnected from the old switch.
With the wires safely disconnected, you are now ready to install the new double pole switch. Stay tuned for our next guide on how to install the double pole switch for a complete step-by-step process.
Identifying The Wires
When it comes to installing a double pole switch, one of the essential steps is identifying the wires. By understanding the different wire colors and using a voltage tester, you can ensure a safe and effective installation. In this section, we will delve into the details of these steps and how to identify the hot, neutral, and ground wires.
Understanding the different wire colors
Before diving into the installation process, it’s crucial to understand the significance of different wire colors. Electrical wires are typically color-coded to indicate their purpose, ensuring proper connections and safe usage. Here are the most common wire colors and their meanings:
| Wire Color | Meaning |
|---|---|
| Black | Hot wire carrying electrical current |
| Red | Second hot wire used in 240-volt circuits |
| White | Neutral wire providing return path for electrical current |
| Green or Bare Copper | Ground wire for safety, preventing electrical shock |
By knowing these wire color conventions, you can easily identify the purpose of each wire during the installation process.
Using a voltage tester to ensure the power is off
Prior to handling any electrical wires, it is crucial to ensure the power is completely turned off. This is where a voltage tester becomes an indispensable tool. The voltage tester allows you to verify whether the circuit is live or dead, ensuring your safety throughout the process.
- Start by switching off the circuit breaker that controls the power to the area you’ll be working in.
- Next, carefully remove the switch cover plate using a screwdriver.
- Once the cover plate is removed, it’s time to use the voltage tester. Simply place the tip of the tester against each wire’s insulation, making sure to keep a firm grip.
- If the tester indicates any voltage or lights up, the power is still active, and you should go back and double-check the circuit breaker.
- Only proceed with the installation once the tester confirms that the power is indeed off.
Remember, safety should always be the top priority when dealing with electrical wiring.
Identifying the hot, neutral, and ground wires
Once you have ensured that the power is off, it’s time to identify the hot, neutral, and ground wires for the installation. Here’s what to look for:
- Hot wire: This wire carries the electrical current and is usually black or red in color. Use the voltage tester to confirm which wire is hot.
- Neutral wire: The neutral wire provides the return path for the electrical current. It is typically white in color.
- Ground wire: The ground wire is essential for safety, preventing electrical shock. It is usually green or bare copper. Identify the grounding wire and make sure it is securely connected.
By correctly identifying these wires, you’ll be ready to safely and effectively install your double pole switch.
Connecting The Wires To The New Switch
When it comes to installing a double pole switch, connecting the wires to the new switch is an essential step. This ensures that the switch is properly connected to the power supply and can effectively control the electrical circuit. To help you with this process, we have outlined the steps you need to follow.
Preparing the wires for connection
Start by preparing the wires for connection. Here’s how you can do it:
1. Turn off the power: Before you begin, switch off the power at the main circuit breaker to ensure your safety.
2. Strip the wires: Take a wire stripper and carefully remove about ¾ inch of insulation from the ends of the wires. This will expose the copper conductor for proper connection.
3. Straighten the wires: Gently straighten the exposed wires to ensure a smooth and secure connection to the switch terminals.
Making proper wire connections
Now that you have prepared the wires, it’s time to make the proper wire connections. Follow these steps:
1. Identify the terminals: Look for the brass or gold-colored terminals on the double pole switch. These are the hot terminals.
2. Connect the hot wires: Take the hot wires coming from your power source and attach them to the hot terminals on the switch. Make sure to match the color-coding of the wires (black to black, red to red) or follow any wiring diagram provided with the switch.
3. Connect the load wires: Next, connect the load wires that go to the device or circuit you want to control. Attach them to the remaining terminals on the switch, again ensuring proper color matching.
4. Make secure connections: To ensure a secure connection, insert the stripped ends of the wires into the appropriate terminals on the switch. Use a screwdriver to tighten the terminal screws, making sure the wires are held firmly in place.
Tightening the wire nuts securely
To complete the wiring process, it’s important to tighten the wire nuts securely. Follow these steps:
1. Twist the wires together: Before securing the wires with wire nuts, twist the exposed ends of the wires together firmly in a clockwise direction. This will ensure a tight connection.
2. Apply the wire nuts: Place the wire nut over the twisted wires and twist it clockwise until it is tightly secured. Make sure the wire nut covers all the exposed copper and provides a secure connection.
3. Test the wire nuts: Gently tug on the wires to ensure that the wire nuts are properly tightened. If the wires come loose, remove the wire nut and repeat the twisting and securing process.
By following these steps, you can confidently connect the wires to your new double pole switch. Always remember to follow safety guidelines and consult a professional if you are unsure about any step in the installation process.
Securing The Switch In Place
Once you have positioned the new double pole switch in the electrical box, the next step is to secure it firmly in place. This ensures that the switch remains stable and functions properly. Follow these simple steps to secure the switch securely:
Positioning the new switch in the electrical box
To begin, make sure that the power to the circuit is turned off. This is essential for your safety while working with electrical components. Carefully position the new double pole switch in the electrical box, ensuring that it is properly aligned and flush against the wall.
Aligning the switch with the screw holes
Next, align the switch with the screw holes in the electrical box. Ensure that the switch is level and straight. This step is crucial for proper installation and functionality. Take your time to align the switch accurately, making any necessary adjustments before proceeding to the next step.
Using screws to secure the switch
Once the switch has been aligned with the screw holes, it’s time to secure it using screws. Choose screws that are suitable for the electrical box material and ensure they are long enough to hold the switch firmly in place. Insert the screws into the screw holes and tighten them using a screwdriver.
Ensure that each screw is tightened securely, but be careful not to overtighten and damage the switch or electrical box. Double-check the alignment and stability of the switch as you tighten each screw, making any necessary adjustments along the way.
Pro Tip: If you find that the screws are not gripping securely or are loose, consider using wall anchors or longer screws for added stability.
With the switch securely in place, you can now proceed to connect the wires and complete the installation process. Remember to follow all safety guidelines and consult a professional if you are unsure about any steps. Taking the time to properly secure the double pole switch ensures a reliable and long-lasting electrical installation for your home.
Testing The Switch
Once you have successfully installed the double pole switch, it’s essential to test its functionality to ensure everything is working as it should. In this section, we will cover the steps you should take to test your switch properly.
Restoring the Power Supply
Before testing the switch, you need to restore the power supply to the circuit you are working on. Switch off the main circuit breaker to cut off the power supply, and then turn it back on. This will ensure that the power is flowing through the circuit again and the switch is ready for testing.
Checking the Functionality of the Switch
Now that the power supply is restored, you can proceed with checking if the switch is functioning correctly. Follow these steps to perform this test:
- Flip the switch to the “on” position.
- Observe if the appropriate lights, appliances, or devices connected to the circuit are powered on. Make sure that the switch is controlling the desired electrical load effectively.
- Switch the double pole switch to the “off” position and verify that the lights, appliances, or devices connected to the circuit are now turned off. This will confirm that the switch is cutting off the power supply as intended.
By performing this functionality check, you can ensure that the double pole switch is operating smoothly and that it is properly controlling the electrical flow.
Verifying Correct Wiring
Lastly, it’s crucial to verify that the wiring of your double pole switch has been done correctly. Follow these steps to confirm proper wiring:
- Turn off the power supply to the circuit once again by switching off the main circuit breaker.
- Remove the switch cover plate using a screwdriver and inspect the wiring connections.
- Ensure that all wires are securely connected to the switch terminals, with no loose or exposed wires present.
- If you had labeled the wires during the installation process, double-check that the connections match the appropriate terminals.
Verifying the correct wiring is essential for the safe and reliable operation of the double pole switch. If any issues or discrepancies are found, consult a professional electrician to rectify the wiring before proceeding further.
By following these testing procedures, you can verify that your double pole switch is functioning correctly and that the wiring is properly installed. This ensures the reliable operation of your electrical circuit and provides peace of mind.
Troubleshooting Common Issues
Installing a double pole switch can seem overwhelming, especially if you encounter any common issues along the way. However, with a little troubleshooting, you can quickly resolve these problems and get your switch working smoothly. In this section, we will discuss some of the most common installation problems and provide solutions to help you troubleshoot each issue effectively.
Identifying Common Installation Problems
Before we dive into the solutions, it’s important to identify the common installation problems you may encounter when installing a double pole switch. By understanding the issues, you can address them efficiently and avoid any further complications. Here are some of the most frequently experienced problems:
- Flickering lights: If you notice your lights flickering upon installation, this could indicate a loose connection.
- No power: If the switch doesn’t seem to have any power, it might be due to improper wiring or a faulty switch.
- Switch not working: If the switch isn’t functioning as expected, it could be due to incorrect installation or a defective switch.
- Overheating: If the switch feels hot to the touch, it could be a sign of overloaded circuits or faulty wiring.
Solutions for Troubleshooting Each Issue
Now that we’ve identified the common problems, let’s explore the solutions for troubleshooting each issue:
Flickering lights:
If your lights are flickering after installing the double pole switch, the first step is to check the connections. Ensure all wires are securely tightened and properly connected to their respective terminals. If the issue persists, the problem may lie with the switch itself. Consider replacing the switch with a new one to see if that resolves the flickering problem.
No power:
In the case of no power to the switch, start by checking your circuit breaker panel to ensure the switch’s circuit breaker is not tripped. If the breaker appears fine, double-check the wiring connections to verify that they are correctly installed. If everything seems in order and you still have no power, it might be necessary to consult a qualified electrician to diagnose and resolve the issue.
Switch not working:
If the double pole switch is not functioning, start by rechecking the wiring connections to ensure they are accurate. It’s essential to connect the hot wires (usually black) to the brass terminals and the neutral wires (usually white) to the silver terminals correctly. If the connections are correct and the switch still won’t work, consider replacing it with a new one as it could be faulty.
Overheating:
If the switch feels hot to the touch, it’s crucial to address the issue promptly to prevent any potential fire hazards. Overheating can be caused by overloaded circuits or faulty wiring. Determine whether the circuit is overloaded by checking the wattage of the connected devices. If it exceeds the rating of the switch, you may need to redistribute the load or upgrade to a higher-rated switch. If the wiring is suspected to be faulty, it’s best to seek professional assistance to inspect and rectify the problem.
By troubleshooting these common issues during the installation of a double pole switch, you can ensure a smooth and safe electrical setup. Remember, if you encounter any difficulties beyond your expertise, it’s always wise to consult a qualified electrician to avoid potential risks.
Switch Not Working After Installation
Switch not working after installation
If you’ve recently installed a double pole switch and it’s not working, don’t fret! There are several potential reasons for this issue, and in this guide, we’ll explore some troubleshooting steps you can take to get your switch up and running smoothly. By checking for loose connections, verifying proper wiring, and testing the switch with a multimeter, you’ll be able to diagnose and fix the problem in no time.
Checking for loose connections
One common reason for a double pole switch not working after installation is loose connections. It’s crucial to ensure that all wires are securely fastened to their respective terminals. Loose connections can disrupt the flow of electricity and result in a non-functional switch.
To check for loose connections, follow these steps:
1. Turn off the power: Before working with any electrical component, always turn off the power at the circuit breaker to avoid the risk of electric shock.
2. Inspect the connections: Carefully examine each wire connected to the switch. Check for any signs of looseness or disconnection. Gently tug on each wire to ensure a snug fit.
3. Tighten the terminals: If you find any loose connections, use a screwdriver to tighten the terminal screws. Be sure not to overtighten, as this can damage the wires.
By carefully inspecting and tightening any loose connections, you can eliminate this common issue and potentially solve the problem with your switch not functioning properly.
Verifying proper wiring
Another potential cause for a non-working double pole switch is incorrect wiring. It’s essential to ensure that the wires are connected to the correct terminals on the switch. Refer to the manufacturer’s instructions or a reliable wiring diagram to verify the proper wiring configuration.
To verify proper wiring, follow these steps:
1. Double-check the wiring diagram: Confirm that the wires are connected to the correct terminals based on the wiring diagram. Pay close attention to the distinction between the hot (usually black) and neutral (usually white) wires.
2. Inspect for crossed or mixed-up wires: Sometimes during installation, wires can get mixed up or crossed. Examine each wire to ensure it is connected to the correct terminal and there are no crossed or tangled wires.
3. Re-wire if necessary: If you find any incorrect or mixed-up wiring, carefully rewire the switch according to the correct configuration. Take your time and make sure each wire is securely attached to the proper terminal.
By verifying that the wiring is correct, you can eliminate any potential issues caused by incorrect connections and increase the chances of your double pole switch functioning as intended.
Testing the switch with a multimeter
If the switch is still not working after checking for loose connections and verifying proper wiring, additional troubleshooting is required. Testing the switch with a multimeter can help determine whether it is functioning properly or if there are any underlying issues.
Follow these steps to test the switch with a multimeter:
1. Set the multimeter: Switch the multimeter to the appropriate AC voltage setting. Consult the multimeter’s user manual for specific instructions on how to select the correct setting.
2. Test for voltage: Using the multimeter, carefully touch one probe to the hot wire terminal and the other probe to the neutral wire terminal on the switch. If the switch is working correctly, the multimeter should display the appropriate voltage.
3. Check for continuity: Next, test the continuity of the switch by touching one probe to each of the switch’s terminals. If the switch is functioning correctly, the multimeter should show continuity (a closed circuit).
If the multimeter readings indicate that the switch is not receiving voltage or there is no continuity, it may be defective and require replacement.
In conclusion, if your double pole switch is not working after installation, don’t panic. By following these troubleshooting steps and checking for loose connections, verifying proper wiring, and testing the switch with a multimeter, you can identify and resolve the issue. Remember to always prioritize safety and consult a qualified electrician if you encounter any difficulties.
Lights Flickering Or Dimming
Examining wire connections
If you have been experiencing lights flickering or dimming in your home, it can be frustrating and even cause safety concerns. One possible reason for this issue is faulty wire connections. To troubleshoot the problem, you need to examine the wire connections associated with the double pole switch installation. Here are some steps to follow:
- First, turn off the power supply to the switch by flipping the circuit breaker.
- Remove the faceplate of the switch using a screwdriver.
- Check all the wire connections behind the switch. Make sure they are securely connected and there are no loose or damaged wires.
- If you find any loose connections, gently tighten them with a screwdriver or electrical pliers.
- Inspect the insulation on the wires. If you notice any worn-out or damaged insulation, it’s important to replace the wires to ensure a safe and proper connection.
Ensuring proper voltage supply
Another factor that can contribute to lights flickering or dimming is an inadequate voltage supply. To ensure a proper voltage supply, follow these steps:
- Check the voltage rating of your electrical system. It should match the voltage requirement of the double pole switch.
- If the voltage rating is correct, use a voltmeter to measure the voltage at the switch terminals. It should be within the acceptable range mentioned in the switch’s manual.
- If the voltage reading is too low or fluctuating, there might be an issue with the electrical system or the circuit supplying power to the switch. In such cases, it is recommended to consult a licensed electrician.
Identifying potential wiring issues
In some cases, lights flickering or dimming can be caused by underlying wiring issues. Here are a few possible wiring problems to be aware of:
- Overloaded circuits: Check if the circuit connected to the switch is overloaded with too many appliances. If so, consider redistributing the load or installing a separate circuit.
- Faulty wiring connections: Inspect other wiring connections in the affected area. Loose or damaged connections elsewhere might be causing the issue.
- Old wiring: If your home has old or outdated wiring, it may not be able to handle the electrical load from modern appliances and lighting. Consider upgrading the wiring if necessary.
By examining wire connections, ensuring proper voltage supply, and identifying potential wiring issues, you can address the lights flickering or dimming problem. However, if you are not comfortable working with electrical systems, it is always best to seek assistance from a professional electrician to ensure safety and proper installation.
Switch Getting Warm Or Hot
One common issue that homeowners may encounter when installing a double pole switch is the switch getting warm or hot. This can be a cause for concern, as excessive heat can indicate a problem with the switch or the electrical circuit. In this section, we will discuss the potential reasons for the switch getting warm or hot and how to address these issues.
Understanding heat dissipation
Heat dissipation is an important factor to consider when it comes to electrical switches. Switches are designed to handle a specific amount of electrical current, and when the current exceeds this limit, the switch can become hot. This can be due to several reasons, such as overloaded circuits or heavy loads being connected to the switch.
Checking for overloaded circuits
To determine if the switch is becoming hot due to an overloaded circuit, it is essential to check the electrical load connected to the circuit. Overloaded circuits occur when too many devices or appliances are connected to a single circuit, exceeding its capacity. This can cause the switch to overheat and potentially lead to electrical hazards.
Here’s how you can check for overloaded circuits:
- Make a list of all the devices or appliances connected to the circuit.
- Calculate the total wattage or amperage of the connected devices.
- Compare the total wattage or amperage to the circuit’s maximum capacity, which is usually mentioned on the circuit breaker or panel.
- If the total wattage or amperage exceeds the circuit’s capacity, you will need to redistribute the devices or consider installing a separate circuit.
Resolving issues with heavy loads
Another reason for a switch getting warm or hot is when it is connected to heavy loads. Heavy loads refer to devices or appliances that require a significant amount of electrical power to operate, such as air conditioners or heaters. These devices can put a strain on the switch and cause it to heat up.
To resolve issues with heavy loads and prevent the switch from getting excessively hot, consider the following steps:
- Check the rating of the switch to ensure it can handle the electrical requirements of the connected load.
- If the switch is undersized for the load, replace it with a switch that has a higher amperage or wattage rating.
- You may also consider dividing the load by installing additional switches or redistributing the devices across multiple circuits.
By understanding heat dissipation, checking for overloaded circuits, and resolving issues with heavy loads, you can ensure that your double pole switch operates safely and efficiently without overheating. If you continue to experience problems with the switch getting warm or hot, it is advisable to consult a licensed electrician to inspect your electrical system.
Frequently Asked Questions
How Is Double Pole Switch Connected?
The double pole switch is connected by connecting the hot wires to the brass terminal screws and the neutral wires to the silver terminal screws. The ground wire is connected to the green screw. Remember to turn off the power before making any connections.
Which Wire Is Connected To Double Pole Switch?
In a double pole switch, two wires are connected.
When Would You Use A Double Pole Switch?
A double pole switch is used when you want to control two separate circuits or appliances with a single switch. It allows you to turn off both circuits at the same time for safety reasons or convenience. Double pole switches are commonly used in kitchens, bathrooms, and other areas with multiple electrical devices.
Can I Use A Double Pole Switch On A Single Pole Circuit?
Yes, you can use a double pole switch on a single pole circuit. However, the second pole won’t have any functionality in a single pole circuit. It’s always best to use a single pole switch for a single pole circuit to ensure proper functionality.
Conclusion
To sum up, installing a double pole switch may seem daunting at first, but with the right guidance and step-by-step instructions, it can be easily accomplished. By following the tips provided in this blog post, you can ensure a smooth and successful installation.
Remember to prioritize safety and consult a professional if you encounter any difficulties. Happy switching!