To install a dimmer switch, follow these steps: Turn off the power, remove the existing switch, connect the dimmer wires to the corresponding wires in the electrical box, and secure the dimmer switch in place. Adding a dimmer switch allows you to adjust the brightness of your lights, creating a more comfortable and cozy atmosphere in your home.
With a few simple steps, you can easily install a dimmer switch and enjoy the flexibility it offers in controlling the lighting in your space. In this guide, we will walk you through the process of installing a dimmer switch, ensuring a smooth and efficient installation.
So, let’s get started!
Understanding Dimmer Switches
Dimmer switches have become increasingly popular in homes and businesses. These versatile devices allow you to control the brightness of your lights, creating the perfect ambiance for any occasion. Understanding how dimmer switches work and the benefits they offer can help you make an informed decision when installing one in your space. Additionally, knowing the different types of dimmer switches available in the market ensures that you choose the right one for your needs.
What is a dimmer switch and how does it work?
A dimmer switch is an electrical device that lets you adjust the brightness of a light bulb. Unlike traditional switches, which only offer on or off options, a dimmer switch provides a range of light intensities. It works by altering the amount of electricity flowing to the light bulb, hence changing its brightness. This is achieved through a process called pulse-width modulation (PWM), where the dimmer switch rapidly turns the electrical current on and off, adjusting the average power delivered to the light.
Benefits of using dimmer switches
Installing dimmer switches in your space comes with several benefits:
- Energy savings: By reducing the brightness of your lights, dimmer switches can help you conserve energy and lower your electricity bills. Dimming the lights by just 10% can result in around 10% savings in energy consumption.
- Extended bulb lifespan: Dimming the lights can also increase the lifespan of your light bulbs. Lowering the intensity of the electrical current can reduce the strain on the filament, resulting in less frequent bulb replacements.
- Mood and ambiance: Dimmer switches allow you to set the perfect mood for any occasion. Whether you want bright lighting for a lively gathering or soft, warm lighting for a cozy evening, dimmer switches give you the flexibility to create the desired ambiance.
- Improved comfort and aesthetics: With dimmer switches, you can easily adjust the lighting to suit your comfort level and enhance the aesthetics of your space. From bright task lighting for reading or cooking to a soft glow for movie nights, dimmer switches offer versatile lighting options.
Different types of dimmer switches available in the market
When it comes to choosing a dimmer switch for your space, you’ll find various options available in the market. The type of dimmer switch you select will depend on factors such as the type of lighting fixture, your personal preferences, and the compatibility with your electrical system. Here are some common types of dimmer switches:
| Type of Dimmer Switch | Description |
|---|---|
| Rotary Dimmer Switch | A traditional knob or dial that rotates to adjust the brightness. These switches are easy to install and operate. |
| Toggle Dimmer Switch | Similar to a standard switch, but with the ability to toggle the lights on and off, as well as adjust the brightness. |
| Slide Dimmer Switch | Features a slider that moves horizontally to control the brightness. Slide dimmer switches provide precise adjustments and are often used in contemporary settings. |
| Tap Dimmer Switch | Activated by tapping or pressing the dimmer switch surface. These switches are convenient and can be easily controlled with a light touch. |
| Smart Dimmer Switch | Offers advanced features such as voice control, smartphone app compatibility, and remote accessibility. Smart dimmer switches utilize technology like Wi-Fi or Zigbee to provide a seamless lighting experience. |
Choosing the right dimmer switch involves considering factors such as the electrical load it can handle, compatibility with dimmable LED or CFL bulbs, and the aesthetics that best match your space. Consulting with an electrician or researching the specific requirements for each type of dimmer switch can help you make an informed decision.
Now that you have a better understanding of dimmer switches, their benefits, and the different types available, you can confidently proceed with your dimmer switch installation. With the ability to adjust the lighting to suit your needs, you’ll have greater control over the ambiance and energy consumption in your space.
Preparing For Installation
Before you start installing a dimmer switch, it’s important to prepare yourself and your surroundings for a safe and successful installation. This will not only ensure that the process goes smoothly, but also that you’re taking the necessary precautions to avoid any potential accidents. In this section, we’ll discuss the tools and materials required for installation, as well as the essential step of switching off the power supply and removing the existing switch cover and switch.
Tools and Materials Required for Installation
Here is a list of the tools and materials you’ll need to have on hand before you can begin installing a dimmer switch:
| Tools | Materials |
|---|---|
| Screwdriver (flathead or Phillips, depending on the switch) | Dimmer switch |
| Pliers | Wire nuts |
| Voltage tester | Electrical tape |
| Wire stripper/cutter | Marker or pen |
| Wire connectors |
Gathering all these tools and materials in advance will save you time and help you stay organized throughout the installation process.
Switching off the Power Supply
Before working with any electrical component, it’s crucial to turn off the power supply to ensure your safety. Here’s how you can do it:
- Locate the circuit breaker box in your home.
- Open the circuit breaker box cover.
- Locate the breaker that controls the power supply to the area where you’ll be installing the dimmer switch.
- Flip the breaker switch to the “off” position.
- Use a voltage tester to double-check that the power has indeed been switched off.
Remember, safety should always be your top priority when working with electricity.
Removing the Existing Switch Cover and Switch
Now that you’ve switched off the power supply, you can proceed with removing the existing switch cover and switch. Follow these steps:
- Using a screwdriver, unscrew the screws securing the switch cover in place.
- Set aside the switch cover and screws in a safe location.
- Hold the switch firmly and unscrew the screws connecting it to the electrical box.
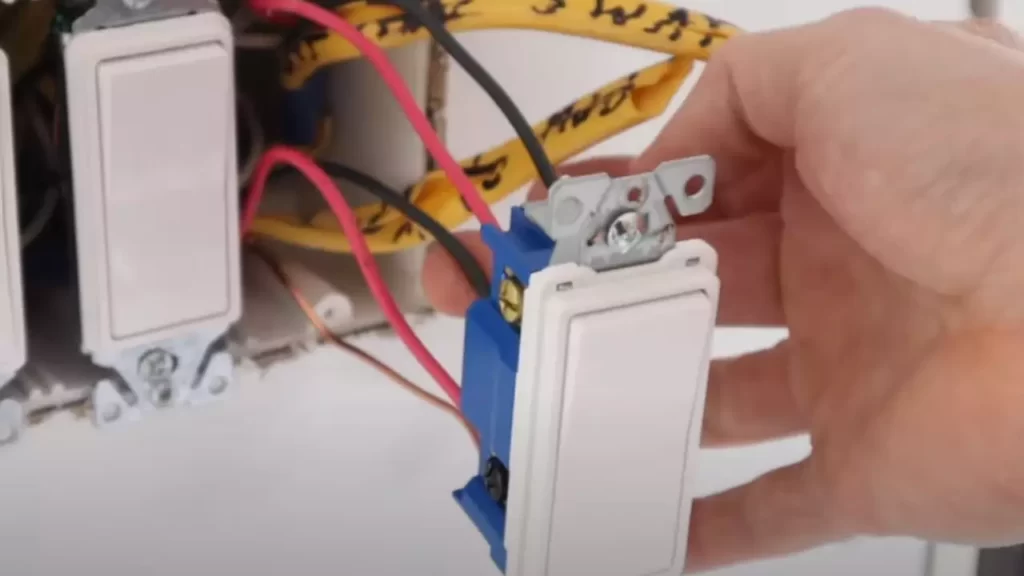
- Carefully pull the switch away from the box, exposing the wires.
- If necessary, use pliers to disconnect any wire connectors connecting the switch to the wires.
By properly removing the existing switch cover and switch, you’re now ready to move on to the next steps of the dimmer switch installation process.
Installing The Dimmer Switch
Identifying the correct wires and labeling them
Before beginning the installation process, it is crucial to identify the correct wires and label them appropriately. This will help ensure a smooth and hassle-free installation of your dimmer switch. First, cut off the power supply to the circuit at the main electrical panel, and then use a non-contact voltage tester to confirm that the power is indeed off. Once you’ve done that, follow these steps to identify and label the wires:
- Separate the wires: Carefully separate the wires coming out of the wall box, and untwist the wire nuts.
- Identify the hot wire: The hot wire will be connected to the switch’s black screw terminal. Use a voltage tester to identify the wire that carries electrical current. Typically, it will be black or red in color.
- Identify the neutral wire: The neutral wire is usually white or gray in color. It is connected to the switch’s silver screw terminal.
- Identify the ground wire: The ground wire is usually green or bare copper in color. It is connected to the switch’s green screw terminal or the grounding screw in the wall box.
- Label the wires: Use masking tape or wire labels to mark each wire with its corresponding function for easy identification later on.
Once you have successfully identified and labeled the wires, you can move on to the next step of connecting them to the dimmer switch.
Connecting the wires to the dimmer switch
Now that you have identified and labeled the wires, it’s time to connect them to the dimmer switch. Follow these steps for a safe and secure connection:
- Strip the wire insulation: Use wire strippers to carefully strip off about half an inch of insulation from each wire.
- Connect the hot wire: Connect the hot wire, identified earlier as the one connected to the switch’s black screw terminal, to the dimmer switch’s black screw terminal. Make sure the connection is tight and secure.
- Connect the neutral wire: Connect the neutral wire, which is usually white or gray in color, to the dimmer switch’s silver screw terminal. Again, ensure the connection is tight and secure.
- Connect the ground wire: Connect the ground wire, typically green or bare copper, to the dimmer switch’s green screw terminal or the grounding screw in the wall box. This connection is vital for safety reasons.
With the wires now connected to the dimmer switch, you’re ready to move on to the next step of mounting the switch onto the wall.
Mounting the dimmer switch onto the wall
Mounting the dimmer switch onto the wall is a straightforward process. Ensure you have the necessary tools and follow these steps:
- Prepare the wall box: Remove the existing switch by unscrewing the screws that hold it in place. Clean the wall box, ensuring there are no loose wires or debris.
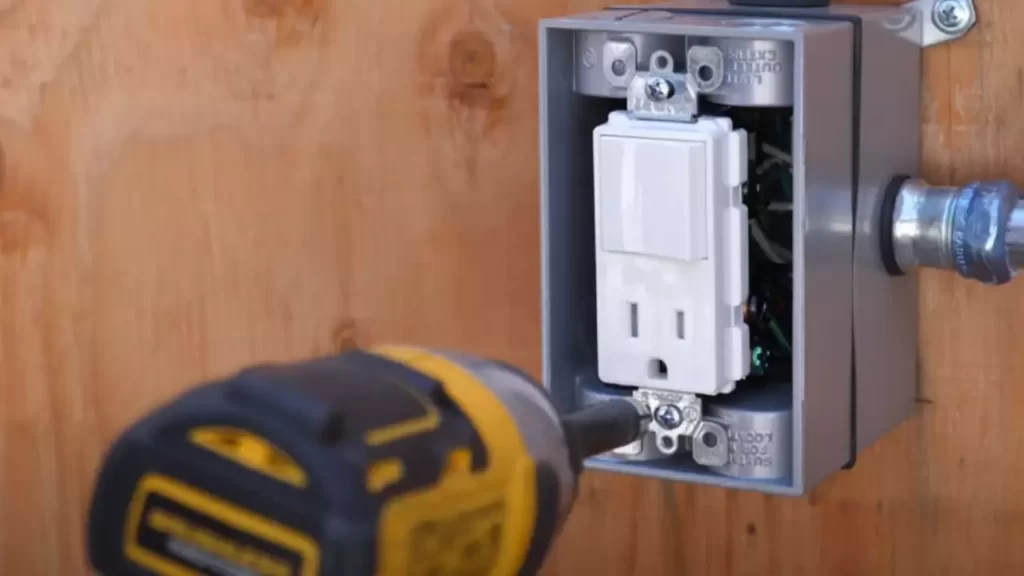
- Place the dimmer switch: Gently insert the dimmer switch into the wall box, positioning it so that the screw holes align with the holes in the box.
- Screw the switch in place: Use screws provided with the dimmer switch or ones that are suitable for your wall box type. Tighten the screws securely, but be careful not to overtighten and damage the switch or wall box.
Congratulations! The dimmer switch is now securely mounted onto the wall. The final step is to install the dimmer switch cover, completing the installation process.
Installing the dimmer switch cover
The dimmer switch cover not only provides a finished look to your installation but also offers protection. Follow these simple steps to install the dimmer switch cover:
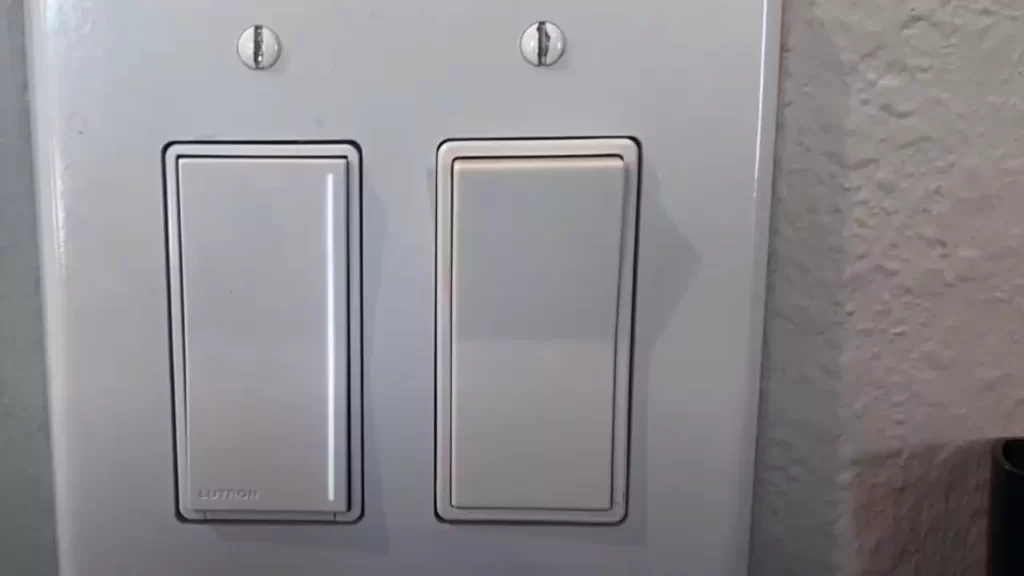
- Align the cover with the switch: Place the dimmer switch cover over the mounted switch, ensuring it aligns properly.
- Screw the cover in place: Use the screws provided with the dimmer switch cover to attach it securely. Tighten the screws just enough so that the cover sits flush against the wall without any gaps.
And there you have it! The dimmer switch is now fully installed and ready to enhance the ambience of your space. Remember to restore power to the circuit at the main electrical panel and test the dimmer switch to ensure it’s functioning properly.
Testing And Troubleshooting
Installing a dimmer switch can greatly enhance the ambiance and convenience of your home lighting. However, before enjoying the benefits of dimmable lighting, it’s important to test and troubleshoot the installation to ensure everything is working properly. In this section, we will guide you through the essential steps of testing the power supply, adjusting the dimmer switch settings, and troubleshooting common issues that may arise. With these tips, you’ll be able to have smooth control over your lighting and create the perfect atmosphere for any occasion.
Turning on the power supply and testing the dimmer switch
After successfully installing the dimmer switch, the first step is to turn on the power supply. Locate the circuit breaker or fuse for the lighting circuit and switch it on. Once the power is restored, it’s time to check the dimmer switch functionality.
- Turn on the lights using the dimmer switch and ensure they light up smoothly. If they flicker or fail to turn on, double-check the wiring connections to ensure they are secure and properly connected.
- If the lights turn on, test the dimming functionality. Gradually adjust the dimmer switch to different levels and observe the lights. They should respond smoothly, with no flickering or sudden changes in brightness.
- If the lights do not dim or behave erratically, it could be due to incompatible bulbs. Some types of bulbs, such as certain LED or fluorescent lights, may not be compatible with all dimmer switches. Refer to the manufacturer’s specifications or consult a professional if necessary.
Adjusting the dimmer switch settings
Once you have verified that the dimmer switch is functioning properly, you may want to adjust its settings to suit your preferences and the type of lighting in your space. Most dimmer switches offer customizable options:
- Minimum and maximum brightness levels: Some dimmer switches allow you to adjust the lowest and highest brightness levels. This can be useful if you want to avoid completely turning off the lights or if you want to limit the maximum brightness.
- Ramp rate: The ramp rate determines how quickly the lights transition from one brightness level to another. You can adjust this setting to make the changes smoother or faster, depending on your preference.
- On/off fade: This feature controls how the lights fade in or out when you turn them on or off. You can set a gradual fade to create a gentle transition or a quick fade for a more immediate effect.
Refer to the dimmer switch manufacturer’s instructions to learn how to access and adjust these settings. Experiment with different configurations until you find the perfect lighting experience for your space.
Common troubleshooting tips and solutions
Despite proper installation and testing, issues with dimmer switches can still occur. Here are some common problems you may encounter, along with their possible solutions:
| Issue | Possible Solution |
|---|---|
| Lights flickering at low dimming levels | Replace the current dimmer switch with one specifically designed for low-wattage lighting fixtures or switch to compatible LED bulbs. |
| Noisy dimmer switch | Inspect the switch for loose connections and make sure it is securely mounted. If the noise persists, consider replacing the dimmer switch. |
| Lights not turning on/off | Check the wiring connections to ensure they are secure. If the issue persists, consult an electrician to assess the circuit or the dimmer switch itself. |
Remember, if you encounter any difficulties or are unsure about any aspect of the installation or troubleshooting process, it’s always best to consult a professional electrician for assistance. They have the expertise to ensure a safe and efficient dimmer switch installation.
Safety Precautions
In any electrical installation process, safety should be the topmost priority. Installing a dimmer switch may seem like a simple task, but it involves working with electrical wires and connections, which can be hazardous if not done correctly. To ensure a secure and functioning dimmer switch installation, it is crucial to follow the necessary safety guidelines.
Importance of following safety guidelines during installation
Following safety guidelines during the installation of a dimmer switch is of utmost importance. This ensures not only your personal safety but also the safety of your home and its electrical system. By adhering to the proper safety precautions, you can minimize the risk of electrical accidents, such as electrical shocks, fires, or short circuits.
Handling electrical wires and connections safely
When it comes to working with electrical wires and connections, it is essential to take extra precautions. Here are some safety tips to consider:
- Turn off the power: Before starting any electrical work, ensure that the power to the specific circuit is turned off. This can be done by switching off the corresponding circuit breaker in your electrical panel.
- Use appropriate protective gear: It is essential to wear safety goggles and insulated gloves to protect yourself from any potential electrical hazards.
- Inspect the wires: Before touching any wires, visually inspect them for any signs of damage, such as fraying, exposed copper, or discoloration. If you notice any issues, it is advisable to replace the wires instead of proceeding with the installation.
- Avoid contact with live wires: Even when the power is turned off, always treat electrical wires as if they are live. Ensure that your hands are dry and avoid touching any exposed wires.
Tips for ensuring a secure and functioning dimmer switch installation
To ensure that your dimmer switch installation is secure and functioning properly, consider the following tips:
- Read the instruction manual: Familiarize yourself with the manufacturer’s instructions before starting the installation process. This will help you understand the specific requirements and steps for your dimmer switch model.
- Choose the right dimmer switch: Make sure you select a dimmer switch that is compatible with the type of light bulbs you are using. Different types of bulbs may require specific dimmer switches to operate correctly.
- Properly wire the dimmer switch: Take your time to correctly wire the dimmer switch following the manufacturer’s guidelines or consulting a professional electrician if needed. Incorrect wiring can lead to malfunctions or even damage to the switch.
- Test the dimmer switch: After the installation is complete, test the dimmer switch functionality by gradually dimming and brightening the lights. This will ensure that the switch is working correctly and the lights are responding as expected.
By following these safety precautions and tips, you can install a dimmer switch with confidence, providing you with the desired lighting control while maintaining a safe electrical environment in your home.
Frequently Asked Questions
Installing a dimmer switch can be a great way to enhance the ambiance of your room and save energy. However, before you begin the installation process, you may have a few questions in mind. In this section, we will address some frequently asked questions about installing a dimmer switch.
Can I install a dimmer switch on any light fixture?
Yes, in most cases, you can install a dimmer switch on any light fixture. Whether it’s a ceiling light, a chandelier, or a wall sconce, dimmer switches are compatible with a wide range of fixtures. However, it’s important to check the manufacturer’s specifications to ensure compatibility. Some light fixtures, such as certain fluorescent or recessed lighting, may require specific dimmer switches.
What are the potential risks of installing a dimmer switch?
While installing a dimmer switch is a relatively straightforward process, it’s important to be aware of potential risks. One of the main risks is overloading the dimmer switch with higher wattage lights or bulbs. This can cause the switch to overheat and potentially lead to electrical hazards. It’s essential to follow the manufacturer’s instructions and choose a dimmer switch that is compatible with the wattage of your lights.
Can I use a dimmer switch with LED bulbs?
Yes, dimmer switches are compatible with LED bulbs, and they offer a great way to control the brightness of your LED lights. However, not all LED bulbs are compatible with dimmer switches, so it’s crucial to look for dimmable LED bulbs specifically. Additionally, make sure the dimmer switch you choose is designed for use with LED bulbs to ensure optimal performance and to prevent flickering or humming.
Are dimmer switches compatible with all types of electrical systems?
Dimmer switches can typically be used with most types of electrical systems, including both 120-volt and 240-volt systems. However, it’s important to note that some older electrical systems may not be compatible with dimmer switches. If you have an older home or are unsure about the compatibility of your electrical system, it’s recommended to consult a qualified electrician before installing a dimmer switch.
Frequently Asked Questions
Can You Install Your Own Dimmer Switch?
Yes, you can install your own dimmer switch. It’s a DIY task that requires some electrical knowledge. Make sure to turn off the power, follow the instructions carefully, and check the compatibility with your light bulbs. If you’re unsure, it’s best to consult a licensed electrician.
Do You Need An Electrician To Install A Dimmer Switch?
Yes, it is recommended to hire an electrician to install a dimmer switch for safety and proper installation. A professional electrician has the knowledge and expertise to wire and connect the switch correctly, ensuring it functions as intended and meets electrical safety standards.
How Do You Wire A Dimmer Switch?
To wire a dimmer switch, you need to turn off the power, remove the old switch, connect the wires to the new dimmer, and screw it back into place. Ensure the wires are connected properly and secure. Finally, turn the power back on to test the dimmer switch.
Can You Put A Dimmer Switch On A Regular Outlet?
No, you cannot put a dimmer switch on a regular outlet. Dimmer switches are designed to control the light intensity of compatible light fixtures, not outlets.
Conclusion
Installing a dimmer switch is a simple and effective way to customize the lighting in your home. With the proper tools and following the step-by-step instructions outlined in this blog post, you’ll be able to control the brightness of your lights with ease.
It’s a cost-effective solution that adds ambience and functionality to any room. So, don’t hesitate to upgrade your lighting and enjoy a more customizable environment.