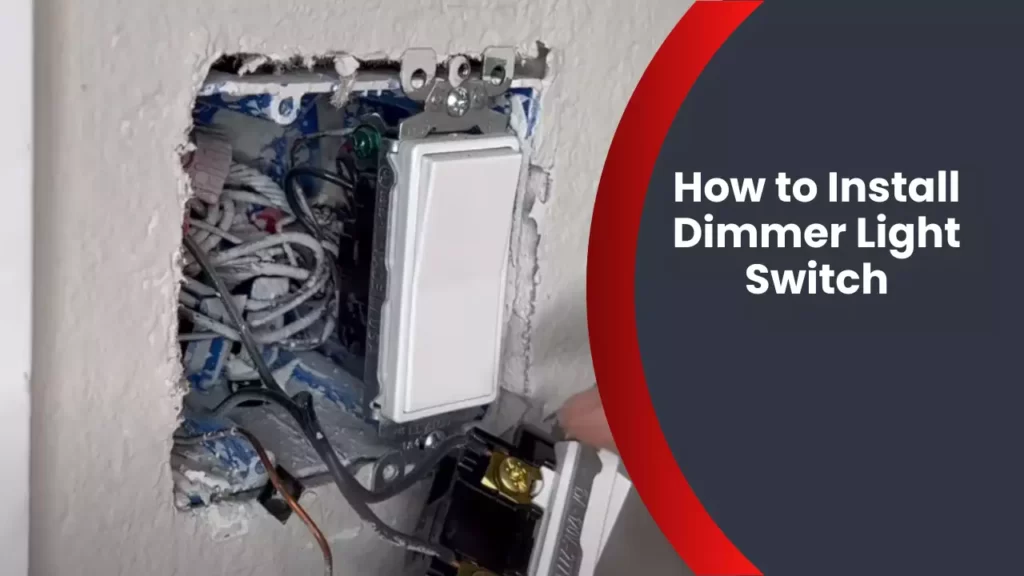
To install a dimmer light switch, turn off the power, remove the old switch, connect the dimmer wires to the house wiring, and attach the dimmer switch to the wall box. Installing a dimmer light switch is a simple process that allows you to control the brightness of your lights.
Follow these steps to install a dimmer light switch in your home.
Understanding The Benefits Of Dimmer Light Switches
Dimmer light switches are a fantastic addition to any home. Not only do they offer convenience and flexibility when it comes to controlling your lighting, but they also provide a range of benefits that can enhance your overall living environment. In this section, we will explore why upgrading to a dimmer light switch is a wise decision and the impact it can have on energy consumption.
Why Upgrade to a Dimmer Light Switch?
There are several compelling reasons to upgrade to a dimmer light switch in your home. Let’s take a closer look at the key advantages:
- Adjustable Lighting Levels: With a dimmer light switch, you can easily adjust the brightness of your lights according to your needs and preferences. Whether you want to create a cozy ambiance in the evenings or need brighter lighting for a task, a dimmer switch allows you to customize the lighting level to suit any situation.
- Enhanced Mood and Atmosphere: Lighting plays a crucial role in setting the mood and atmosphere of a room. Dimmer switches offer the flexibility to create the perfect ambiance for any occasion, whether it’s a romantic dinner, a movie night, or a relaxing evening at home. The ability to dim the lights not only adds visual appeal but also creates a more inviting and comfortable space.
- Extended Bulb Life: By reducing the amount of electricity flowing through the bulbs, dimmer switches help extend the lifespan of your light bulbs. When lights are dimmed, their filaments aren’t subjected to the same level of stress as when they are at full brightness. This not only saves you money on replacement bulbs but also reduces the environmental impact of disposing of old bulbs.
- Energy Efficiency: Dimmer switches are an excellent way to reduce energy consumption and lower your electricity bills. By lowering the brightness level, you use less electricity, which translates into savings over time. Choosing a dimmer switch with energy-saving features can further maximize energy efficiency in your home.
- Flexibility and Control: Installing a dimmer switch gives you greater control over your lighting, allowing you to tailor the brightness to your specific needs. This versatility can be especially useful in areas like the living room, bedroom, or dining room, where different activities require different lighting levels. Dimmer switches provide the flexibility to adapt the lighting to various tasks or occasions.
- Easy Installation: Upgrading to a dimmer light switch is a straightforward process that can be done by most homeowners. With just a few simple steps, you can transform the lighting in your home and enjoy the benefits that dimmer switches offer.
The Impact of Dimmer Light Switches on Energy Consumption
Dimmer light switches not only provide aesthetic and functional benefits but also have a positive impact on energy consumption. Here’s how:
| Energy Saving | Explanation |
|---|---|
| Bulb Life Extension | Dimming the lights reduces the stress on the bulbs, resulting in longer bulb lifespan and reduced replacement frequency. |
| Reduced Electricity Usage | Dimming the lights decreases the amount of electricity used, leading to lower energy consumption and reduced electricity bills over time. |
| Environmental Impact | By lowering energy consumption, dimmer light switches contribute to reducing carbon footprint and promote sustainable living. |
Upgrade to a dimmer switch today and experience the numerous benefits it brings, from adjustable lighting levels and enhanced atmosphere to energy efficiency and improved control. Not only will you enjoy a more inviting living space, but you’ll also make a positive impact on your energy consumption and the environment.
Choosing The Right Dimmer Light Switch
Installing a dimmer light switch is a great way to enhance the ambiance in any room and gain control over the brightness of your lighting. However, choosing the right dimmer light switch can seem overwhelming with the plethora of options available in the market. To help you make an informed decision, this section will guide you through the factors to consider before buying a dimmer light switch, explore the different types available, and explain the importance of understanding their compatibility.
Factors to Consider Before Buying a Dimmer Light Switch
Before heading to the store or making an online purchase, it’s important to take a few factors into account to ensure you choose a dimmer light switch that suits your needs and preferences. These considerations may include:
- Dimmable Bulbs: Not all bulbs are dimmable, so it’s crucial to check the type of bulbs you have or plan to install. LED, CFL, incandescent, and halogen bulbs are the most commonly dimmable options.
- Wattage Compatibility: Each dimmer switch has a specific wattage rating, indicating the maximum load it can handle. Make sure the switch you choose is compatible with the total wattage of the bulbs in the circuit.
- Single-Pole or Three-Way Switch: Determine whether you need a single-pole or three-way switch. A single-pole switch controls the light from one location, while a three-way switch allows control from multiple locations.
- Design and Aesthetics: Consider the design and aesthetics of the dimmer switch to ensure it complements your room’s decor. There are various styles and finishes available, such as traditional, modern, or decorative.
Different Types of Dimmer Light Switches Available
Dimmer light switches come in different types, each offering unique features and functionalities. Let’s explore some of the most common types:
| Type | Description |
|---|---|
| Rocker Switch | A simple, easy-to-use switch that turns the lights on and off with a rocking motion. |
| Slide Dimmer | Features a sliding mechanism to adjust the brightness, allowing you to set the lighting level precisely. |
| Toggle Dimmer | Works similarly to a regular toggle switch but has a built-in dimmer function to control the brightness. |
| Touch Dimmer | Utilizes touch-sensitive technology to adjust the brightness level by simply touching the switch. |
Understanding the Compatibility of Dimmer Light Switches
To ensure the smooth operation of your dimmer light switch, it’s crucial to understand its compatibility with your existing electrical system. Some key points to consider:
- LED Compatibility: If you plan to install dimmable LED bulbs, make sure the switch is specifically designed for LED bulbs or compatible with them.
- Minimum Load Requirement: Certain dimmer switches have a minimum load requirement, which is the minimum wattage needed to operate correctly. Ensure your bulbs meet this requirement to prevent potential flickering or buzzing issues.
- Neutral Wire: Determine whether your electrical setup has a neutral wire. Some dimmer switches require a neutral wire connection for proper functioning.
- Dimming Range: Check the dimming range capability of the switch, which indicates the lowest and highest light levels it can achieve. This is particularly important if you desire a wide range of brightness options.
By considering these compatibility factors, you can ensure a seamless integration of your dimmer light switch into your electrical system.
Now that you have a better understanding of the factors to consider before buying a dimmer light switch, the different types available, and the importance of compatibility, you can confidently choose the right dimmer switch for your lighting needs. So go ahead, enhance your home’s lighting experience and create the perfect ambiance with the perfect dimmer light switch.
Installing A Dimmer Light Switch: Tools And Materials Needed
Looking to add some ambiance to your living space? Installing a dimmer light switch is a simple and effective way to control the brightness of your lights. Whether you want to create a cozy atmosphere in your bedroom or adjust the lighting in your dining room for a romantic dinner, a dimmer light switch allows you to easily set the mood. In this article, we will walk you through the necessary tools and materials needed for a successful dimmer light switch installation, ensuring you have everything you need to get started.
Essential Tools for Installing a Dimmer Light Switch
Before you begin installing a dimmer light switch, it’s important to gather all the necessary tools. Having these tools on hand will make the installation process much smoother and save you time and frustration. Here are the essential tools you’ll need:
- Flathead screwdriver: This versatile tool is essential for removing the existing light switch plate and attaching the dimmer switch. It allows you to easily loosen and tighten screws, providing a secure connection.
- Wire cutters/strippers: To ensure a proper electrical connection, you will need wire cutters or strippers to trim and expose the ends of the wires. This will allow you to connect them to the dimmer switch securely.
- Voltage tester: Safety is paramount when working with electrical wiring. A voltage tester helps you determine if the power is properly shut off before you begin your installation. It ensures your safety by detecting the presence of electricity in the wires.
- Pliers: Pliers are useful for twisting wires together, ensuring a secure connection. They also provide a firm grip when tightening screws.
- Electrical tape: Electrical tape is used to insulate and protect wire connections. It helps prevent the risk of electrical shock or short circuits. Make sure to use high-quality electrical tape to ensure a reliable and long-lasting connection.
Materials Required for a Successful Installation
Now that you have the necessary tools, let’s take a look at the materials you’ll need for a successful dimmer light switch installation:
- Dimmer light switch: Choose a dimmer switch that is compatible with your lights. Consider the wattage and type of bulbs you’ll be using to ensure compatibility. There are various types of dimmer switches available, including rotary, toggle, and slide switches.
- Wire nuts: Wire nuts are used to securely connect the wires together. They provide insulation and prevent the wires from coming loose.
- Screwdriver: In addition to a flathead screwdriver, you may need a Phillips screwdriver to remove and attach the switch plate, depending on the type of screws used.
- Wire connectors: Wire connectors, also known as wire caps or wire nuts, are used to connect the wires together. They provide a secure and reliable connection, ensuring the safe operation of the dimmer switch.
- Pencil and paper: Before you begin the installation, it’s helpful to sketch a diagram or take notes of the existing wiring configuration. This will help you reconnect the wires correctly after removing the old switch.
Safety Precautions to Take Before Starting
Before you start your dimmer light switch installation, it’s important to take certain safety precautions to protect yourself and your home. Here are some essential safety tips to keep in mind:
- Turn off the power: Ensure that the power is completely shut off at the circuit breaker before you begin. This will prevent the risk of electrical shock.
- Double-check the power: Use a voltage tester to verify that there is no electrical current running through the wires. Safety should always be your top priority.
- Use insulated tools: Working with electricity requires insulated tools to minimize the risk of shock. Avoid using any damaged or worn-out tools that could compromise your safety.
- Follow the manufacturer’s instructions: Every dimmer switch may have specific installation instructions provided by the manufacturer. Make sure to read and follow these instructions carefully.
- Ask for professional help if needed: If you are uncomfortable working with electrical wiring or unsure about any aspect of the installation process, it’s always best to seek assistance from a qualified electrician.
Now that you have an understanding of the tools, materials, and safety precautions required for installing a dimmer light switch, you are ready to proceed with the installation process. In the next section, we will guide you step-by-step through the installation process, ensuring a successful outcome.

Step 1: Turn Off Power Supply
When it comes to installing a dimmer light switch, the first and most important step is to turn off the power supply. This ensures both your safety and the integrity of your electrical system. In this step-by-step guide, we will walk you through the process of turning off the power supply, ensuring a smooth installation of your dimmer light switch.
Locating the Correct Circuit Breaker
The first thing you need to do is locate the correct circuit breaker. This will allow you to turn off the power supply to the affected area without disrupting the electricity in other parts of your home. To locate the correct circuit breaker, follow these steps:
- Start by finding your home’s electrical panel or breaker box. This is usually located in the basement, garage, or utility room.
- Open the breaker box door and look for a diagram or labeling system that indicates which circuit breaker corresponds to the area where you will be installing the dimmer light switch.
- If there is no diagram or labeling system, you can identify the correct circuit breaker by following these steps:
- Turn on the light switch that controls the affected area.
- Ask a friend or family member to help you by yelling out when the light turns off.
- Stand near the circuit breaker box and begin flipping the switches one by one until your helper calls out that the light has turned off.
- When the light turns off, you have located the correct circuit breaker.
Switching Off the Power to the Affected Area
Once you have located the correct circuit breaker, it’s time to switch off the power to the affected area. Follow these steps to ensure the power is completely turned off:
- Position yourself near the circuit breaker box and ensure you have a clear view of the switches.
- Identify the switch that corresponds to the circuit breaker you located previously, and make sure it is in the “On” position.
- With caution, firmly push the switch to the “Off” position. You should hear a click, indicating that the power to the affected area has been cut off.
- Double-check that the power has been successfully turned off by attempting to turn on the lights or any other electrical devices in the affected area.
By following these steps, you have successfully turned off the power supply to the affected area. This ensures a safe environment for the installation of your new dimmer light switch. In the next step, we will guide you through the process of removing the existing light switch and preparing for the installation of the dimmer switch.
Step 2: Remove The Old Light Switch
In order to install a dimmer light switch, you’ll first need to remove the old light switch. This step-by-step guide will walk you through the process with ease. Follow these simple instructions to get started:
Removing the Faceplate
The first thing you need to do is remove the faceplate from the old light switch. This is usually held in place by a screw in the center of the faceplate. Use a screwdriver to loosen and remove the screw, and then carefully pull the faceplate away from the wall. Set it aside for later use.
Disconnecting the Wires from the Old Switch
Once you’ve removed the faceplate, you’ll need to disconnect the wires from the old light switch. Start by turning off the power to the switch at the main circuit breaker. This is an essential safety precaution to avoid any accidents or electrical shocks.
Next, take a look at the old switch. You’ll see several wires connected to it. Using a voltage tester or a multimeter, verify that the power is indeed off before proceeding. Once you’ve confirmed that it’s safe to continue, use a screwdriver to loosen and remove the screws holding the wires in place.
Take note of the wire colors and their positions on the old switch. This will be important when connecting the wires to the new dimmer switch. If necessary, you can use a piece of tape to label each wire to ensure you remember which one goes where.
After removing the screws, gently pull the wires away from the old switch. Carefully untangle them and ensure they are not touching each other or any other nearby objects. This will prevent any potential electrical hazards.
At this point, you have successfully completed the second step of installing a dimmer light switch. You can now continue to the next step, which is installing the new switch.
Step 3: Prepare The Dimmer Switch
Once you have all the necessary tools and materials ready, it’s time to prepare the dimmer switch for installation. This step involves familiarizing yourself with the dimmer switch components, adjusting the dimmer switch settings, and wiring the dimmer switch correctly. Let’s dive right into it!
Familiarizing Yourself with the Dimmer Switch Components
Before you begin, it’s important to understand the various components of the dimmer switch. By doing so, you’ll have a clear idea of how it works and how to handle it properly. Here are the key components you should be familiar with:
- Dimmer Knob: The dial or slider that allows you to control the brightness of the lights.
- Faceplate: The cover that goes over the dimmer switch, often available in various colors and designs to match your home decor.
- Wire terminals: The connection points on the dimmer switch where the electrical wires will be secured.
- Screw holes: The holes on the dimmer switch used to secure it to the electrical box.
Take a moment to familiarize yourself with these components before moving on to the next step. This will ensure a smoother installation process.
Adjusting the Dimmer Switch Settings
Before you install the dimmer switch, you may need to adjust its settings to meet your specific requirements. Since dimmer switches come with different features and options, it’s essential to customize them accordingly. Here’s how you can do it:
- Check the user manual: Refer to the user manual provided by the manufacturer to understand the specific settings and adjustments available for your dimmer switch model.
- Set the maximum brightness: Adjust the dimmer switch settings to set the maximum brightness level that suits your lighting needs. This will ensure you have the desired brightness range when using the dimmer switch.
- Enable or disable additional features: Depending on your dimmer switch model, you may have extra features such as fade-on/fade-off, night light mode, or timer settings. Customize these options according to your preferences.
By adjusting the dimmer switch settings beforehand, you can optimize its functionality and make it work perfectly for your needs.
Wiring the Dimmer Switch for Installation
Properly wiring the dimmer switch is crucial to ensure its safe and effective operation. Follow these steps to wire the dimmer switch correctly:
- Turn off the power: Always start by turning off the power supply to the circuit you’ll be working on. This will prevent any electrical accidents.
- Remove the existing switch: Carefully remove the existing switch from the electrical box by unscrewing the mounting screws. Disconnect the wires from the switch.
- Attach the wires: Connect the dimmer switch’s wires to the corresponding wires in the electrical box. Usually, this involves matching the colored wires (black to black, white to white, and ground to ground).
- Secure the dimmer switch: Once the wires are connected, push the dimmer switch into the electrical box and secure it in place using the provided screws.
- Install the faceplate: Finally, snap the faceplate onto the dimmer switch, ensuring it fits securely and aligns properly with the switch.
Double-check all the connections to ensure they are secure and tight. Once you are confident in the wiring, you can proceed to the next steps of installation.
With the dimmer switch properly prepared, you’re now ready to move on to installation. In the next step, we will guide you on how to mount the dimmer switch into the electrical box. Stay tuned!
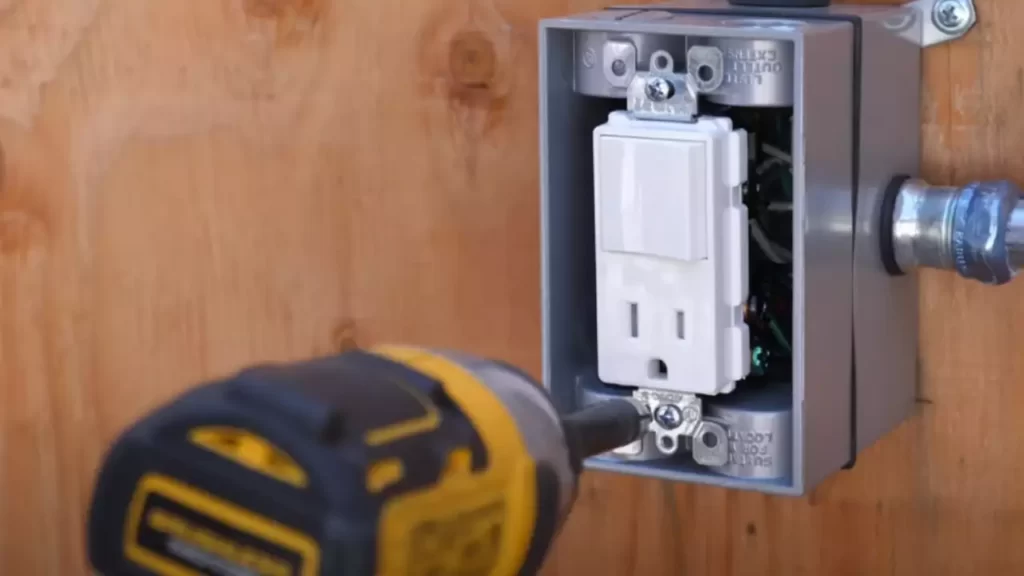
Step 4: Installation And Wiring
After preparing the electrical box and removing the old switch, it’s time to move on to the installation and wiring of your dimmer light switch. This crucial step involves connecting the dimmer switch wires to the electrical box wires, securing the dimmer switch to the electrical box, and insulating the connection with wire nuts. Let’s dive into each of these tasks in detail.
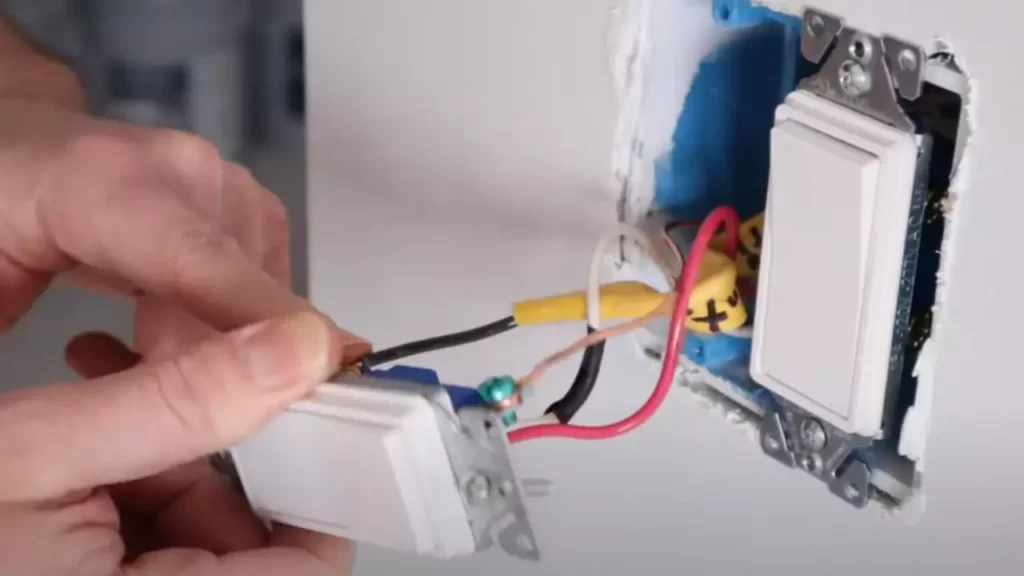
Connecting the Dimmer Switch Wires to the Electrical Box Wires
To ensure a safe and reliable connection, you need to connect the dimmer switch wires to the electrical box wires correctly. Start by identifying the wire labeled “load” on your dimmer switch, which carries power to the lighting fixture. Connect this wire to the wire in your electrical box that leads to the light. It’s essential to make a solid connection by twisting the ends of the wires together clockwise using pliers. Once connected, secure the connection with a wire nut and gently push the wires into the electrical box.
Securing the Dimmer Switch to the Electrical Box
Now that you have connected the wires, it’s time to secure the dimmer switch to the electrical box. Align the switch’s screw holes with the corresponding holes in the box and use the screws provided with the switch to fasten it in place. Ensure that the switch is well-aligned and level before tightening the screws fully. A firm and secure attachment will prevent any loose connections and ensure the switch stays in place.
Insulating the Connection with Wire Nuts
To further enhance safety and protect the wire connections, it’s essential to insulate them using wire nuts. Begin by twisting the wire nut over the connected wires, ensuring they are fully covered, and the nut fits snugly in place. This insulation prevents accidental contact with live wires, reducing the risk of electrical shocks or damage to the switch. Inspect the connections to make sure there are no exposed wires or loose nuts, as these can lead to potential hazards.
Remember, the installation and wiring process requires precision and attention to detail. Taking the time to connect the dimmer switch wires correctly, securing the switch tightly, and insulating the connections adequately will guarantee a safe and efficient dimmer light switch installation.
Step 5: Testing The Dimmer Light Switch
Now that you have successfully installed the dimmer light switch, it is essential to test its functionality to ensure everything is working as intended. In this step, we will cover two key aspects of testing: restoring the power supply and checking the functionality of the dimmer switch.
Restoring the Power Supply
Once the installation is complete, you will need to restore the power supply to the switch. Here’s a step-by-step guide on how to do it:
- Locate the circuit breaker panel in your house. It is usually situated in the basement, garage, or utility room.
- Open the panel cover using a screwdriver or by pressing the release latch.
- Find the circuit breaker that corresponds to the room where you installed the dimmer switch.
- Switch the circuit breaker to the “On” position to restore power to the switch.
Once the power supply is restored, you can move on to testing the functionality of the dimmer switch.
Checking the Functionality of the Dimmer Switch
Now that the power supply is on, it’s time to check if the dimmer switch is working properly. Follow these steps to test its functionality:
- Turn on the light fixture connected to the dimmer switch by flipping the switch on.
- Gradually move the dimmer switch slider up and down to see if the light intensity changes accordingly. Observe if the transition is smooth without any flickering or buzzing sounds.
- Test the switch at different light levels to ensure it can dim the light as desired.
- If your dimmer switch has additional features like preset scenes or multiple switches controlling the same light fixture, test those functionalities as well.
If you experience any issues during this testing phase, double-check the installation steps and consult the manufacturer’s instructions. It is crucial to ensure the dimmer switch is functioning correctly to enjoy the benefits of adjustable lighting in your space.
By following these crucial steps, you can confidently install and test a dimmer light switch in your home. Enjoy the flexibility and ambiance that dimmer switches offer, creating the perfect lighting atmosphere for any occasion.
Troubleshooting Common Issues With Dimmer Light Switches
Dimmer light switches are a popular choice for homeowners wanting to control the ambiance and brightness of their lighting. However, like any electrical component, they can sometimes experience issues that require troubleshooting. In this section, we will explore and offer solutions to common problems you may encounter when installing dimmer light switches.
Dimmer Switch Not Working Properly
One of the most frustrating issues with dimmer light switches is when they stop working properly. If your dimmer switch doesn’t respond or is behaving erratically, there are a few potential causes and solutions to consider:
- Check the wiring connections: Ensure that all the wiring connections to the dimmer switch are secure and tightly fastened. Loose connections can lead to intermittent functionality or complete failure.
- Verify compatibility: Dimmer switches are designed for specific types of lighting, such as incandescent, LED, or halogen bulbs. Make sure that your dimmer switch is compatible with the type of lighting you have installed. Using the wrong dimmer switch can result in issues like flickering or buzzing.
- Assess the load: Dimmer switches are rated for specific wattage loads. If your lighting setup exceeds the maximum load capacity of the dimmer switch, it can cause issues. Check the wattage of your bulbs and ensure they are within the recommended range for your dimmer switch.
Lights Flickering or Buzzing
One common problem you might encounter with dimmer light switches is flickering or buzzing lights. These issues can be attributed to several factors, and here are a few troubleshooting steps to address them:
- Use compatible bulbs: Different types of dimmer switches require specific types of bulbs. Using the wrong bulbs can result in flickering or buzzing lights. Check the dimmer switch’s compatibility guidelines and make sure your bulbs are appropriate.
- Replace incompatible bulbs: If you’ve recently switched to LED bulbs and are experiencing flickering or buzzing, it may be due to incompatibility with your dimmer switch. Consider replacing them with LED bulbs that are specifically labeled as dimmable.
- Inspect the wiring: Loose or faulty wiring can cause flickering or buzzing. Ensure all the wiring connections are secure and properly installed. If necessary, consult a qualified electrician to inspect and fix any wiring issues.
Overheating Dimmer Switches and Safety Concerns
Another potential issue you may encounter with dimmer light switches is overheating. While dimmer switches are designed to dissipate heat, excessive heat buildup can be a safety concern. Here are a few steps you can take to address overheating dimmer switches:
- Reduce the load: Dimmer switches have a maximum load rating, and exceeding this limit can lead to overheating. If you have multiple high-wattage bulbs connected to a single dimmer switch, consider reducing the load by using fewer bulbs or installing additional dimmer switches.
- Upgrade to a higher-rated dimmer switch: If you consistently experience overheating with your current dimmer switch, consider upgrading to a higher-rated model. A dimmer switch with a higher wattage capacity will better handle the load, reducing the risk of overheating.
- Inspect for proper ventilation: Dimmer switches require proper ventilation to dissipate heat effectively. Ensure that the switch is installed in a location with adequate airflow and not obstructed by objects or covered by plates that limit ventilation.
By troubleshooting these common issues with dimmer light switches, you can ensure optimal performance and enjoy the convenience and ambiance they offer. Remember, if you are unsure about any electrical work, it’s always best to consult a qualified electrician for assistance.
Frequently Asked Questions
Can You Install Your Own Dimmer Switch?
Yes, you can install your own dimmer switch. It’s simple and doesn’t require professional help. Just follow the instructions provided with the switch and ensure that you turn off the power before installation. With a few easy steps, you’ll have a dimmer switch installed and ready to use.
Do You Need An Electrician To Install A Dimmer Switch?
No, an electrician is not necessary for installing a dimmer switch. You can safely install a dimmer switch yourself.
How Do You Wire A Dimmer Light Switch?
To wire a dimmer light switch, follow these steps: 1. Turn off power to the circuit at the breaker box. 2. Remove the old switch and disconnect the wires. 3. Connect the dimmer switch’s black wire to the circuit’s black wire using a wire connector.
4. Connect the dimmer switch’s green or bare copper wire to the circuit’s ground wire. 5. Connect the dimmer switch’s red wire to the circuit’s black wire leading to the light fixture.
Can You Install A Dimmer Switch On Any Outlet?
No, you cannot install a dimmer switch on any outlet. Dimmer switches are only compatible with certain types of lighting fixtures. It’s important to check the compatibility before attempting to install a dimmer switch to ensure it will function properly and safely.
Conclusion
To wrap up, installing a dimmer light switch is a simple and effective way to enhance the lighting in your home. By following the step-by-step instructions provided in this guide, even novice DIYers can successfully complete this project. Remember to prioritize safety, turn off the power, and read the manufacturer’s instructions before getting started.
With a dimmer light switch, you can effortlessly adjust the ambiance and mood of any room, creating a cozy and inviting atmosphere. So go ahead and give it a try – you’ll be amazed at the difference it makes!