To install crown molding on a vaulted ceiling, start by measuring and cutting the molding to fit the desired length, then secure it to the ceiling using adhesive and brad nails.
Understanding The Basics Of Crown Molding Installation
Understanding the Basics of Crown Molding Installation
When it comes to adding elegance and charm to your vaulted ceilings, crown molding is a surefire way to achieve a polished look. Installing crown molding on a vaulted ceiling may seem like a daunting task, but with the right tools and a basic understanding of the process, you can achieve professional results. In this section, we will break down the basics of crown molding installation, including the types of crown molding suitable for vaulted ceilings, the tools and materials needed, and how to measure and calculate the amount of crown molding required for your project.
Types of Crown Molding Suitable for Vaulted Ceilings
Before diving into the installation process, it’s important to choose the right type of crown molding for your vaulted ceiling. Not all crown molding is suitable for sloped ceilings, as the angles and curves can pose a challenge. When selecting crown molding, consider flexible options such as polyurethane or light-density fiberboard (LDF) moldings. These materials can easily bend and conform to the contours of your vaulted ceiling, allowing for a seamless installation. Additionally, opt for crown molding with a simple profile, as intricate designs may be difficult to install and detract from the overall aesthetic.
Tools and Materials Needed for the Installation
To ensure a successful installation, gather the necessary tools and materials beforehand. Here is a list of what you will need:
1. Crown molding: Measure the perimeter of your room and purchase enough crown molding to cover the entire length.
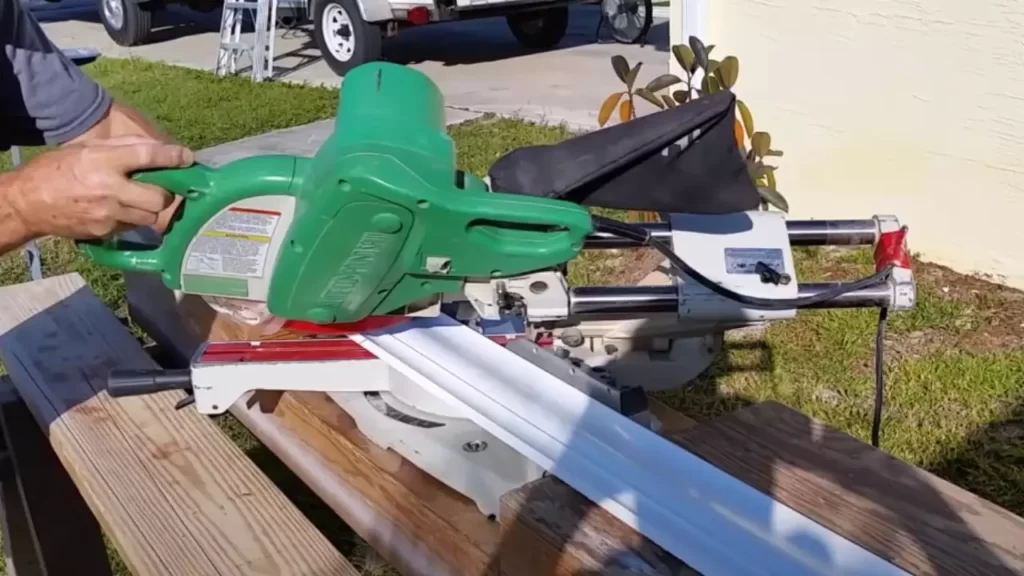
2. Miter saw: A miter saw is essential for making accurate cuts at the correct angles.
3. Corner blocks: Corner blocks provide an easy and elegant solution for joining crown molding at corners.
4. Construction adhesive: Use construction adhesive to secure the crown molding to the ceiling.
5. Wood putty: Fill any gaps or nail holes with wood putty for a seamless finished look.
6. Measuring tape and pencil: Measure and mark the crown molding lengths and angles accurately.
7. Nail gun or finishing nails: Use a nail gun or finishing nails to secure the crown molding in place.
Measuring and Calculating the Amount of Crown Molding Required
Before starting the installation process, take precise measurements to determine the amount of crown molding needed. Begin by measuring the perimeter of the room, accounting for any breaks or gaps where the molding will not be installed. Next, calculate the angle of your vaulted ceiling using a protractor or angle finder. This angle will be crucial for making precise cuts when installing the molding. Once you have the perimeter and angle measurements, add a little extra to account for any mistakes or waste.
To calculate the linear footage of crown molding required, add the lengths of each wall together. Divide this total by the length of the crown molding you have chosen, and round up to the nearest whole number. This will give you an estimate of how many linear feet of crown molding you need to purchase.
Understanding the basics of crown molding installation is the first step towards achieving a flawless look on your vaulted ceilings. By choosing the right type of crown molding, gathering the necessary tools and materials, and accurately measuring and calculating the amount required, you are well on your way to transforming your space into a stunning masterpiece. Stay tuned for the next section, where we will delve into the step-by-step process of installing crown molding on a vaulted ceiling.
Preparing The Vaulted Ceiling For Crown Molding Installation
When it comes to installing crown molding on a vaulted ceiling, proper preparation is key to achieving a seamless and professional-looking result. Preparing the vaulted ceiling for crown molding installation involves several important steps that will ensure a flawless finish. In this section, we will guide you through the process of inspecting the ceiling, cleaning the surface, and applying a primer or sealant to enhance adhesion.
Inspecting the ceiling for any imperfections or damage
Before you begin installing crown molding on a vaulted ceiling, it is crucial to inspect the ceiling for any imperfections or damage. Ensure that the ceiling is structurally sound and free from cracks, holes, or any other issues that may affect the installation process. Look for any signs of water damage, such as discoloration or sagging, as this could indicate underlying issues that need to be addressed.
If you find any imperfections or damage on the ceiling, it is important to repair them before proceeding with the crown molding installation. Fill any cracks or holes with a suitable filler and allow it to dry completely. Sand the repaired areas to create a smooth surface that will ensure the crown molding adheres properly.
Cleaning the ceiling surface and removing any debris
Once you have inspected the ceiling and made any necessary repairs, the next step is to clean the surface thoroughly. Remove any dust, dirt, or debris that may have accumulated on the ceiling. This can be done using a vacuum cleaner with a soft brush attachment or a microfiber cloth.
Pay special attention to the corners and edges of the ceiling, as these areas tend to collect more dirt and dust. Ensure that the entire ceiling surface is free from any contaminants that may hinder the adhesion of the crown molding.
Applying a primer or sealant to enhance adhesion
After cleaning the ceiling surface, it is recommended to apply a primer or sealant to enhance the adhesion of the crown molding. A primer will create a smooth and even surface, improving the bonding between the molding and the ceiling.
Choose a primer or sealant that is suitable for the type of ceiling material you have. Apply the primer according to the manufacturer’s instructions, ensuring an even and consistent coverage. Allow the primer to dry completely before proceeding with the crown molding installation.
Step-By-Step Guide To Installing Crown Molding On A Vaulted Ceiling
Step-by-Step Guide to Installing Crown Molding on a Vaulted Ceiling
Installing crown molding on a vaulted ceiling can add a touch of elegance and sophistication to any room. However, the process can be a bit challenging, particularly if you are not familiar with the steps involved. In this step-by-step guide, we will walk you through the process of installing crown molding on a vaulted ceiling to ensure a seamless fit and professional-looking finish.
Determining the starting point and angle for the first piece of molding
Before you start installing crown molding on a vaulted ceiling, it is crucial to determine the starting point and the angle for the first piece of molding. The starting point is usually where the vertical wall meets the ceiling.
Here’s how you can determine the starting point and angle for the first piece of molding:
- Measure the length of the wall where the molding will be installed.
- Divide the length of the wall by the length of the molding to determine the number of pieces needed.
- Use a protractor to measure and mark the angle where the molding will meet the vertical wall.
Cutting the crown molding at the correct angles for a seamless fit
The key to achieving a seamless fit when installing crown molding on a vaulted ceiling lies in cutting the molding at the correct angles. This step can be tricky, but with some precision and the right tools, you can achieve a professional-looking result.
Follow these steps to cut the crown molding at the correct angles:
- Place the molding upside down on the miter saw.
- Set the miter saw to the appropriate angle, matching the angle determined in the previous step.
- Make the cut, ensuring that the molding is securely held in place throughout the process.
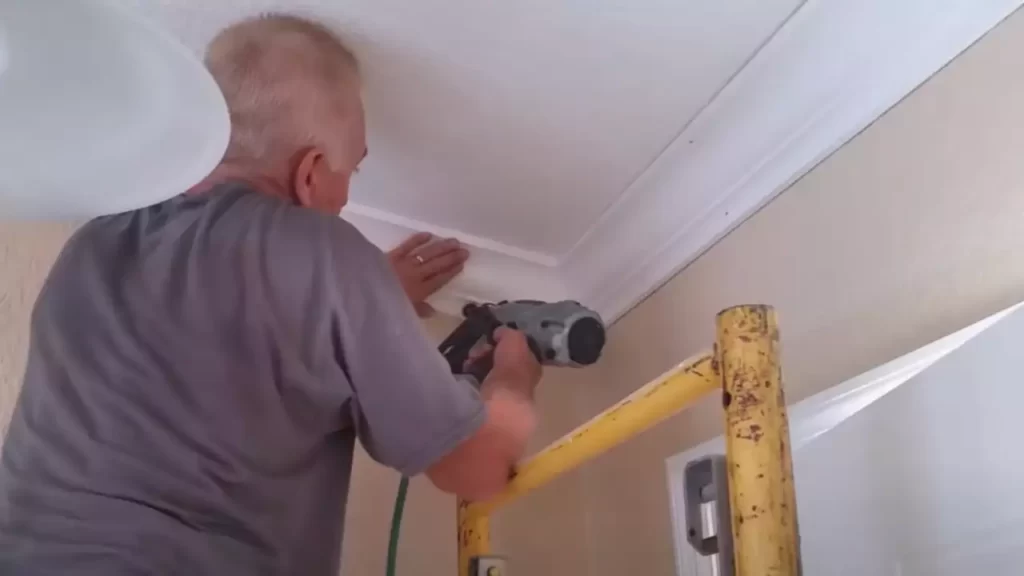
Installing the first piece securely using adhesive and nails
Once you have cut the first piece of crown molding, it’s time to install it securely on the vaulted ceiling. This step will provide the foundation for the rest of the installation process.
Here’s how you can install the first piece securely using adhesive and nails:
- Apply a thin, even layer of adhesive to the back of the molding.
- Press the molding firmly against the ceiling, ensuring it is aligned with the starting point and angle.
- Secure the molding in place by driving nails through the molding and into the ceiling joists.
Continuing the installation process, fitting each subsequent piece of molding
With the first piece of crown molding securely installed, you can now continue the installation process by fitting each subsequent piece in place. It is essential to ensure a seamless transition between each piece to maintain the overall aesthetic appeal.
Follow these steps to fit each subsequent piece of molding:
- Measure and cut each piece of molding carefully, taking into account any corners, angles, or junctions.
- Apply adhesive to the back of the molding and press it firmly against the ceiling, aligning it with the previous piece.
- Secure the molding with nails as before, making sure they are driven into the ceiling joists for maximum stability.
Dealing with corners, angles, and junctions in the vaulted ceiling
Installing crown molding on a vaulted ceiling often involves working with corners, angles, and junctions. These areas can be challenging to navigate, but with some patience and careful measuring, you can achieve a professional finish.
Here are some tips for dealing with corners, angles, and junctions:
- Measure each corner or junction carefully to ensure the molding is cut at the correct angle.
- Use a coping saw or miter saw to make precise cuts for a seamless fit.
- Remember to account for any additional angles created by the vaulted ceiling.
Mitigating any gaps or inconsistencies in the crown molding
Even with careful cutting and installation, there may be some gaps or inconsistencies in the crown molding. These can be mitigated to ensure a polished and professional finish.
To mitigate any gaps or inconsistencies in the crown molding, consider the following:
- Use wood putty or caulk to fill in any small gaps between the molding pieces or between the molding and the ceiling or wall.
- Sand down any rough edges or uneven surfaces for a smooth finish.
- Apply a final coat of paint or stain to enhance the overall appearance and to hide any imperfections.
With this step-by-step guide, you should now be well-equipped to install crown molding on a vaulted ceiling. Remember to take your time, measure carefully, and ensure a secure installation for a professional and visually stunning result.
Tips And Tricks For A Professional-Looking Crown Molding Installation
When it comes to installing crown molding on a vaulted ceiling, there are a few tips and tricks you can utilize to achieve a professional-looking result. These techniques will help you navigate the challenges posed by sloped surfaces and create a seamless and polished finish. In this section, we will explore four important aspects of crown molding installation: creating miter joints for seamless corners, using coping saw techniques for complex angles and curves, sanding and filling any gaps or imperfections in the crown molding, and priming and painting the crown molding for a finished look. Additionally, we will discuss the importance of applying caulk to achieve a seamless transition between the molding and ceiling. Let’s dive in!
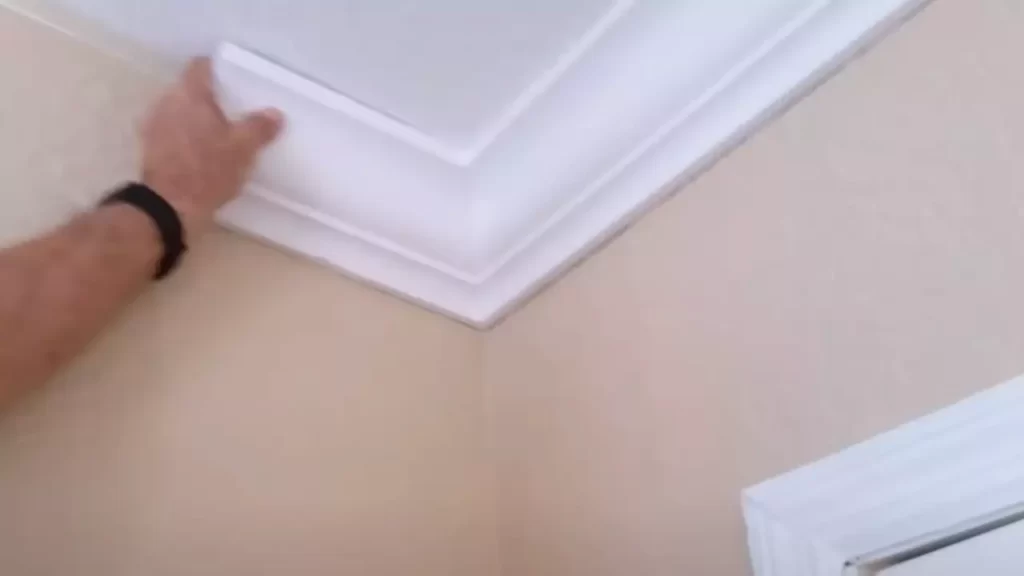
Creative miter joints for seamless corners
Creating seamless corners is essential for a professional-looking crown molding installation. Miter joints are the key to achieving this result. To create miter joints, follow these step-by-step instructions:
- Start by measuring the wall angles accurately to determine the required angles for the corners.
- Use a miter saw to cut the molding at a 45-degree angle for inside corners or a 90-degree angle for outside corners.
- Ensure that the lengths of the molding pieces align perfectly and fit snugly together, creating a seamless joint.
- Apply wood glue to the mitered ends and secure them with finishing nails for added stability.
Using coping saw techniques for complex angles and curves
Complex angles and curves on a vaulted ceiling can pose a challenge during crown molding installation. However, with the use of a coping saw, you can tackle these obstacles effectively. Follow these steps to utilize coping saw techniques:
- First, cut the molding at a 45-degree angle using a miter saw as mentioned earlier.
- Next, use a coping saw to carefully remove the excess wood from the backside of the molding, following the contour of the curve or angle.
- This technique allows the molding to fit snugly against the wall, creating a seamless and professional look.
Sanding and filling any gaps or imperfections in the crown molding
After installing the crown molding, it’s important to thoroughly inspect it for any gaps or imperfections. To ensure a professional finish, follow these steps for sanding and filling:
- Use fine-grit sandpaper to smooth out any rough edges, ensuring a uniform surface.
- Inspect the molding for any gaps or visible imperfections. Fill these areas with wood filler, using a putty knife, and allow it to dry completely.
- Once dry, sand the filled areas lightly to achieve a seamless and smooth surface.
- Wipe off any excess dust or debris before proceeding to the next step.
Priming and painting the crown molding for a finished look
Now that the crown molding is smooth and free from imperfections, it’s time to prime and paint it for a polished appearance. Follow these steps for a professional finish:
- Start by applying a coat of primer to the entire surface of the crown molding. This will help the paint adhere better and provide a consistent base for the color.
- Allow the primer to dry completely before applying the paint color of your choice.
- Using a high-quality paintbrush or paint sprayer, apply an even coat of paint to the crown molding, ensuring full coverage.
- Allow the paint to dry between coats and apply additional coats as necessary to achieve the desired color and finish.
Applying caulk to achieve a seamless transition between the molding and ceiling
To achieve a seamless transition between the crown molding and the vaulted ceiling, it is essential to apply caulk. Follow these steps for a professional and finished look:
- Carefully apply caulk along the top edge of the crown molding, where it meets the ceiling. Use a caulk gun for precise application.
- Smooth the caulk with a damp cloth or your finger to create a seamless transition and remove any excess.
- Allow the caulk to dry completely before finishing the installation process.
By following these tips and tricks, you can achieve a professional-looking crown molding installation on a vaulted ceiling. From creating miter joints for seamless corners to using coping saw techniques for complex angles and curves, sanding and filling imperfections, priming and painting, and applying caulk for a seamless transition, these steps will help you create an elegant and polished finish. Take your time, follow the instructions diligently, and enjoy the transformation of your vaulted ceiling with beautiful crown molding.
Troubleshooting Common Issues During Crown Molding Installation
Installing crown molding on a vaulted ceiling can transform the overall look of a room, adding elegance and charm. However, like any home improvement project, crown molding installation can come with its fair share of challenges. In this section, we will address some of the most common issues that arise during crown molding installation on vaulted ceilings and provide practical solutions to overcome them.
Dealing with uneven or sloping vaulted ceilings
One of the major challenges when installing crown molding on a vaulted ceiling is dealing with uneven or sloping surfaces. This can lead to gaps between the molding and the ceiling, resulting in an unprofessional and unfinished appearance. Thankfully, there are several strategies to overcome this issue:
- Measure the angle of the slope accurately: Use a digital angle finder to measure the slope of the ceiling at various points. This will help you determine the right angle for cutting the crown molding.
- Create custom templates: Cut templates out of cardboard or scrap wood to match the surface contours of the ceiling. These templates can then be used to transfer the accurate measurements onto the crown molding for precise cuts.
- Use shims for leveling: If you encounter uneven surfaces, especially near corners or sloping areas, consider using shims to level the crown molding. Place the shims behind the molding at strategic points to fill any gaps and create a seamless installation.
- Sand, caulk, and blend: Once the crown molding is installed, sand any rough edges or surfaces to create a smooth finish. Then, use a paintable caulk to fill in any remaining gaps or cracks. Finally, paint the molding to match the ceiling or trim color for a cohesive look.
Fixing gaps or cracks in the crown molding joints
Gaps or cracks in the joints of crown molding can significantly diminish the overall appearance of the installation. Luckily, there are easy ways to fix these issues:
- Check for proper cutting angles: Ensure that the compound miter cuts for the molding are precise and accurate. Misaligned cuts can lead to gaps at the joints.
- Use wood filler for minor gaps: For small gaps, apply a high-quality wood filler that matches the color of the molding. Fill the gaps carefully, following the manufacturer’s instructions, and sand away any excess filler once dry.
- Consider corner blocks or rosettes: If the gaps in the joints persist despite your best efforts, using corner blocks or decorative rosettes can be an effective solution. These decorative elements not only cover gaps but also add an aesthetic touch to the overall crown molding design.
Addressing issues with the adhesion of the crown molding to the ceiling
Another common issue during crown molding installation is the adhesion of the molding to the ceiling. If the molding does not adhere properly, it can sag or even fall off. Here are some tips to improve adhesion:
- Prep the surface: Ensure that both the molding and the ceiling are clean and free from dust, dirt, or any other contaminants. This will provide a better surface for adhesion.
- Use suitable adhesives: Depending on the type of molding material and the ceiling surface, choose an adhesive that provides strong bonding while being compatible with both surfaces.
- Apply consistent pressure: Once the adhesive is applied, firmly press the molding against the ceiling, applying consistent pressure along its entire length. This will help create a strong bond.
- Support with nails or screws: In addition to adhesive, consider using finishing nails or screws to secure the crown molding in place. Remember to countersink the nails or screws and fill the holes for a seamless finish.
Repairing damaged or chipped crown molding sections
During installation, crown molding can sometimes get damaged or chipped. Here’s what you should do:
- Assess the damage: Identify the extent of the damage, whether it’s a minor chip or a larger section that needs repair.
- Use wood filler or epoxy putty: For minor chips or cracks, use a suitable wood filler or epoxy putty to fill in the damaged area. Follow the manufacturer’s instructions for application and drying time.
- Sand and blend: Once the filler or putty is dry, carefully sand the repaired area to create a smooth surface. Then, paint or stain the crown molding to match the rest of the installation.
- Consider replacing severely damaged sections: In cases where the damage is extensive, it may be necessary to replace the affected sections of the crown molding. Measure, cut, and install the replacement sections following the same techniques used for initial installation.
By troubleshooting these common issues during crown molding installation on vaulted ceilings, you can ensure a successful and visually appealing outcome. Remember to take your time, follow the guidelines, and seek professional help if needed. With patience and attention to detail, you can create a stunning crown molding installation that enhances the beauty of your vaulted ceiling.
Final Steps And Maintenance For Crown Molding On A Vaulted Ceiling
Cleaning and maintaining the crown molding regularly
One of the key aspects of keeping your crown molding on a vaulted ceiling looking pristine is regular cleaning and maintenance. As with any decorative feature in your home, dust and dirt can gradually accumulate on the molding’s intricate details, detracting from its overall beauty. To prevent this, I recommend following a simple cleaning routine.
Firstly, gather a soft microfiber cloth, a mild soap, and warm water. Mix a small amount of soap with the water in a bucket or container. Take the cloth and dip it into the soapy solution, making sure to wring out any excess liquid.
Next, gently wipe down the crown molding, starting from one end and working your way to the other. Be thorough in your cleaning, paying special attention to any hard-to-reach areas or crevices. This way, you’ll remove any accumulated dust or grime and restore the molding’s original luster.
Remember to dry the crown molding completely after cleaning. You can use another dry microfiber cloth to ensure that no moisture is left behind. This step is crucial because any lingering dampness can lead to the growth of mold or mildew, which could damage the wood or paint.
Touching up any paint chips or imperfections over time
Over time, your crown molding on a vaulted ceiling may experience minor wear and tear, such as paint chips or small imperfections. Thankfully, these issues can be easily fixed with a little touch-up work.
To begin, examine the molding closely, identifying any areas where the paint is chipped or damaged. You’ll want to address these spots promptly to prevent further deterioration. If the damage is minimal, you can use a small artist’s brush or a clean, fine-tipped paintbrush to carefully touch up the affected areas with matching paint.
However, if the paint damage is more extensive, it may be necessary to repaint the entire section of the crown molding. In this case, take note of the paint color and finish used previously to ensure a seamless blend. Prepare the area by sanding down any rough edges or irregularities before applying the new coat of paint.
Remember, a well-maintained crown molding not only enhances the aesthetics of a room but also protects the underlying structure. Taking the time to address paint chips and imperfections will prolong the overall lifespan of your crown molding.
Enhancing the longevity of the crown molding through proper care and maintenance
Proper care and maintenance are vital for ensuring the longevity of your crown molding on a vaulted ceiling. While regular cleaning and touch-up work contribute to this factor, there are a few additional steps you can take to protect your molding investment.
Firstly, be cautious when placing or moving furniture near the crown molding. Accidental bumps or scrapes can cause significant damage, leading to the need for repairs or replacements. Consider adding furniture pads or protective bumpers to prevent accidental contact.
Additionally, maintain a consistent indoor climate within your home. Extreme temperature changes or high levels of humidity can negatively impact the crown molding, causing it to warp or crack. Use a dehumidifier if necessary to control excess moisture in the air, especially in rooms with vaulted ceilings.
Finally, inspect the molding periodically for signs of wood damage or pest infestations. Insufficient ventilation or hidden water leaks can create optimal conditions for mold growth or attract wood-damaging insects. Should you notice any issues, consult with a professional to address the problem promptly.
By following these final steps and implementing proper care and maintenance, you can ensure that your crown molding on a vaulted ceiling remains in impeccable condition for years to come.
Frequently Asked Questions
Can You Put Crown Molding In A Room With A Vaulted Ceiling?
Yes, crown molding can be installed in a room with a vaulted ceiling. By using flexible molding materials, it can be installed to follow the contours of the ceiling. Professional installation is recommended for best results.
What Angle Do You Cut Crown Molding On A Vaulted Ceiling?
Cutting crown molding on a vaulted ceiling requires an angle of 45 degrees. Make sure to measure and mark accurately for a precise cut.
How Do You Install Crown Molding On An Angled Ceiling?
To install crown molding on an angled ceiling, follow these steps: 1. Measure and cut the crown molding according to the slope angle. 2. Use a stud finder or nails to locate the wall studs for secure installation. 3. Apply adhesive to the back of the molding and press it firmly against the wall.
4. Use finish nails to secure the molding along the wall studs. 5. Fill any gaps or nail holes with wood filler and sand the surface for a smooth finish.
Should You Put Crown Molding On Slanted Ceiling?
Yes, crown molding can be installed on a slanted ceiling. It adds architectural interest and can visually connect the walls and ceiling. However, it requires careful measurement and installation to ensure a proper fit and appearance.
Conclusion
Installing crown molding on a vaulted ceiling can enhance the beauty and elegance of any space. By following these step-by-step instructions, you can successfully complete this challenging but rewarding DIY project. Remember to measure twice, cut carefully, and use the right tools for the job.
With a little patience and attention to detail, you’ll be able to achieve professional-looking results that will impress anyone who enters your home. So why wait? Start transforming your space today and enjoy the stunning impact of crown molding on your vaulted ceiling.