To install corner bead drywall, measure and cut the bead, apply joint compound to the corner, press the bead into place, and secure it with nails or screws. When the joint compound is dry, sand and finish the corner.
Welcome to our guide on how to install corner bead drywall! Whether you’re a DIY enthusiast or a professional contractor, knowing how to properly install corner bead is essential for achieving a seamless and professional-looking finish in your drywall project.
Corner bead is a metal or plastic strip that is attached to the corners of walls to protect them from damage and create a clean and straight edge. In this guide, we’ll walk you through the step-by-step process of installing corner bead, from measuring and cutting the bead to finishing and sanding the corner for a flawless result. Let’s dive in!
Understanding The Purpose And Benefits Of Corner Bead
Corner bead is an essential component when it comes to drywall installation. It not only enhances the overall look of the walls but also provides added protection and durability. Corner bead is a strip or piece of material that is specially designed to reinforce and protect the corners of drywall. It helps to create a smooth and straight edge, preventing any cracks or damage that may occur over time. In this section, we will delve into the various types of corner bead available and shed light on why it is necessary for a successful drywall installation.
Types of Corner Bead
When it comes to corner bead, there are three main types that are commonly used in drywall installation:
1. Metal Corner Bead: This is the most popular type of corner bead, made of galvanized steel or aluminum. Metal corner bead offers excellent strength and durability. It is resistant to cracking, denting, and warping, making it ideal for high-traffic areas or places prone to impact. The rigid structure of metal corner bead ensures a crisp and clean corner, giving your walls a professional finish.
2. Vinyl Corner Bead: Vinyl corner bead is a more flexible option compared to metal. It is made of PVC (Polyvinyl Chloride) and is ideal for curved or irregular corners. This type of corner bead is resistant to rust and corrosion, and it is easily cut and shaped according to the required dimensions. Vinyl corner bead is lightweight, cost-effective, and easy to install, making it a popular choice among DIY enthusiasts.
3. Paper-Faced Corner Bead: Paper-faced corner bead is a combination of metal and paper. It has a metal core that provides rigidity and strength, while the paper surface allows for easy finishing and blending with the surrounding drywall. This type of corner bead is perfect for achieving seamless transitions between walls and corners. Paper-faced corner bead is moisture-resistant and provides a smooth finish that can be easily painted or textured.
Why Corner Bead is Necessary for Drywall Installation
Corner bead plays a vital role in ensuring a successful drywall installation for several reasons:
1. Reinforcement: The primary purpose of corner bead is to reinforce the corners of drywall. Without corner bead, the corner edges of the drywall are more susceptible to cracks, chips, and damage. Corner bead provides strength and stability, preventing any structural issues and extending the lifespan of your walls.
2. Protection: Another benefit of corner bead is the added protection it offers. The corners of walls are prone to impact and accidental bumps, which can easily result in unsightly damage. Corner bead acts as a shield, absorbing the impact and preventing any cracks or dents from occurring.
3. Aesthetics: Corner bead ensures a clean and professional look for your walls. It helps to create a straight and smooth edge, giving your walls a polished appearance. With the right corner bead, you can achieve crisp corners that contribute to the overall visual appeal of your space.
4. Installation: Corner bead is designed to facilitate an easier and more efficient installation process. It provides a guide for applying joint compound or mud, allowing for a seamless and consistent finish. Additionally, corner bead helps to eliminate the need for excessive sanding and patching, saving time and effort in the long run.
In conclusion, corner bead is an essential component of drywall installation. It not only reinforces and protects the corners of the walls but also enhances the overall aesthetics of your space. Understanding the different types of corner bead available and why it is necessary for a successful drywall installation will help you achieve professional-looking walls that are durable and long-lasting.
Preparing For Corner Bead Installation
Before you can install corner bead on your drywall, it’s important to properly prepare the area. This involves gathering the necessary tools and materials, as well as measuring and cutting the corner bead to ensure a perfect fit. By following these steps, you’ll be well on your way to achieving a professional-looking finish for your drywall corners.
Gathering the necessary tools and materials
Having the right tools and materials on hand is essential when it comes to installing corner bead on your drywall. Here’s a list of everything you’ll need:
- Drywall corner bead
- Tape measure
- Hacksaw or tin snips
- Power drill
- Screwdriver
- Joint compound
- Putty knife
- Sanding sponge or sandpaper
- Painter’s tape (optional)
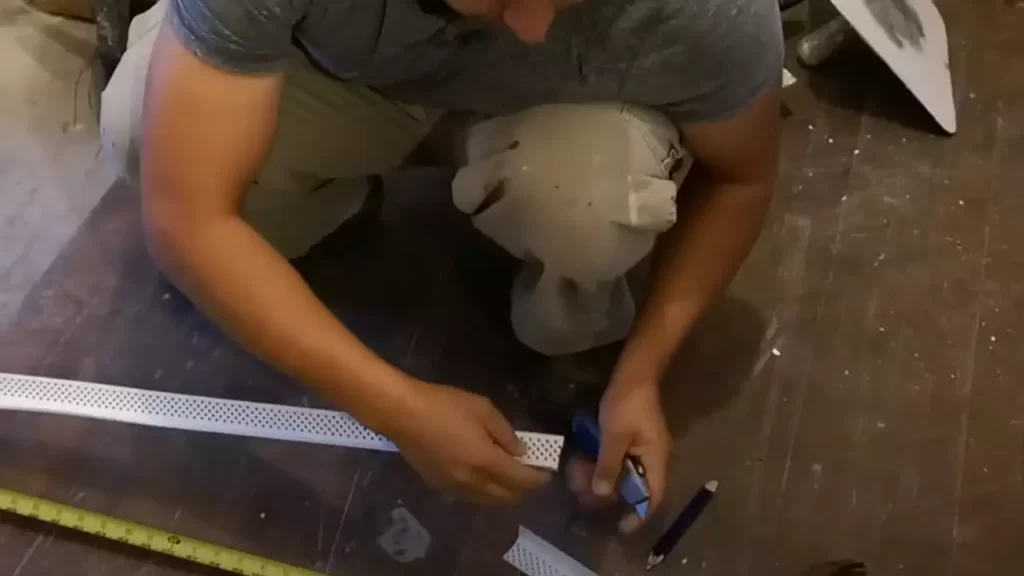
Measuring and cutting the corner bead
Once you have all your tools and materials ready, it’s time to measure and cut the corner bead to fit your drywall corners. Follow these steps:
- Begin by measuring the length of the corner where you’ll be installing the bead. Use a tape measure to accurately determine the length.
- Transfer the measurement onto the corner bead, marking the appropriate length with a pencil or a small piece of painter’s tape.
- Using a hacksaw or tin snips, carefully cut the corner bead along the marked line. Make sure to wear gloves to protect your hands from any sharp edges.
- Once you have the corner bead cut to size, hold it up against the corner to ensure a proper fit. Adjust the size if necessary.
Now that you have your corner bead prepared, you’re ready to move on to the installation process. Follow these steps carefully for a successful corner bead installation. Remember, taking the time to prepare and measure accurately will result in a professional finish for your drywall corners.
Step 1: Applying Joint Compound
When it comes to installing corner bead drywall, the first step is to apply joint compound along the corner. This is a crucial part of the process as it helps to secure the corner bead and create a smooth finish. In this step, we will go through the preparation of the joint compound and the application process. Let’s get started!
Preparing the joint compound
Before applying the joint compound, it’s essential to ensure that it’s properly prepared. Here are the steps to follow:
- Start by opening the joint compound container and give it a thorough stir using a mixing paddle or a paint stick. This will help to achieve a consistent texture throughout the compound.
- After stirring, check the consistency of the joint compound. It should be smooth and easy to spread, similar to a thick pancake batter. If the compound is too thick, add a small amount of clean water and mix well. On the other hand, if it’s too runny, you can add a bit more joint compound powder to thicken it up.
- Once the joint compound reaches the desired consistency, cover it with a plastic wrap or put the lid back on the container. This will prevent it from drying out while you work.
By properly preparing the joint compound, you ensure that it’s easy to work with and provides a strong bond with the corner bead.
Applying the first layer of joint compound along the corner
Now that the joint compound is ready, it’s time to apply the first layer along the corner. Here’s how:
- Start by using a putty knife or a drywall knife to scoop a small amount of joint compound onto the knife’s blade.
- Hold the knife at a 45-degree angle and begin applying the joint compound onto the corner bead. Start from the top and work your way down, ensuring that each stroke overlaps the previous one by around half an inch.
- Apply firm pressure on the knife to flatten the joint compound and create a smooth finish. Be careful not to press too hard, as this can cause the compound to squeeze out from under the corner bead.
- Continue applying the joint compound along the entire length of the corner bead, working in small sections at a time.
- Once the first layer is complete, allow it to dry completely before moving on to the next step. The drying time may vary depending on the temperature and humidity levels in your workspace.
Remember to take your time and ensure an even application of the joint compound. This will help to create a solid foundation for the subsequent layers and contribute to a professional-looking corner bead installation.
Step 2: Placing The Corner Bead
Now that you have prepared the joint compound in Step 1, it’s time to position the corner bead on the joint compound. Proper placement of the corner bead is crucial for achieving a seamless and professional-looking finish. Follow these steps to ensure accurate positioning.
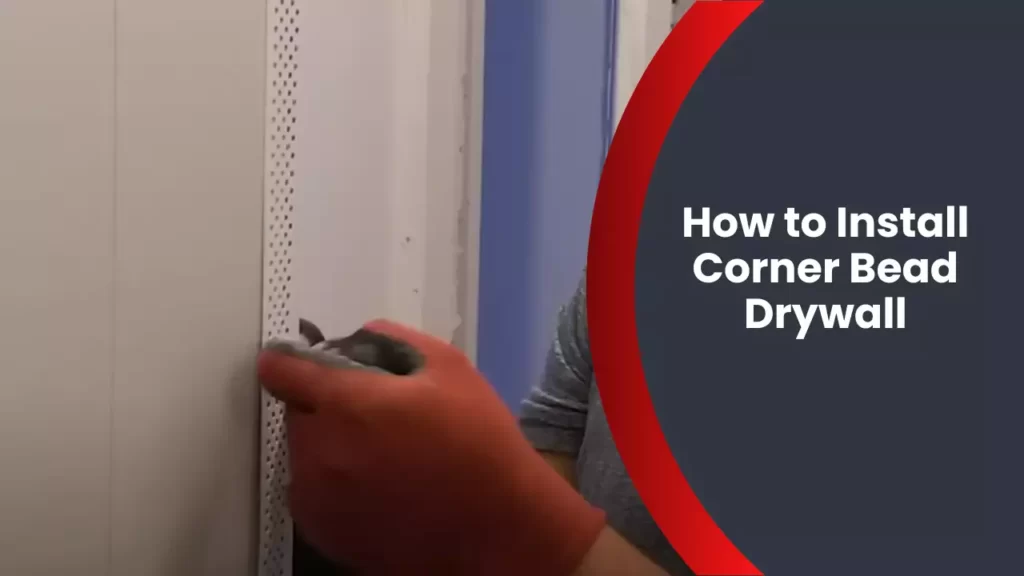
Positioning the corner bead on the joint compound
To start, apply a generous amount of joint compound onto the corner where the bead will be placed. Use a putty knife to spread the compound evenly along the corner, making sure to cover the entire area that will be covered by the bead.
Next, take the corner bead and align it with the joint compound on the wall. Carefully position the edge of the bead against the wall corner, ensuring that it is centered and straight. You can use a level or a straight edge to double-check the alignment.
To prevent the corner bead from sliding or shifting during installation, it’s a good idea to secure it in place temporarily. You can use small pieces of masking tape to hold the bead in position or ask for an extra pair of hands to assist while you proceed with the next steps.
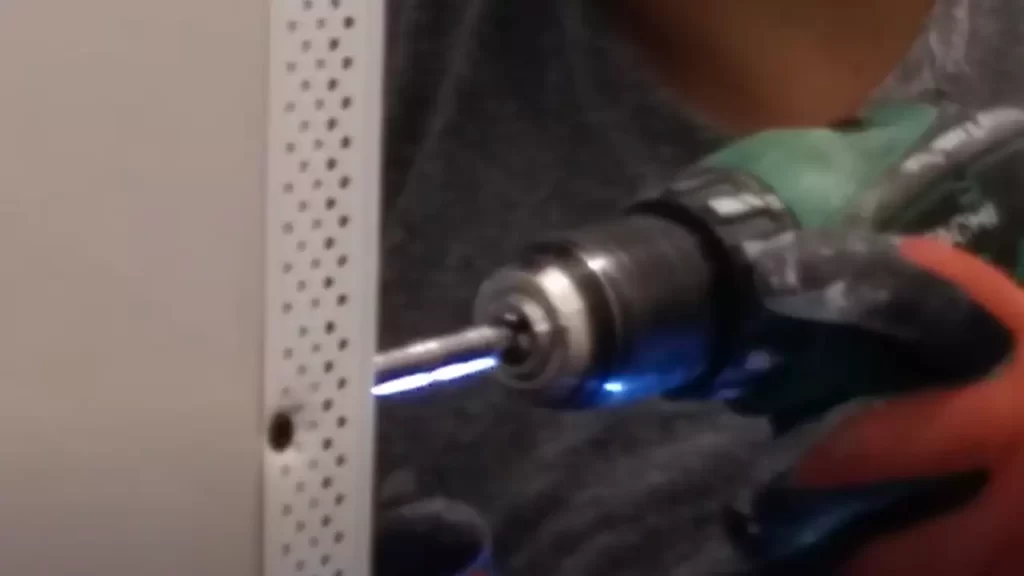
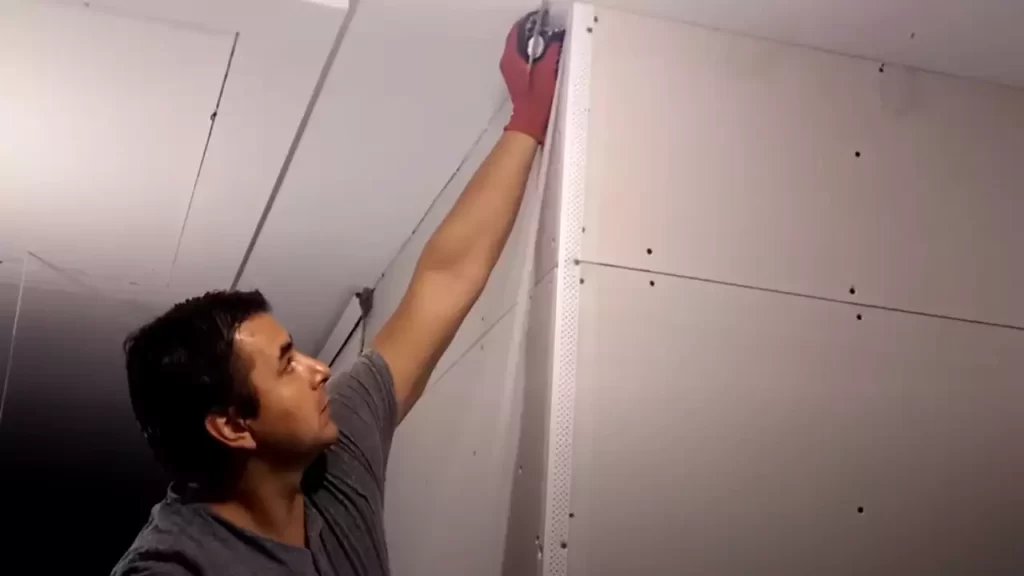
Securing the corner bead with nails or adhesive
There are two common methods for securing the corner bead: using nails or adhesive. The method you choose may depend on personal preference, the type of corner bead you are using, or specific project requirements.
If you opt for nails, gently hammer them into the corner bead, spacing them evenly along the length of the bead. Make sure the nails penetrate the wall studs or solid surfaces behind the drywall. This will provide the necessary stability and prevent the corner bead from loosening over time.
Alternatively, you can use adhesive to secure the corner bead. Apply a thin layer of adhesive along the back of the bead, ensuring complete coverage. Then, press the bead firmly against the wall corner, applying pressure to ensure proper adhesion. Allow the adhesive to dry and set according to the manufacturer’s instructions before proceeding with the next steps.
Remember, whether you choose nails or adhesive, it’s essential to secure the corner bead firmly to guarantee long-lasting durability and a flawless finish. Take your time to ensure each fixing is secure to avoid any potential issues down the road.
Now that you have successfully positioned and secured the corner bead, you can proceed to the next step in the installation process, Step 3: Applying the Joint Compound.
Step 3: Applying Additional Joint Compound
Applying a Second Layer of Joint Compound over the Corner Bead
Now that you have successfully installed the corner bead on your drywall, it’s time to move on to the next important step: applying additional joint compound. This step is crucial to achieving a smooth and seamless finish on your corner bead.
The purpose of the joint compound is to fill in any gaps or imperfections between the corner bead and the drywall, creating a seamless transition. It also helps to strengthen the bond between the corner bead and the drywall, ensuring long-lasting durability.
Ensuring a Smooth and Even Application
When applying the second layer of joint compound, it’s important to ensure a smooth and even application for a professional-looking finish. Follow these steps to achieve the best results:
- Preparation: Before starting, make sure the first layer of joint compound is completely dry. Sand down any rough edges or excess compound to create a smooth surface.
- Applying the joint compound: Using a putty knife or drywall taping knife, scoop out a small amount of joint compound and apply it directly over the corner bead. Begin by spreading a thin layer of compound along the edges of the corner bead, covering the entire length.
- Feathering: To create a seamless transition, feather out the joint compound by applying less pressure and gradually decreasing the compound thickness towards the edges. This technique ensures a smooth blend between the compound and the surrounding drywall.
- Smoothing: After applying the compound, use the putty knife or taping knife to smooth out any excess compound, ensuring a flat and even surface. This step helps to eliminate any visible lines or ridges.
- Drying and sanding: Allow the joint compound to dry completely according to the manufacturer’s instructions. Once dry, lightly sand the area to remove any imperfections and create a smooth finish.
Remember to take your time during this process and pay attention to details. A meticulous application of joint compound will result in a flawlessly finished corner bead that seamlessly blends with your drywall.
Now that you have completed the process of applying additional joint compound, you are ready to move on to the final step: finishing and painting your drywall. Stay tuned for Step 4 where we’ll guide you through the process of achieving a professional paint job on your newly installed drywall!
Step 4: Sanding And Finishing
Sanding the joint compound to achieve a smooth finish
Once the joint compound has dried completely, it’s time to move on to the next crucial step in installing corner bead drywall – sanding. Sanding helps you achieve a perfectly smooth finish, ensuring that your walls are ready for the final touches.
To sand the joint compound, you’ll need some essential tools:
| Tools | Materials |
|---|---|
|
|
Before you begin sanding, put on a dust mask to protect yourself from inhaling any fine particles. Next, take your sanding block or sanding pole and attach a sandpaper with medium-grit (around 120-grit) to it. The medium-grit sandpaper will effectively smooth out any imperfections in the joint compound without leaving visible scratches on the surface.
Using the sanding block or pole, apply gentle pressure and sand the joint compound in small, circular motions. Start from one corner of the bead and work your way outwards, paying attention to any rough or uneven areas. Be sure to remove any excess joint compound that might have dripped onto the edges of the corner bead.
Once you’ve sanded the entire corner bead, wipe off any dust using a clean cloth. It’s crucial to remove all dust particles before moving on to the next step to ensure a flawless finish. You can also use a vacuum or broom to clean up any remaining dust in the surrounding area.
Applying a final layer of joint compound if necessary
After sanding, examine the corner bead carefully. If you notice any unevenness or visible imperfections, it may be necessary to apply a final layer of joint compound to achieve a seamless finish.
To apply the final layer of joint compound, follow these steps:
- Prepare a small amount of joint compound, mixing it according to the manufacturer’s instructions.
- Using a putty knife, apply a thin layer of joint compound over the corner bead, covering any areas that require additional smoothing.
- With the putty knife, gently feather the edges of the compound to blend it seamlessly with the surrounding wall. Ensure that the transition between the corner bead and the wall is smooth and indistinguishable.
- Allow the final layer of joint compound to dry completely.
Once the final layer of joint compound has dried, you can proceed to the next step in your drywall installation process, such as priming and painting.
Step 5: Priming And Painting
Step 5: Priming and Painting
Priming the Corner Bead and Surrounding Drywall
After successfully installing the corner bead on your drywall, it’s important to ensure that it is properly primed to create a smooth and cohesive finish. Priming helps to seal the porous surface, allowing the paint to adhere more effectively while also preventing any moisture damage. Here’s how you can prime the corner bead and surrounding drywall:
- Clean the area: Before priming, make sure to clean the corner bead and surrounding drywall. Remove any dust, debris, or residue that may have been left behind during the installation process.
- Apply a coat of high-quality primer: Using a paintbrush or roller, apply a coat of primer to the corner bead and the adjacent drywall. Make sure to cover the entire area evenly. Allow the primer to dry completely before moving on to the next step.
- Sand the primed surface: Once the primer has dried, gently sand the primed surface using a fine-grit sandpaper. This step helps to smooth out any imperfections and prepares the corner bead for painting.
- Clean up the dust: After sanding, clean up the dust particles using a soft cloth or a vacuum cleaner. You want to ensure that the surface is free from any debris before moving on to the painting stage.
Painting the Corner Bead to Match the Rest of the Wall
Painting the corner bead is the final step in achieving a seamless and finished look for your wall. It’s crucial to choose the right paint color that matches the rest of the wall. Here’s how you can paint the corner bead:
- Choose the paint color: Select a paint color that matches the existing wall color. You can either use the same color as the rest of the wall or opt for a contrasting shade to create an accent.
- Protect the surrounding areas: Before painting, protect the adjacent surfaces by applying painter’s tape. This will prevent any accidental paint splatters on the neighboring walls or trim.
- Apply the paint: Using a paintbrush or roller, apply the paint onto the corner bead, ensuring that the coverage is even and smooth. Start from the top and work your way down. Allow the first coat to dry completely before applying additional coats, if necessary.
- Inspect and touch up: Once the paint has dried, carefully inspect the painted corner bead for any missed spots or uneven areas. If needed, touch up these areas with a small brush or roller.
- Remove the painter’s tape: Once the paint is dry and you are satisfied with the results, remove the painter’s tape gently to avoid any damage to the freshly painted surface.
With the final step of priming and painting complete, your corner bead installation is now ready to be showcased as a seamless part of your wall. The priming and painting process not only enhances the visual appeal of the corner bead but also protects it from the wear and tear of everyday use. Take your time during this step to ensure a professional finish that blends seamlessly with the rest of your wall.
Tips For A Successful Corner Bead Installation
Properly installing corner bead drywall is crucial for achieving a professional and polished look in any room. By following these tips, you can ensure a successful installation and avoid common mistakes that could compromise the finished result. From properly sealing joints and corners to avoiding mishaps during installation, these tips will help you achieve a seamless and professional corner bead installation.
Properly sealing joints and corners
When it comes to installing corner bead, one of the most important steps is properly sealing the joints and corners. This not only ensures a clean look but also strengthens the corner, preventing cracks or damage. Here are some tips to help you achieve a proper seal:
- Clean and prepare the surface: Before installing the corner bead, make sure the surface is clean and free from any debris or contaminants. This will allow the joint compound to adhere properly.
- Apply joint compound: Using a trowel, apply a thin layer of joint compound along the corner where the bead will be installed. Ensure the compound is evenly spread and covers the joint area.
- Embed the corner bead: Gently press the corner bead into the joint compound, making sure it’s aligned with the corner. Use a drywall knife to remove any excess compound.
- Seal the edges: Apply additional joint compound along the edges of the corner bead to create a smooth transition and ensure a secure bond.
Remember, the key to a successful corner bead installation is achieving a strong and seamless seal. Taking the time to properly prepare the surface and apply the joint compound will result in a professional-looking finish.
Avoiding common mistakes during installation
During the installation process, it’s important to avoid common mistakes that can negatively impact the final outcome. By keeping these tips in mind, you can ensure a smooth and successful installation:
- Avoid over-tightening the screws: When securing the corner bead with screws, be cautious not to over-tighten them, as this can cause the bead to crack or distort. Tighten the screws until they are flush with the surface.
- Check for alignment: Before applying joint compound, ensure that the corner bead is aligned properly and is straight. Small adjustments can be made by gently tapping the bead with a rubber mallet.
- Monitor drying time: Allow ample drying time for the joint compound. Rushing this step can result in cracks or shrinkage, compromising the integrity of the installation.
- Inspect and sand: Once the joint compound is completely dry, thoroughly inspect the installation for any imperfections. Sand any rough edges or excess compound to achieve a smooth finish.
By avoiding these common mistakes and taking the time to ensure proper alignment and drying, you can achieve a flawless corner bead installation. Remember, attention to detail is key when it comes to achieving professional results.
Frequently Asked Questions
How Do You Attach Corner Beads To Drywall?
To attach corner beads to drywall, follow these steps: 1. Pre-cut the corner bead to the desired length. 2. Apply a thin layer of drywall joint compound to the corner. 3. Position the corner bead and press it firmly into place.
4. Use drywall screws or nails to secure the bead every 6 inches or as recommended. 5. Smooth out any excess compound and let it dry before sanding.
Do You Nail Or Screw Corner Bead?
Nail corner bead to achieve a secure installation.
Do You Put Mud Under Corner Bead?
Yes, mud is commonly used under corner bead during drywall installation to secure it in place.
Do You Put Corner Bead On Before Or After Tape?
Attach the corner bead before applying tape for a smoother and more professional finish.
Conclusion
Installing corner bead drywall is a crucial step in achieving professional-looking walls. With the right tools and techniques, you can ensure a seamless finish that adds durability and aesthetic appeal to your space. By following the steps outlined in this blog post, you can confidently tackle this task and achieve excellent results.
Remember to measure accurately, secure the bead with the appropriate adhesive or fasteners, and ensure a smooth transition between the bead and the rest of the drywall. With these tips, you’ll be well on your way to mastering corner bead installation.
Happy DIY-ing!