To install concrete anchors, drill holes into the concrete, insert the anchors, and then tighten them securely using a wrench or screwdriver. When it comes to anchoring items to concrete surfaces, such as walls or floors, it is essential to ensure a strong and reliable connection.
Concrete anchors provide a secure hold and are commonly used in various applications, from attaching shelves or hooks to mounting heavy machinery or equipment. By following a few straightforward steps, you can easily install concrete anchors and enjoy a stable support system.
In this guide, we will walk you through the process of installing concrete anchors, including drilling the holes, inserting the anchors, and tightening them adequately. With these simple instructions, you’ll be able to confidently anchor items to concrete surfaces without any hassle.
Understanding Concrete Anchors
Concrete anchors are essential for securely fastening objects to concrete surfaces. Whether it’s installing shelves, mounting brackets, or securing heavy machinery, concrete anchors provide stability and prevent movement or damage. By understanding the different types of concrete anchors and their applications, you can choose the right anchor for your project and ensure a successful installation.
What are Concrete Anchors and why are they used?
Concrete anchors are specialized fasteners designed to attach objects to concrete surfaces. Unlike regular screws or nails, concrete anchors have unique features that allow them to grip into the concrete effectively. This ensures that the anchor stays in place even under heavy loads or vibrations.
Concrete anchors are commonly used for a variety of applications, ranging from simple DIY projects to industrial installations. They provide the necessary stability and security, making them ideal for attaching objects such as shelves, racks, furniture, handrails, signs, and even heavy machinery to concrete walls or floors.
Different types of Concrete Anchors and their applications
There are several types of concrete anchors available, each designed for specific applications and weight capacities. Some commonly used concrete anchors include:
| Type of Concrete Anchor | Application |
|---|---|
| Wedge Anchors | Ideal for securing heavy objects, structural connections, and machinery |
| Sleeve Anchors | Suitable for medium to heavy-duty applications, such as attaching brackets or handrails |
| Drop-In Anchors | Perfect for flush-mount applications, providing a strong and secure connection |
| Expansion Anchors | Commonly used for lighter applications, like mounting electrical boxes or small fixtures |
Understanding the specific usage and weight capacity of each type of concrete anchor is crucial. This knowledge allows you to select the appropriate anchor based on the weight of the object you plan to install and the surface conditions of the concrete.
Materials and tools needed for Concrete Anchor installation
Before you begin the concrete anchor installation process, it’s essential to gather the necessary materials and tools. Having everything prepared beforehand ensures a smooth installation and reduces any unnecessary delays. Here’s a list of the materials and tools you will need:
- Concrete anchors of your chosen type
- Power drill with the appropriate drill bit size
- Hammer for striking the anchor, if required
- Safety goggles to protect your eyes from debris
- Dust mask to avoid inhaling dust particles while drilling
- Tape measure and marking tools for accurate placement
- Clean cloth or brush to remove dust and debris from the drilled hole
- Hammer drill or impact driver, depending on the size of the project
- Level to ensure proper alignment
- Screwdriver or wrench to tighten the concrete anchor
By having the necessary materials and tools ready, you can proceed with confidence and achieve a successful concrete anchor installation. Remember to follow the manufacturer’s instructions for the specific type of anchor you are using to ensure proper installation and maximum holding strength.
Preparing For Concrete Anchor Installation
Before you start installing concrete anchors, it’s crucial to properly prepare the surface to ensure a secure and reliable hold. This section will guide you through the essential steps of assessing the surface and determining the anchor requirements, cleaning and prepping the concrete surface, and marking the anchor locations. By following these steps, you’ll set yourself up for a successful concrete anchor installation.
Assessing the surface and determining anchor requirements
The first step in preparing for concrete anchor installation is to assess the surface and determine the specific requirements for your anchors.
Assess the surface: Before installing anchors, examine the concrete surface for any cracks, chips, or other imperfections. These flaws can weaken the hold of the anchor, so it’s important to address them beforehand.
Determine the anchor requirements: Consider the weight and type of load that the anchor will bear. This will help you determine the size and strength of the anchor required for your specific application.
Consult anchor manufacturer guidelines: Different anchor manufacturers may have specific recommendations for their products. Always refer to the manufacturer’s guidelines to ensure you choose the appropriate anchor for your installation.
Cleaning and prepping the concrete surface
Once you’ve assessed the surface and determined the anchor requirements, the next step is to clean and prep the concrete surface. A clean surface is essential for proper anchor adhesion.
Remove any debris: Before cleaning, clear the concrete surface of any dirt, dust, or debris. Use a broom or a vacuum to ensure a clean working area.
Clean with a concrete cleaner: Use a concrete cleaner or a degreasing solution to remove any oil, grease, or stains from the surface. Follow the manufacturer’s instructions for the specific cleaner you choose.
Rinse and let it dry: After cleaning, rinse the surface thoroughly with water and allow it to dry completely. Avoid installing anchors on wet or damp surfaces, as this can compromise their effectiveness.
Marking the anchor locations
Now that the surface is clean and prepped, it’s time to mark the anchor locations. This step will ensure accurate installation and prevent any errors.
Measure and mark: Use a measuring tape to determine the precise locations where you’ll install the anchors. Mark these spots with a pencil or chalk.
Consider spacing and layout: Depending on your project requirements, determine the optimal spacing and layout for the anchors. This will help distribute the load evenly and maximize the strength of the installation.
Double-check the markings: Before you begin drilling, double-check the markings to ensure they are accurate and in the right positions. This will help prevent any mistakes during the installation process.
By assessing the surface, cleaning and prepping the concrete, and marking the anchor locations, you’ve completed the essential steps in preparing for concrete anchor installation. Now you’re ready to move on to the next phase: drilling and installing the anchors.
Installing Concrete Anchors
Concrete anchors are essential for securely fastening objects to concrete surfaces. Whether you are mounting shelves, installing a TV bracket, or securing heavy equipment, properly installing concrete anchors ensures the stability and durability of your project. In this guide, we will walk you through the step-by-step instructions for installing three common types of concrete anchors: wedge anchors, sleeve anchors, and expansion anchors. Each anchor type has its own unique installation process, so let’s dive in and learn how to install each one.
Selecting the Appropriate Anchor Type for Your Project
Before diving into the installation process, it’s crucial to select the right anchor type for your project. The anchor type you choose will depend on several factors, including the load capacity required, the type of material you are fastening, and the environmental conditions. Consider the weight and size of the object you are attaching to the concrete, as well as any movement or vibration it may experience. Consult the manufacturer’s guidelines or seek professional advice if you are unsure which anchor type best suits your needs.
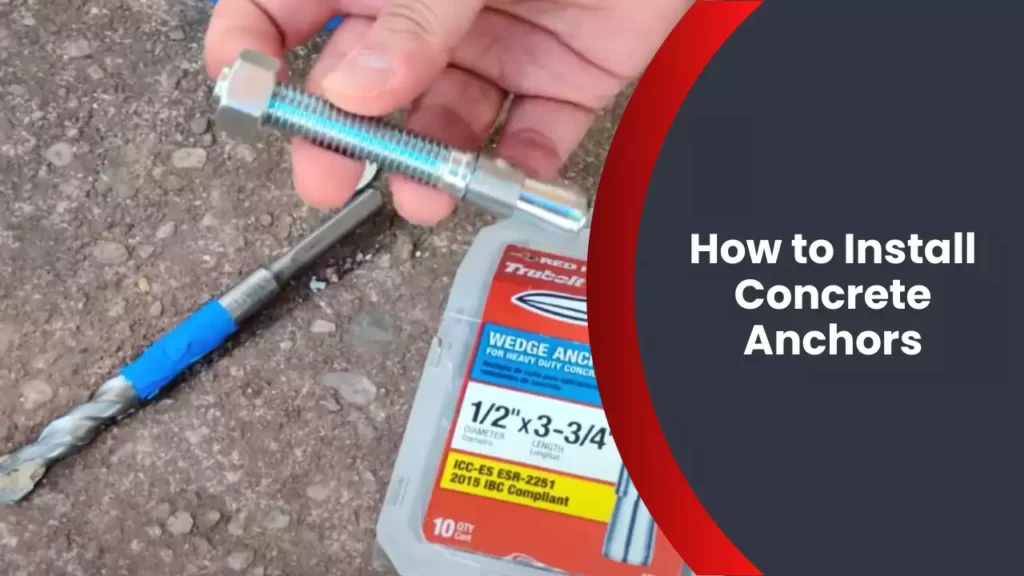
Step-by-Step Instructions for Installing Wedge Anchors
Wedge anchors are ideal for heavy-duty applications where high load capacities and strong hold are required. Here is a step-by-step guide on how to install wedge anchors:
- Begin by marking the locations for your anchor holes on the concrete surface using a pencil or marker.
- Next, put on safety goggles and drill the anchor holes into the concrete using a hammer drill and a masonry bit that matches the diameter of the wedge anchor.
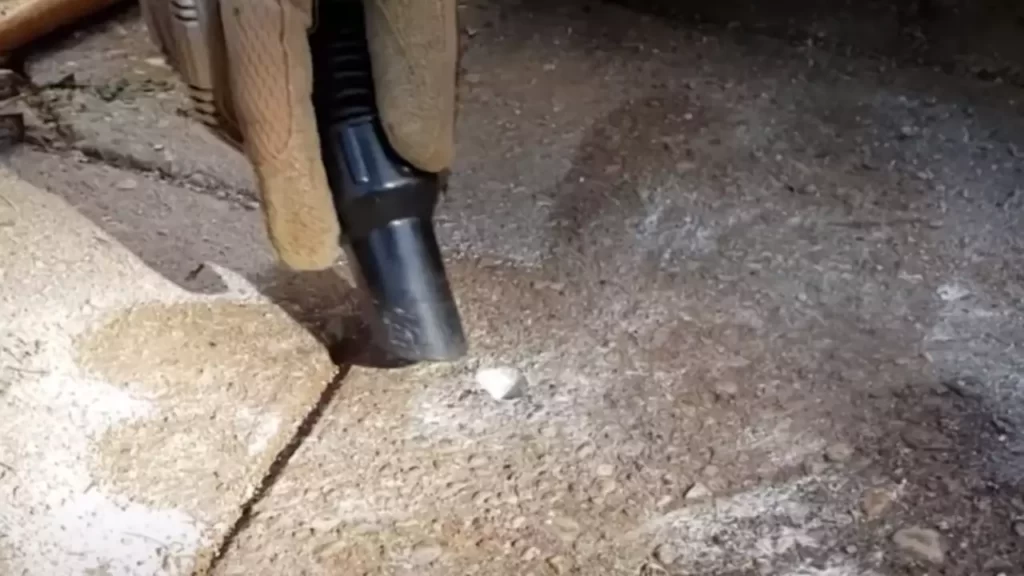
- Clear away any debris from the holes using a brush or compressed air.
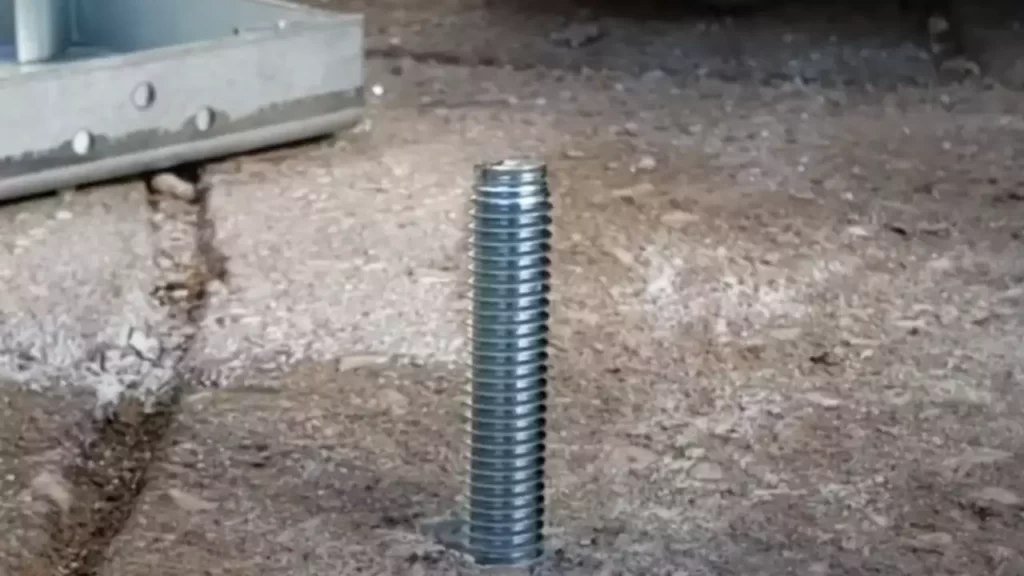
- Insert the wedge anchor into the hole, making sure it is flush with the surface of the concrete.
- Tighten the anchor by turning the nut clockwise using a wrench until it is secure. Be careful not to overtighten, as it can cause the concrete to crack.
Step-by-Step Instructions for Installing Sleeve Anchors
Sleeve anchors are versatile and suitable for various applications. Follow these steps to install sleeve anchors:
- Start by marking the positions of the anchor holes on the concrete.
- Put on safety goggles and use a hammer drill and a masonry bit to drill the holes into the concrete at the marked locations.
- Clean out any debris from the holes using a brush or compressed air.
- Insert the sleeve anchor into the hole, making sure it is flush with the concrete surface.
- Tighten the anchor by turning the bolt clockwise using a wrench until it is firmly secure. Keep tightening until the washer is snug against the surface.
Step-by-Step Instructions for Installing Expansion Anchors
Expansion anchors provide excellent holding power and are straightforward to install. Follow these steps to install expansion anchors:
- Start by marking the locations for your anchor holes on the concrete surface.
- Put on safety goggles and use a hammer drill and a masonry bit to drill the holes into the concrete at the marked positions.
- Clean out any debris from the holes using a brush or compressed air.
- Insert the expansion anchor into the hole, making sure it is flush with the surface of the concrete.
- Using a wrench, tighten the nut clockwise until the anchor expands and holds securely in place.
Installing concrete anchors requires precision and attention to detail. By following these step-by-step instructions and selecting the appropriate anchor type for your project, you can ensure a strong and reliable attachment that will withstand the test of time.
Tips And Tricks For Successful Concrete Anchor Installation
Installing concrete anchors is a crucial step in ensuring the stability and safety of various structures. Whether you are securing heavy machinery, shelving units, or outdoor fixtures, a strong and secure anchor is essential. To help you achieve a successful installation, here are some tips and tricks that will ensure your concrete anchors hold tight.
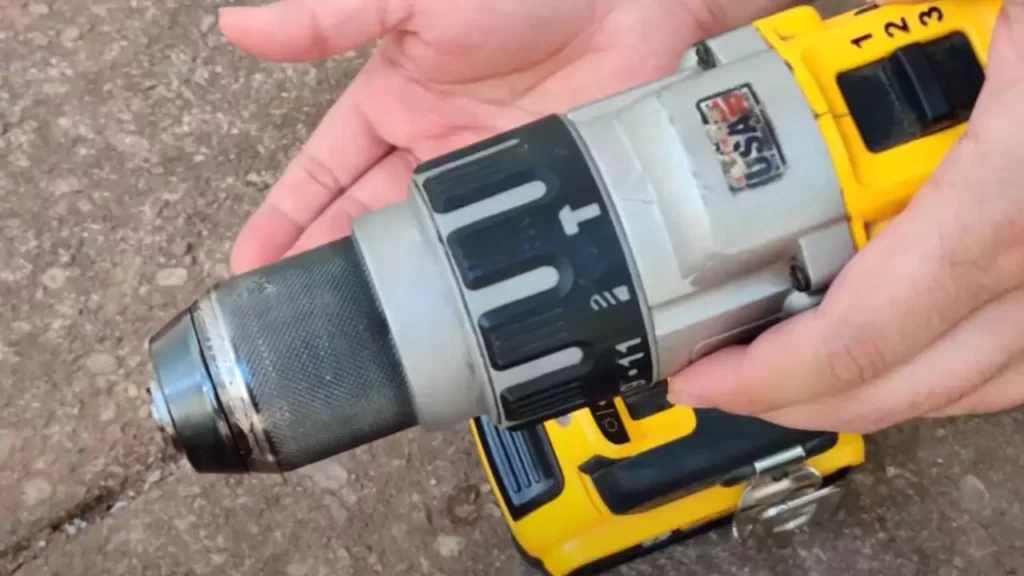
Importance of using the correct drill bit
Using the correct drill bit is paramount when it comes to installing concrete anchors. The type of anchor you are using will determine the size and type of drill bit required. Choosing an incorrect drill bit can lead to ineffective anchor installation and compromised structural integrity.
To determine the correct drill bit size, refer to the manufacturer’s guidelines or consult an expert. Typically, a hammer drill with a carbide-tipped masonry bit is ideal for drilling into concrete surfaces. Make sure to clean any debris from the hole after drilling to optimize anchor performance.
How to ensure proper anchor depth and embedment
Proper anchor depth and embedment are crucial for achieving a strong and secure installation. Inadequate depth can result in insufficient grip and may cause the anchor to pull out under heavy loads or during seismic activity.
To determine the required depth, consider the thickness of the material being fastened and the length of the anchor. Use a tape measure or mark the drill bit with tape to ensure accurate drilling depth.
Once the hole is drilled, blow out any loose debris and insert the anchor with a hammer or wrench depending on the anchor type. Ensure the anchor is fully embedded in the concrete for maximum holding strength.
Techniques for achieving maximum holding strength
To ensure maximum holding strength of your concrete anchors, consider the following techniques:
- Pre-drilling pilot holes: Pre-drilling pilot holes can help guide the anchor into the correct position, preventing it from drifting during installation.
- Using adhesive: Applying an epoxy or adhesive to the anchor can enhance its holding power, particularly in situations where vibrations or sudden impacts may occur.
- Re-tightening: After initial installation, allow the anchor to set for the recommended time and then re-tighten it to ensure maximum tightness and strength.
Tips for dealing with common installation challenges
Concrete anchor installation can present a few challenges. Here are some tips to overcome these obstacles:
- To prevent anchor spinning: If the anchor starts spinning instead of tightening, use pliers or a wrench to hold the anchor securely while turning the nut or bolt.
- For extremely hard concrete: If you encounter extremely hard concrete, consider using a rotary hammer drill or a high-strength anchor designed for hard surfaces.
- In case of unexpected voids: If the anchor does not hold well due to an unexpected void in the concrete, remove the anchor, fill the void with an epoxy filler, and reinstall the anchor.
By following these tips and tricks, you can ensure a successful concrete anchor installation that will provide the strength and security your project requires.
Safety Considerations For Concrete Anchor Installation
When installing concrete anchors, it is crucial to prioritize safety to prevent accidents and injuries. By taking the following precautions and adhering to personal protective equipment (PPE) requirements, you can ensure a secure and risk-free installation process.
Personal Protective Equipment (PPE) Requirements
Before proceeding with the installation, make sure you have the necessary personal protective equipment (PPE) to provide adequate safety to yourself and others around you. The following PPE should be worn during the installation process:
- Safety glasses or goggles to protect your eyes from flying debris.
- Safety gloves to safeguard your hands from sharp edges and prevent cuts or abrasions.
- Hard hat to protect your head from falling objects or possible impacts.
- Dust mask or respirator to prevent inhalation of dust particles when drilling into concrete.
- Earplugs or earmuffs to protect your hearing from loud noises generated during the installation.
- Sturdy work boots with steel toes to protect your feet from potential hazards on the job site.
Precautions to Prevent Injury
Installing concrete anchors requires careful attention and adherence to precautionary measures to prevent injury. Follow these precautions to minimize the risk of accidents:
- Inspect the work area for any potential hazards, such as uneven surfaces, debris, or overhead obstacles. Clear the area of any obstructions before commencing the installation.
- Ensure proper lighting in the work area to improve visibility and reduce the chances of tripping or falling.
- Use the appropriate tools for each step of the installation process. Ensure that your tools are in good working condition and free from defects.
- When drilling into concrete, follow the manufacturer’s guidelines for drill bit selection and ensure that it is suitable for the type of concrete being drilled.
- Hold the drill firmly with both hands and maintain a stable posture to reduce the risk of losing control during drilling.
- When inserting the concrete anchor, gently tap it into position using a hammer or mallet. Avoid excessive force or hammering, which can cause injury or damage the anchor.
- Keep your hands and fingers away from the drilling area and any rotating parts of the drill to prevent accidental injury.
- Secure loose clothing, tie back long hair, and remove any dangling accessories that may get caught in machinery or tools during the installation.
Proper Handling and Disposal of Tools and Materials
After completing the installation, proper handling and disposal of tools and materials are essential for maintaining a safe work environment. Follow these guidelines to ensure the safe handling and disposal:
- After use, clean and store your tools in a designated area, away from children or unauthorized individuals.
- If any tools or equipment are damaged or malfunctioning, remove them from service immediately and have them repaired or replaced.
- Dispose of any leftover materials, such as packaging or unused anchors, in accordance with local regulations and waste management guidelines.
- Ensure that sharp or hazardous materials are securely stored or disposed of in appropriate containers to prevent injuries or accidents.
By following these safety considerations, you can mitigate potential risks and ensure a successful and secure installation of concrete anchors. Prioritizing safety throughout the process will not only protect yourself and others but also contribute to the overall efficiency of the installation.
Troubleshooting Common Issues With Concrete Anchor Installation
Installing concrete anchors is an essential step in securing various objects to concrete surfaces. However, like any other installation process, it can sometimes encounter common issues. In this section, we will discuss some of the most frequent problems that arise during concrete anchor installation and provide practical solutions to troubleshoot them. By addressing these issues, you can ensure a reliable and long-lasting anchor installation.
Anchor Failure and How to Prevent It
Anchor failure can occur due to several factors, including improper installation techniques or using the wrong type of anchor for the project. To prevent anchor failure:
- Ensure that you select the correct anchor type based on the weight and load requirements of the object you are installing. Consult the manufacturer’s guidelines or seek professional advice if needed.
- Make sure the anchor hole is the proper size and depth for the specific anchor being used. Use a hammer drill and a correct-sized masonry bit to drill the hole.
- Clean the hole thoroughly to remove any debris or dust that may hinder the anchor’s grip in the concrete.
- Insert the anchor into the hole, making sure it is flush with the surface. Avoid overtightening the anchor, as it may cause the fastener to strip or break.
- Finally, test the anchor’s stability and holding power before applying any load. If it feels loose or shows signs of weakness, remove the anchor and consult an expert.
Fixing Loose or Stripped Anchors
Occasionally, anchors can become loose or stripped over time, compromising their strength. If you encounter a loose or stripped anchor, follow these steps to fix the issue:
- First, remove the loose anchor by unscrewing it counterclockwise or tapping it gently with a hammer until it loosens.
- Inspect the anchor hole for any damage or debris that may have contributed to the loosening. Clean the hole thoroughly to ensure a proper grip for the new anchor.
- If the anchor hole is damaged or too large for the original anchor, use epoxy adhesive and a properly sized anchor to fill the hole and create a secure attachment point.
- Screw the new anchor into the repaired hole, making sure it is securely tightened. Test its stability before applying any load to ensure it is properly fixed.
Dealing with Cracks or Damage around Anchor Holes
Cracks or damage around anchor holes can weaken the integrity of the installation. To address this issue:
- Inspect the cracks or damage around the anchor hole carefully. If the cracks are minor, they can often be repaired using epoxy filler.
- Clean the cracks or damaged areas thoroughly, then mix the epoxy according to the manufacturer’s instructions.
- Apply the epoxy filler to the cracks or damaged areas, making sure to cover and fill them completely. Smooth the surface with a putty knife or a similar tool.
- Allow the epoxy filler to cure completely before reinstalling the anchor. Once cured, it will strengthen the surrounding area, providing extra support and preventing further damage.
By troubleshooting common issues in concrete anchor installation, you can ensure a successful and secure installation process. Following proper techniques and taking necessary precautions will guarantee the durability and effectiveness of concrete anchors in supporting your desired objects on concrete surfaces.
Installing concrete anchors is a crucial step in ensuring the stability and strength of your construction projects. However, it’s not uncommon for people to have questions about the weight and load capacity limits of different anchor types, their suitability for various concrete surfaces, and potential alternatives for heavy-duty applications. In this section, we address these commonly asked questions to provide you with the information you need to make informed decisions.
What are the weight and load capacity limits of different anchor types?
Concrete anchors come in various types, each designed to accommodate different weight and load capacities. Here’s an overview of the most commonly used anchor types and their corresponding weight and load limits:
| Anchor Type | Weight Capacity | Load Capacity |
|---|---|---|
| Wedge Anchors | Up to 2,500 lbs | Dependent on concrete strength |
| Sleeve Anchors | Up to 500 lbs | Dependent on concrete strength |
| Drop-in Anchors | Up to 1,100 lbs | Dependent on concrete strength |
| Expansion Anchors | Up to 1,000 lbs | Dependent on concrete strength |
It’s important to note that weight and load capacity limits may vary depending on factors such as concrete quality and installation technique. Always refer to the manufacturer’s instructions and seek professional advice when dealing with heavy loads or critical applications.
Can Concrete Anchors be used in all types of concrete surfaces?
Concrete anchors are specifically designed to be used with concrete surfaces. However, it’s essential to consider the type of concrete you’re dealing with. Some anchor types work better with certain concrete compositions or densities. Here are the common types of concrete surfaces and their compatibility with concrete anchors:
- Poured Concrete: Suitable for all anchor types, ensuring proper drilling techniques are employed to avoid cracking or damaging the concrete.
- Block or Hollow Concrete: May require specialized anchor types, such as sleeve anchors or toggle bolts, specifically designed to hold securely in these porous materials.
- Stamped or Decorative Concrete: Care must be taken to prevent surface damage when drilling and installing anchors. Seek professional advice to choose the appropriate anchors for this type of concrete.
Always consider the composition and condition of the concrete surface before selecting the appropriate concrete anchor. When in doubt, consult with experts or experienced professionals to ensure the best choice.
Are there any alternatives to using Concrete Anchors for heavy-duty applications?
While concrete anchors are commonly used for heavy-duty applications due to their reliability and strength, there are alternative options available. Here are a few alternatives to using concrete anchors in such situations:
- Chemical Bonding: Epoxy or chemical adhesives can be used to bond materials directly to the concrete surface, providing a strong and durable connection.
- Mechanical Fasteners: Threaded rods, expansion shields, or specialized fasteners can be used in combination with concrete epoxy to secure heavy loads.
- Structural Steel Connections: Welding or bolting directly to structural steel elements can transfer heavy loads without the need for concrete anchors.
When considering alternatives to concrete anchors, it’s crucial to assess the specific requirements of your project, consult with structural engineers, and ensure compliance with building codes and regulations.
By understanding the weight and load capacity limits of different anchor types, the compatibility with various concrete surfaces, and available alternatives for heavy-duty applications, you can confidently choose the right method to install concrete anchors that meet your construction needs.
Frequently Asked Questions
Do You Hammer In Concrete Anchors?
Yes, you can hammer in concrete anchors.
How Are Anchor Bolts Installed In Concrete?
Anchor bolts are installed in concrete by drilling holes, inserting the bolts, and securing them with nuts and washers. The bolts should be placed accurately and aligned properly to ensure stability and strength in the concrete structure.
How Deep Should Anchor Bolts Be In Concrete Slab?
Anchor bolts in a concrete slab should be embedded at least 7 inches.
How Do You Install Self Drilling Concrete Anchors?
To install self-drilling concrete anchors, follow these steps: 1. Use a drill with the correct size bit to create a pilot hole in the concrete. 2. Insert the anchor into the hole and use a drill to drive it into the concrete.
3. Apply steady pressure until the anchor is flush with the surface. 4. Check the anchor to ensure it is secure before using it for any weight-bearing purposes.
Conclusion
Learning how to install concrete anchors is a valuable skill for any homeowner or DIY enthusiast. By following the steps outlined in this guide, you can securely mount objects to concrete walls or floors with ease. Remember to choose the right type of anchor for your specific project and ensure a proper installation.
With this knowledge, you can confidently tackle a variety of anchoring tasks around your home or workspace. Start anchoring today and enjoy the peace of mind that comes with a secure and reliable attachment.