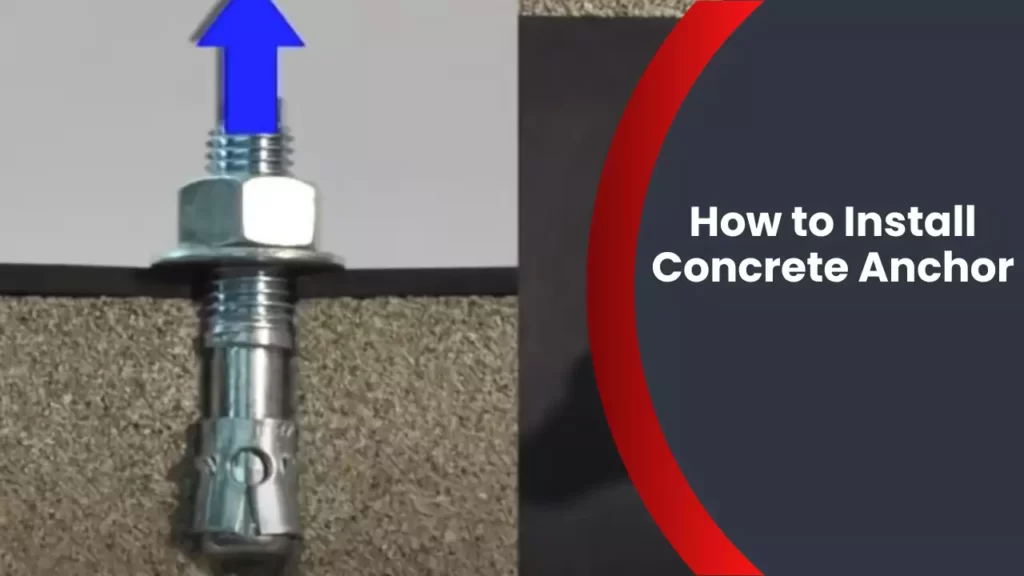
To install a concrete anchor, drill a hole in the concrete, insert the anchor, and tighten it securely with a wrench. Concrete anchors are commonly used to secure heavy items to concrete surfaces.
Concrete anchors are essential for securely attaching heavy items to concrete surfaces. Whether you are mounting a TV bracket, installing a shelf, or anchoring a fence post, using concrete anchors ensures stability and durability. We will guide you on how to install concrete anchors effectively.
By following the simple steps outlined below, you can confidently secure your items to concrete surfaces with ease. So, let’s get started by gathering the necessary tools and materials and learning the precise techniques to install concrete anchors correctly.
Choosing The Right Concrete Anchor For Your Project
When it comes to installing concrete anchors, selecting the right type for your project is crucial. The right anchor ensures stability and strength, providing a reliable foundation for your structure. With various options available, it’s important to consider a few key factors before making your decision. In this article, we’ll explore the different types of concrete anchors and the factors to consider when selecting the perfect anchor for your project.
Different Types of Concrete Anchors
Concrete anchors come in several different types, each designed for specific applications. Let’s take a closer look at the most common types:
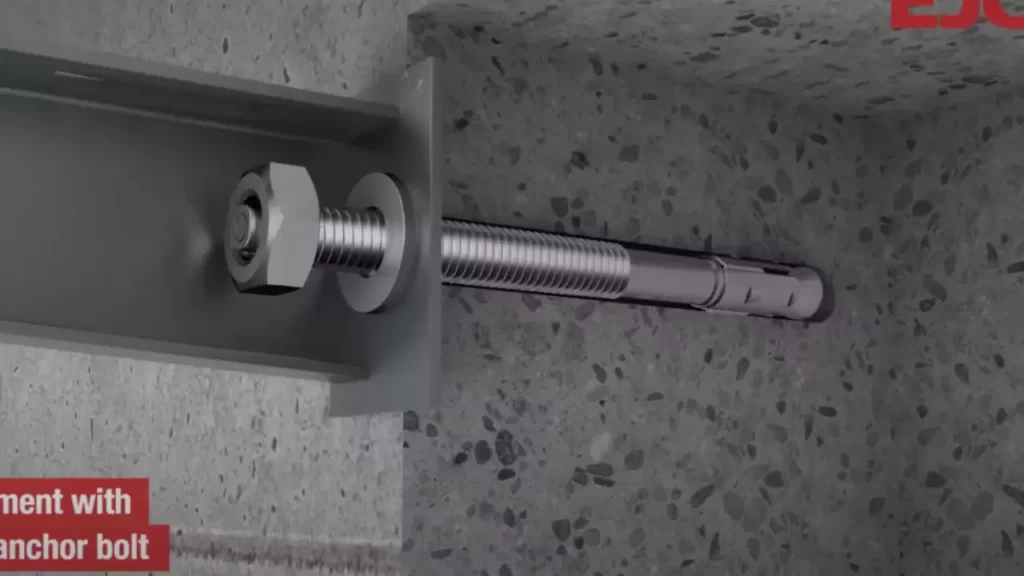
- Wedge Anchors: These anchors feature a wedge-shaped expansion mechanism that securely grips the concrete, providing high load capacity.
- Sleeve Anchors: Sleeve anchors are versatile and commonly used for medium to heavy-duty applications. They expand tightly against the sides of the hole, providing excellent holding strength.
- Drop-In Anchors: Drop-in anchors are ideal for applications where a flush-mounted anchor is required. They provide a secure hold for light to medium loads.
- Toggle Bolts: Toggle bolts are suitable for installations where the base material is hollow, such as drywall or concrete block. They expand behind the surface to provide a strong grip.
Factors to Consider When Selecting a Concrete Anchor
Choosing the right concrete anchor involves considering various factors. These factors ensure that the anchor meets the specific requirements of your project. Here are the key factors to keep in mind:
- Load Capacity: Determine the maximum load the anchor will need to support. This will help you select an anchor with the appropriate weight capacity.
- Base Material: Consider the type of material the anchor will be installed in – concrete, brick, or block. Each material requires a specific type of anchor for optimal performance.
- Installation Method: Take into account the ease of installation and the tools required. Some anchors require specialized tools, while others can be installed with basic equipment.
- Environmental Factors: Assess the environmental conditions such as temperature, humidity, and exposure to chemicals to ensure the anchor material is suitable for the situation.
- Anchor Size: Select an anchor size that matches the diameter and depth of the hole. An anchor that fits snugly will provide better stability and load-bearing capacity.
By considering the different types of concrete anchors available and evaluating the essential factors, you can choose the perfect anchor for your project. Remember, the right anchor is the backbone of your structure, ensuring durability, safety, and peace of mind for years to come.
Preparation For Installing Concrete Anchor
Preparation is key when it comes to installing concrete anchors. By taking the time to properly prepare the area and gather the necessary tools and materials, you can ensure a successful and secure installation. In this section, we will discuss the important steps to follow in preparing for installing concrete anchors.
Tools and Materials Required
Before you begin the installation process, it is crucial to gather all the necessary tools and materials. Having everything ready in advance will save you time and make the process much smoother. Below is a list of the tools and materials you will need:
| Tools | Materials |
|---|---|
|
|
Safety Precautions to Follow
Ensuring your safety is paramount when working with concrete anchors. Follow these safety precautions to protect yourself during the installation process:
- Always wear a dust mask to avoid inhaling any dust or debris that may be generated during drilling.
- Wear safety goggles to protect your eyes from flying particles.
- Use safety gloves to protect your hands when handling rough surfaces or chemicals.
- Wear safety boots to protect your feet from potential hazards.
- Read and follow the manufacturer’s instructions and guidelines for each tool and material.
By following these safety precautions, you can minimize the risk of accidents and injuries and focus on completing the installation successfully.
Step-By-Step Guide On How To Install Concrete Anchor
Are you looking to securely fasten objects to concrete surfaces? Installing concrete anchors is a reliable and effective solution. Whether you’re hanging shelves, installing a TV mount, or securing heavy equipment, concrete anchors provide the stability you need. In this step-by-step guide, we will walk you through the process of installing concrete anchors, ensuring a strong and durable attachment.
Marking the Drill Hole Locations
The first step in installing a concrete anchor is marking the drill hole locations. Take your object and position it against the concrete surface where you want it to be mounted. Use a pencil or a marker to mark the spots where the anchor will be installed. It’s recommended to use a measuring tape or a level to ensure accurate positioning.
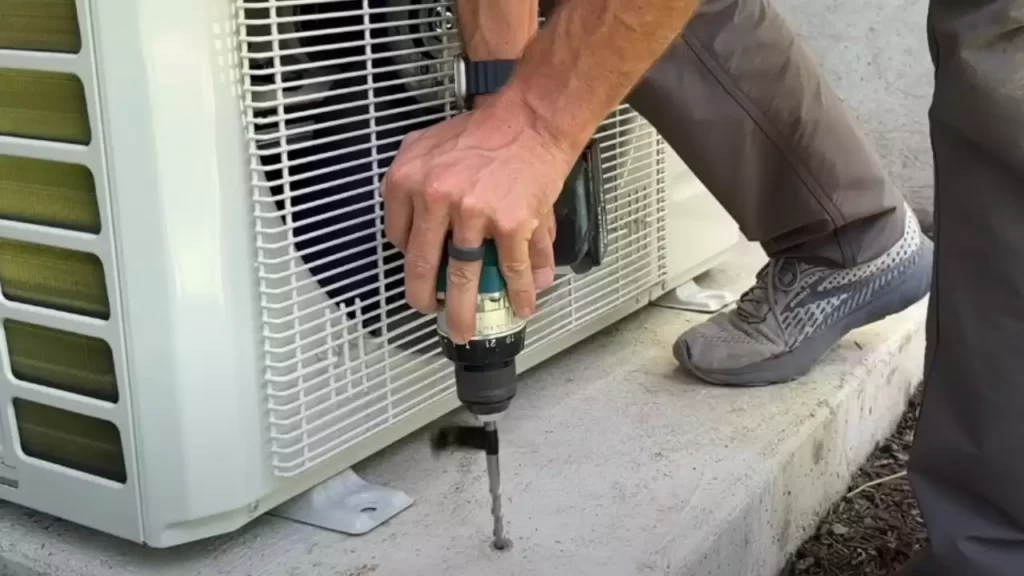
Drilling the Holes in the Concrete
Once you have marked the drill hole locations, it’s time to start drilling. Prepare a power drill with a masonry bit that matches the size of your chosen concrete anchor. Put on safety goggles and ear protection before you begin. Position the drill bit on one of the marked spots and apply steady pressure as you drill into the concrete. It’s important to keep the drill perpendicular to the surface to ensure the hole is straight.
Cleaning the Holes and Removing Debris
After drilling the holes, you need to clean them and remove any debris. Blow compressed air into the holes to remove dust and loose particles. This step is crucial to ensure a proper fit for the concrete anchor and maximize its holding strength. You can also use a small brush or a vacuum cleaner to clean the holes thoroughly.
Inserting the Concrete Anchor
Now that your drill holes are clean and debris-free, it’s time to insert the concrete anchor. Take your anchor and align it with one of the drilled holes. Use a hammer or a mallet to gently tap the anchor into the hole. Ensure that it is inserted fully, leaving only the threaded portion exposed. Repeat this step for each drilled hole, making sure all anchors are properly inserted.
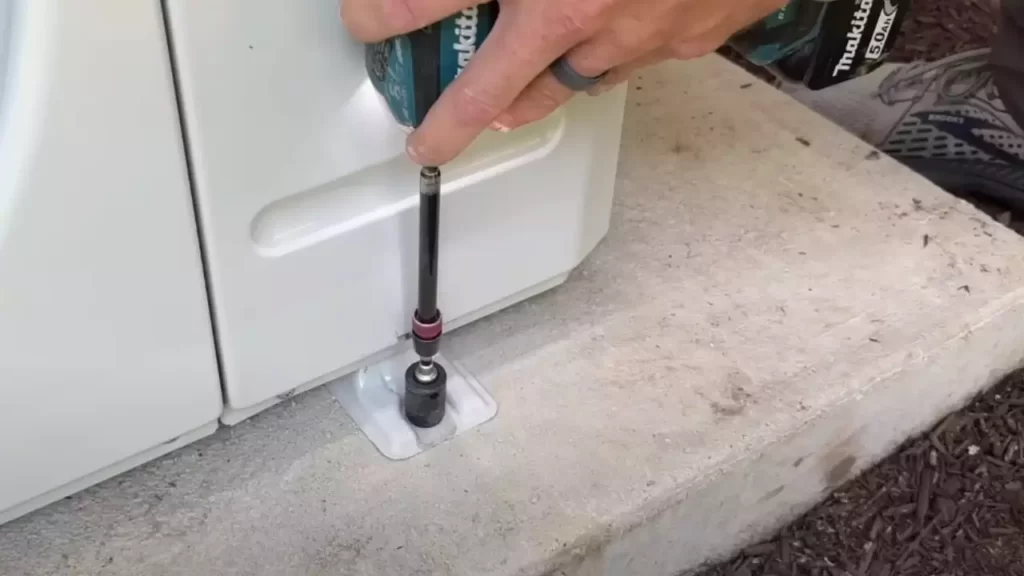
Fastening the Object to the Anchor
With the concrete anchors in place, it’s time to fasten your object securely. Position the object over the anchors and align the mounting holes with the exposed threaded portions. Insert the appropriate screws or bolts into the mounting holes and tighten them using a screwdriver or wrench. Make sure to follow the manufacturer’s guidelines for the specific type of anchor and object you are using. Check the tightness of the fasteners to ensure a secure attachment.
By following this step-by-step guide, you can confidently install concrete anchors and securely fasten objects to concrete surfaces. Remember to choose the right anchor size and type for your specific application and always prioritize safety when working with power tools.
Tips For Successful Concrete Anchor Installation
Tips for Successful Concrete Anchor Installation
When it comes to installing concrete anchors, ensuring a secure and robust attachment is crucial. Whether you are mounting shelves, securing heavy equipment, or hanging artwork, following these essential tips will help ensure a successful installation. Paying attention to the depth and diameter of holes, selecting the correct drill bit for the concrete material, applying adequate torque to secure the anchor, and testing the strength of the anchor are all key considerations. By following these tips, you can greatly enhance the stability and durability of your concrete anchor installation.
Ensuring Proper Depth and Diameter of Holes
One of the most crucial factors for a successful concrete anchor installation is ensuring the proper depth and diameter of holes. The hole should be drilled to a depth that allows the anchor to be fully inserted, with enough room for any additional materials such as washers or nuts. It is essential to follow the manufacturer’s instructions regarding the recommended hole diameter so that the anchor fits snugly. The size of the anchor and the weight of the load it will bear should also be taken into consideration when determining the proper hole dimensions.
Using the Correct Drill Bit for the Concrete Material
Using the correct drill bit for the concrete material is essential to achieve a secure and stable installation. Concrete can vary in hardness, and different drill bits are designed to handle specific types of concrete, such as masonry, reinforced concrete, or lightweight concrete. Consult the manufacturer’s guidelines or seek advice from a hardware expert to select the appropriate drill bit for your project. This ensures that the anchor hole is clean, precise, and properly prepared to receive the anchor.
Securing the Anchor with Adequate Torque
Once the anchor is inserted into the hole, securing it with adequate torque is essential to prevent any loosening or shifting over time. Using a wrench or power tool, apply the recommended amount of torque specified by the manufacturer. Be cautious not to overtighten as it may damage the anchor or the concrete surrounding it. It is advisable to follow the torque specifications carefully to achieve optimal results. A securely fastened anchor provides the necessary support and stability to safely hold the load.
Testing the Anchor’s Strength
Testing the strength of the anchor is a crucial step to ensure its reliability and durability. After installation, allow adequate curing time as recommended by the manufacturer. Once cured, subject the anchor to load stress by gradually applying weight or tension. Monitor for any signs of weakness or movement. If the anchor does not hold up to the anticipated load, consider using a different anchor type or reinforcing the installation with additional anchors. Testing the anchor’s strength helps identify potential issues early on, preventing any accidents or damage.
Troubleshooting Common Issues With Concrete Anchor Installation
Installing concrete anchors can be a sturdy and reliable way to secure objects to a concrete surface. However, just like any installation process, issues can arise from time to time. In this section, we will discuss some common problems that may occur during concrete anchor installation and how to troubleshoot them effectively.
Loose or Wobbly Anchors
One of the most common issues encountered during concrete anchor installation is a loose or wobbly anchor. This can undermine the entire purpose of using anchors in the first place, as they are meant to provide a secure hold. If you notice that your anchor is not firmly in place, there are a few potential causes and solutions:
- Insufficient torque: Sometimes, anchors may become loose due to insufficient torque during installation. In such cases, you can use a torque wrench to apply the recommended amount of force and tighten the anchor properly.
- Incorrect anchor size or type: If the anchor is too small or not suitable for the weight or material being secured, it may not provide a secure hold. Make sure to use the appropriate anchor size and type for your specific application.
- Worn-out anchor: Over time, anchors can wear out and become less effective. If you have been using the same anchor for a long time and notice it becoming loose, consider replacing it with a new one to ensure a secure installation.
Stripped Anchor Threads
Another common issue during concrete anchor installation is stripped anchor threads. This can happen when the threads on the anchor or in the concrete become damaged, making it difficult to secure the anchor properly. Here are some troubleshooting tips for this problem:
- Reposition the anchor: If the threads at one location are stripped, try moving the anchor to a different spot where the threads are still intact. This way, you can ensure a secure hold in an undamaged area of the concrete.
- Use an anchor sleeve: If the damage is extensive or the anchor threads are completely stripped, you can use an anchor sleeve or epoxy to reinforce the hole and create a new threaded surface for the anchor to grip onto.
- Consult a professional: If you encounter severe thread stripping or are unsure about the best course of action, it’s always wise to consult a professional who can assess the situation and provide expert guidance.
Damaged Concrete Surface
Occasionally, the concrete surface itself may be damaged or deteriorated, posing challenges during anchor installation. Here are some troubleshooting tips for this situation:
- Repair the concrete: If the damage is minor, you can repair the concrete surface using suitable concrete repair products. Follow the manufacturer’s instructions to restore the surface integrity before proceeding with the anchor installation.
- Use an adhesive anchor: In cases where the concrete damage is significant or widespread, using an adhesive anchor can be an effective solution. Adhesive anchors bond with the damaged concrete, providing a secure hold even in compromised areas.
- Consider professional assistance: If the concrete damage is extensive or you are unsure about the proper repair methods, it may be beneficial to seek help from a professional concrete contractor or structural engineer.
By understanding and troubleshooting these common issues during concrete anchor installation, you can ensure a successful and secure installation process. Remember to follow the manufacturer’s instructions and use the appropriate tools and materials for your specific application, and don’t hesitate to seek professional help when needed.
Maintenance And Care For Concrete Anchors
Proper maintenance and care for your concrete anchors is crucial to ensure their longevity and effectiveness. Regular inspection, cleaning, lubrication, and replacement of damaged or corroded anchors are essential tasks that should not be overlooked. By following these maintenance guidelines, you can extend the lifespan of your concrete anchors and ensure their optimal performance.
Inspecting the Anchors Regularly
Regular inspections are necessary to identify any signs of wear, damage, or corrosion in your concrete anchors. Inspecting the anchors regularly allows you to catch any issues early on and take timely action to prevent further damage or failure. Here are some important steps to follow during your inspection:
- Visually examine each anchor for cracks, chips, or deformation.
- Check for any signs of rust, corrosion, or discoloration.
- Ensure the anchor is securely fastened and tightly in place.
- Verify that the surrounding concrete is intact and free from cracks or deterioration.
- If there are multiple anchors, check the spacing between them to ensure they meet the required standards.
If you notice any issues during the inspection, take immediate action to address them. This may involve cleaning, lubricating, or replacing the anchors as necessary.
Cleaning and Lubricating the Anchors
Cleaning and lubricating the anchors regularly helps to remove dirt, debris, and other contaminants that can compromise their performance. Follow these steps to clean and lubricate your concrete anchors:
- Wipe the surface of the anchors using a clean cloth or brush to remove any loose dirt or debris.
- Mix a mild detergent or concrete cleaner with water according to the manufacturer’s instructions.
- Apply the cleaning solution to the anchors and scrub gently using a soft-bristle brush.
- Rinse the anchors thoroughly with clean water to remove any residue.
- Once the anchors are clean and dry, apply a suitable lubricant to the threads or moving parts if applicable.
Regular cleaning and lubrication will help prevent the buildup of rust, corrosion, or grime, ensuring that your anchors function optimally.
Replacing Damaged or Corroded Anchors as Needed
If you come across anchors that are damaged, corroded, or no longer meet the required standards, they should be replaced promptly. Here are the steps to follow when replacing concrete anchors:
- Identify the damaged or corroded anchors that need replacement.
- Carefully remove the old anchors using the appropriate tools.
- Clean the surrounding area and prepare it for the installation of the new anchors.
- Choose the right replacement anchors that meet the required specifications and load capacities.
- Follow the correct installation procedures to securely fasten the new anchors in place.
- Perform a final inspection to ensure the newly installed anchors are in proper working condition.
By replacing damaged or corroded anchors as needed, you maintain the safety and reliability of your concrete structures.
Frequently Asked Questions
How Deep Should Anchor Bolts Be In Concrete?
Anchor bolts should be embedded in concrete to a depth of at least four times the diameter of the bolt. This ensures proper anchoring and strength. For example, if the bolt diameter is 1 inch, the minimum depth should be 4 inches.
How Are Anchor Bolts Installed In Concrete?
Anchor bolts are installed in concrete by drilling holes, inserting the bolts, and securing them with nuts and washers. The bolts should be positioned correctly and tightly fastened to ensure stability and structural integrity.
How Far Into Concrete Should Anchors Go?
Anchors in concrete should typically go at least 1 ½ times the length of the anchor. This ensures sufficient grip and stability for the anchor.
How Do You Hammer A Concrete Anchor?
To hammer a concrete anchor, start by positioning the anchor in the desired location on the concrete surface. Then, using a hammer, strike the anchor gently and gradually increase the force until it is securely in place. Be cautious not to damage the anchor or the concrete surface.
Conclusion
Installing concrete anchors is a straightforward process that can greatly enhance the stability and security of your structures. By following the step-by-step instructions provided in this guide, you can ensure a successful installation. Remember to choose the appropriate anchor type for your application and consult with a professional if you have any doubts.
With the right tools and techniques, you’ll be able to tackle any project with confidence. Happy anchoring!