To install cement anchors, first, drill a hole in the wall using a masonry bit according to the anchor size. Insert the anchor into the hole and drive it flush with the surface using a hammer.
Choosing The Right Cement Anchor
When it comes to installing cement anchors, choosing the right one is crucial for the success and durability of your project. There are various factors to consider, such as the type of anchor and its weight capacity and material compatibility. In this article, we will explore the different types of cement anchors available and the key factors to consider when selecting one.
Different types of cement anchors available
- Concrete screws: These anchors are versatile and easy to install. They have sharp threads that securely grip the concrete, making them ideal for applications where the anchor needs to be removed and replaced frequently.
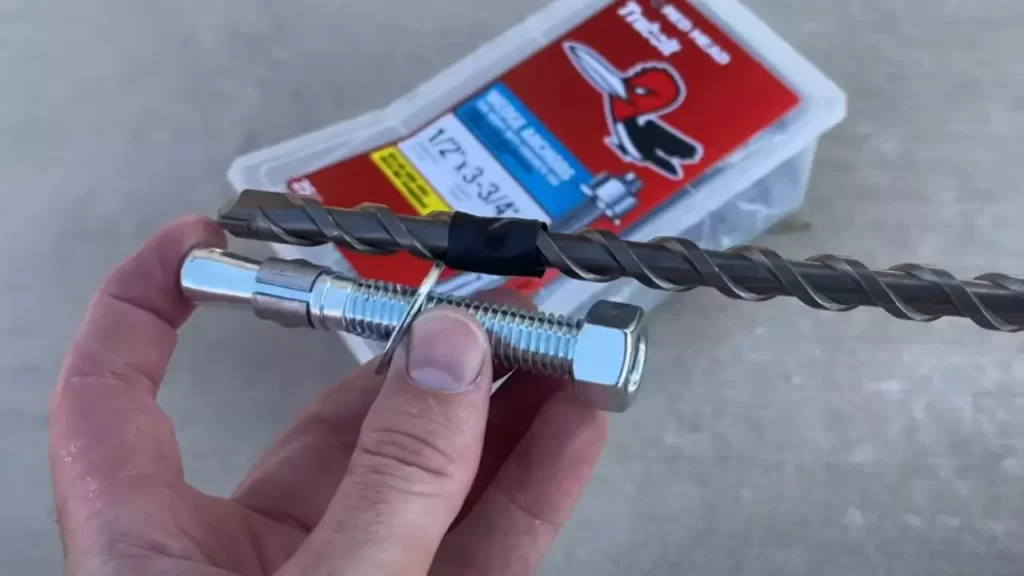
- Expansion anchors: Also known as wedge anchors, these are designed for heavy-duty applications. They create a strong, reliable hold by expanding against the walls of the hole when tightened.
- Drop-in anchors: These anchors are suitable for applications where the hole is pre-drilled. They are easy to install and provide strong, consistent holding power.
- Chemical anchors: Chemical anchors are used when the holding power of mechanical anchors is not sufficient. They chemically bond with the concrete, providing exceptional strength and load capacity.
Factors to consider when choosing a cement anchor
When selecting a cement anchor, it’s important to consider the following factors:
- Application: Determine the purpose of the anchor and the specific requirements of your project. Consider the load capacity, location, and environmental conditions.
- Concrete type: Different types of concrete may require specific anchors. Consult with a professional to ensure compatibility between the anchor and the concrete surface.
- Drilling depth and diameter: The size of the hole needed for the anchor depends on the type and size of the anchor being used. Make sure to follow the manufacturer’s guidelines for the proper drilling depth and diameter.
- Corrosion resistance: Depending on the location and exposure to moisture, it may be necessary to choose an anchor with corrosion-resistant properties, such as stainless steel or zinc coating.
Understanding weight capacity and material compatibility
Weight capacity is a crucial consideration when choosing a cement anchor. The anchor must be able to support the anticipated load without compromising safety. Ensure that you understand the weight rating of the anchor and that it aligns with the specific requirements of your project.
Material compatibility is also important to ensure a secure and long-lasting installation. Consider the type of material the anchor will be attached to and the compatibility between the anchor and that material.
By carefully considering the type of anchor needed for your project, as well as the weight capacity and material compatibility, you can ensure a successful and reliable cement anchor installation. Remember to follow the manufacturer’s instructions and consult with a professional if needed to ensure a secure and durable result.
Preparation And Tools
Installing cement anchors is a crucial step in ensuring the stability and durability of any construction project. Whether you’re working on a DIY project or a professional undertaking, proper preparation and the right tools are essential for a successful installation. In this section, we’ll cover the necessary tools and materials you’ll need for the job, as well as the importance of understanding the surface and load requirements. We’ll also delve into the steps involved in preparing the surface for installation.
Gather the necessary tools and materials
Before you begin the installation process, it’s vital to gather all the tools and materials required. This ensures a smooth and uninterrupted workflow, saving you precious time and effort. Here are the essential tools and materials you’ll need:
- Cement anchors (check the specifications for the appropriate size and weight capacity)
- Drill machine
- Hammer
- Masonry bit
- Broom or brush
- Vacuum cleaner
- Measuring tape
- Safety gloves
- Safety goggles
Having these tools and materials at hand will facilitate a seamless installation process, ensuring precision and accuracy.
Understanding the surface and load requirements
One of the fundamental steps in installing cement anchors is to understand the surface and load requirements. Different surfaces and applications necessitate different types and sizes of anchors. It’s crucial to familiarize yourself with the load capacity specifications provided by the anchor manufacturer. This information will help you choose the appropriate anchor for the weight and pressure the structure will bear.
Additionally, examining the surface is essential for a secure installation. The nature of the material, such as concrete, brick, or drywall, will determine the type of anchor required. Carefully assess the surface for any cracks, weaknesses, or unevenness that may affect the anchor’s performance. Identifying these factors beforehand will ensure a stable and long-lasting installation.
Preparing the surface for installation
Preparing the surface is an integral part of the installation process. Proper preparation not only improves the anchor’s grip but also enhances the overall strength of the structure. Follow these steps to prepare the surface before installing cement anchors:
- Clean the surface: Remove any debris, dust, or loose particles using a broom or brush. This ensures optimal contact between the anchor and the surface.
- Clear the surrounding area: Remove any obstructions around the installation site that may hinder your work.
- Use a vacuum cleaner: For a cleaner and grit-free surface, use a vacuum cleaner to remove any remaining dust or small particles.
- Measure and mark: Use a measuring tape to determine the precise location for the anchor. Mark the spot using a pencil or marker.
- Drill pilot holes: Select an appropriately sized masonry bit and drill pilot holes at the marked spots. Make sure the depth of the hole corresponds to the length of the anchor.
- Clear the drilled holes: After drilling, remove any debris from the holes using a brush or vacuum cleaner. This ensures a smooth insertion of the anchor.
By following these preparation steps, you’ll create an ideal surface for cement anchor installation, ensuring maximum stability and reliability in your construction project.
Step-By-Step Installation Process
In this section, we will walk you through the step-by-step process of installing cement anchors effectively. By following these instructions carefully, you can ensure a secure and stable installation for a variety of applications.
Marking the installation points
The first step in installing cement anchors is to accurately mark the installation points on the surface where you plan to secure the anchors.
Here’s how you can mark the installation points:
- Using a measuring tape or ruler, measure the required distance between the installation points.
- Use a marker or pencil to make small marks indicating the exact spots where you will be drilling the holes for the anchors.
- Double-check the accuracy of your markings to ensure the anchors will be placed in the correct positions.
Drilling the holes
Once you have marked the installation points, you will need to drill holes to accommodate the cement anchors.
Follow these steps to drill the holes:
- Select an appropriate drill bit size based on the diameter of the cement anchors you are using.
- Attach the drill bit securely to your drill.
- Position the drill bit at one of the marked installation points.
- Apply firm pressure to the drill and start drilling the hole, maintaining a steady and controlled motion.
- Repeat the process for each marked installation point, ensuring that all holes are drilled to the required depth.
Inserting the cement anchors
Now that you have drilled the holes, it’s time to insert the cement anchors into the prepared holes.
Follow these steps to insert the cement anchors:
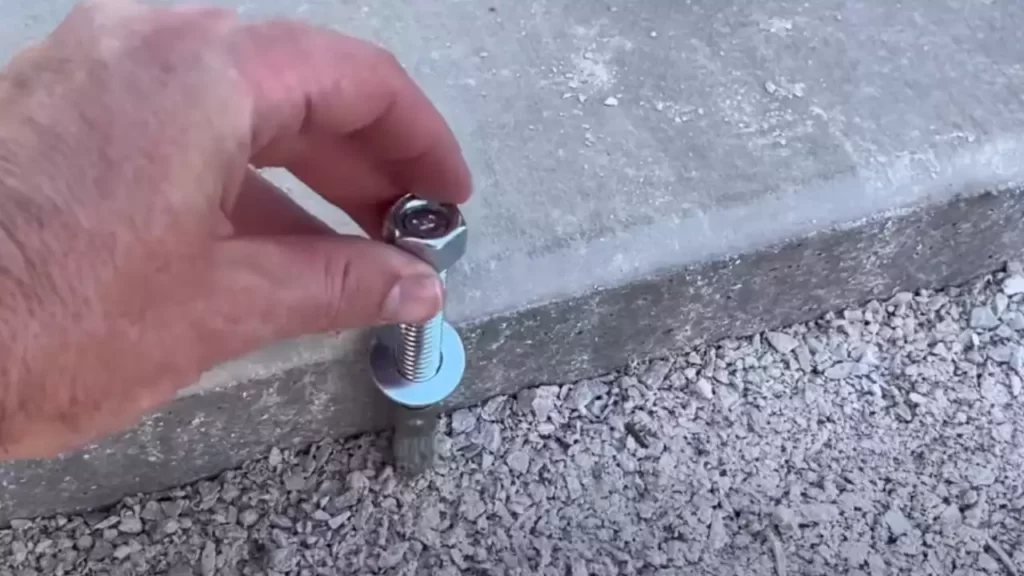
- Take a cement anchor and place it in one of the drilled holes.
- Tap gently on the top of the anchor using a hammer or mallet to ensure it is securely placed in the hole.
- Repeat the process for each drilled hole, making sure that each cement anchor is inserted firmly.
Securing the anchors and tightening
Once all the cement anchors are in place, the final step is to secure them and tighten them properly to ensure a strong installation.
Here’s what you need to do:
- Using a wrench or socket set, tighten the cement anchors clockwise until they are firmly secured against the surface.
- Ensure that each anchor is tightened evenly to maintain stability and prevent any wobbling or loosening over time.
Congratulations! You have successfully installed cement anchors using a step-by-step process. Now you can confidently proceed with your project, knowing that your fixtures or structures are securely attached to the surface.
Troubleshooting And Tips
Common issues during installation and how to resolve them
When installing cement anchors, there are a few common issues that you may encounter. However, with some troubleshooting and tips, you can easily resolve these problems and ensure a successful installation. Here are some solutions to some of the common issues:
-
Inadequate grip:
If you find that the cement anchor is not gripping the surface properly, it can be due to a few reasons. One possibility is that the hole drilled for the anchor is too big. In such cases, you can use epoxy or cement to fill the excess space around the anchor and create a tighter fit.
-
Anchor spinning:
Another issue you may face is the anchor spinning without getting securely fixed. This can happen if the anchor is not inserted at the correct depth. To resolve this, ensure that the anchor is inserted fully into the hole, and you can use a hammer to gently tap it in if needed.
-
Cracks in the surface:
Sometimes, the surface where you want to install the cement anchor may have existing cracks. In such cases, the anchor may not hold properly. To address this, you can use epoxy or a quick-setting cement to reinforce the cracks and create a stable surface for the anchor.
Tips for ensuring a secure and long-lasting installation
To ensure a secure and long-lasting installation of cement anchors, consider the following tips:
-
Choose the right anchor:
Before starting the installation, make sure you select the appropriate type and size of cement anchor for your specific application. Different anchors are designed for different load capacities and materials, so choose wisely.
-
Preparation is key:
Proper preparation of the surface is crucial for a secure installation. Clean the surface thoroughly and remove any debris or loose material. Additionally, ensure that you are drilling the hole at the correct depth and diameter as specified by the manufacturer.
-
Securely tighten the anchor:
Once the anchor is inserted into the hole, use a wrench or socket to tighten it firmly. This will ensure a secure fit and prevent any movement or loosening over time.
-
Allow curing time:
After installation, it is important to allow the cement to cure properly before subjecting it to any load or stress. Follow the manufacturer’s instructions for the recommended curing time.
Understanding when professional help may be needed
While installing cement anchors can be a DIY project, there are situations where professional help may be necessary. Some scenarios where you should consider seeking professional assistance include:
-
Complex installations:
If you are dealing with a complex installation involving multiple anchors or specialized equipment, it is best to consult a professional. They have the expertise and experience to ensure a proper and safe installation.
-
Structural applications:
If you are installing cement anchors for structural purposes, such as supporting heavy loads or securing critical elements, it is crucial to involve a professional. They will ensure that the anchors are installed correctly and meet all necessary safety standards.
-
Uncertain substrate:
If you are unsure about the composition or condition of the substrate where you want to install the anchors, it is wise to consult an expert. They can assess the suitability of the surface and recommend the appropriate anchors and installation methods.
By following these troubleshooting tips and implementing the recommended guidelines, you can ensure a successful installation of cement anchors that will provide a secure and long-lasting solution for your project.
Maintenance And Care
Maintenance and care are essential to ensure the longevity and performance of your cement anchors. By regularly inspecting and maintaining them, cleaning and preventing rust or corrosion, and replacing worn-out or damaged anchors, you can keep them in optimal condition. In this section, we will discuss each of these steps in detail.
Regular inspection and maintenance
Regular inspection is crucial to identify any potential issues with your cement anchors. Conduct a visual examination to check for any signs of wear, tear, or damage. Look for cracks, loose screws or bolts, and damaged parts. Inspect the surrounding cement structure for any signs of degradation. Schedule routine maintenance to address any detected issues promptly.
Cleaning and preventing rust or corrosion
Cement anchors are exposed to various environmental factors that can lead to rust or corrosion. Regular cleaning is essential to keep them free from dirt, debris, and moisture that may accelerate the corrosion process. Follow these steps to clean your cement anchors:
1. Remove any loose dirt or debris using a brush or compressed air.
2. Prepare a mixture of mild detergent and water.
3. Use a soft-bristle brush or cloth to scrub the anchors gently.
4. Rinse thoroughly with clean water and dry using a cloth or air-drying.
To prevent rust or corrosion, apply a thin coat of rust-resistant paint or primer. This additional layer of protection can prolong the lifespan of your cement anchors.
Replacing worn-out or damaged cement anchors
If you notice any signs of wear, tear, or extensive damage during your regular inspection, it is crucial to replace the worn-out or damaged cement anchors promptly. Delaying the replacement may compromise the structural integrity and effectiveness of the anchor. Follow these steps to ensure a proper replacement:
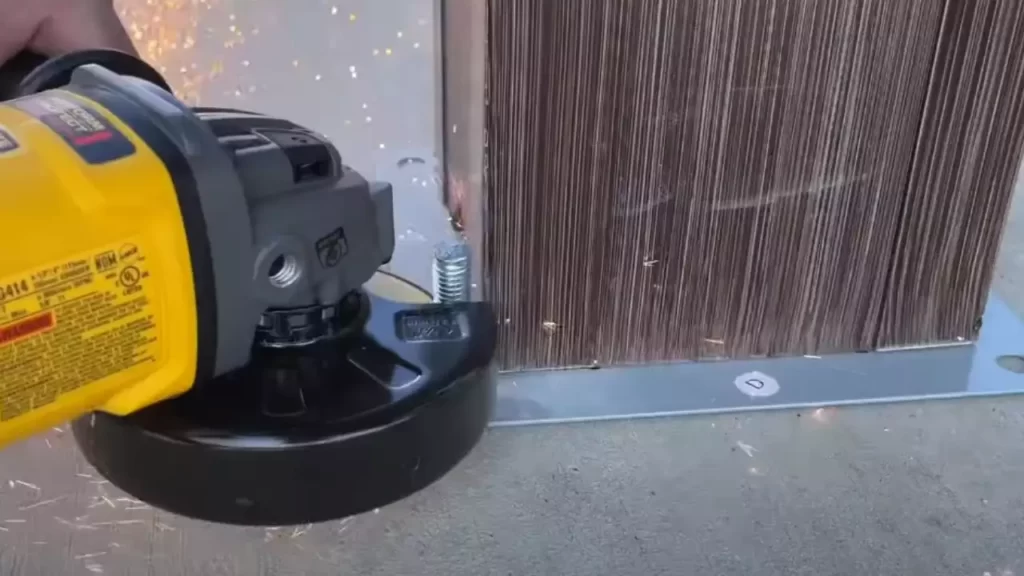
- Remove the old anchor by unscrewing or drilling it out.
- Clean the area thoroughly to remove any debris.
- Choose a suitable replacement anchor based on the specifications of your application, such as diameter, length, and load capacity.
- Insert the new anchor into the pre-drilled hole, making sure it fits securely.
- Tighten the anchor using the appropriate tools, following the manufacturer’s instructions.
- Perform a final inspection to ensure the replacement anchor is securely in place and functioning correctly.
By regularly inspecting, cleaning, and replacing worn-out or damaged cement anchors, you can maintain their effectiveness and ensure the safety of your structures. Implement a maintenance and care routine to maximize the durability and reliability of your cement anchors over time.
Frequently Asked Questions
How To Install A Concrete Anchor?
To install a concrete anchor, follow these steps: 1. Drill a hole in the concrete using a hammer drill. 2. Clean the hole from debris using a brush or compressed air. 3. Insert the anchor into the hole, making sure it is flush with the surface.
4. Tighten the anchor using a wrench or socket. 5. Test the anchor’s stability before applying any load.
Do You Hammer In Concrete Anchors?
Yes, you can use a hammer to install concrete anchors.
How Are Anchor Bolts Installed In Concrete?
Anchor bolts are installed in concrete by drilling holes, cleaning the hole, placing the anchor bolt into the hole, and then tightening the nut to secure it in place. The bolt provides a connection point for structures and equipment to be securely fastened to the concrete.
How Deep Do Anchor Bolts Need To Be In Concrete?
Anchor bolts should be embedded into concrete to a depth of at least 4 times the diameter of the bolt. This ensures proper strength and stability for the anchor point.
Conclusion
To sum up, installing cement anchors is a practical and efficient way to secure objects to concrete surfaces. By following the step-by-step instructions provided in this guide, you can confidently tackle this project. Remember to choose the right anchor and drill, prepare the surface properly, and use the correct technique to achieve long-lasting results.
With a little patience and the right tools, you’ll be able to successfully install cement anchors and ensure the stability of your fixtures.