To install a ceiling fan where a light was, first, turn off the power to the light fixture at the circuit breaker. Remove the light fixture and install a fan-rated ceiling box in its place.
Mount the ceiling fan to the box using the provided hardware. Connect the fan’s wiring to the electrical wires in the ceiling, making sure to match the corresponding colors. Securely attach the fan blades and test the fan to ensure it is functioning properly.
Finally, turn on the power and enjoy your newly installed ceiling fan. Are you looking to replace a light fixture with a ceiling fan in your home? Installing a ceiling fan where a light was is a relatively simple process. With the right tools and following the correct steps, you can have a functional and stylish ceiling fan in no time. In this guide, we will walk you through the installation process, ensuring that you can confidently complete the task yourself. So, let’s get started and bring a cool breeze to your living space!
Required Tools And Materials
Before you embark on installing a ceiling fan where a light used to be, it’s important to gather all the necessary tools and materials. Having everything prepared will make the process smoother and ensure that you have everything you need right at your fingertips.
Screwdriver
A screwdriver is an essential tool for any DIY project, and installing a ceiling fan is no exception. Make sure you have a screwdriver with both flathead and Phillips head options. This will allow you to easily remove the screws holding the light fixture in place, as well as secure the fan blades and other components.
Wire nuts
To properly connect the wires during the installation process, you’ll need wire nuts. These small, often cone-shaped connectors are designed to twist onto the exposed ends of wires, joining them securely. Wire nuts make it easy to ensure a solid electrical connection and minimize the risk of any loose wires.
Wire strippers
Before you can connect the wires with wire nuts, you may need to strip the insulation off the ends of the wires. A pair of wire strippers will make this task simple and efficient. Look for wire strippers with multiple gauge options so that you can work with different sizes of wires.
Electrical tape
Electrical tape is an essential tool for electrical projects, as it provides an extra layer of insulation and helps secure the connections. Once you’ve connected the wires using wire nuts, wrapping them with electrical tape will provide added protection and peace of mind.
Circuit tester
Before you start working with any electrical components, it’s crucial to ensure the power is turned off. A circuit tester is a handy tool that can be used to check if a circuit is live or not. By using a circuit tester, you can confirm that the power is safely turned off before starting the installation process.
Ceiling fan kit
Of course, you’ll need a ceiling fan kit to complete the installation successfully. This kit typically includes the fan motor, fan blades, mounting hardware, and any additional components needed. Make sure you have purchased a ceiling fan kit that is suitable for your specific installation and matches your desired style and functionality.
Ladder
Finally, don’t forget a sturdy ladder to help you reach the ceiling. Working at height can be dangerous, so ensure you have a ladder that provides stability and allows you to comfortably access the ceiling area where the fan will be installed.
By gathering all these tools and materials beforehand, you’ll be well-prepared to install a ceiling fan where a light used to be. Having everything you need at hand will save you time and enable you to carry out a smooth and successful installation.
Preparing For Installation
Preparing for the installation of a ceiling fan where a light fixture once was requires a few important steps to ensure a safe and efficient installation process. By following these steps, you can complete the installation with ease and enjoy the benefits of a cool and comfortable room.
Turn off the power
The first and most crucial step in preparing for the installation of a ceiling fan is to turn off the power to the existing light fixture. This can be done by accessing the circuit breaker panel and locating the switch that controls the power supply to the specific room or area where the installation will take place. It’s essential to double-check that the power is indeed off before proceeding further.
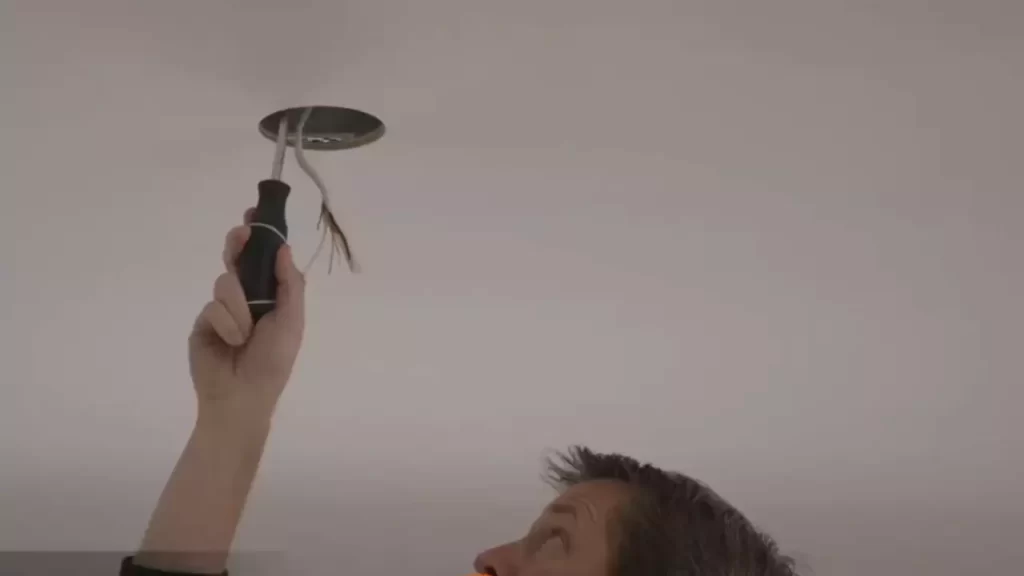
Remove the existing light fixture
Once the power is safely turned off, the next step is to carefully remove the existing light fixture. This typically involves unscrewing the mounting plate and disconnecting the wires that connect the fixture to the electrical box. It’s important to ensure that the fixture is completely detached and set aside in a safe location.
Inspect the electrical box
After removing the light fixture, it is necessary to inspect the electrical box to ensure it is suitable for supporting a ceiling fan. The electrical box must be rated for fan support and be securely attached to a ceiling joist or support beam. If the existing box is not fan-rated or is not securely mounted, it will need to be replaced with a suitable fan-rated box.
To determine if the electrical box is fan-rated, take a close look at the label or certification mark on the box. It should indicate that it is specifically designed and approved for ceiling fan installation. If there is any doubt, it is recommended to consult a qualified electrician to assess the box’s suitability and make any necessary modifications or replacements.
By following these steps and ensuring a safe and secure electrical setup, you can proceed with confidence to the next phase of installing your ceiling fan. In the next section, we will discuss the necessary tools and materials you will need for a successful installation.
Checking Wiring Compatibility
Before installing a ceiling fan where a light fixture was previously, it is crucial to determine if the current wiring supports a ceiling fan. The wiring in your electrical box needs to meet specific requirements to safely power and operate the fan.
Determine if the current wiring supports a ceiling fan
To begin, turn off the power to the existing light fixture from the circuit breaker. Once the power is off, remove the light fixture and inspect the wiring inside the electrical box. Look for the following:
- Adequate amperage: Check if the circuit wiring is rated for the amperage required by the ceiling fan. Typically, a ceiling fan requires a 15-amp circuit, but it may vary depending on the fan’s specifications.
- Proper gauge: Verify that the wire gauge in the box is suitable for a ceiling fan. For most ceiling fans, a 14-gauge wire is sufficient. However, if the fan is larger or more powerful, a 12-gauge wire might be necessary.
- Grounding: Ensure that the wiring includes a ground wire, which is crucial for safety. A ground wire is typically bare or green and should connect to the grounding screw in the electrical box.
Identify the wires in the electrical box
Once you have confirmed the wiring compatibility, it’s important to identify the wires in the electrical box. The wires you will commonly encounter include:
| Wire Color | Description |
|---|---|
| Black (or Red) | Main power supply wire, also known as the “hot” wire. |
| White | Neutral wire, which completes the circuit. |
| Bare (or Green) | Grounding wire, essential for safety. |
It’s crucial to correctly identify these wires to ensure proper installation and operation of the ceiling fan. If you are uncertain about any of the wires, consult a professional electrician for assistance.
By checking the wiring compatibility and identifying the wires in the electrical box, you can proceed with confidence in installing your ceiling fan where the light fixture previously existed.
Installing The Ceiling Fan
When it comes to installing a ceiling fan where a light fixture once was, you’ll want to follow a few simple steps to ensure a successful installation. In this section, we’ll break down the process into three main tasks: mounting the ceiling fan bracket, connecting the ceiling fan wiring, and attaching the fan blades. Let’s get started!
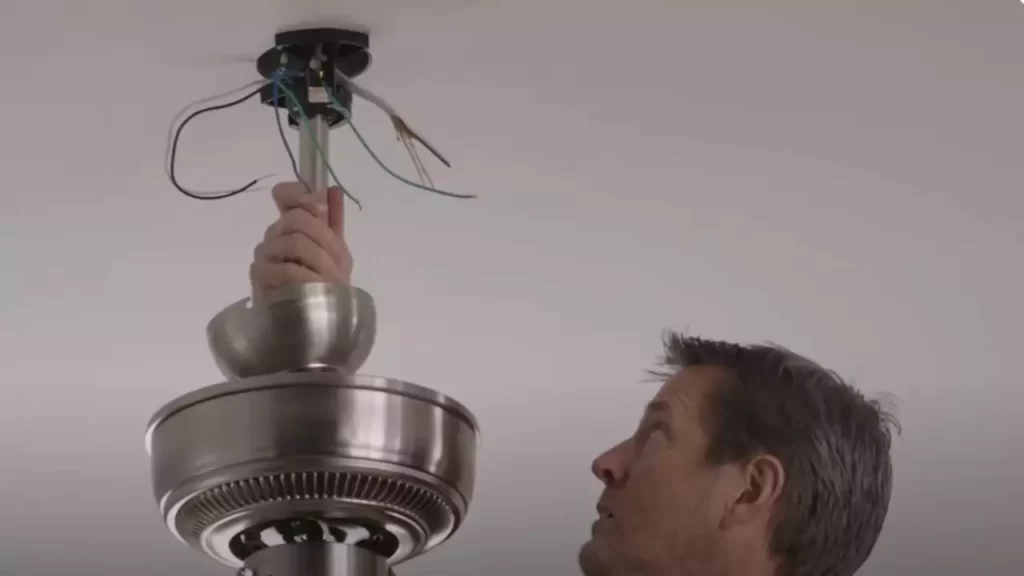
Mounting the Ceiling Fan Bracket
The first step in installing your new ceiling fan is to mount the ceiling fan bracket securely. Ensure that you have chosen a suitable location for the fan and that it can support the weight. Here’s how you can mount the bracket:
- Turn off the power to the circuit at the circuit breaker.
- Remove the existing light fixture.
- Attach the ceiling fan bracket to the electrical box in the ceiling using the provided screws.
- Make sure the bracket is level and securely fastened.
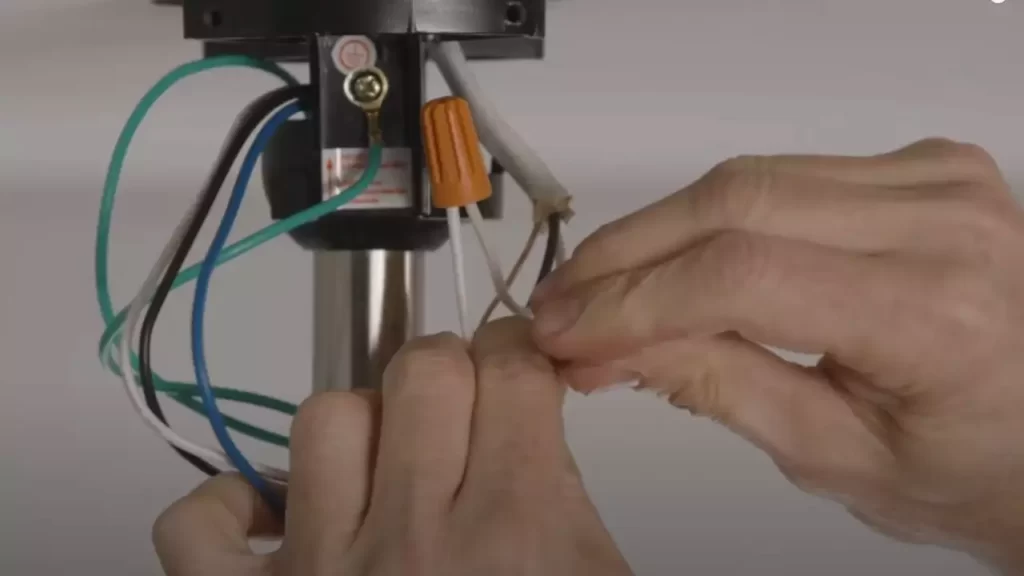
Connecting the Ceiling Fan Wiring
Once the bracket is securely mounted, it’s time to connect the wiring for your ceiling fan. Make sure to follow the manufacturer’s instructions and adhere to safety guidelines. Here’s how you can connect the wiring:
- Identify the wires in the electrical box: typically black (hot), white (neutral), and green or bare copper (ground).
- Match the wires from the fan to the corresponding wires in the electrical box.
- Twist the ends of the wires together, using wire connectors to secure the connections.
- Carefully tuck the connected wires into the electrical box, making sure they are not pinched.
Attaching the Fan Blades
With the wiring in place, it’s time to attach the fan blades. Make sure to follow the instructions provided with your ceiling fan for this step. Here’s how you can attach the fan blades:
- Identify the blade arms and the screw holes on the motor housing.
- Align the blade arms with the screw holes and insert the screws.
- Tighten the screws securely, making sure the blades are properly aligned.
- Repeat this process for each fan blade, ensuring they are evenly spaced.
With the fan blades securely attached, you’re one step closer to enjoying a cool breeze in your space.
Securing the Fan Canopy
The final step in the installation process is to secure the fan canopy, which covers the electrical components of the ceiling fan. Here’s how you can do it:
- Lift the fan canopy and align it with the mounting bracket.
- Rotate the canopy until it locks into place.
- Ensure that the canopy is secure and flush against the ceiling.
- Tighten any screws or fasteners to hold the canopy in place.
With the fan canopy secured, you have successfully installed your ceiling fan where the light fixture once was. Now, you can enjoy the benefits of improved airflow and energy efficiency in your space!
Verifying The Installment
If you have successfully installed your ceiling fan where the light fixture used to be, it is crucial to verify the installation to ensure that everything is in proper working order. This verification process involves checking connections and tightening screws, turning on the power and testing the fan, and balancing the ceiling fan.
Checking connections and tightening screws
Before you turn on the power, take a moment to inspect the connections between the fan and the wiring. Start by checking that the wiring is securely fastened to the fan and that all the wire connectors are tightly in place. If any connectors are loose, tighten them using a screwdriver. Additionally, examine all the screws and bolts that hold the fan blades, motor, and other components together. Ensure that they are all tightened properly to avoid any potential safety hazards.
Turning on the power and testing the fan
Next, it’s time to turn on the power and test the functionality of your newly installed ceiling fan. Locate the circuit breaker for the room where the fan is installed and ensure it is in the “off” position. Once confirmed, flip the breaker to the “on” position. Be attentive and listen for any unusual noises or vibrations as the fan starts spinning. If everything seems to be running smoothly, move on to the next step. However, if you notice any issues, such as a wobbling motion or strange sounds, it is important to troubleshoot and address the problem before proceeding further.
Balancing the ceiling fan
Properly balancing your ceiling fan is essential to ensure its longevity and efficient operation. An unbalanced fan can generate excessive noise and cause premature wear and tear. To balance the fan, start by turning it off and allow it to come to a complete stop. Then, using a balance kit or a simple weighted clip-on, attach it to one of the fan blades. Turn the fan back on at a low speed and observe the movement. If the fan remains stable, move the weight to another blade and repeat the process until you achieve a balanced rotation. Once the fan is properly balanced, remove the weight and double-check all the connections and screws to ensure they are still secure.
Troubleshooting
Faq
If you’re planning to install a ceiling fan where a light was previously installed, you might have a few questions about the process. In this FAQ section, we will address some common queries that you may have.
Can I install a ceiling fan on a sloped ceiling?
Yes, you can definitely install a ceiling fan on a sloped ceiling. However, it is crucial to ensure that the ceiling fan is compatible with a sloped ceiling installation. Not all ceiling fans are designed to be mounted on sloped ceilings, so it’s essential to check the manufacturer’s instructions or specifications before starting the installation.
Here are a few important things to keep in mind:
- Make sure that the ceiling fan you choose is specifically listed as suitable for sloped ceilings. This information can usually be found in the product description or installation manual.
- Consider purchasing a sloped ceiling adapter kit if it is not included with the fan. This kit will allow you to install the fan properly on a sloped ceiling.
- Ensure that the angle of the ceiling slope falls within the acceptable range specified by the ceiling fan’s manufacturer.
What should I do if the ceiling fan wobbles?
If your newly installed ceiling fan starts to wobble, it can be both annoying and concerning. Here are a few steps you can take to address the issue:
- Check that all screws and bolts are securely tightened. Loose fittings can contribute to wobbling.
- Ensure that the ceiling fan blades are properly aligned. They should be at an equal distance from the ceiling.
- Use a balancing kit that typically comes with the ceiling fan. This kit includes clip-on weights that you can attach to the blades to balance them out.
- If the wobbling persists, you may need to use a fan balancing kit or consult a professional electrician to identify the underlying problem.
Can I install a remote control for the ceiling fan?
Yes, it is often possible to install a remote control for a ceiling fan. Many ceiling fans are designed to accommodate remote controls, but not all of them come with one included. Here’s how you can install a remote control:
- First, check the ceiling fan’s instruction manual to determine whether it is compatible with a remote control accessory.
- If it is compatible, you can usually purchase a remote control kit separately from the ceiling fan. Make sure to choose a kit that is designed for your specific fan model.
- Follow the installation instructions provided with the remote control kit to wire it into the existing electrical connections of your ceiling fan.
- Once properly installed, you can enjoy the convenience of controlling your ceiling fan’s speed, direction, and lighting with the remote control.
Remember, always consult the manufacturer’s instructions or seek professional help if you are unsure about any step of the installation process.
Frequently Asked Questions
Can You Hang A Fan Where A Light Fixture Was?
Yes, you can hang a fan in the place where a light fixture was.
How Do I Know If My Junction Box Will Hold A Ceiling Fan?
Check the rating on your junction box. Make sure it can support the weight of a ceiling fan. If the box is rated for a fan, it will be labeled as such. If not, you’ll need to install a fan-rated junction box.
Consult a professional if unsure.
How Do You Remove A Light Housing From A Ceiling Fan?
To remove a light housing from a ceiling fan, first turn off the power. Then, unscrew the screws or nuts attaching the housing. Gently pull down the housing and disconnect the wires. Take note of their positions for later reinstallation.
That’s it! The housing is removed.
Can You Install A Ceiling Fan Where There Is No Light Fixture?
Yes, you can install a ceiling fan even if there is no light fixture present. However, you will need to hire an electrician to run wiring to the location you want the fan installed, since there is no existing electrical connection.
A professional will ensure the installation is safe and up to code.
Conclusion
Installing a ceiling fan where a light fixture used to be is a relatively simple process. By carefully following the steps outlined in this guide, you can successfully upgrade your space with a functional and stylish ceiling fan. Remember to always prioritize safety, turn off the electricity, and consult a professional if needed.
Enjoy the benefits of improved air circulation and energy efficiency in your home with your new ceiling fan installation.