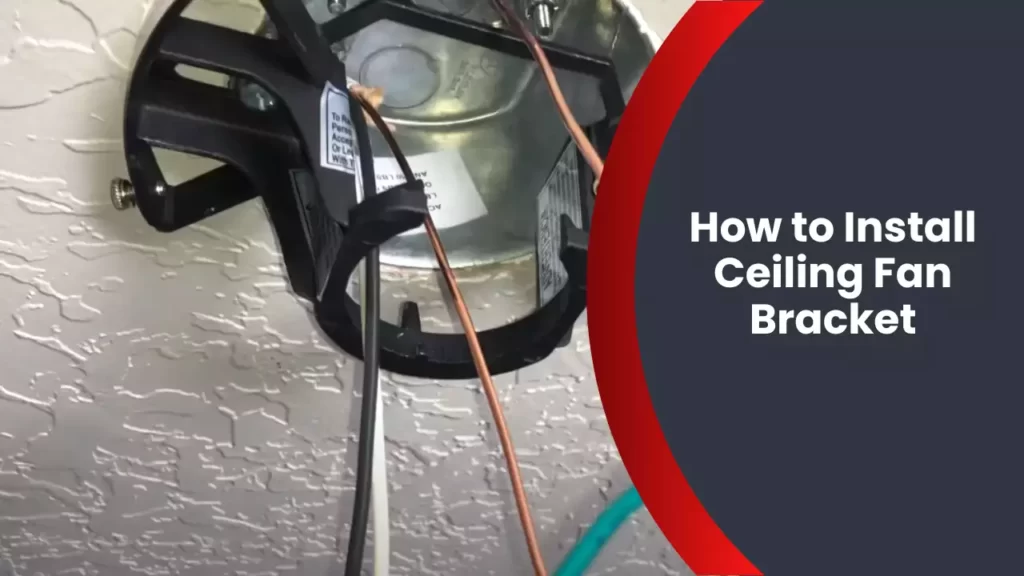
Installing a ceiling fan bracket involves following certain steps like locating a joist, marking the spot, drilling a hole, and securing the bracket. Now, let’s explore the procedure in detail.
Ceiling fans provide efficient cooling and air circulation in homes. Installing a ceiling fan bracket requires identifying a joist in the ceiling, marking the spot, drilling a hole, and securing the bracket. This guide will provide step-by-step instructions on how to install a ceiling fan bracket, ensuring a safe and sturdy installation.
By following these instructions, you’ll be able to enjoy the comfort and functionality of a ceiling fan in your home.
The Importance Of A Ceiling Fan Bracket
The Importance of a Ceiling Fan Bracket
When installing a ceiling fan, one of the most crucial components to consider is the ceiling fan bracket. The bracket serves as a sturdy support system, ensuring the fan is securely attached to the ceiling. Without a reliable bracket, the ceiling fan may wobble, vibrate, or even fall down, posing a safety risk and potentially causing damage to your property.
Why a secure bracket is essential
A secure ceiling fan bracket is essential for a variety of reasons. Here are a few key points to understand:
- Ensures stability: A properly installed ceiling fan bracket minimizes any unwanted movement and ensures that your fan operates smoothly and quietly. By securing the fan in place, you can enjoy a comfortable living space without any unnecessary noise or wobbling.
- Reduces the risk of accidents: A loose or weakly attached ceiling fan can be hazardous, especially if it falls or collapses unexpectedly. Installing a secure bracket reduces the risk of accidents, protecting you, your family, and your belongings from potential harm.
- Prolongs the lifespan of your fan: A ceiling fan that is not securely attached may experience increased wear and tear, shortening its lifespan. By ensuring a stable installation with a reliable bracket, you can enhance the longevity of your fan and avoid unnecessary repairs or replacements.
Benefits of installing a ceiling fan bracket correctly
Installing a ceiling fan bracket correctly offers numerous benefits that go beyond just stability and safety. Let’s explore them:
- Improved energy efficiency: By installing a ceiling fan bracket correctly, you can optimize the efficiency of your fan. A secure bracket allows the fan to operate at its highest capacity, providing better airflow and cooling in your space while consuming less energy.
- Enhanced comfort: With a well-installed ceiling fan bracket, you can experience enhanced comfort in your rooms. The fan will distribute air evenly, creating a soothing breeze that can alleviate heat and humidity during the summer months, and even help circulate warm air during winter.
- Increased aesthetic appeal: Properly installing a ceiling fan bracket ensures that your fan is aligned correctly with the ceiling. This results in a visually appealing and cohesive look for your space. No more crooked or tilted fans that disrupt the overall aesthetics of your room.
In conclusion, a ceiling fan bracket should never be overlooked during the installation process. It plays a vital role in providing stability, safety, and optimal performance for your ceiling fan. By prioritizing the correct installation of the bracket, you can enjoy the plethora of benefits it offers, including improved energy efficiency, enhanced comfort, and an aesthetically pleasing appearance.
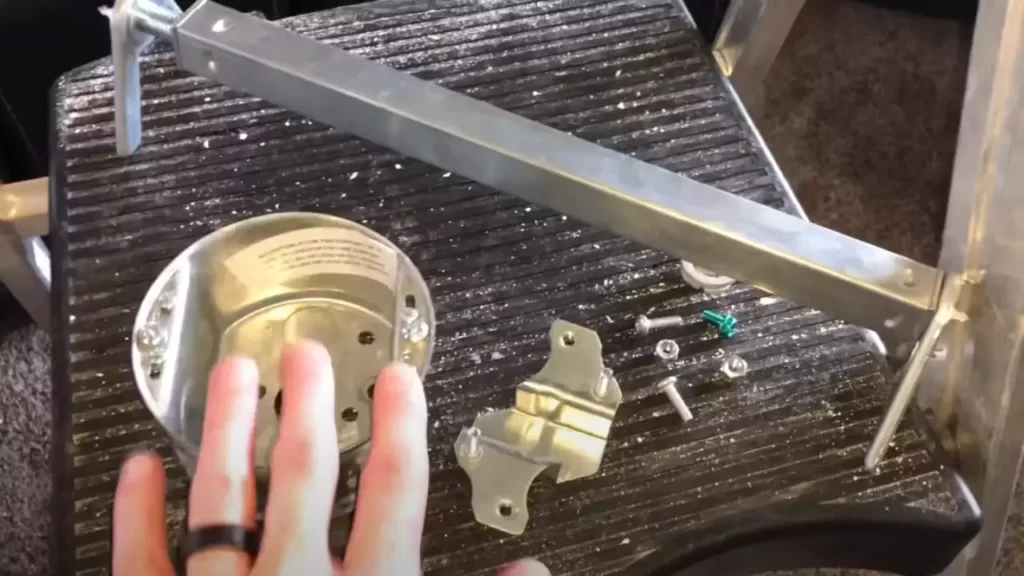
Tools And Materials Needed
Before you begin installing a ceiling fan bracket, it’s important to gather all the necessary tools and materials. Having everything you need beforehand will ensure a smooth installation process and save you from any last-minute trips to the hardware store. In this section, we’ll provide you with a comprehensive list of tools and materials required for mounting the ceiling fan bracket.
List of necessary tools for installation
To install a ceiling fan bracket, you’ll need the following tools:
- Drill
- Screwdriver (Phillips and flathead)
- Tape Measure
- Stud Finder
- Pencil or Marker
- Wire Strippers
- Wire Nuts
- Adjustable Wrench
- Step Ladder
Having these essential tools at your disposal will make the installation process quick and hassle-free. Before starting, make sure all your tools are in good working condition and easily accessible.
Required materials for mounting the bracket
In addition to the tools listed above, you will also need the following materials:
| Materials | Quantity |
|---|---|
| Ceiling fan bracket | 1 |
| Mounting screws | 2-4 (depending on bracket design) |
| Anchors | 2-4 (if mounting on drywall) |
| Wire connectors | Several |
Make sure you have all the required materials before starting the installation process. Using the right materials will guarantee a secure and stable mounting of the ceiling fan bracket.
Preparations Before Installation
Before installing a ceiling fan bracket, it is crucial to make a few necessary preparations to ensure a smooth and safe installation process. These preparations will not only help you set up the bracket correctly but also ensure your safety while working with electrical connections and heavy equipment. Here are the essential preparations you need to make before installing a ceiling fan bracket:
Turning off the power supply
The first and most important step in preparing for the installation of a ceiling fan bracket is to turn off the power supply. This is crucial to prevent any accidental electric shocks while working with the electrical connections. To turn off the power supply, locate and switch off the circuit breaker that controls the room’s electricity. Double-check by testing the wires with a non-contact voltage tester to confirm that the power is indeed off before proceeding with any installation work.
Cleaning the ceiling area
Prior to installing the ceiling fan bracket, it is vital to have a clean and stable surface to work with. Begin by removing any existing fixtures or debris from the ceiling area where the fan will be mounted. Use a soft cloth or brush to gently wipe away any dust or dirt accumulation. This will ensure a secure installation and prevent any potential hazards that could arise from loose particles falling during the process. If needed, you can also use a mild cleaner to remove stubborn stains or grime, followed by drying the surface thoroughly.
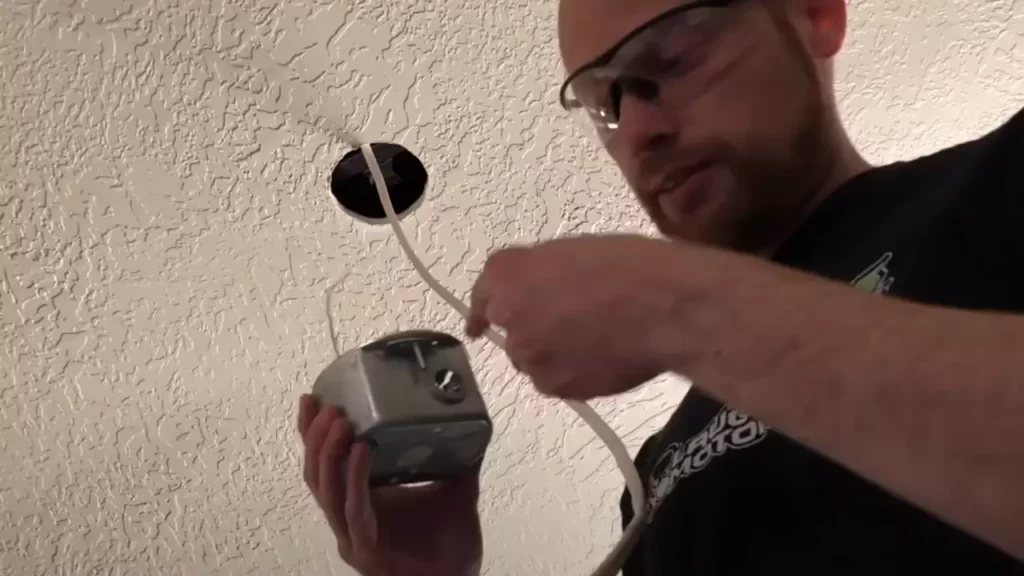
Measuring the distance from the electrical box
To install the ceiling fan bracket accurately, you need to measure the distance between the electrical box and the desired fan location. This step is crucial to ensure that the bracket aligns properly with the electrical box and allows for ample clearance for the fan blades. Use a tape measure to determine the distance, measuring from the center of the electrical box to the desired spot for the fan. Note down this measurement as it will guide you during the installation process.
By completing these preparations before starting the installation of the ceiling fan bracket, you will create a safe and organized working environment. These steps will help streamline the installation process, allowing you to proceed with confidence and ensure a successful outcome. Remember to always prioritize safety and follow the manufacturer’s instructions for your specific ceiling fan model to achieve the best results.
Step-By-Step Guide To Install A Ceiling Fan Bracket
Step-by-Step Guide to Install a Ceiling Fan Bracket
Installing a ceiling fan bracket is a simple task that can help you enhance the airflow and aesthetics of your room. With the right tools and a clear understanding of the process, you can have your fan up and running in no time. In this step-by-step guide, we will walk you through each stage of the installation, from positioning the bracket on the ceiling to attaching it securely. Follow these instructions carefully to ensure a safe and successful installation.
Positioning the bracket on the ceiling
Before you start, make sure you have turned off the power to the room. This will prevent any accidental electrical mishaps during the installation process. Once the power is off, follow these steps to position the bracket:
- Locate the center of the room’s ceiling using a measuring tape. Mark it with a pencil.
- Using a stud finder, locate a ceiling joist near the center mark. This is where the bracket will be securely attached.
- Hold the bracket against the ceiling, aligning it with the center mark and the joist. Ensure that the bracket is level using a carpenter’s level. Make any adjustments if needed.
Marking the screw holes
Once the bracket is securely positioned, it’s time to mark the screw holes for drilling. Follow these steps:
- Using a pencil, mark the screw holes on the ceiling by tracing the openings of the bracket.
- Double-check the alignment and levelness of the bracket before proceeding to ensure a properly positioned fan.
Drilling holes for the screws
With the screw holes marked, it’s time to drill the necessary holes into the ceiling. Here’s what you need to do:
- Attach a drill bit suitable for your ceiling material to your power drill.
- Position the drill bit directly over the marked screw holes. Start drilling slowly to create pilot holes.
- Increase the drill’s speed and apply firm pressure as you complete the holes. Take care not to drill too deep or damage any electrical wiring.
Attaching the bracket securely to the ceiling
Now that the holes are drilled, it’s time to attach the bracket to the ceiling. Follow these steps:
- Position the bracket back onto the ceiling, aligning it with the drilled holes.
- Insert screws through the bracket’s holes and into the pilot holes in the ceiling.
- Using a screwdriver or power drill, tighten the screws securely to hold the bracket firmly in place.
- Double-check the bracket’s stability and ensure it can support the weight of the ceiling fan.
By following these step-by-step instructions, you can successfully install a ceiling fan bracket and enjoy the comfort and style it brings to your space. Remember to exercise caution, follow safety guidelines, and refer to the manufacturer’s instructions throughout the installation process.
Choosing The Right Ceiling Fan Bracket
When it comes to installing a ceiling fan, choosing the right bracket is crucial for a secure and stable installation. The ceiling fan bracket is responsible for supporting the weight of the fan and ensuring it stays safely in place. In this section, we will provide an overview of the different types of brackets available and discuss the factors to consider when selecting a bracket for your ceiling fan.
Overview of different types of brackets available
There are several types of brackets available for ceiling fans, each designed to suit different types of installations. Below, we provide an overview of some commonly used ceiling fan brackets:
| Type of Bracket | Description |
|---|---|
| Standard Mounting | This type of bracket is the most common and is suitable for ceilings with a regular height. |
| Angled Mounting | If you have a sloped or vaulted ceiling, an angled mounting bracket is essential to ensure proper installation. |
| Low Profile Mounting | Also known as a “hugger” or “flush mount” bracket, this type is ideal for ceilings with low clearance or when you prefer the fan to be as close to the ceiling as possible. |
| Dual Mounting | This versatile bracket allows you to choose between a standard or angled mounting depending on your ceiling type. |
Factors to consider when selecting a bracket for your ceiling fan
When selecting a bracket for your ceiling fan, it is important to consider the following factors:
- Ceiling Height: Take into account the height of your ceiling to determine the appropriate bracket type. For low ceilings, a low profile mounting bracket would be suitable, while sloped ceilings would require an angled mounting bracket.
- Weight Capacity: Ensure that the bracket you choose can support the weight of your ceiling fan. Check the manufacturer’s specifications for maximum weight capacity.
- Ceiling Material: Different types of brackets are suitable for different ceiling materials. Make sure the bracket is compatible with your ceiling, whether it’s drywall, concrete, or a suspended ceiling.
- Design and Aesthetics: Consider the design and aesthetics of the bracket, as it will be visible once the fan is installed. Choose a bracket that complements your ceiling fan and overall room decor.
- Installation Complexity: Some brackets may require more complex installation procedures, while others are simpler and easier to install. Consider your level of DIY expertise and choose a bracket that matches your comfort level.
By considering these factors and understanding the different types of brackets available, you can confidently choose the right ceiling fan bracket for your specific installation needs. Remember to carefully follow the manufacturer’s instructions and seek professional assistance if needed. The right bracket will ensure a safe and secure ceiling fan installation that will provide comfort and functionality for years to come.
Common Mistakes To Avoid During Installation
Installing a ceiling fan can be a daunting task, but with the right guidance, it becomes a breeze. However, even the most experienced DIYers can make some common mistakes during the installation process. These mistakes can jeopardize the safety and durability of your ceiling fan, and even result in a less efficient performance. To help you avoid these pitfalls, here are some crucial mistakes you should steer clear of when installing a ceiling fan bracket:
Using the Wrong Bracket Size for the Fan
One of the most critical aspects of installing a ceiling fan is choosing the right bracket size for your fan. Each ceiling fan comes with a specific bracket size that is designed to fit accordingly. However, people often make the mistake of using a bracket that is either too small or too large for their fan. This mismatch can lead to various problems, including unstable fan operation, excessive wobbling, and potentially even falling off.
To ensure a secure and stable installation, it is crucial to carefully match the bracket size with the specifications of your ceiling fan. Start by referring to the fan’s instruction manual or consult the manufacturer’s website for the correct bracket size. By using the appropriate bracket, you can guarantee a safer and more efficient operation of your ceiling fan.
Failing to Secure the Bracket Properly
Securing the bracket properly is another common mistake to avoid during the installation process. Many homeowners overlook the importance of securely fastening the bracket to the ceiling, leading to potential hazards in the long run. Improperly secured brackets can cause the fan to sway, make noise, or even detach from the ceiling altogether.
When installing the bracket, ensure that it is firmly attached to the ceiling joist using appropriate screws or bolts. Avoid using short screws or insufficient fasteners that may not provide the necessary support. Double-check the stability of the bracket by giving it a gentle shake before proceeding with the fan installation. This simple step can prevent future problems and ensure the safety of your ceiling fan for years to come.
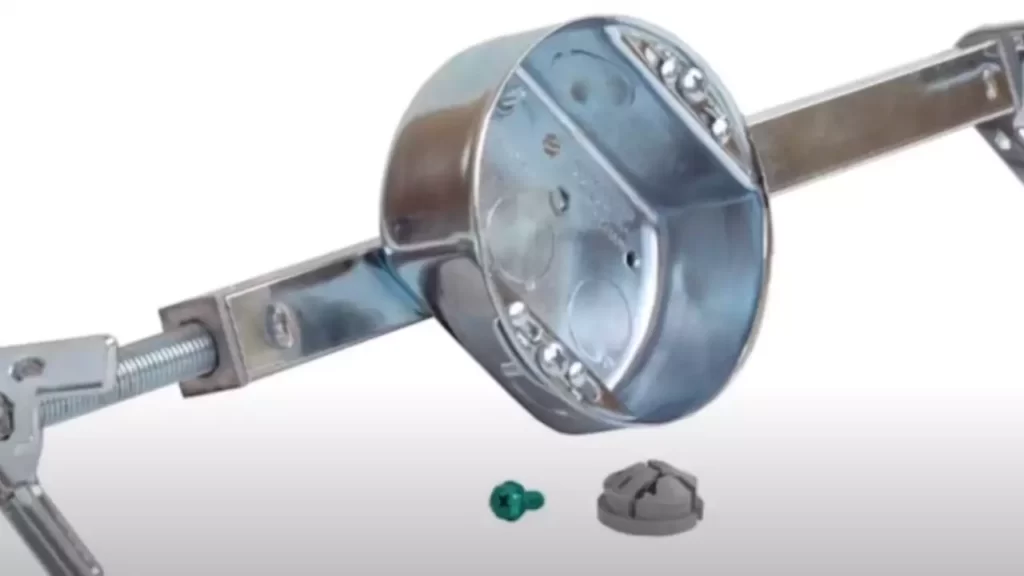
Overlooking Electrical Box Limitations
Another crucial mistake commonly made during ceiling fan installation is overlooking the limitations of the electrical box. The electrical box supports the weight of the fan and holds the electrical connections. Depending on its design and load-bearing capacity, the electrical box may not be suitable for supporting a ceiling fan.
Before proceeding with the installation, ensure that your electrical box is specifically labeled and rated for ceiling fan installations. If it is not, you will need to replace the existing electrical box with a rated one that can handle the weight and movement associated with a ceiling fan. Neglecting this step can put unnecessary stress on the electrical wiring and compromise the stability of the fan.
By avoiding these common mistakes during the installation process, you can ensure a safe and successful installation of your ceiling fan bracket. Take the time to carefully select the appropriate bracket size, secure it properly, and pay attention to the limitations of your electrical box. With these precautions in mind, you can enjoy the comfort and functionality of your ceiling fan for years to come!
Troubleshooting And Tips
If you’re looking to install a ceiling fan bracket, it’s important to be prepared for any potential issues that may arise during the process. In this section, we will address some common installation issues and provide you with helpful tips to ensure an easy and successful installation.
Fixing common installation issues
Even with careful planning, it’s not uncommon for certain installation issues to arise. Here are some common problems you may encounter and ways to fix them:
- Uneven or sloping ceiling: If your ceiling is not level, it can pose a challenge when installing the ceiling fan bracket. To fix this issue, you may need to use a shim or a leveling kit to ensure that the bracket is installed securely and correctly.
- Inadequate support: Sometimes, the existing electrical box may not provide enough support for the weight of the ceiling fan. In such cases, it’s important to replace the existing box with a fan-rated box that can handle the load. This will ensure the safety and stability of the fan.
- Wiring complications: Dealing with electrical wiring can be tricky, especially if you’re not familiar with it. If you encounter any difficulties with the wiring, it’s best to consult a professional electrician to ensure a safe installation.
- No power supply: Before installing the ceiling fan bracket, make sure there is a power supply nearby. If there isn’t, you may need to consult an electrician to extend the wiring and provide a suitable power source.
Tips for easy and successful installation
To make your ceiling fan bracket installation a breeze, here are some essential tips to keep in mind:
- Read and follow instructions: Before starting the installation process, carefully read and follow the manufacturer’s instructions that come with the ceiling fan. Each fan may have specific requirements and steps that you need to follow.
- Gather the necessary tools: Make sure you have all the required tools handy before you begin the installation. This may include a screwdriver, pliers, wire stripper, electrical tape, and a ladder or step stool for reaching the ceiling.
- Double-check measurements: Before drilling any holes or attaching the bracket, double-check the measurements and ensure that everything is aligned correctly. Taking this extra step can save you time and frustration later on.
- Securely fasten the bracket: The bracket serves as the foundation for your ceiling fan, so it’s crucial to ensure that it is securely fastened. Use screws or bolts provided by the manufacturer, and make sure the bracket is stable and level.
- Test the fan before finishing: Once the bracket is installed, connect the necessary wiring and test the fan before finishing the installation. This will allow you to identify any issues or defects before completing the installation process.
- Seek professional help if needed: If you’re unsure about any aspect of the installation process or encounter any significant complications, it’s always best to seek the assistance of a professional electrician. They have the experience and knowledge to ensure a safe and proper installation.
By being aware of common installation issues and following these helpful tips, you can confidently install a ceiling fan bracket and enjoy the comfort and functionality it brings to your space.
Final Thoughts
Installing a ceiling fan bracket may seem like a daunting task, but with the right instructions, it can be a straightforward process. By following the steps provided in this guide, you can ensure that your ceiling fan is securely mounted and ready to provide years of comfort and functionality.
Importance of Following Instructions Carefully
When it comes to installing a ceiling fan bracket, it’s crucial to follow the instructions carefully. This ensures that the bracket is installed correctly, providing a stable foundation for your ceiling fan. Neglecting to follow the instructions could lead to an improperly mounted bracket, which may result in wobbling or even the fan falling from the ceiling.
By carefully reading and understanding the instructions, you can avoid any potential mishaps and ensure that your ceiling fan is installed securely. These instructions are usually provided by the manufacturer and tailored specifically to their product, so following them is essential for a successful installation.
Additionally, following the instructions ensures that you use the correct tools and materials. Different ceiling fan brackets may require specific screws or mounting hardware, and using the wrong ones can compromise the integrity of the installation. It’s crucial to use the provided screws and follow the recommended torque specifications to ensure a safe and sturdy mount.
Enjoying the Benefits of a Well-Mounted Ceiling Fan Bracket
By taking the time to properly install your ceiling fan bracket, you can enjoy a range of benefits. A well-mounted bracket provides stability, reducing the chances of your ceiling fan wobbling or making noise when in use. This ensures a more comfortable and enjoyable experience, as the fan can operate smoothly and efficiently.
In addition to stability, a securely mounted ceiling fan bracket also enhances safety. When properly installed, the fan is less likely to detach from the ceiling, reducing the risk of injury or property damage. This is especially important if you have children or pets who may be at risk of getting injured by a falling fan.
Furthermore, a well-mounted ceiling fan bracket allows for optimal airflow and ventilation. When the fan is securely in place, it can effectively circulate air in the room, providing a cooling breeze in the hot summer months and helping to distribute heat evenly in the winter. This can contribute to energy savings by reducing the need for heating or cooling appliances.
In conclusion, taking the time to install your ceiling fan bracket correctly is vital for both safety and performance. By carefully following the instructions and using the proper tools and materials, you can enjoy the benefits of a well-mounted ceiling fan bracket for years to come.
Frequently Asked Questions
Do You Need A Mounting Bracket For Ceiling Fan?
Yes, a mounting bracket is needed for a ceiling fan. It is essential for proper installation and ensuring the safety and stability of the fan.
How Do I Know If My Junction Box Will Hold A Ceiling Fan?
To determine if your junction box can support a ceiling fan, check for the following: 1. Ensure the junction box is labeled “Suitable for Ceiling Fan Support. ” 2. Confirm that the box is securely mounted to a ceiling joist or support brace.
3. Verify that the box is rated to handle the weight and vibrations of a ceiling fan. 4. Check that all connections are tight and secure. 5. Consult a qualified electrician if you are uncertain about the box’s suitability.
What Is The Ground Wire On A Ceiling Fan Mounting Bracket?
The ground wire on a ceiling fan mounting bracket provides a connection between the fan and the electrical system’s ground. It ensures safety by diverting excess electrical current to the ground, reducing the risk of electric shock or damage to the fan.
How Many Mounting Options For Ceiling Fans?
Ceiling fans typically come with three mounting options: standard, flush mount, and angled mount. The standard mount is suitable for flat or sloped ceilings, while the flush mount is ideal for low ceilings. The angled mount is used for sloped or vaulted ceilings to ensure proper airflow.
Conclusion
Installing a ceiling fan bracket is a simple and cost-effective way to enhance the comfort and aesthetic appeal of any room. By following the steps outlined in this guide, you can confidently tackle this DIY project with ease. Remember to choose the right bracket, measure accurately, and secure the bracket properly.
With the right tools and a little patience, you’ll soon be enjoying the cooling breeze and stylish statement of your new ceiling fan. So, don’t hesitate to give it a try – you’ll be amazed at the difference it can make!