Installing a Cat6 connector is a straightforward process that involves stripping the insulation from the Cat6 cable, untwisting the pairs of wires, inserting them into the correct slots, and crimping the connector to secure the connection. The Cat6 connector serves as a crucial component in creating a high-speed Ethernet connection.
Whether you’re setting up a new network or replacing a damaged connector, understanding the installation process is essential. In this guide, we’ll walk you through the steps required to install a Cat6 connector, ensuring a reliable and efficient network connection.
By following these instructions, you can successfully install a Cat6 connector and enjoy fast and reliable network performance. So, let’s get started!
Understanding The Cat6 Connector
What is a Cat6 Connector?
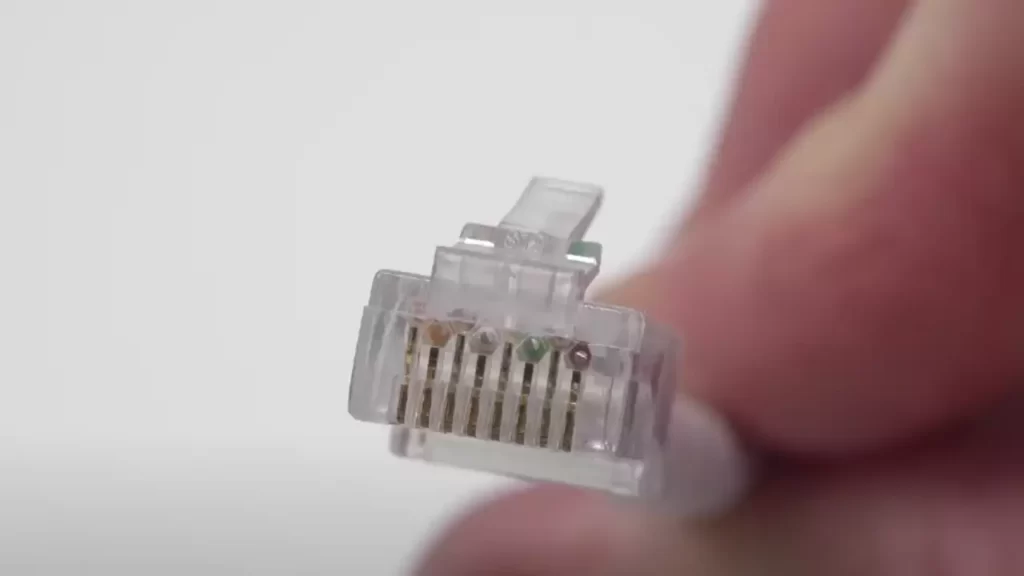
A Cat6 connector, also known as an RJ45 connector, is a key component in networking installations. It is specifically designed to connect Cat6 cables, which are used for high-speed Ethernet connections. By attaching these connectors to the ends of the cables, you can easily establish reliable connections between networking devices, such as computers, routers, switches, and modems.
Definition and purpose of a Cat6 Connector
The Cat6 connector is a standardized modular plug that follows the TIA/EIA-568-B.2-1 specification. It features eight conductors that are arranged in a pin-out configuration to ensure proper connectivity and performance. These connectors are designed to provide high-speed data transmission over long distances, making them ideal for modern network infrastructures.
The primary purpose of a Cat6 connector is to transmit Ethernet signals with minimal interference or loss of data. It achieves this by maintaining a tight connection between the cable and the networking device. This ensures that the electrical signals pass through the connector effectively, allowing for fast and reliable data transfer.
Importance of using Cat6 connectors in network installations
Using Cat6 connectors in network installations is crucial for several reasons. First and foremost, these connectors are specifically designed to work with Cat6 cables, ensuring compatibility and optimal performance. The use of Cat6 connectors guarantees that you are utilizing the full potential of your Cat6 cables’ capabilities.
Furthermore, Cat6 connectors are essential to maintaining the integrity of your network connections. They provide a secure and stable connection, minimizing the chances of data loss, signal interference, or network disruptions. This is particularly important when dealing with high-bandwidth applications, such as video streaming, online gaming, and large file transfers.
Another advantage of using Cat6 connectors is their durability. They are built to withstand frequent insertion and removal, ensuring longevity even in environments with heavy network traffic. By using reliable connectors, you can avoid signal degradation or connection issues that may arise from using low-quality or worn-out connectors.
In conclusion, understanding the Cat6 connector is important for anyone involved in network installations. From their definition and purpose to the importance of using them in network setups, Cat6 connectors play a critical role in establishing fast and reliable connections. By using these connectors, you can ensure optimal performance, minimal interference, and long-lasting network stability.

Tools And Materials Required
When it comes to installing Cat6 connectors, having the right tools and materials is essential for a successful and efficient installation. Whether you are a professional network installer or a DIY enthusiast, having a well-equipped toolbox is vital to ensure optimal performance and longevity of your Cat6 network connections.
Essential tools for installing Cat6 connectors
Before you begin your installation process, you need to make sure you have the following essential tools at your disposal:
- Crimping tool
- Wire stripper
- Scissors
- Needle-nose pliers
- LAN cable tester
- Cable cutter
- Electrician’s tape
These tools play a crucial role in achieving a secure and reliable Cat6 connection. The crimping tool, wire stripper, and cable cutter help you prepare the cable ends for termination, while the scissors and needle-nose pliers assist in the precise trimming and positioning of the wires. Once the connectors are terminated, a LAN cable tester ensures the integrity of the connection, allowing you to detect any faults or issues that may compromise network performance. Lastly, electrician’s tape is used to wrap the terminated ends, adding an extra layer of protection.
Required materials for a successful installation
In addition to the tools, you will need the following materials to complete a successful installation:
- Cat6 connectors
- Cat6 UTP (Unshielded Twisted Pair) cable
- Cable boots
- Cable ties
- Labeling tags
Cat6 connectors are specifically designed to match the performance capabilities of Cat6 cables, ensuring optimal signal transmission and reduced interference. It is crucial to use high-quality connectors to maintain the integrity of your network connection. Additionally, Cat6 UTP cables are essential as they provide reliable data transmission while minimizing crosstalk and signal loss. Cable boots, cable ties, and labeling tags are often used for organization and cable management purposes, helping you maintain a neat and professional installation.
Best practices for selecting tools and materials
When selecting tools and materials for your Cat6 connector installation, it is important to follow these best practices:
- Choose tools that are specifically designed for Cat6 connectors to ensure compatibility and optimal results.
- Invest in high-quality connectors and cables to ensure reliable and long-lasting network connections.
- Consider the length and type of cable needed for your installation to avoid any unnecessary wastage.
- Properly inspect all tools and materials before starting the installation to ensure they are in good working condition and free from any defects.
- Label and organize your cables using labeling tags and cable ties to simplify future maintenance and troubleshooting.
By adhering to these best practices, you can ensure a smooth installation process and achieve a robust and efficient Cat6 network connection.
Steps To Install Cat6 Connectors
In order to successfully install Cat6 connectors, it is important to follow a systematic approach. By breaking down the installation process into steps, you can ensure a proper and secure connection for your Cat6 cable.
Step 1: Preparing the cable
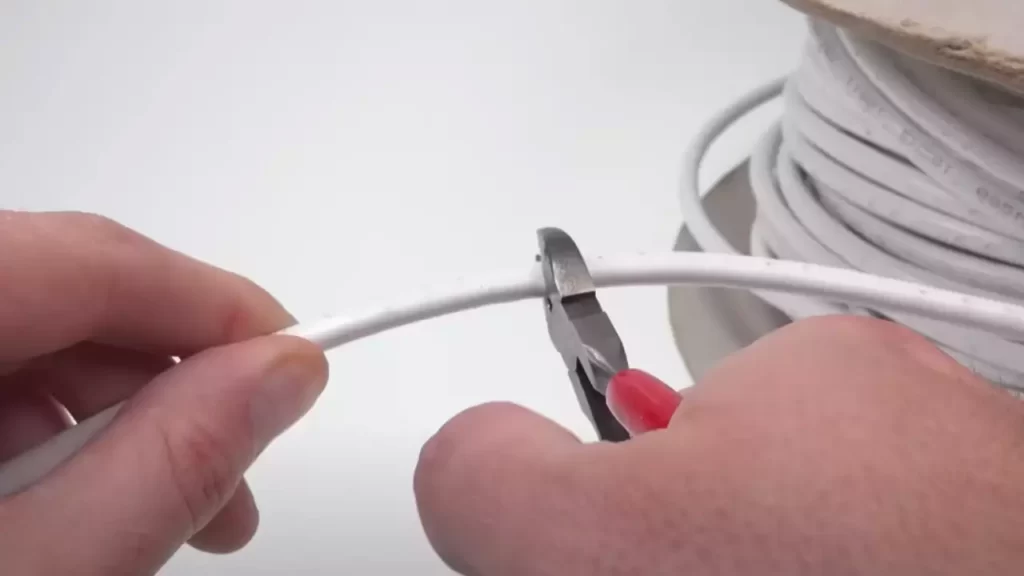
Before you begin installing the Cat6 connector, you need to ensure that the cable is properly prepared. Start by untwisting and straightening the Cat6 cable. This will make it easier to work with and ensure a clean connection. Trim the cable to the correct length, leaving enough slack to work comfortably.
Step 2: Stripping the cable
The next step involves stripping the outer jacket of the Cat6 cable. Use a cable stripper or a utility knife to carefully remove the outer jacket, making sure not to damage the inner wires. Once the outer jacket is removed, strip the individual wire pairs, exposing a small section of the copper conductors.
Step 3: Organizing the wires
Properly organizing the wires is crucial for a successful Cat6 connector installation. Arrange the wire pairs in the correct order according to the T568B or T568A wiring standard, depending on your preference. Ensure that the wires are properly aligned and untangled, as any misalignment or tangling can affect the performance of the connection.
Step 4: Terminating the connector
In this step, you will insert the wires into the Cat6 connector. Starting from the end of the connector, insert each wire into its respective slot according to the wiring standard you are following. Make sure that the wires are fully inserted and that they reach the end of the connector. Once all the wires are in place, use a crimping tool to secure the wires with the connector’s contacts.
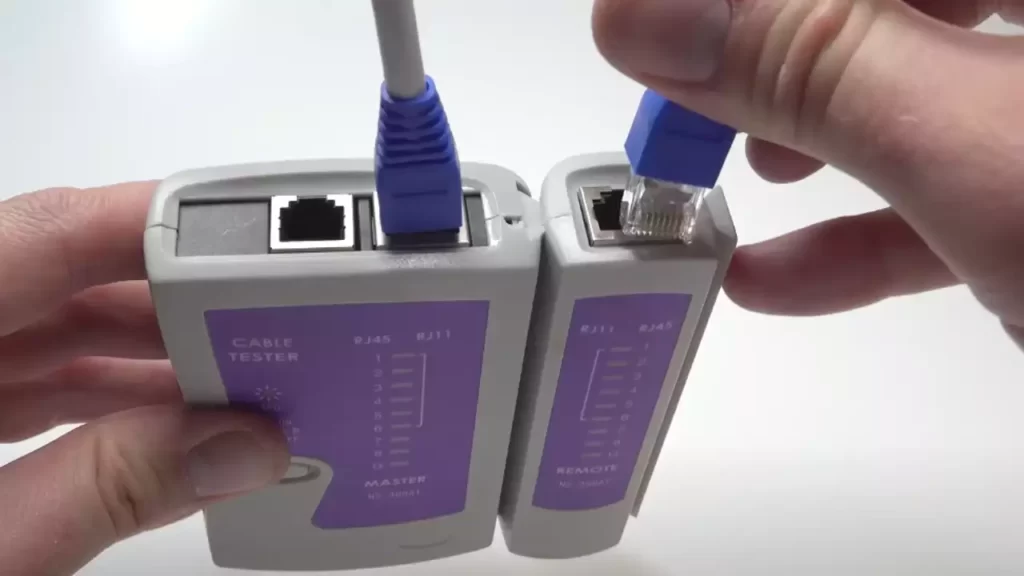
Step 5: Testing the connection
After terminating the connector, it is important to test the connection to ensure its functionality. Verify the continuity and signal integrity using a cable tester. This will help you identify any wiring issues or problems with the connection. By testing the connection, you can ensure that it meets the required standards for performance and reliability.
By following these steps, you can successfully install Cat6 connectors and create a reliable and efficient network connection. Take your time to carefully execute each step, ensuring proper alignment, secure termination, and thorough testing of the connection. With a properly installed Cat6 connector, you can enjoy fast and reliable network performance.
Troubleshooting Common Issues
While installing Cat6 connectors can provide improved performance and faster network speeds, it’s not uncommon to encounter some common issues along the way. In this section, we will discuss how to troubleshoot these issues, ensuring a successful installation and optimal connectivity.
Identifying and Resolving Improper Wire Placement
One of the most common problems when installing a Cat6 connector is improper wire placement. This can lead to connectivity issues and poor signal transmission. Thankfully, identifying and resolving this issue is relatively straightforward.
To address improper wire placement, follow these steps:
- Begin by carefully inspecting each wire within the connector to ensure it is correctly aligned with its designated slot. The wire colors should match the standardized T568A or T568B wiring scheme.
- If any wires are misaligned or out of place, gently remove the connector from the cable.
- Using a wire stripper, carefully remove the outer jacket of the cable, exposing the individual wires.
- Trim any damaged wires and ensure they are of the correct length.
- Properly align and insert the wires back into the connector using a suitable crimping tool.
- Once the wires are securely in place, verify their correct positioning by referring to the T568A or T568B wiring scheme.
- Apply firm pressure to crimp the connector, ensuring a solid connection between the wires and the connector plugs.
Dealing with a Broken or Damaged Connector
Encountering a broken or damaged connector during the installation process can be frustrating. However, there are steps you can take to address this issue and ensure a successful installation.
Follow these steps to deal with a broken or damaged connector:
- If you notice any physical damage or breakage to the connector, remove it from the cable immediately.
- Inspect the cable for any signs of damage, such as frayed wires or exposed conductors.
- If the cable appears undamaged, carefully strip back the outer jacket to expose a fresh section of the wires.
- Trim any damaged wires and ensure they are of the correct length.
- Procure a new connector and carefully align the wires according to the T568A or T568B wiring scheme.
- Using a crimping tool, secure the wires within the new connector, ensuring a firm connection.
Addressing Connectivity Problems after Installation
Despite following proper installation procedures, connectivity issues may arise following the installation of a Cat6 connector. However, with a systematic troubleshooting approach, these problems can be resolved.
Consider the following steps to address connectivity problems:
- Inspect the connector for any obvious signs of damage or improper wire placement.
- If the connector appears intact, check the corresponding port on the networking equipment or device for any signs of damage.
- Try connecting a different device to the same port to determine if the issue lies with the device or the connection itself.
- Ensure that the cable is securely plugged into the device and the networking equipment.
- If the problem persists, try using a known working cable to rule out any issues related to the cable itself.
- If all else fails, consult a professional or reach out to customer support for further assistance.
By following these troubleshooting steps, you can overcome common issues associated with installing Cat6 connectors and ensure reliable connectivity for your network.
Best Practices For Cat6 Connector Installations
Installing Cat6 connectors requires careful attention to detail and adherence to industry standards and guidelines. By following best practices, you can ensure a reliable and high-performance network connection. In this section, we will explore three key areas of focus: following industry standards and guidelines, proper cable management techniques, and regular maintenance and inspections for long-term performance.
Following industry standards and guidelines
When it comes to installing Cat6 connectors, it is crucial to follow the industry standards and guidelines set forth by organizations such as the Telecommunications Industry Association (TIA) and the International Organization for Standardization (ISO). These standards ensure consistency, compatibility, and optimum performance. Here are some best practices to consider:
- Use proper tools and equipment for the installation process, such as cable cutters, stripping tools, and crimping tools.
- Follow the correct wiring scheme, which is often referred to as the T568A or T568B standard.
- Ensure proper termination of the cable by carefully aligning and inserting the wires into the connector.
Proper cable management techniques
Effective cable management is essential for maintaining organization, preventing cable damage, and minimizing signal interference. Here are some best practices for cable management during Cat6 connector installations:
- Organize cables in a neat and orderly manner using cable ties or cable management solutions.
- Avoid tight bends or sharp angles that could damage the cable or disrupt the signal.
- Keep cables away from sources of interference, such as power lines or fluorescent lights.
Regular maintenance and inspections for long-term performance
Ensuring the long-term performance of a Cat6 connector installation requires regular maintenance and inspections. By following these best practices, you can identify and address potential issues before they impact network performance:
- Perform visual inspections of the connectors and cable for any signs of damage, such as frayed wires or loose connections.
- Clean connectors and cables regularly using appropriate cleaning solutions and tools.
- Test the network periodically to measure signal strength and identify any potential issues.
By following these best practices, you can achieve a successful Cat6 connector installation that provides reliable and high-speed network connectivity.
Frequently Asked Questions
How Do You Connect A Cat6 Cable Connector?
To connect a cat6 cable connector, follow these steps: 1. Strip about an inch of the cable’s jacket. 2. Untwist the pairs of wires and arrange them according to the connector’s color code. 3. Trim the excess wires to ensure a clean connection.
4. Insert the wires into the connector and use a crimping tool to secure them. 5. Test the connection for a stable network connection.
How Do You Crimp A Cat6 Plug?
To crimp a cat6 plug, follow these steps: 1. Strip about 1. 5 inches of the cable’s outer jacket. 2. Untwist and arrange the wires as per the color code. 3. Trim the wires to ensure they are even. 4. Insert the wires into the plug, making sure they reach the end.
5. Use a crimping tool to press the plug firmly, creating a secure connection.
What Order Do Ethernet Wires Go In?
Ethernet wires should be connected in a specific order. The order for Ethernet wires is: orange-white, orange, green-white, blue, blue-white, green, brown-white, and brown. Make sure to follow this order when setting up your Ethernet connections for optimal performance.
Is It Ok To Splice Cat6?
Splicing CAT6 cables is not recommended. It can degrade performance, cause signal loss and disrupt network connectivity. It is better to use longer cables or junction boxes for proper installation and to ensure optimal network performance.
Conclusion
Installing a Cat6 connector may seem daunting, but with the right tools and step-by-step instructions, it’s a straightforward process. By following the tips outlined in this blog post, you can ensure a successful installation and enjoy the benefits of a reliable and high-speed network connection.
Remember to prepare your cables, trim the ends correctly, and use the appropriate tool for crimping. With these guidelines in mind, you’ll be well-equipped to tackle your Cat6 connector installation with confidence. Happy networking!