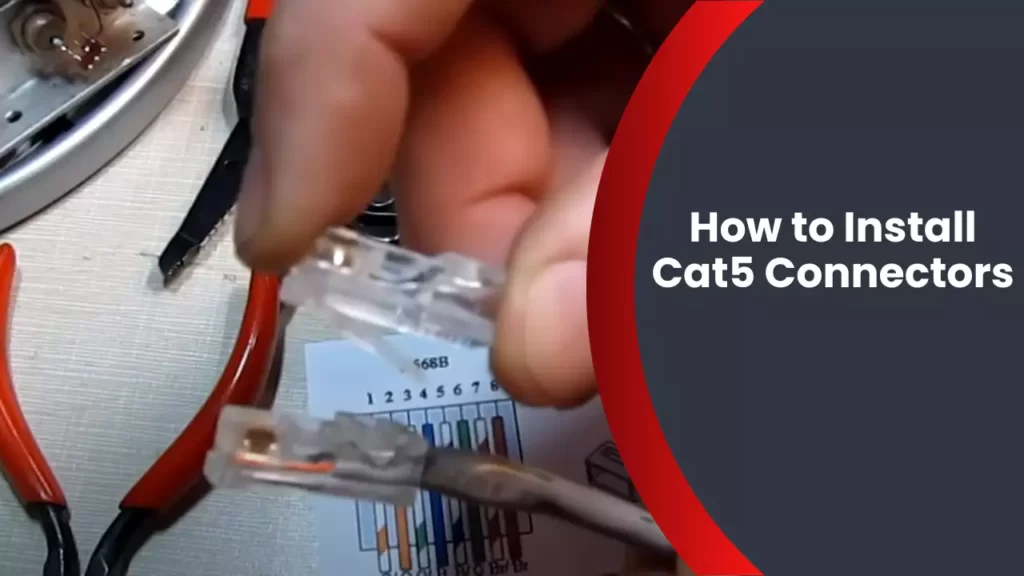
To install Cat5 connectors, strip the outer jacket and insulation from the cable, untwist the wires, and insert them into the correct slots of the connector before crimping it with a crimping tool. Installing Cat5 connectors requires a straightforward process that involves removing the outer jacket and insulation, untwisting the wires, and inserting them into the appropriate slots of the connector.
Once the wires are correctly positioned, use a crimping tool to secure the connector. This easy-to-follow guide will walk you through the necessary steps to install Cat5 connectors, allowing you to create seamless connections for your networking needs. With just a little bit of effort and a few simple tools, you’ll be well on your way to achieving reliable, high-speed data transfers in no time.
So let’s dive into the step-by-step process of installing Cat5 connectors and start enjoying the benefits of efficient network connections.
Understanding Cat5 Connectors: A Brief Overview
When it comes to setting up a reliable and efficient network, understanding Cat5 connectors is crucial. These connectors not only ensure seamless connectivity but also play a vital role in transmitting data signals without loss or interference. In this article, we will provide you with a comprehensive overview of Cat5 connectors, including their importance in networking and the different types that are commonly used.
What are Cat5 connectors and their importance in networking?
Your network’s performance heavily relies on the quality and compatibility of its connectors. Cat5 connectors, also known as RJ-45 connectors, are specifically designed for Cat5 cables, which are frequently used for Ethernet connections. These connectors are essential in networking as they establish a secure and stable connection between devices, allowing efficient data transmission.
Not only do Cat5 connectors ensure reliable connectivity, but they also contribute to maintaining data integrity. Without a proper connection, there may be data loss or signal degradation, leading to slower transfer speeds and an overall decrease in network performance. Therefore, understanding the installation and correct usage of Cat5 connectors is essential to optimize your network’s effectiveness.
Different types of Cat5 connectors and their uses.
There are several types of Cat5 connectors available, each with its unique characteristics and applications. Choosing the right connector type for your specific network requirements is crucial for achieving optimal performance. Below, we will discuss the most commonly used Cat5 connectors and their uses:
| Connector Type | Description | Common Use |
|---|---|---|
| Standard Cat5 Connector | This is the most common type of Cat5 connector, featuring eight pins that are used for transmitting data signals. | Recommended for general Ethernet connections in homes, offices, and small businesses. |
| Shielded Cat5 Connector | These connectors have additional shielding to protect against electromagnetic interference, making them suitable for environments with high interference levels. | Ideal for industrial settings, server rooms, and areas with heavy electrical equipment. |
| Tool-less Cat5 Connector | Designed for easy installation without the need for specialized tools, these connectors simplify the process and save time. | Perfect for quick network setups, home installations, and situations requiring frequent connector changes. |
By understanding the different types of Cat5 connectors available and their specific uses, you can select the appropriate connector that matches your networking needs. This will result in a more efficient and reliable network, enhancing overall productivity and connectivity.
Tools Needed For Cat5 Connector Installation
One of the fundamental aspects of setting up a reliable and efficient network is installing Cat5 connectors. Whether you are a professional network technician or a DIY enthusiast, having the right tools and knowledge is crucial for a successful installation. In this blog post, we will guide you through the process of installing Cat5 connectors and highlight the essential tools required for this task.
Essential tools required for installing Cat5 connectors
To ensure a smooth installation of Cat5 connectors, you will need the following tools:
- Crimping Tool: This tool is essential for attaching the connector to the cable. It allows you to precisely crimp the metal contacts to ensure a secure and reliable connection. Make sure to use a high-quality crimper that is specifically designed for RJ45 connectors.
- Cable Stripper: A cable stripper is necessary for removing the outer insulation of the Cat5 cable. This ensures that the wire pairs inside are exposed and ready for termination.
- Wire Cutter: A reliable wire cutter is needed to trim the excess wire after termination. This tool helps ensure a neat and professional-looking installation.
- Connector Boots: Although not essential, connector boots provide extra protection and strain relief for the terminated connectors. They also give a finished look to the installation.
Safety precautions to be taken while working with Cat5 connectors
Working with Cat5 connectors involves handling delicate wires and using tools that may cause injury if not used properly. Here are some safety precautions to keep in mind:
- Wear Safety Glasses: When stripping cables or crimping connectors, tiny metal shards or plastic pieces can potentially fly off. Protecting your eyes with safety glasses is a simple yet effective way to prevent any eye hazards.
- Disconnect Power: Before working with any network cables, ensure that the power to all devices connected to the network is turned off. This helps to mitigate the risk of electrical shock.
- Handle Tools with Care: Sharp edges on wire cutters or poorly maintained crimping tools can lead to accidental cuts. Always handle tools with care, and inspect them before each use to ensure they are in good working condition.
- Secure Cables: To avoid any tripping hazards or unintentional disconnections, make sure to secure the cables properly using cable management tools such as clips or cable ties.
By following these safety precautions and using the right tools, you can ensure a smooth and successful installation of Cat5 connectors. Stay tuned for the next section, where we will guide you through the step-by-step process of terminating Cat5 cables with connectors!
Step-By-Step Guide To Installing Cat5 Connectors
If you’re planning to set up a wired network in your home or office, one of the essential components you’ll need is Cat5 connectors. These connectors allow you to terminate the Cat5 cable and create a secure and reliable connection. To help you navigate through the installation process with ease, we’ve created a comprehensive step-by-step guide. Follow these instructions to ensure that your Cat5 connectors are installed correctly and your network is up and running smoothly.
Preparing the Cat5 cable for installation
Before you begin installing your Cat5 connectors, it’s crucial to prepare the Cat5 cable properly. This involves stripping the outer sheath and untwisting the wires.
Here’s how you can prepare your Cat5 cable:
- Start by using a sharp utility knife or cable stripper to carefully cut about an inch of the outer sheath at one end of the Cat5 cable.
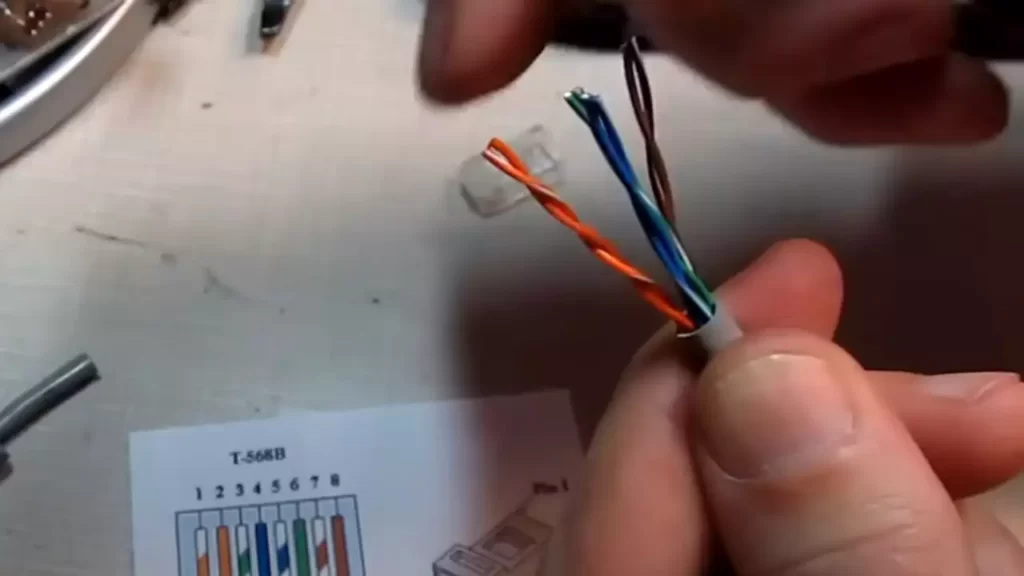
- Next, gently bend and twist the cable to break the sheath completely.
- Once the sheath is broken, you can easily slide it off, revealing four twisted pair wires inside.
Aligning and inserting the wires into the connector
After preparing the Cat5 cable, the next step is to align and insert the wires into the connector correctly. This is a crucial step to ensure a secure and reliable connection.
Here’s what you need to do:
- Arrange the four twisted pair wires in the correct order according to the T568B or T568A wiring standard.
- Hold the wires tightly and trim them evenly to ensure they are all the same length.
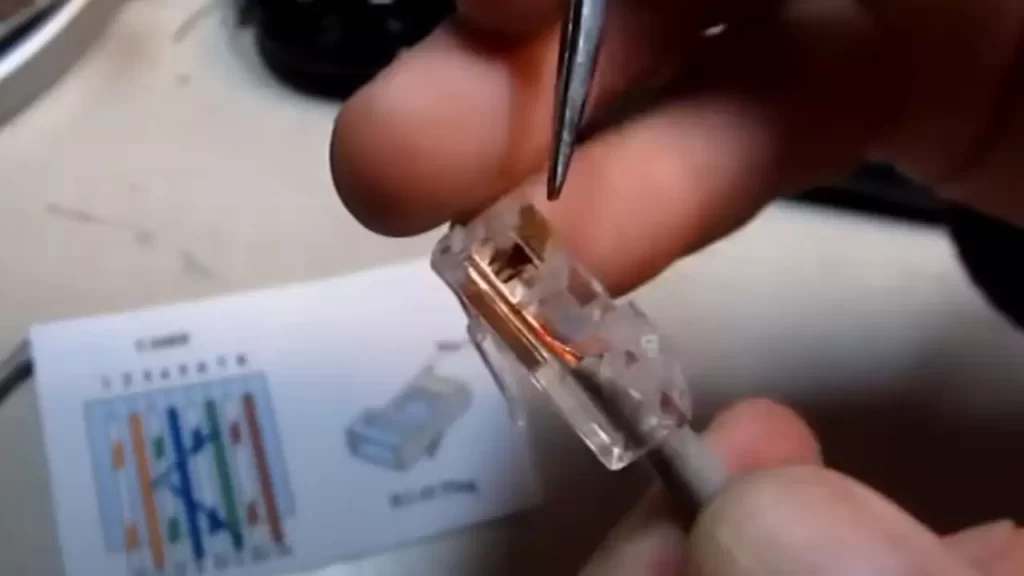
- Gently insert the wires into the connector, making sure they reach the end of the connector.
- Double-check the order of the wires to ensure they are aligned correctly.
Securing the connection with the crimping tool
Once the wires are properly inserted into the connector, it’s time to secure the connection using a crimping tool. The crimping tool will compress the connector and the wires, creating a secure bond.
Follow these steps to use the crimping tool:
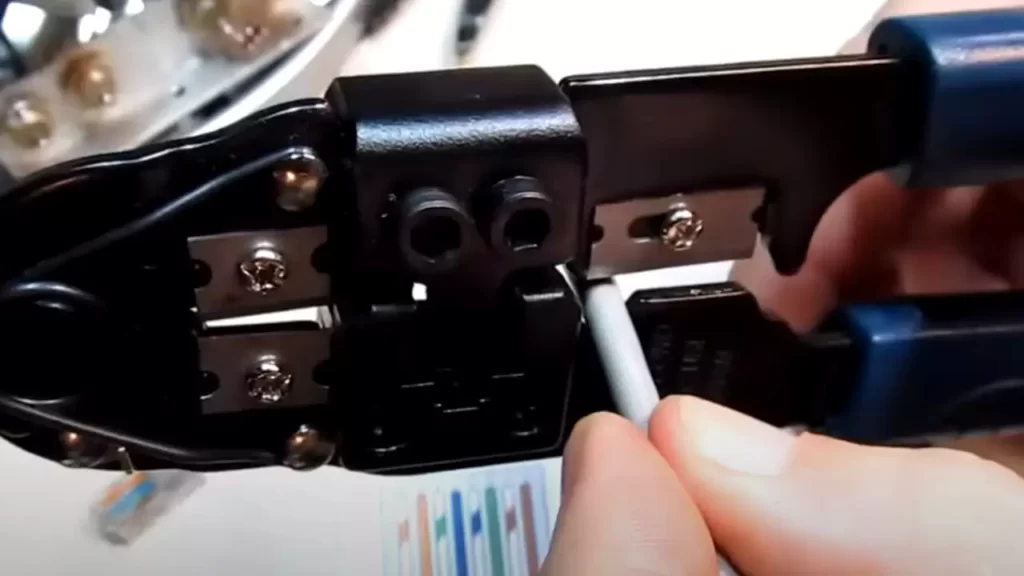
- Hold the connector with one hand to keep the wires in place.
- Place the connector into the crimping tool, ensuring that the blades are aligned with the connector’s pins.
- Squeeze the crimping tool firmly to securely crimp the connector onto the wires.
- Repeat the process for the other end of the cable if necessary.
Testing the connection for proper functionality
After you’ve installed the Cat5 connector, it’s essential to test the connection to ensure it is functioning correctly. Testing will help identify any connectivity issues and allow you to make any necessary adjustments.
Here’s how you can test the connection:
- Connect one end of the Cat5 cable to a network device, such as a computer or a switch.
- Connect the other end of the cable to a compatible network port.
- Check the lights on the network device or use network testing software to verify that the connection is established and working properly.
By following these step-by-step instructions, you’ll be able to install Cat5 connectors and create a reliable wired network connection. Remember to test the connection after installation to ensure optimal performance.
Troubleshooting Common Issues With Cat5 Connectors
Installing Cat5 connectors is crucial for ensuring a reliable and efficient network connection. However, even with proper installation, issues can arise that affect the performance of your network. In this section, we will discuss common problems that you may encounter with Cat5 connectors and provide effective troubleshooting solutions to solve them.
Identifying common problems with Cat5 connectors
When troubleshooting Cat5 connectors, it is essential to understand the most common issues that may occur. By identifying these problems, you can quickly pinpoint the cause and find the appropriate solution:
- Incorrect wiring: One of the primary issues with Cat5 connectors is incorrect wiring. This can result in signal loss, decreased bandwidth, and intermittent connectivity.
- Loose connections: Loose connections can cause signal instability, leading to a poor network connection. It is crucial to ensure that all connections are secure and properly tightened.
- Damaged connectors: Physical damage to the connectors, such as bent pins or broken clips, can hinder the transmission of data.
- Inconsistent crimping: Inconsistent crimping of the connectors can result in a weak connection or loss of connectivity altogether. This can occur if the crimping tool is not used correctly or if there is uneven pressure applied.
- Lengthy cable runs: Cable runs that exceed the recommended industry standards can lead to signal degradation and performance issues.
Solving connectivity issues and ensuring a reliable connection
To solve connectivity issues and guarantee a reliable connection with your Cat5 connectors, follow these troubleshooting steps:
- Double-check wiring: Verify that the wiring is correctly done, following the T568A or T568B standard. Ensure that each wire is fully inserted into its corresponding slot in the connector.
- Inspect connectors: Inspect the connectors for any signs of damage, such as bent pins, broken clips, or frayed wires. Replace any defective connectors to maintain optimal performance.
- Tighten connections: Check all connections along the network cable, including at the switch, wall plate, and connector ends. Secure any loose connections to eliminate signal instability.
- Re-crimp connectors: If you find inconsistent crimping or suspect a weak connection, use a proper crimping tool to re-crimp the connectors, ensuring even pressure is applied.
- Use quality cables: Ensure that you are using high-quality Cat5 cables that meet the industry standards. Avoid excessively long cable runs beyond the recommended length to maintain optimal signal integrity.
- Perform cable testing: Use a cable tester to verify the connectivity and performance of your Cat5 cables. This will help identify any hidden issues and allow for prompt troubleshooting.
By following these troubleshooting steps, you can address common issues with Cat5 connectors and establish a reliable network connection. Remember to thoroughly inspect and maintain your connectors regularly to prevent future problems and ensure consistent performance.
Tips And Best Practices For Cat5 Connector Installation
Proper installation of Cat5 connectors is crucial to ensure seamless networking performance. Whether you are a professional network installer or a DIY enthusiast, following these tips and best practices will help you achieve reliable connections and minimize issues. In this article, we will discuss proper cable management techniques for neat and organized installations as well as various methods for securing connectors to prevent accidental disconnections.
Proper cable management techniques for neat and organized installations
When it comes to Cat5 connector installation, cable management plays a significant role in maintaining a tidy and organized setup. Here are a few best practices to follow:
- Start by carefully measuring the length of the cable needed. Avoid excessive cable lengths to reduce clutter and potential signal loss.
- Use cable ties or Velcro wraps to secure cables, keeping them neatly bundled together. This not only improves aesthetics but also prevents tangling and accidental damage.
- Label each cable at both ends to easily identify connections, making future troubleshooting or modifications more straightforward.
- Invest in cable management solutions such as cable trays, raceways, or conduit for professional-grade installations. These options keep cables hidden and protected, reducing the risk of tripping hazards and damage.
Various methods for securing connectors to prevent accidental disconnections
Ensuring stable and secure connections is essential for optimal network performance. Here are different methods you can employ to prevent accidental disconnections:
- Punch-down technique: This method involves using a punch-down tool to insert individual conductors into slots on a punch-down block or keystone jack. The punched-down wires are then trimmed, and the keystone jack is snapped into place. This technique creates reliable and secure connections.
- Snag-proof boots: Installing connectors with snag-proof boots adds an extra layer of security. These boots protect the clip and latch mechanism against accidental snagging or unintentional tugs, preventing disconnections.
- Using cable management panels: Cable management panels provide a secure mounting platform for connectors. They not only organize and keep cables in place but also offer strain relief for connections, reducing the chances of accidental disconnections.
- Applying cable strain relief: Properly implementing cable strain relief techniques helps minimize tension on connectors, preventing them from loosening or becoming disconnected. Methods include using cable ties, Velcro wraps, or strain relief bars.
By following these tips and leveraging best practices for Cat5 connector installation, you can ensure reliable network connections and a well-organized setup. Implementing proper cable management techniques and securing connectors will not only improve aesthetics but also minimize signal loss and prevent accidental disconnections. Remember, a well-executed installation translates into a smooth and efficient networking experience.
Advanced Techniques For Cat5 Connector Installation
When it comes to installing Cat5 connectors, understanding the basics is essential. But for those who are looking to take their skills to the next level, there are advanced techniques that can be employed to ensure a secure and efficient installation. In this section, we will explore two such techniques: installing Cat5 connectors in challenging environments and using specialized connectors for specific applications.
Installing Cat5 connectors in challenging environments
Installations in challenging environments can present unique obstacles. However, with the right approach and techniques, you can overcome these challenges and achieve a successful connection. Here are some advanced techniques to consider:
- Ensure proper cable management: When working in challenging environments, cable management becomes crucial. Organizing and securing cables not only prevents damage but also improves airflow and reduces the risk of tripping hazards.
- Use appropriate tools: When dealing with difficult installations, having the right tools can make a significant difference. Invest in tools specifically designed for challenging environments, such as sturdy cable ties, waterproof connectors, and heat-resistant insulation materials.
- Implement proper grounding: In certain environments, grounding is essential to protect against electrical interference and ensure signal integrity. Follow industry standards and guidelines to establish a solid grounding system for your Cat5 connectors.
- Take precautions against moisture and humidity: Moisture and humidity can pose serious threats to Cat5 connectors. To protect against these elements, apply weatherproofing techniques, such as using waterproof shrink tubing and sealants, and utilizing moisture-resistant connectors.
Using specialized connectors for specific applications
While standard Cat5 connectors work well in most situations, there are specialized connectors available for specific applications that can enhance performance and reliability. Here are some examples:
| Connector Type | Application |
|---|---|
| RJ-45 Locking Connector | Enhanced security applications where accidental disconnections must be prevented. |
| Shielded RJ-45 Connector | Environments with high levels of electromagnetic interference, protecting against signal degradation. |
| PoE (Power over Ethernet) Connector | Powering devices through the Ethernet cable, eliminating the need for separate power sources. |
| Right-Angle Connector | Space-constrained areas where a straight connector might be impractical. |
By utilizing specialized connectors for specific applications, you can optimize performance, improve reliability, and adapt to unique installation requirements.
Now armed with these advanced techniques and knowledge of specialized connectors, you can take your Cat5 connector installation skills to new heights. Remember to always follow industry guidelines and choose the right tools and connectors for the job at hand. With practice and attention to detail, you can achieve professional-level installations even in the most challenging environments.
Frequently Asked Questions
How Do You Wire A Cat5 Plug?
To wire a Cat5 plug, follow these steps: 1. Strip about an inch of outer insulation from the cable end. 2. Untwist and arrange the individual wires according to the color code: orange-white, orange, green-white, blue, blue-white, green, brown-white, brown.
3. Trim the ends of the wires to ensure they are even. 4. Insert the wires into the plug, matching their colors to the appropriate slots. 5. Use a crimping tool to secure the wires in the plug.
How Do I Install An Ethernet Cable Connector?
To install an Ethernet cable connector, follow these steps: 1. Strip the outer insulation of the cable 2. Untwist the wires and straighten them 3. Arrange the wires according to the T568B or T568A standard 4. Trim the excess wires 5. Insert the wires into the connector in the correct order and crimp it tightly.
What Are The Different Types Of Cat5 Connectors?
Cat5 connectors come in various types, including RJ45 modular plugs, RJ45 keystone jacks, and RJ45 inline couplers. These connectors are used to terminate Cat5 cables for networking purposes.
Does Cat5 Cable Have To Be In Conduit?
No, Cat5 cable does not have to be in conduit. However, using conduit can provide additional protection and help maintain the integrity of the cable. Ultimately, the decision to use conduit depends on the specific installation requirements and the desired level of protection for the cable.
Conclusion
Installing Cat5 connectors doesn’t have to be a daunting task. With the right tools and a little know-how, you can easily connect your Cat5 cables to achieve a reliable network connection. Remember to follow the step-by-step instructions provided in this blog post and take note of important tips along the way.
By mastering this skill, you’ll be able to create a seamless network infrastructure in no time. So, get ready to enhance your connectivity and enjoy smooth data transmission with your newly installed Cat5 connectors!