To install a Cat 6 connector, strip the cable and arrange the wires according to the color code, insert them into the connector’s slots, and secure them using a crimping tool. Cat 6 connectors are essential for achieving high-speed internet connections and network performance.
Installing these connectors is a relatively simple task that can be done by following a few steps. By properly stripping the cable and arranging the wires according to the color code, you can ensure a solid connection. Inserting the wires into the connector’s slots and using a crimping tool to secure them will complete the installation process.
In this guide, we will provide you with all the necessary information, so you can successfully install a Cat 6 connector and enjoy fast, reliable network connectivity.
Understanding The Importance Of A Cat 6 Connector
A high-speed internet connection is a necessity in today’s fast-paced digital world. Whether you are running a business or simply streaming your favorite movies, having a reliable and fast internet connection is vital. That’s where a Cat 6 connector comes into play.
Why Cat 6 Connectors are Essential for High-Speed Internet Connections
When it comes to high-speed internet connections, using a Cat 6 connector is crucial. Unlike older connectors, Cat 6 connectors are specifically designed to handle the demands of today’s technology-driven world. Here’s why these connectors are essential for your internet setup:
- Higher Bandwidth: Cat 6 connectors offer a higher bandwidth capacity compared to their predecessors. This means they can support faster data transmission speeds, making them ideal for activities that require large amounts of data, such as video streaming or online gaming.
- Reduced Signal Loss: Cat 6 connectors are engineered to minimize signal loss, ensuring a strong and reliable connection. With less signal interference and attenuation, you can experience a seamless internet experience without any disruptions.
- Improved Performance: By using Cat 6 connectors, you can expect improved overall network performance. These connectors are designed to minimize crosstalk, ensuring clearer and more consistent signal transmission. This translates to faster and more stable internet connections.
Benefits of Using Cat 6 Connectors over Other Types of Connectors
When it comes to choosing the right connector for your high-speed internet setup, Cat 6 connectors offer numerous benefits over other types of connectors:
| Higher Speeds: | Cat 6 connectors provide faster data transmission speeds compared to Cat 5 and Cat 5e connectors. This is crucial for activities that require rapid data transfer, such as downloading large files or video conferencing. |
| Future-Proofing: | Investing in Cat 6 connectors ensures your network is ready to handle future technological advancements. With its higher bandwidth capacity, Cat 6 connectors can support emerging technologies and provide a reliable connection for years to come. |
| Compatibility: | Cat 6 connectors are backward compatible with lower category cables, such as Cat 5 and Cat 5e. This means you can easily upgrade your existing network infrastructure without the need for extensive rewiring, making it a cost-effective solution. |
When it comes to achieving lightning-fast internet speeds and reliable connections, Cat 6 connectors are the way to go. Upgrade your network infrastructure with these advanced connectors and experience the true power of high-speed internet.
Gathering The Necessary Tools And Materials
Before you begin installing a Cat 6 connector, it’s important to gather all the necessary tools and materials. Having everything on hand will ensure a smooth and efficient installation process. In this section, we will provide you with a comprehensive list of tools and materials required for installing a Cat 6 connector.
List of tools required for installing a Cat 6 connector
Ensure you have the following tools available before you start the installation:
| Tool | Description |
|---|---|
| Crimping Tool | A specialized tool used to attach the connector to the Cat 6 cable. |
| Wire Cutters | Used to trim the excess cable after crimping. |
| Stripper | A tool designed to remove the outer insulation from the Cat 6 cable. |
| Needle-nose pliers | Useful for manipulating and securing small components during the installation. |
| Marker or Labeling Tape | Used to label and identify the cables for easy organization. |
List of materials needed for the installation process
The following materials are essential for a successful Cat 6 connector installation:
- Cat 6 Cable: Ensure you have enough cable to connect the desired devices. It is recommended to use high-quality Cat 6 cable for optimal performance.
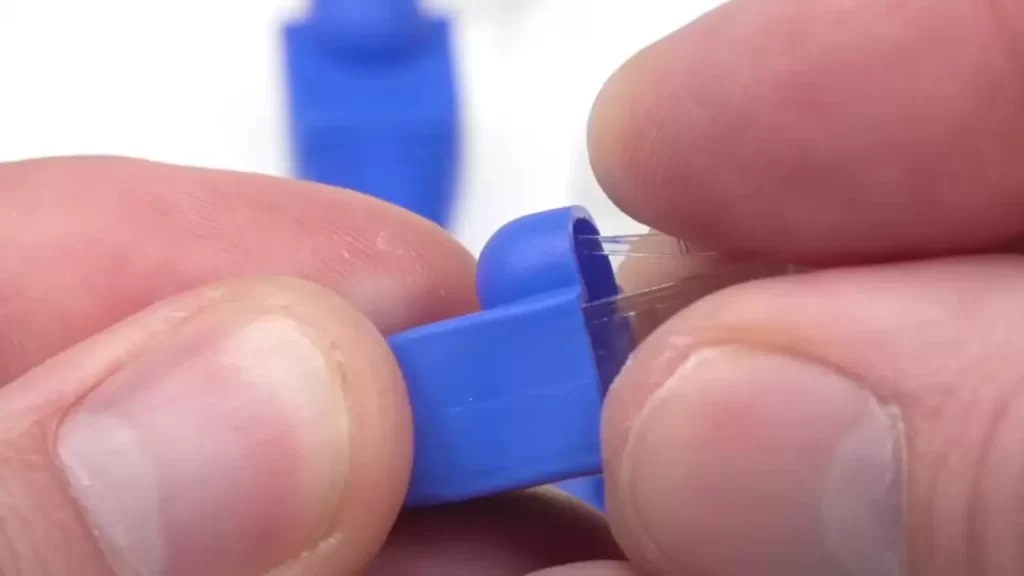
- Cat 6 Connectors: High-quality connectors designed specifically for Cat 6 cables will ensure a secure and reliable connection.
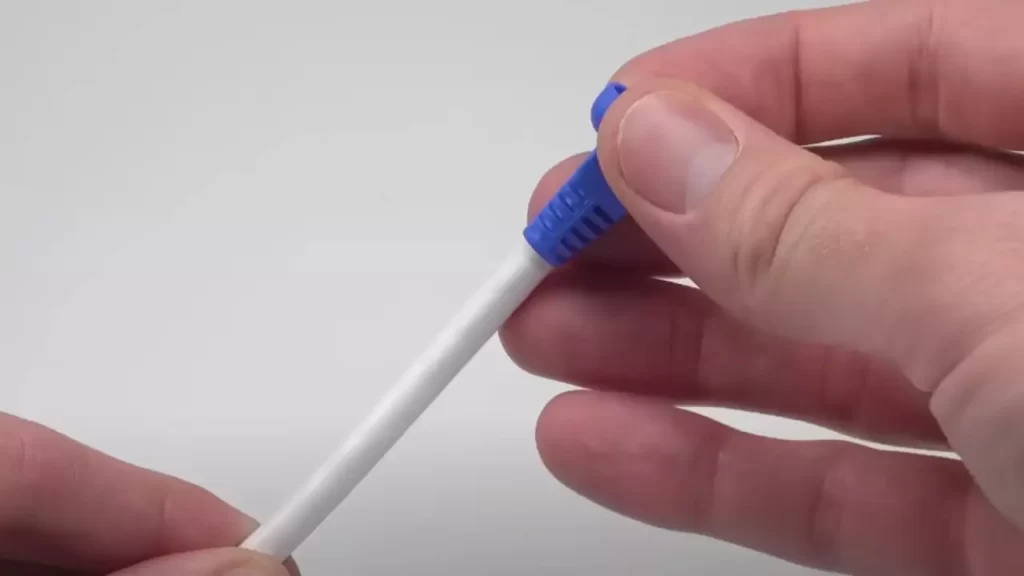
- Color-Coded Boots: These small rubber boots provide strain relief for the cable and make it easier to identify the different connections.
- Tape or Cable Ties: Use these to secure the cables and prevent them from dangling or getting tangled.
- Wire Labels: Labels or stickers can be used to mark the connectors or cables for easy identification.
Once you have gathered all the required tools and materials, you’ll be ready to move on to the next steps of the installation process. Having everything prepared will save you time and ensure a successful installation of your Cat 6 connector.
Step 1: Preparing The Cable
|
Step 1: Preparing the Cable |
Before you can start installing a Cat 6 Connector, it is crucial to properly prepare the cable. This step ensures that the cable is in good condition and ready for termination. In this section, we will discuss the three essential tasks for preparing the cable: inspecting the cable for any damage or defects, measuring and cutting the cable to the desired length, and stripping the outer jacket of the cable.
Inspecting the Cable for any Damage or Defects
The first task in preparing the cable is to inspect it thoroughly for any damage or defects. This step ensures that the cable will perform optimally and that there are no underlying issues that could affect the overall connectivity.
To inspect the cable, follow these steps:
- Visually examine the cable for any visible signs of damage such as cuts, kinks, or frayed wires.
- Ensure that the cable’s sheathing is intact and free from any cracks or breaks.
- Check for any signs of moisture or corrosion on the cable, as these can impact the signal quality.
If you notice any damage or defects during the inspection, it is essential to replace the cable with a new one to ensure a reliable connection.
Measuring and Cutting the Cable to the Desired Length
After inspecting the cable and ensuring its integrity, the next step is to measure and cut it to the desired length. This step is crucial to ensure that the cable fits perfectly and provides an efficient network connection.
Follow these steps to measure and cut the cable:
- Using a measuring tape or ruler, carefully measure the required length for your cable.
- Mark the measured length on the cable using a permanent marker or any suitable marker.
- Using cable cutters or professional-grade wire cutters, cut the cable along the marked line.
Remember to double-check the measurements before cutting to avoid any unnecessary mistakes. It is always better to have a slightly longer cable than a shorter one, as you can trim it down later if needed.
Stripping the Outer Jacket of the Cable
The last task in preparing the cable is to strip the outer jacket. This step exposes the individual wire pairs inside the cable for termination. It is crucial to strip the jacket carefully to avoid damaging the internal wires.
Follow these steps to strip the outer jacket of the cable:
- Using cable strippers or a sharp utility knife, carefully score the outer jacket of the cable.
- Gently pull the scored portion of the jacket away from the cable, exposing the wires.
- Continue to strip the jacket off completely, ensuring that no excessive force is applied, which could damage the internal wires.
Once the outer jacket is stripped, you should have access to the individual wire pairs, each consisting of a solid-colored wire and a striped wire.
By thoroughly inspecting the cable for any damage or defects, measuring and cutting it to the desired length, and stripping the outer jacket carefully, you have successfully prepared the cable for installing a Cat 6 Connector. This critical step ensures that the cable is in optimum condition and ready for efficient network connectivity.
Step 2: Untwisting And Organizing The Wires
Once you have prepared the Cat 6 cable by stripping off the outer jacket, it’s time to move on to the next step of installing the Cat 6 connector. In this step, we will untwist and organize the wires to ensure a secure and reliable connection. This process involves untwisting the pairs of wires inside the cable, grouping them according to the T568A or T568B wiring standards, and trimming any excess wire length.
Untwisting and Straightening the Wires for Easy Connection
The first task in organizing the wires is to carefully untwist them to prepare for connection. It’s essential to maintain the integrity and performance of the cable by minimizing any unnecessary twisting or bending of the wires. Follow these steps to untwist and straighten the wires:
- Gently grasp the end of the cable where you stripped off the outer jacket.
- Identify the four pairs of wires: orange and white, orange, green and white, blue, blue and white, green, and brown and white, brown.
- Starting with one of the pairs, carefully untwist the wires without creating any kinks or loops. It’s important to keep each wire as straight as possible.
- Repeat this process for all four pairs of wires until they are untwisted and straightened.
Grouping the Wires According to the T568A or T568B Wiring Standards
After untwisting the wires, the next step is to group them according to the desired wiring standard: T568A or T568B. These standards define the order in which the wires should be arranged within the connector for proper network connectivity. Follow the appropriate standard based on your specific requirements or network setup. Here’s how to group the wires:
T568A Wiring Standard:
| Wire Color | PIN |
|---|---|
| Green and White | 1 |
| Green | 2 |
| Orange and White | 3 |
| Blue | 4 |
| Blue and White | 5 |
| Orange | 6 |
| Brown and White | 7 |
| Brown | 8 |
T568B Wiring Standard:
| Wire Color | PIN |
|---|---|
| Orange and White | 1 |
| Orange | 2 |
| Green and White | 3 |
| Blue | 4 |
| Blue and White | 5 |
| Green | 6 |
| Brown and White | 7 |
| Brown | 8 |
Trimming any Excess Wire Length
Once the wires are correctly grouped according to the wiring standard, it’s essential to trim any excess wire length to ensure neatness and prevent interference or crosstalk. Use a pair of cable cutters or wire strippers to remove the excess wire length while leaving enough copper exposed for secure termination. Trim each wire carefully, ensuring a clean cut without damaging the copper strands.
With Step 2 complete, you have successfully untwisted, organized, and trimmed the wires within the Cat 6 cable. In the next step, we will move on to connecting the wires to the Cat 6 connector, bringing us one step closer to a fully functioning Ethernet cable.
Step 3: Terminating The Wires
After carefully stripping the outer jacket and untwisting the pairs of wires, you are now ready to terminate the Cat 6 connector. This step is critical to ensure a reliable and high-performance network connection. In this section, we will guide you through the process of inserting the wires into the corresponding slots of the connector, using a punch-down tool to secure them in place, and checking for proper wire seating and connectivity.
Inserting the wires into the corresponding slots of the connector
To begin, refer to the T568B standard for wiring color codes. Ensure that you follow this standard to maintain consistency in your network setup. Each wire should be inserted into the correct slot within the Cat 6 connector. Here’s a step-by-step guide to help you with this process:
- Starting from left to right, arrange the wires according to the T568B sequence: white-orange, orange, white-green, blue, white-blue, green, white-brown, and brown.
- Hold the connector firmly between your thumb and index finger, ensuring the wires are facing upwards.
- Gently insert each wire into its corresponding slot, being careful not to bend or damage the conductors.
- Push the wires all the way into the slots until they can no longer be inserted further.
Remember, accuracy and attention to detail are crucial during this step to ensure a proper and secure termination. By inserting the wires correctly, you will pave the way for a reliable network connection.
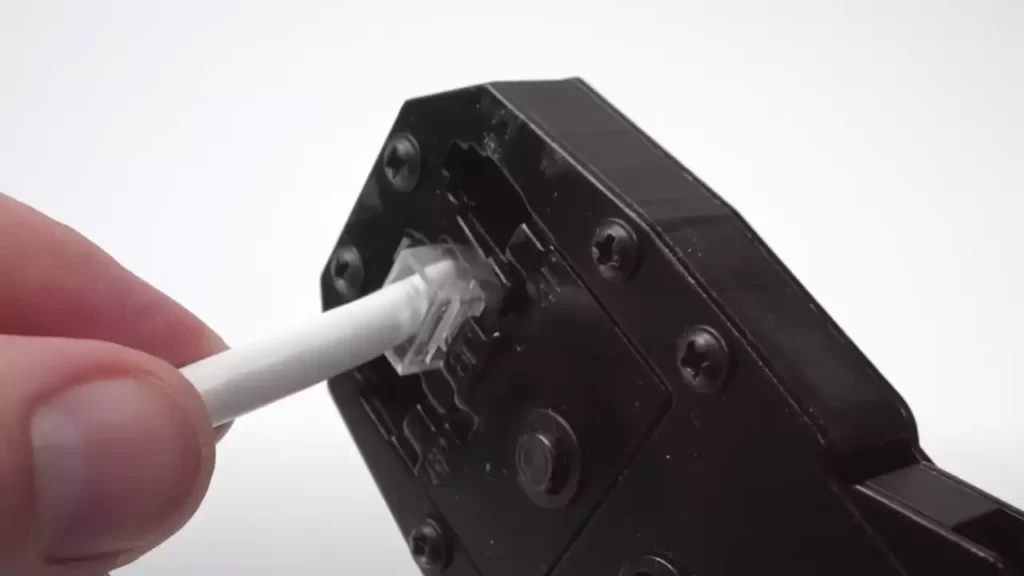
Using a punch-down tool to secure the wires in place
Once the wires are inserted into the slots, it’s time to secure them using a punch-down tool. This tool is specifically designed to make a solid connection between the wires and the connector. Follow these steps to properly use the punch-down tool:
- Position the punch-down tool over the areas of the connector where the wires are inserted.
- Press down firmly on the tool, ensuring it makes contact with the connector.
- Apply a steady downward force, puncturing the insulation and pushing the wires into the IDC (insulation displacement connector) contacts.
- Repeat this process for each wire, ensuring a strong and consistent connection.
By using a punch-down tool, you can secure the wires firmly in place, minimizing the risk of any accidental disconnections or signal loss within your network.
Checking for proper wire seating and connectivity
Once the wires are terminated and secured, it’s crucial to check for proper wire seating and connectivity. This step ensures that each wire is properly connected, allowing for reliable data transmission. Here are some tips to follow:
- Visually inspect the connector to ensure all wires are fully seated in their respective slots.
- Gently tug on each wire to check for any signs of movement or looseness. A properly terminated wire should be secure and unable to be easily pulled out.
- Use a cable tester or network testing tool to verify connectivity and perform tests to ensure proper transmission of data.
By checking the wire seating and connectivity, you can identify and address any potential issues early on, ensuring a robust network connection for your Cat 6 installation.
Conclusion
By following these steps, you can successfully terminate the wires of your Cat 6 connector. Remember to carefully insert the wires into the correct slots, secure them using a punch-down tool, and check for proper wire seating and connectivity. Taking these measures will help you achieve a reliable and high-performance network setup, ensuring smooth data transmission and optimal network performance.
Step 4: Testing The Connection
Once you have successfully terminated the Cat 6 connector, the next crucial step is to test the connection. This step ensures that the network cable is properly functioning and capable of delivering optimal performance. Testing the connection involves using a cable tester, troubleshooting any common issues that may arise, and verifying the speed and stability of the network connection.
Using a cable tester to ensure a successful connection
In order to determine if the Cat 6 connector is properly terminated and the cables are correctly connected, it is essential to use a cable tester. A cable tester is a device designed to detect any faults or issues in the network cable, providing valuable insight into the quality of the connection.
Using a cable tester is a straightforward process. Once the Cat 6 connector is plugged into both ends of the network cable, connect the cable tester to one end and power it on. The tester will analyze the connection and indicate whether it is successful or if there are any faults. Make sure to follow the manufacturer’s instructions for your specific cable tester to ensure accurate results.
Troubleshooting common issues and fixing them
During the testing process, it is possible to encounter common issues that can hinder the performance of the network connection. Identifying and troubleshooting these issues is crucial for ensuring a smooth and reliable connection.
Some common issues you may encounter include crossed cables, faulty terminations, or incorrect wiring. If the cable tester indicates a problem, carefully inspect the cables and connectors for any visible signs of damage or incorrect wiring. Often, reterminating the connector or fixing any wiring errors can resolve these issues.
Verifying the speed and stability of the network connection
In addition to testing the physical connection using a cable tester, it is essential to verify the speed and stability of the network connection. This step ensures that the Cat 6 cable is capable of delivering the desired performance levels.
To verify the speed and stability, you can use network testing tools or software that measure the network’s bandwidth, latency, and packet loss. Running these tests will provide valuable information about the quality of the connection, helping to identify any potential bottlenecks or performance issues.
By performing these tests, you can ensure that the Cat 6 connector is properly installed and that the network connection is operating at its maximum potential, delivering fast and stable performance for all your networking needs.
Additional Tips And Best Practices
Proper cable management techniques to avoid signal interference
When it comes to installing Cat 6 connectors, ensuring proper cable management is essential to avoid any signal interference or loss. Here are some best practices and techniques to help you achieve optimal performance:
- Keep cable lengths short: It is important to keep the cable lengths as short as possible to minimize signal degradation. Longer cables increase the chances of interference, which can affect the overall performance of your network.
- Avoid tight bends: When routing the cables, it’s crucial to avoid tight bends as they can cause signal loss or damage the internal wires. Make sure to use smooth, gradual curves instead.
- Separate power and data cables: To minimize signal interference, it’s recommended to separate the power cables from the data cables. This helps reduce electromagnetic interference (EMI) and ensures optimal performance.
- Use cable management accessories: Utilize cable management accessories such as cable ties or raceways to keep the cables organized and secure. This not only improves the aesthetics but also helps prevent accidental damage to the connectors.
How to choose the right Cat 6 connector for your specific needs
Choosing the right Cat 6 connector is essential to ensure a reliable and high-speed network connection. Consider the following factors when selecting a connector for your specific needs:
- Compatibility: Ensure that the connector you choose is compatible with Cat 6 cables. Using a connector that is not specifically designed for Cat 6 can result in signal loss and poor performance.
- Quality: Opt for connectors made from high-quality materials to ensure durability and long-lasting performance. Look for connectors that meet industry standards to guarantee reliable connectivity.
- Shielding: If you are installing Cat 6 connectors in an area prone to electromagnetic interference, consider using shielded connectors. These connectors provide additional protection against external interference, resulting in a more stable network connection.
- Installation ease: Choose connectors that are easy to install and terminate. This will save you time and effort during the installation process, especially if you are working with a large number of connectors.
Regular maintenance and inspection of the connectors for optimal performance
To ensure optimal performance of your Cat 6 connectors, regular maintenance and inspection are crucial. Follow these tips to maintain the connectors in top condition:
- Regular cleaning: Dust and debris can accumulate on the connectors over time, affecting the signal quality. Regularly clean the connectors using a lint-free cloth or compressed air to remove any build-up.
- Inspect for physical damage: Periodically inspect the connectors for any signs of physical damage, such as bent pins or loose connections. If you notice any issues, replace the affected connectors promptly to prevent further damage.
- Test the connections: Use a cable tester to check the connectivity and performance of the connectors. This will help identify any faulty connectors or cables and allow you to address the issues promptly.
By following these additional tips and best practices, you can ensure a reliable and efficient Cat 6 connector installation. Proper cable management, choosing the right connector, and regular maintenance are key to achieving optimal performance and minimizing signal interference. Take the time to implement these practices, and you’ll enjoy a smooth and stable network connection.
Frequently Asked Questions
How Do You Attach A Cat6 Connector?
To attach a cat6 connector, follow these steps: 1. Strip the outer jacket of the cable, exposing the wires. 2. Untwist and arrange the wires in the correct order according to the T568B or T568A wiring standard. 3. Trim the excess wires to ensure they are all the same length.
4. Insert the wires into the connector, making sure they go all the way to the end. 5. Use a crimping tool to secure the wires and connector together.
How Is Cat6 Wired?
Cat6 is wired using a four-pair twisted copper wire cable. Each pair is color-coded and twisted together to minimize interference. The wiring follows the TIA/EIA-568-A or TIA/EIA-568-B standard, with the pairs connected in a specific order to ensure proper signal transmission.
How Much Does It Cost To Install Cat6 Cable?
The cost of installing Cat6 cable varies depending on factors such as the length of cable, complexity of the installation, and labor charges. On average, the cost can range from $150 to $300 for a basic installation. However, for more extensive projects, the cost may increase accordingly.
How Do You Splice Cat6?
To splice Cat6, follow these guidelines: 1. Strip the outer jacket and unravel the wires carefully. 2. Arrange the wires according to the TIA-568A or TIA-568B wiring standard. 3. Trim the excess wire length and insert them into the RJ45 connector.
4. Use a crimping tool to secure the wires in place. 5. Test the connection using a cable tester to ensure proper functionality.
Conclusion
Installing a Cat 6 connector is a simple process that can greatly improve the performance and reliability of your ethernet connections. By following the steps outlined in this blog post, you can ensure a secure and efficient connection that meets the requirements of modern networking.
Remember to use the right tools and carefully follow the instructions to achieve the best results. Enjoy your fast and stable internet experience with Cat 6 connectors!