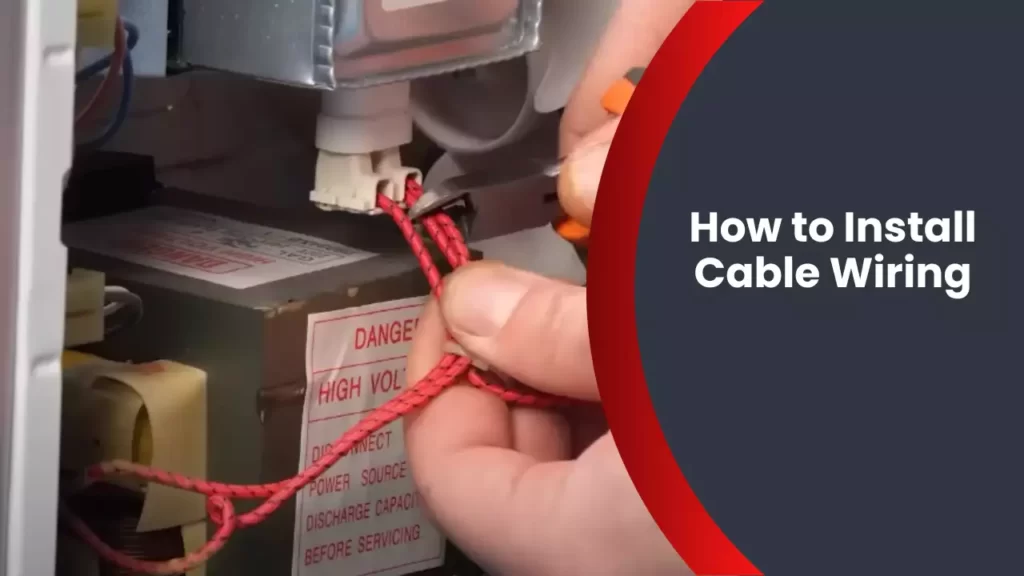
To install cable wiring, first determine the desired location and gather the necessary tools. Then, run the cable through walls or under floors, connecting it to the necessary outlets or devices.
Interested in installing cable wiring in your home or office? This process can seem daunting at first, but with the right tools and a little know-how, it can be done efficiently and effectively. Whether you’re looking to set up a new entertainment system or establish reliable internet connections, cable wiring installation is an essential skill to have.
In this guide, we’ll walk you through the necessary steps to install cable wiring in your space, ensuring a seamless and tidy setup. So let’s dive in and get started!
Understanding The Basics Of Cable Wiring
In this section, we will delve into the fundamentals of cable wiring, allowing you to grasp the essentials required for a successful installation. By understanding the key elements of cable types, the importance of proper installation techniques, and the necessary safety precautions, you’ll be equipped with the knowledge to ensure a seamless wiring setup.
Types of cables commonly used for wiring
When it comes to cable wiring, various types of cables are commonly employed based on their specific functionalities. Let’s take a closer look at the four main types:
Coaxial cables
Coaxial cables are frequently used for providing reliable connections in cable television, satellite broadcasting, and internet setups. These cables consist of an inner conductor, surrounded by an insulating layer, a metallic shield, and finally an outer insulating layer. The design of coaxial cables effectively minimizes interference, ensuring high-quality transmission of signals.
Ethernet cables
Ethernet cables are widely used for networking purposes, such as connecting computers, printers, and routers. These cables facilitate the transmission of data with a high level of speed and stability. The most common type of Ethernet cable is the Category 5 (CAT5) cable, although newer versions like CAT6 and CAT7 offer even faster data transfer rates and improved performance.
HDMI cables
HDMI cables are essential for home theaters, gaming consoles, and multimedia setups. They transmit both high-definition video and audio signals, ensuring a seamless viewing and listening experience. HDMI cables come in different versions, with the latest being HDMI 2.1 which supports 8K resolution and enhanced color depth.
Fiber optic cables
Fiber optic cables are revolutionizing high-speed internet and long-distance communication. With their ability to transmit data using pulses of light, these cables offer increased bandwidth, faster speeds, and improved signal integrity. Fiber optic cables are commonly used in telecommunications, data centers, and areas where other cables struggle to provide reliable connections.
Importance of proper cable installation
Proper cable installation plays a critical role in ensuring optimal performance and longevity of your network or audiovisual system. When cables are installed correctly, you can expect minimal interference, maximum signal strength, and a seamless user experience. On the other hand, improper installation can result in connectivity issues, signal degradation, and even safety hazards.
By following the recommended installation practices specific to each cable type, you can avoid potential setbacks and enjoy a reliable and efficient wiring setup for years to come.
Safety precautions to take during the installation process
During the installation process, it is crucial to prioritize safety to prevent accidents and ensure the well-being of both individuals and property. Here are some vital safety precautions to keep in mind:
- Always switch off the power supply before working with cables to minimize the risk of electric shocks.
- Avoid bending cables beyond their minimum bend radius, as excessive bending can lead to signal loss and damage.
- Use cable management solutions like cable ties and cable clips to organize and secure cables, reducing the risk of tripping hazards and cable damage.
- Make sure to wear protective gloves and eyewear when handling cables, especially when working with fiber optic cables that require precise handling.
By implementing these safety precautions, you can ensure a safe installation process and reduce the chances of encountering any unfortunate incidents that may compromise the quality of your cable wiring setup.
Planning And Preparing For Cable Installation
Planning and preparing for cable installation is a crucial step to ensure a successful and efficient wiring project. By taking the time to identify the areas where cable wiring is needed, measuring and estimating cable lengths, and gathering the necessary tools and materials, you can streamline the installation process and avoid common pitfalls. In this blog post, we will explore each of these aspects in detail, providing you with a comprehensive guide to cable wiring installation.
Identifying the areas where cable wiring is needed
The first step in planning for cable installation is identifying the specific areas where the wiring is required. Take a thorough walk-through of your property or project site, noting down each location that will require cable wiring. This could include rooms, floors, outdoor areas, or even specific devices that need to be connected. By clearly identifying these areas, you can ensure that you have a complete picture of the scope of the project and can proceed with accurate measurements and estimates.
Measuring and estimating cable lengths
Once you have identified the areas where cable wiring is needed, it’s important to measure and estimate the cable lengths required. This will help you determine the amount of cable you will need to purchase, minimizing the risk of running out of cable or having excess length. To accurately measure, use a measuring tape to determine the distance between the areas that need to be connected. Take note of any obstacles or unique pathways the cable may need to follow to ensure you account for any additional length required.
Gathering the necessary tools and materials
Gathering the necessary tools and materials before starting the cable installation will save you time and prevent any unnecessary delays. Here are some essential tools and materials you will need:
| Tool/Material | Description |
| Cable cutters/strippers | Used to cut and strip the cable’s protective outer layer, exposing the inner wiring for connection. |
| Crimping tool | Essential for securely attaching cable connectors to the exposed wiring ends. |
| Cable connectors | These connectors are used to join cables together, ensuring a secure and reliable connection. |
| Mounting hardware | Allows you to securely attach cables to walls, floors, or other surfaces. |
| Fish tape | A flexible tool used to guide cables through walls, conduits, or other tight spaces. |
By having these tools and materials readily available, you can work efficiently and effectively during the installation process, avoiding any unnecessary trips to the store.
[Next Heading and content…]
Routing And Running Cable Wiring
When it comes to installing cable wiring, the process of routing and running the cables is crucial. This ensures that the cables are properly installed and organized, leading to a reliable and efficient network system. In this section, we will explore the necessary steps to successfully route and run cable wiring in your building, including locating the cable entry point, evaluating potential obstacles, utilizing cable management solutions, and tips for running cables through difficult areas.
Locating the Cable Entry Point in Your Building
The first step in routing and running cable wiring is to determine the ideal entry point for the cables in your building. This entry point should provide easy access to the main distribution point or network equipment. Look for areas such as utility rooms, server closets, or designated cable conduits that allow for a centralized and organized cable installation.
Evaluating Potential Obstacles and Making Necessary Accommodations
Before routing and running cable wiring, it is important to evaluate potential obstacles that could hinder the installation process. By identifying and addressing these obstacles beforehand, you can save time and avoid potential issues down the line. Let’s explore some common obstacles and the necessary accommodations for each:
Walls
When running cables through walls, it is crucial to consider the type of wall construction. For solid walls, such as concrete or masonry, drilling through may be necessary. It is advisable to use conduit pipes to protect the cables and facilitate future maintenance. For drywall or stud walls, locating the wall studs is essential for secure cable installation. Use stud finders or tapping techniques to locate the studs accurately.
Ceilings
Running cable wiring through ceilings requires careful planning and consideration. Identify drop ceilings or access panels that allow for easy cable routing. If there are no existing access points, you may need to create one carefully. Ensure that the cables are securely fastened and not in direct contact with any insulation or HVAC components.
Floors
When it comes to running cables through floors, it is important to choose the pathway that minimizes disruption and provides efficient cable management. Identify existing cable conduits or floor ducts that allow for easy cable routing. If these options are not available, considering floor boxes or undercarpet cable management systems can provide a tidy and organized solution.
Conduits
Using conduits is a popular and efficient method of protecting cables and managing their routing. When utilizing conduits, ensure that they are of suitable size to accommodate the cables and any necessary bends. Properly fasten the conduits to the walls or ceilings using appropriate brackets or clamps for a secure installation.
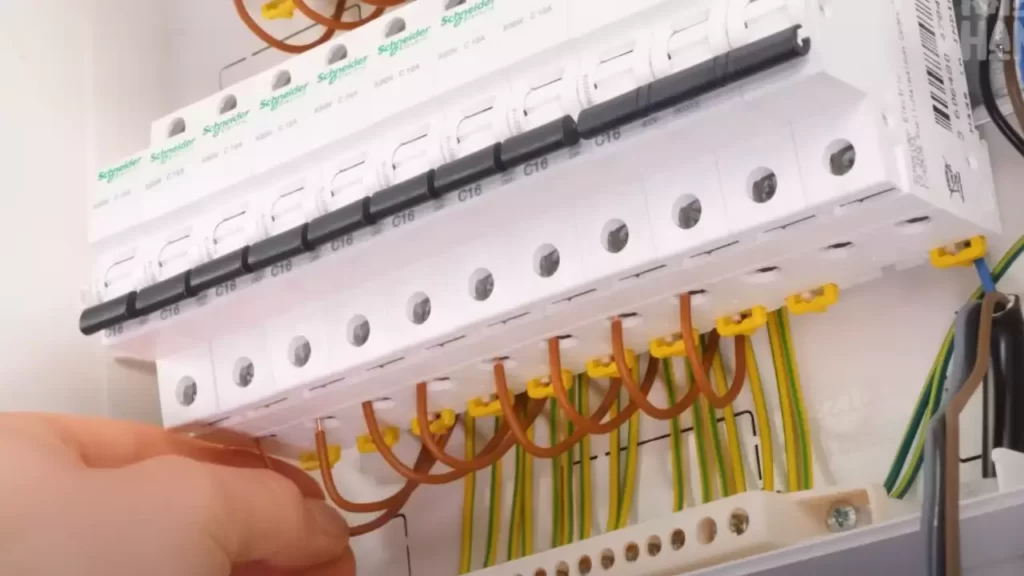
Utilizing Cable Management Solutions
Effective cable management is crucial in maintaining an organized and functional network system. Utilize cable management solutions such as cable trays, racks, or sleeves to keep the cables neatly organized and easily accessible. This not only simplifies future maintenance or troubleshooting but also ensures signal integrity and reduces the risk of cable damage.
Tips for Running Cables Through Difficult Areas
Running cables through difficult areas requires strategic planning and execution. Here are some tips to help you navigate challenging installations:
- Bend radius: Take into account the maximum bend radius of the cables to prevent signal loss or damage. Avoid sharp bends that could weaken the cables.
- Cable length: Measure the required cable length accurately to avoid unnecessary excess or shortage.
- Cable labeling: Properly label each cable for easy identification and troubleshooting in the future.
- Cable ties and clips: Use cable ties or clips to secure the cables along their routing path, ensuring a clean and organized installation.
- Testing: Once the cables are installed, thoroughly test each cable to ensure proper connectivity and signal strength.
By following these tips and adhering to best practices in cable routing and running, you can ensure a reliable and efficient cable installation that supports your network infrastructure.

Terminating And Connecting Cable Wiring
In order to successfully install cable wiring, it is essential to know how to properly terminate and connect the cables. This crucial step ensures that the connections are secure and reliable, allowing for efficient transmission of signals. In this section, we will discuss the important aspects of terminating and connecting cable wiring, including the proper stripping of cable insulation, choosing the appropriate connectors for different cable types, steps for crimping connectors onto cables, and finally, testing cable connections for continuity and signal quality.
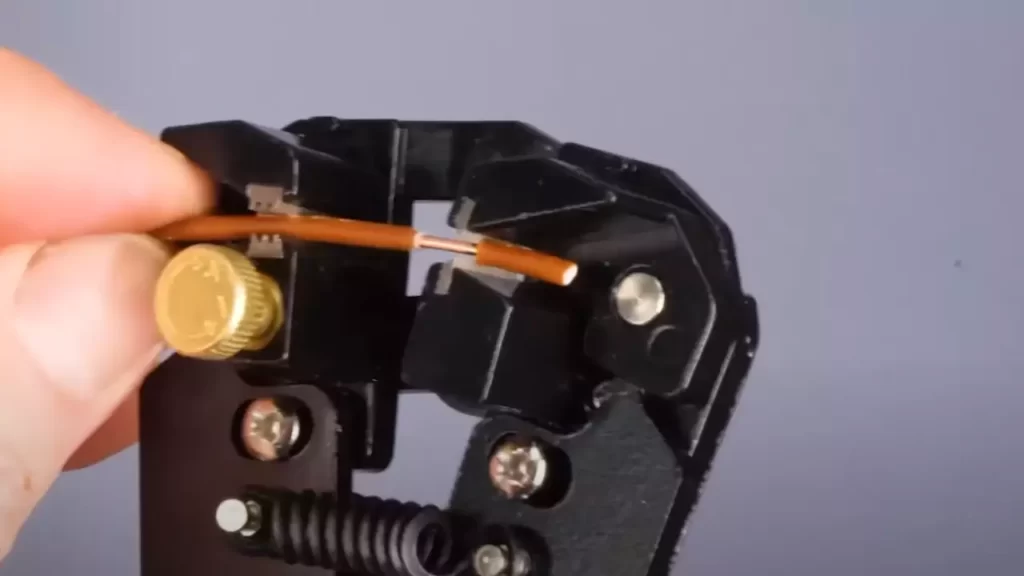
1. Properly stripping cable insulation:
Before connecting cables, it is of utmost importance to strip the cable insulation properly. Follow these steps to ensure a secure connection:
- Gather the necessary tools such as a cable stripper or a sharp knife.
- Identify the section of the cable where the insulation needs to be stripped.
- Place the cable into the stripper or carefully use the knife to score the insulation without damaging the underlying wires.
- Gently remove the insulation by pulling it away from the scored section.
- Inspect the exposed wires to ensure they are not damaged or frayed.
2. Choosing the appropriate connectors for different cable types:
When it comes to connecting cable wiring, selecting the right connectors for each cable type is crucial for optimal performance. Consider the following connectors:
| Cable Type | Appropriate Connector |
|---|---|
| Cat5e/Cat6 Ethernet Cable | RJ45 connectors |
| Coaxial Cable | F-type connectors |
| Speaker Wire | Banana plugs or spade connectors |
| HDMI Cable | HDMI connectors |
3. Steps for crimping connectors onto cables:
When it comes to securely connecting connectors onto cables, following these steps will ensure a reliable connection:
- Strip the cable insulation, as explained earlier, ensuring the exposed wires are clean and undamaged.
- Insert the exposed wires into the appropriate slots on the connector.
- Use a crimping tool to apply pressure and create a tight connection between the wires and the connector pins.
- Inspect the crimped connection to ensure it is secure.
4. Testing cable connections for continuity and signal quality:
After completing the termination process, it is vital to test the cable connections to ensure proper continuity and signal quality. Follow these steps:
- Use a cable tester or a multimeter to check the continuity of the cable. Ensure there are no breaks or shorts in the connection.
- Test the signal quality by connecting the cable to the appropriate device and verifying that the signal is clear and strong.
- Make any necessary adjustments or re-terminations if there are issues with the continuity or signal quality.
By following these steps, you can confidently terminate and connect cable wiring, ensuring reliable and efficient transmission of signals.
Cable Wiring Techniques For Specific Applications
When it comes to cable wiring, it’s important to have a good understanding of the specific applications you’ll be working with. In this section, we’ll dive into the various techniques and considerations for installing cable wiring for different purposes. Whether you’re setting up a home theater, connecting audiovisual components, or establishing a home network, these cable wiring techniques will help you achieve optimal performance and a clean appearance.
Installing Cable Wiring for Home Theaters and Entertainment Systems
Home theaters and entertainment systems require careful planning and precise cable wiring installation. To ensure an immersive and uninterrupted viewing experience, it’s essential to properly connect all the necessary audiovisual components.
Connecting Audiovisual Components
Connecting audiovisual components involves establishing clear connections between devices such as televisions, Blu-ray players, gaming consoles, and speakers. To achieve high-quality audio and video signal transmission, use HDMI cables for digital connections and higher-quality analog audio cables.
Setting up Surround Sound Systems
Creating a surround sound system involves placing speakers strategically around the room to deliver an enveloping audio experience. Proper cable wiring is necessary to connect each speaker to the audio receiver. Use speaker wires with the appropriate gauge and length to ensure optimal performance.
Hiding Cables for a Clean Appearance
A cluttered web of cables can detract from the beauty of your home theater or entertainment setup. To maintain a clean appearance, consider hiding your cables. Use cable management solutions such as cable raceways, wall-mounted conduit systems, or in-wall cable channels to conceal your wires.
Cable Wiring for Home Networking
Setting up a home network requires specific cable wiring techniques to establish reliable connections between devices and enable internet access throughout your home.
Setting up a Wired LAN
A wired LAN (Local Area Network) is a network system that utilizes Ethernet cables for data transmission. To set up a wired LAN, you’ll need to install Ethernet cables and connect them to a central network switch or router.
Installing Network Switches and Routers
Network switches and routers are crucial components of a home network, allowing multiple devices to connect and communicate with each other. When installing these devices, ensure they are positioned in a central location for optimal coverage. Connect them to the modem and other network devices using Ethernet cables.
Setting up Wi-Fi Access Points
Wi-Fi access points extend wireless coverage throughout your home, providing reliable internet connectivity to devices such as smartphones, tablets, and laptops. When setting up Wi-Fi access points, strategically position them for maximum coverage and connect them to the network switch or router using Ethernet cables.
By understanding the specific cable wiring techniques for different applications, you’ll be equipped to create a seamless and efficient setup for your home theater, entertainment systems, and home network. Remember, proper cable installation not only ensures optimal performance but also enhances the aesthetics of your space. Whether you’re connecting audiovisual components, hiding cables, or setting up a LAN or Wi-Fi network, following these techniques will help you achieve a clean and professional installation.
Troubleshooting Common Cable Installation Issues
Installing cable wiring can sometimes come with its fair share of challenges. From connectivity problems to cable length limitations, it’s essential to be prepared to troubleshoot these issues effectively. By understanding how to identify and resolve cable connectivity problems, dealing with cable length limitations, and adhering to guidelines for cable maintenance and troubleshooting, you can ensure a smooth and efficient cable installation process.
Identifying and resolving cable connectivity problems
When it comes to cable installation, connectivity problems can be a major roadblock. The first step in troubleshooting such issues is to identify the root cause. Ensure that all cable connections are secure and properly plugged in. Loose or faulty connections can lead to signal loss and frustration. If desired, use a cable tester tool to check the integrity of the cables before installation. It’s also important to check for any damaged cables or connectors as they can disrupt the entire installation process.
If you encounter connectivity issues during cable installation, try the following troubleshooting steps:
- Double-check cable connections to ensure they are snugly attached and properly seated.
- Inspect the cables for any signs of wear and tear, including frayed wires or bent connectors. Replace any damaged cables with new ones.
- Consider changing the connectors if you suspect a faulty connection. Use high-quality connectors to ensure optimal performance.
- Reboot your devices, including modems, routers, and cable boxes, as sometimes a simple restart can resolve connectivity issues.
- If you are dealing with multiple devices, make sure that they are all compatible with the type of cable wiring you are using.
Dealing with cable length limitations
Another common issue faced during cable installation is cable length limitations. Each cable type has a maximum length beyond which signal degradation can occur. This can negatively impact the quality of your audio, video, or internet connection. It’s crucial to be aware of the cable length limitations specific to the wiring you are working with to avoid such problems.
Here are some guidelines to help you manage cable length limitations:
- Measure the distance between the devices you need to connect and ensure it doesn’t exceed the cable length limitations. If it does, consider using signal boosters or extenders to maintain signal strength.
- Consider the path the cable will take during installation. Avoid sharp bends or kinks as they can affect signal quality. Use cable management solutions like clips or conduits to keep cables properly routed and organized.
- If you need to cover longer distances, consider using fiber-optic cables instead. They offer higher bandwidth and are less prone to signal degradation over extended lengths.
Guidelines for cable maintenance and troubleshooting
Proper maintenance and regular troubleshooting can not only resolve current issues but also prevent potential problems down the line. Following these guidelines can help you maintain a reliable cable installation:
- Inspect cables periodically for any signs of wear and tear. Replace damaged cables promptly.
- Avoid placing cables near sources of interference, such as power lines or microwave ovens.
- Secure cables properly using cable clips or ties to prevent accidental disconnections or damage.
- Ensure that cable connectors are cleaned and free from dust or debris.
- If you experience ongoing connectivity problems, consult a professional technician who specializes in cable installations.
By having a thorough understanding of the common cable installation issues and knowing how to troubleshoot them effectively, you can ensure a successful and reliable cable wiring installation.
Best Practices For Cable Wiring Installation
Labeling and Organizing Cables for Easy Identification
One of the essential steps in ensuring a smooth and hassle-free cable wiring installation is effectively labeling and organizing your cables. Whether you are working on a small residential project or a large-scale commercial installation, proper cable identification can save you precious time and prevent confusion.
Investing a little effort into organizing your cables can go a long way in simplifying troubleshooting and future maintenance tasks. Implementing a consistent labeling system allows you to easily identify and locate specific cables, reducing the chances of accidental disconnections or unnecessarily tampering with other connections.
Adopting Proper Cable Management Practices
Poor cable management not only makes your installation look messy but also increases the risk of cable damage and network performance issues. By adopting proper cable management practices, you can ensure the longevity and efficiency of your setup.
One effective way to manage your cables is by using cable trays or raceways. These solutions organize and bundle cables neatly, preventing tangles and minimizing the risk of accidental damage. Additionally, using cable ties or straps can help secure cables in place and prevent them from interfering with other equipment or creating trip hazards.
Following Building Codes and Regulations Related to Cable Installation
When it comes to cable wiring installation, it is crucial to adhere to building codes and regulations set forth by relevant authorities. Following these guidelines not only ensures the safety of your installation but also helps prevent potential legal issues that may arise due to non-compliance.
Building codes typically cover various aspects such as cable pathway requirements, fire safety measures, and electrical standards. Familiarize yourself with the specific codes applicable to your project and make sure all cable installations comply with these regulations. This will help you avoid unnecessary fines, delays, and, most importantly, safeguard the integrity of your installation.
Regularly Updating and Upgrading Cable Wiring to Meet Evolving Needs
In today’s fast-paced technological landscape, staying up-to-date with the latest advancements and ensuring your cable wiring meets evolving needs is crucial. Regularly updating and upgrading your cable wiring infrastructure not only enhances performance but also allows for scalability and future expansion.
Consider conducting regular assessments to identify any outdated or faulty cables that need to be replaced. With advancements in technology, newer cables may offer improved speeds, reduced latency, and enhanced reliability. Upgrading to these newer options can help future-proof your installation and ensure it remains efficient and compatible with emerging technologies.
Remember, the key to a successful cable wiring installation is to stay vigilant, prioritize organization, comply with regulations, and keep pace with ever-changing technological requirements.
Frequently Asked Questions
Can You Install Cable Yourself?
Yes, you can install cable yourself. It is a simple process that can be done by following the instructions provided with the cable package. Installing cable on your own can save you money and give you the flexibility to set it up according to your needs.
What Are The 3 Methods Of Installing Cables?
The three methods of installing cables are conduit, direct-buried, and overhead. Conduit involves placing cables in pipes or tubes, while direct-buried means burying cables underground. Overhead installation involves suspending cables from utility poles or other structures.
Can I Install My Own Coax Cable?
Yes, you can install your own coax cable. Follow these guidelines: 1) Ensure you have the necessary tools and materials. 2) Plan and measure where the cable needs to run. 3) Use the appropriate connectors for a secure connection. 4) Test the cable to ensure proper signal transmission.
5) Use cable clips or ties to secure the cable along its route.
How Do You Attach Cable Wires To The Wall?
To attach cable wires to the wall, follow these steps: 1. Locate a desired position on the wall. 2. Use cable clips or wall staples to secure the wires. 3. Ensure the wires are neatly arranged. 4. Use a drill or screwdriver to affix the clips or staples.
5. Test the attachment to ensure it is secure.
Conclusion
In wrapping up, installing cable wiring can seem daunting, but with a systematic approach, it becomes manageable. By gathering the necessary tools, planning the layout, and following the right steps, anyone can successfully install cable wiring in their homes or offices.
Remember to always prioritize safety, consult professionals when needed, and enjoy the benefits of a well-connected space.