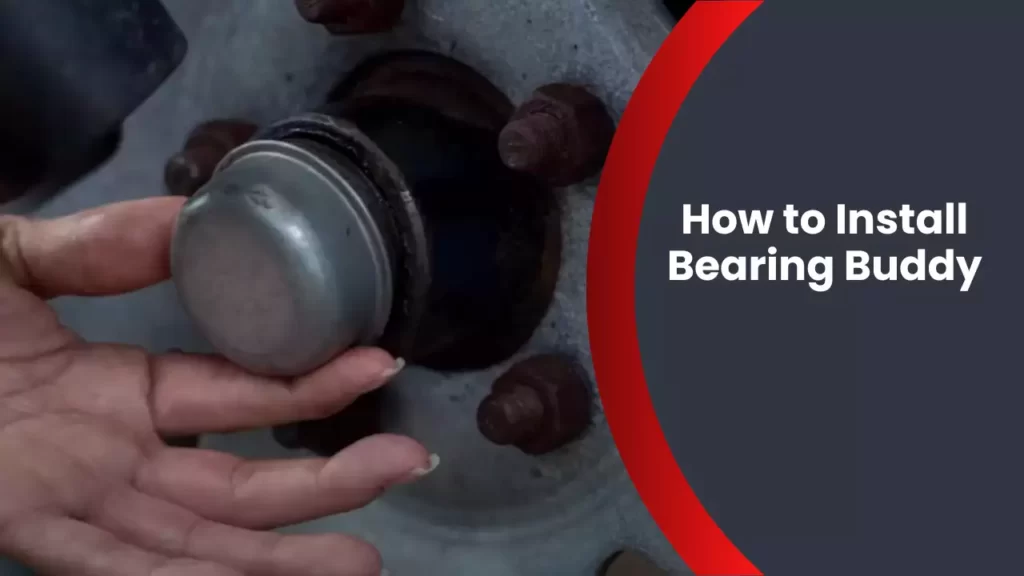
To install a Bearing Buddy, remove the dust cover and spindle nut, slide the Bearing Buddy over the spindle, then secure it with the spindle nut. Installing a Bearing Buddy is a simple and important task for maintaining the health and longevity of your trailer’s wheel bearings.
By properly installing a Bearing Buddy, you can protect your wheel bearings from water and dirt contamination, reducing the risk of bearing failure and extending their lifespan. We will guide you through the step-by-step process of installing a Bearing Buddy, ensuring that your trailer’s wheel bearings stay well-lubricated and in top condition for your towing needs.
So, let’s get started with the installation process to give your wheel bearings the care they deserve.
Gathering The Necessary Tools And Materials
Choose the Right Bearing Buddy Size
Before you begin the installation process of a Bearing Buddy, it’s crucial to choose the right size for your trailer’s axle. This will ensure a proper fit and optimal performance. The size of the Bearing Buddy is determined by the outer diameter of your trailer’s axle hub. To determine the right size, you can refer to the owner’s manual of your trailer or measure the diameter yourself using a caliper.
Tools You’ll Need
To successfully install a Bearing Buddy, you’ll need a few essential tools to make the process smoother. Here’s a list of what you’ll need:
- Socket wrench set – Having a socket wrench set of various sizes will allow you to loosen and tighten the necessary bolts and nuts during the installation process. Make sure you have the appropriate socket size for your Bearing Buddy.
- Grease gun – A grease gun is essential for lubricating the bearings inside the Bearing Buddy. It will help prevent friction and ensure smooth operation. Make sure you have the right type of grease recommended for your trailer’s bearings.
- Rubber mallet – A rubber mallet will come in handy when you need to gently tap the Bearing Buddy into place. It will help ensure a secure and tight fit without causing any damage to the hub.
- Pliers or wire cutters – You may need pliers or wire cutters to remove any old cotter pins or retaining rings that are holding the existing dust cap in place. These tools will make it easier to remove these components without causing any damage.
- Clean cloth or paper towels – Before installing the new Bearing Buddy, it’s important to clean the hub thoroughly. Having a clean cloth or paper towels on hand will help you remove any dirt, debris, or old grease that may have accumulated in the hub.
Having these tools ready before you start the installation process will save you time and frustration. Make sure to have them all assembled and easily accessible in your workspace to ensure a smooth and efficient installation process.
Preparing The Trailer
Before you can successfully install a Bearing Buddy on your trailer, it’s crucial to prepare the trailer properly. This involves several important steps to ensure a secure and reliable installation. In this section, we’ll guide you through the process, emphasizing safety and attention to detail.
Safely Elevate the Trailer
The first step in preparing your trailer for Bearing Buddy installation is to safely elevate it. This is essential for easy access to the hub and wheel assembly. One effective method of elevating the trailer is by using a sturdy jack. Here’s a step-by-step guide:
- Position the jack under the trailer frame near the wheel you’ll be working on.
- Ensure the jack is stable and properly aligned with the trailer frame.
- Carefully pump the jack handle to lift the trailer off the ground.
- Continue pumping until the wheel is safely elevated.
- Place a jack stand under the frame for added stability.
- Repeat these steps for each wheel you plan to work on.
Remove the Hub Dust Cover
Once the trailer is safely elevated, it’s time to remove the hub dust cover. The dust cover protects the hub, bearings, and other internal components from dirt, debris, and moisture. Follow these steps to remove the hub dust cover:
- Inspect the hub and identify the dust cover. It is usually located in the center of the hub.
- Use a flathead screwdriver or a pry bar to carefully remove the dust cover. Insert the tool between the cover and the hub.
- Gently pry the cover off by applying gradual pressure. Be cautious not to damage the cover or the hub.
- Once the dust cover is removed, set it aside in a clean and safe location.
Inspect the Inner Hub Bearings
With the dust cover removed, it’s time to inspect the inner hub bearings. These bearings play a crucial role in the smooth operation of the trailer’s wheels. Inspecting the bearings allows you to assess their condition and determine if they need to be replaced. Follow these steps to inspect the bearings:
- Visually inspect the bearings for signs of wear, damage, or excessive rust.
- Check for any noticeable play or looseness in the bearings. They should rotate smoothly without any wiggle.
- If you notice any issues with the bearings, such as wear or play, it is recommended to replace them before proceeding with the installation of the Bearing Buddy.
Clean the Hub and Bearings
After inspecting the bearings, it’s essential to clean the hub and bearings thoroughly. This helps remove any dirt, debris, or old grease that could affect the performance of the Bearing Buddy. Follow these steps to clean the hub and bearings:
- Use a suitable solvent or degreaser to clean the hub and bearings. Apply the solvent to a clean cloth or brush and scrub the surfaces gently.
- Make sure to remove any old grease or accumulated dirt from the bearings.
- Once clean, inspect the hub and bearings again to ensure they are free from any remaining debris.
By following these steps, you can effectively prepare your trailer for the installation of a Bearing Buddy. Remember, taking the time to properly prepare the trailer ensures a reliable and long-lasting installation.
Installing The Bearing Buddy
The Bearing Buddy is an essential component in ensuring the proper lubrication and protection of your trailer’s wheel bearings. Installing it correctly is crucial to maintain the longevity and performance of your trailer. In this section, we will guide you through the step-by-step process of installing the Bearing Buddy, making it a hassle-free experience for you.
Apply Grease to the Bearing Buddy
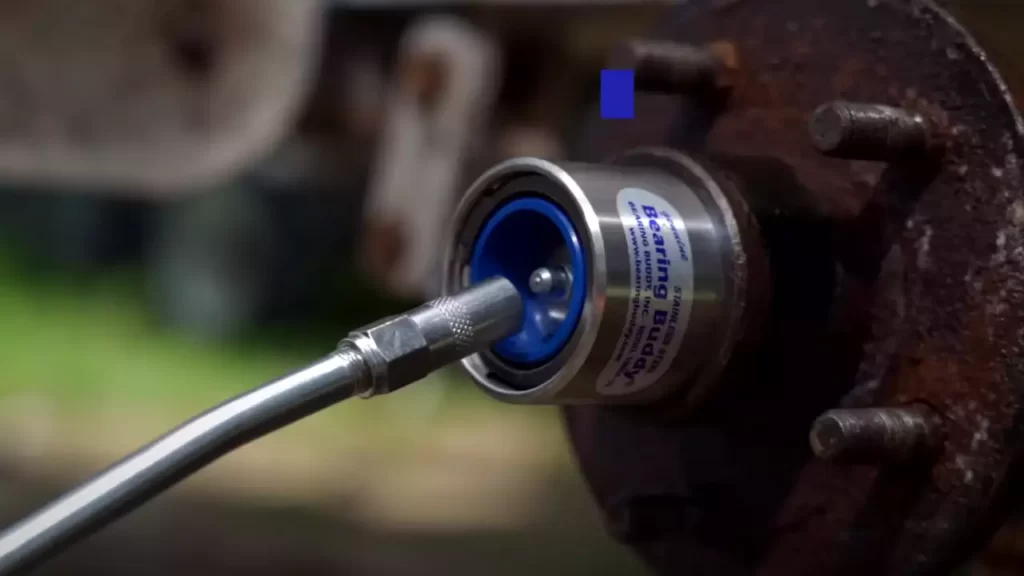
Before inserting the Bearing Buddy into the hub, you need to apply grease to it. This will ensure that the bearings are properly lubricated, reducing friction and preventing any potential damage. To apply the grease, follow these simple steps:
- Clean the Bearing Buddy to remove any dirt or debris.
- Using a grease gun, attach the grease fitting to the zerk fitting on the Bearing Buddy.
- Squeeze the grease gun handle to pump the grease into the Bearing Buddy. Make sure to apply enough grease to fill the chamber, but do not overfill it.
- Continue pumping the grease until you see fresh grease coming out around the edges of the Bearing Buddy.
Applying grease to the Bearing Buddy will ensure that the lubricant is evenly distributed and the bearings are well protected during operation.
Insert the Bearing Buddy into the Hub
Once you have properly applied grease to the Bearing Buddy, you are ready to insert it into the hub. The following steps will guide you through the process:
- Align the Bearing Buddy with the hub opening.
- With a gentle but firm grip, push the Bearing Buddy into the hub. The grease will help create a smooth insertion process.
- Continue pushing until the Bearing Buddy is fully seated in the hub.
Properly inserting the Bearing Buddy will ensure a secure fit, preventing any leakage of grease and maintaining the integrity of your trailer’s wheel bearings.
Use a Mallet to Tap the Bearing Buddy into Place
In some cases, you may find that the Bearing Buddy needs a little extra persuasion to fully seat in the hub. You can use a rubber mallet or a block of wood to gently tap the Bearing Buddy into place. Here’s how:
- Position the mallet or block of wood against the outer edge of the Bearing Buddy.
- Apply light, controlled taps with the mallet or wood block to gradually seat the Bearing Buddy into the hub.
- Continue tapping until the Bearing Buddy is fully seated.
Using a mallet or wood block to tap the Bearing Buddy into place will ensure a snug fit and eliminate any potential for movement or displacement.
By following these simple steps, you can effortlessly install the Bearing Buddy, ensuring the optimal performance and longevity of your trailer’s wheel bearings. Now that you have successfully completed the installation process, you can enjoy a smooth and safe towing experience.
Frequently Asked Questions
Do You Need To Repack Bearings With Bearing Buddies?
Yes, re-packing bearings with bearing buddies is necessary to ensure proper lubrication and prevent damage.
Why Won T My Bearing Buddy Go In?
Ensure that you are using the correct size and type of Bearing Buddy for your trailer. Lubricate the Bearing Buddy and use a rubber mallet to gently tap it in. If it still won’t go in, check for any obstructions or damage to the hub.
If necessary, consult a professional for assistance.
Do Bearing Buddies Grease The Inner Bearing?
Yes, bearing buddies do grease the inner bearing. They provide a constant supply of grease to the bearing, which helps reduce heat and friction, extending the life of the bearing and promoting smooth operation.
How Do You Tap A Bearing Buddy?
To tap a Bearing Buddy, first, remove the grease fitting and insert a tap into the hole. Rotate the tap clockwise, applying gentle pressure until it threads into the Bearing Buddy. Once threaded, rotate the tap counterclockwise to remove any debris or corrosion.
Conclusion
To sum up, installing a Bearing Buddy is a straightforward process that ensures the longevity and smooth operation of your trailer’s bearings. By following the steps outlined in this guide, such as removing the old grease, inserting the Bearing Buddy, and applying fresh grease, you’ll be able to protect your bearings from moisture and debris.
With this simple yet effective maintenance routine, you can enjoy worry-free towing and extend the lifespan of your trailer. Happy towing!