To install a battery vent tube, first, locate the battery vent on the battery. Then, attach one end of the vent tube to the vent and the other end to a designated area for venting.
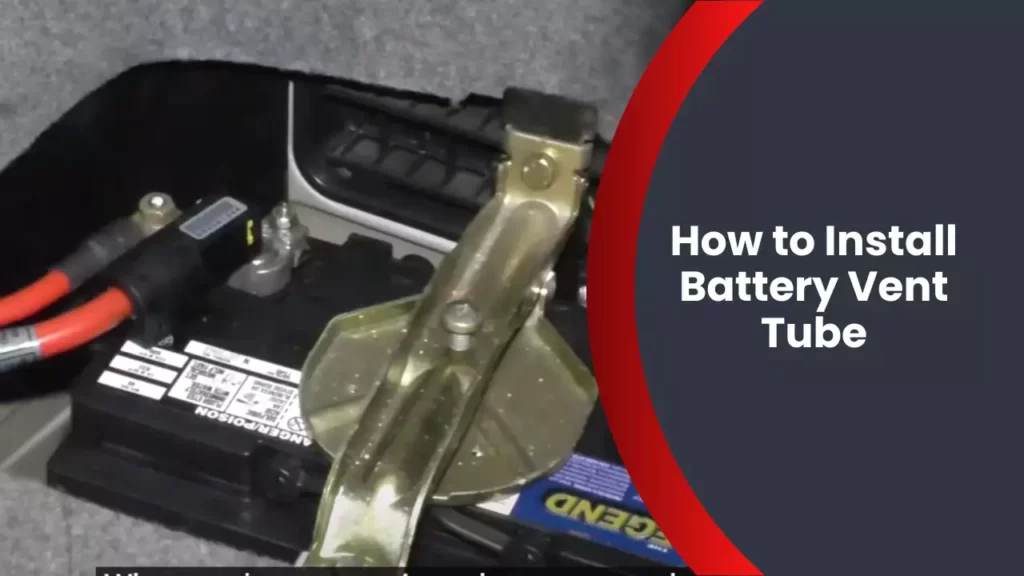
Installing a battery vent tube is an essential step in maintaining the functionality and safety of your battery. Proper ventilation helps prevent the build-up of harmful gases that can lead to battery damage or even explosion. We will guide you through the simple process of installing a battery vent tube.
By following these step-by-step instructions, you can ensure the optimal performance and longevity of your battery, giving you peace of mind and a safer environment for your electrical equipment.
Importance Of Battery Vent Tube In Ensuring Safety And Performance
Prevents the build-up of harmful gases
One of the key functions of a battery vent tube is to prevent the build-up of harmful gases inside the battery. As the battery charges and discharges, it undergoes a chemical reaction that produces gases, such as hydrogen and oxygen. If these gases are not properly vented, they can accumulate, leading to a potentially dangerous situation.
Without a battery vent tube, the build-up of these gases can lead to:
- 1. Increased risk of explosion: When the concentration of gases reaches a certain level, the risk of an explosion increases significantly. This can be extremely dangerous, not only for the battery itself but also for anyone nearby.
- 2. Internal pressure build-up: The accumulation of gases can cause a significant increase in internal pressure, putting stress on the battery’s components. This can lead to damage or even rupture of the battery, resulting in a complete failure.
- 3. Shortened battery lifespan: The presence of excessive gases can accelerate the degradation of battery components, reducing the overall lifespan of the battery. This can result in frequent battery replacements and increased costs.
Maintains proper pressure inside the battery
A battery vent tube plays a crucial role in maintaining proper pressure inside the battery. As the battery charges and discharges, the internal pressure fluctuates. The vent tube provides a pathway for excess gases to escape, helping to equalize the pressure and prevent any potential damage to the battery.
When the vent tube is functioning properly, it:
- 1. Regulates internal pressure: By allowing the release of excess gases, the vent tube helps regulate the internal pressure of the battery. This prevents the pressure from reaching dangerous levels and ensures the battery operates within a safe range.
- 2. Reduces the risk of explosions: The vent tube’s ability to maintain proper pressure reduces the chances of explosions due to pressure build-up. It effectively mitigates the risks associated with overpressure, providing a safer operating environment.
- 3. Promotes battery longevity: By preventing excessive pressure, the vent tube helps to preserve the structural integrity of the battery. This ultimately contributes to its longevity, allowing the battery to perform optimally for an extended period.
Helps prevent leaks and corrosion
Battery vent tubes not only serve vital safety functions but also help prevent leaks and corrosion within the battery. Leaks can occur when the battery is exposed to extreme temperatures or when internal pressures become too high. Corrosion, on the other hand, is caused by the interaction between the battery’s electrolyte and its surrounding environment.
By incorporating a vent tube into the battery:
- 1. Leakage risk is reduced: The vent tube provides a controlled pathway for the release of excess gases, preventing pressure build-up and the subsequent risk of leaks. This ensures the battery’s electrolyte remains contained, reducing the likelihood of any hazardous leaks.
- 2. Corrosion is minimized: Proper ventilation helps prevent the accumulation of corrosive gases within the battery. These gases, if not vented, can react with the battery’s components and lead to premature corrosion. By regulating the presence of these gases, the vent tube mitigates the risk of corrosion and extends the battery’s lifespan.
Ensures optimal battery performance
The presence of a battery vent tube is crucial for ensuring optimal battery performance. A well-vented battery is able to operate more efficiently, with decreased risk of failure, improved lifespan, and enhanced overall functionality.
Here’s how a battery vent tube contributes to optimal performance:
- 1. Enhanced battery efficiency: By preventing the build-up of harmful gases and regulating internal pressure, the vent tube enables the battery to function at its optimum efficiency. This allows for better utilization of the battery’s capacity and improves its overall performance.
- 2. Extended battery lifespan: With proper ventilation, a battery experiences reduced stress and minimized risks of explosions, leakage, and corrosion. As a result, the battery’s lifespan is significantly prolonged, providing longer-lasting power for various applications.
- 3. Reliable performance in all conditions: A properly vented battery is better equipped to handle temperature fluctuations and extreme operating conditions. It remains stable and reliable, ensuring consistent performance regardless of the environmental challenges it may encounter.
In conclusion, it is evident that a battery vent tube is of utmost importance when it comes to ensuring both safety and performance. It prevents the build-up of harmful gases, maintains proper pressure, helps prevent leaks and corrosion, and ensures optimal battery performance. Incorporating a battery vent tube into your battery installation is an essential step towards ensuring the longevity, efficiency, and reliability of your battery.
Essential Tools
Screwdriver
When it comes to installing a battery vent tube, one of the essential tools you will need is a screwdriver. A screwdriver can be used to remove and tighten screws and bolts, making it an indispensable tool for this installation process. Make sure you have a screwdriver with a comfortable grip and the appropriate size for the screws and bolts you will be working with. This will ensure that you have the necessary torque and control to secure the battery vent tube properly.
Pliers
Another important tool to have at your disposal when installing a battery vent tube is a pair of pliers. Pliers are versatile and can be used for various tasks during the installation process. Whether you need to grip and twist wires, tighten clamps, or bend metal, a good pair of pliers will make the job easier. Look for pliers with a comfortable grip and durable construction to ensure they can handle the demands of the installation.
Wrench
In addition to a screwdriver and pliers, you will also need a wrench for certain aspects of the battery vent tube installation. A wrench is crucial for loosening and tightening nuts, bolts, and other fasteners that may be required during the process. Choose a wrench that fits securely on the fasteners you will be working with, as a loose fit can lead to stripped or damaged components. Additionally, consider a wrench with an adjustable design to accommodate different sizes of fasteners.
Materials Required
Before you start the installation process for the battery vent tube, you will need to gather a few key materials. These materials are essential to ensure a successful and efficient installation. Here are the materials required:
Battery vent tube
The battery vent tube is an essential component for maintaining the proper ventilation of your battery. It helps to release any excess gas or pressure that may build up during the battery charging process. It is important to choose a battery vent tube that is compatible with your specific battery model.
Hose clamp
A hose clamp is a crucial accessory for securing the battery vent tube to the battery. It ensures proper fitting and prevents any leaks or disconnections. When selecting a hose clamp, make sure to choose one that matches the diameter of your battery vent tube and provides a tight seal.
Vent fitting
The vent fitting acts as a connector between the battery vent tube and the vent cap. It ensures a secure attachment, allowing for the smooth flow of gases. When choosing a vent fitting, verify that it is compatible with your battery vent tube and vent cap.
Vent cap
The vent cap is the final component that seals the battery vent tube and prevents any external elements from entering. It plays a vital role in maintaining the safety and longevity of your battery. Look for a vent cap that is suitable for your battery vent tube and provides reliable protection.
By gathering these materials, you will be well-prepared to install the battery vent tube and ensure your battery operates at its best. So, let’s move on to the next section, where we will discuss the step-by-step process of installing the battery vent tube.

Step 1: Safety Precautions
Before you begin installing a battery vent tube, it is important to take some safety precautions to protect yourself and ensure a smooth and incident-free installation process. Follow these essential steps:
-
Disconnect the battery
-
Put on safety goggles and gloves
Start by disconnecting the battery from its power source. This will help prevent any electrical shocks or accidents while working with the battery vent tube. Simply locate the negative (-) terminal on the battery and use a wrench to loosen the nut holding the cable. Carefully remove the cable from the terminal and set it aside in a safe place away from the battery.
Next, it’s crucial to protect your eyes and hands from any potential hazards. Put on a pair of safety goggles to shield your eyes from any particles or chemicals that may be released during the installation process.
Additionally, wearing gloves will protect your hands from any corrosive substances or acid contained in the battery. Use a pair of gloves that are resistant to acid and chemical contact to ensure your safety.
By following these simple safety precautions, you can significantly reduce the risk of accidents and injuries while installing a battery vent tube. Remember, your safety should always be your primary concern. Now that you have taken the necessary safety measures, you are ready to move on to the next steps of the installation process.
Step 2: Remove Old Vent Tube (If Applicable)
Now that you have located the old vent tube, it’s time to carefully remove it from the battery. This step is important to ensure a proper installation of the new vent tube and maintain the battery’s performance.
Locate the old vent tube
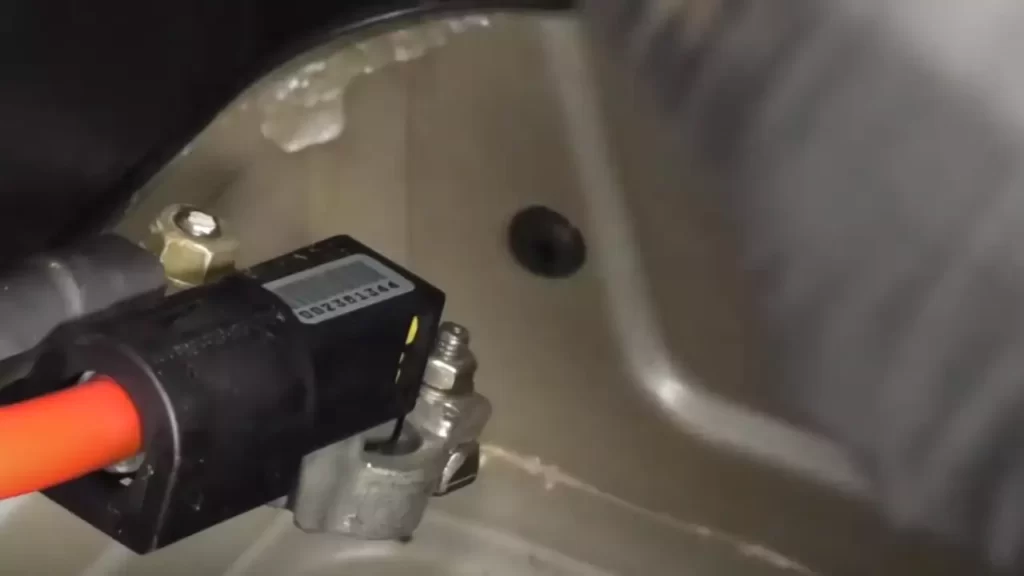
Before removing the vent tube, it’s essential to locate its position on the battery. The vent tube is typically located on top of the battery casing and is attached to one of the battery cells. Take a close look at the battery and identify the cylindrical tube that connects to an opening on the battery.
Note: If you cannot locate the vent tube or your battery does not have one, you can skip this step and proceed directly to the installation of the new vent tube in the next step.
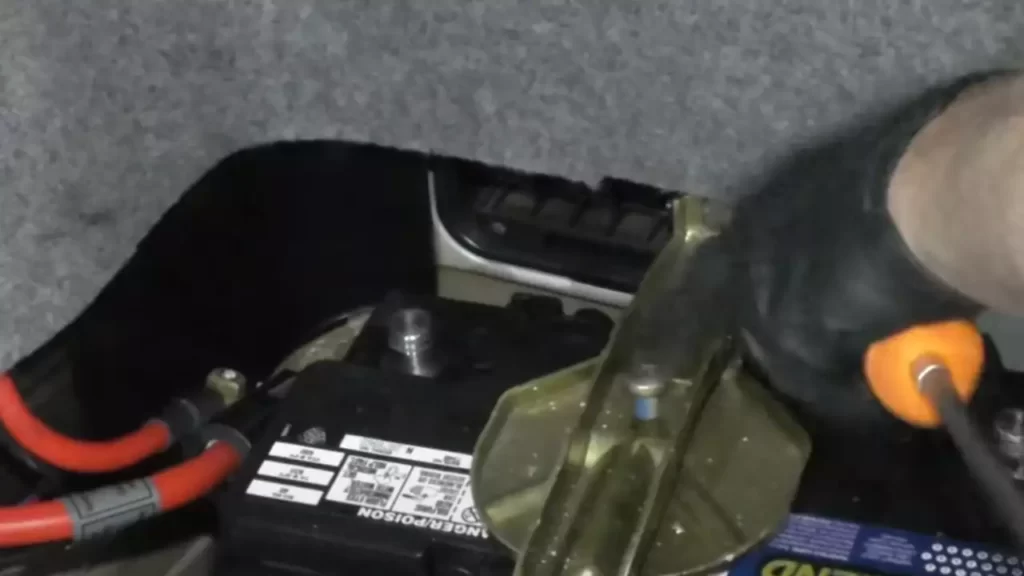
Carefully remove the vent tube from the battery
Once you have located the old vent tube, it’s time to remove it from the battery. Follow these steps to ensure a safe and proper removal:
- Inspect the vent tube for any signs of damage or deterioration. If the old vent tube is damaged, it’s crucial to replace it with a new one to maintain the battery’s performance and prevent any leakage.
- Wearing protective gloves, gently twist and pull the vent tube in a counterclockwise motion to loosen it from the battery’s opening.
- Slowly and carefully pull the vent tube upward, ensuring it doesn’t twist or bend excessively. This will help avoid any potential damage to the battery or the tube itself.
- Once the vent tube is free from the battery’s opening, inspect the battery cell and surrounding area for any corrosion or buildup. If you notice any, clean it using a battery cleaning solution and a brush to ensure a clean and secure connection with the new vent tube.
Note: If you encounter any difficulties or the vent tube seems stuck, it’s recommended to seek professional assistance or contact the battery manufacturer for guidance.
By following these steps, you will successfully remove the old vent tube from your battery, preparing it for the installation of the new vent tube in the next step. Remember to handle the vent tube with care to avoid any potential damage and always prioritize your safety throughout the process.
Step 3: Measure And Cut The New Vent Tube
Now that you have removed the old battery vent tube and prepared the area, it’s time to measure and cut the new vent tube to ensure a proper fit. Following these steps will help you complete this task efficiently and effectively.
Measure the length needed for the new vent tube
Start by measuring the distance between the battery and the vent opening on your vehicle. Using a measuring tape, carefully determine the length needed for the new vent tube. It’s important to get an accurate measurement to avoid any issues during the installation process.
Once you have the measurement, mark the appropriate length on the new vent tube. Remember to use a permanent marker or any other suitable marking tool that won’t easily rub off. This will help you cut the tube to the correct size.
Use a sharp knife or scissors to cut the tube to the appropriate size
Now that you have marked the length needed on the new vent tube, it’s time to cut it to size. Grab a sharp knife or a pair of scissors and carefully follow the marked line to make a clean cut. Be cautious while cutting to avoid any accidents or damage to the tube.
Ensure that the cut is straight and even, as this will ensure a proper fit and functionality of the vent tube. You can also use sandpaper to smooth out any rough edges after cutting, to prevent any potential damage to the battery or surrounding components.
Remember, safety is paramount when cutting the tube. Make sure to wear protective gloves and glasses to avoid any injuries. Take your time and be patient during this step to ensure a precise and well-fitting cut.
Following these steps will help you measure and cut the new vent tube accurately, ensuring a proper fit between the battery and the vent opening. Once you have completed this step, you’ll be one step closer to installing the new battery vent tube and ensuring the optimal performance of your vehicle’s battery system.
Step 4: Attach The Vent Fitting
Now that you have successfully positioned the battery vent tube, it’s time to secure it by attaching the vent fitting. This step is crucial to ensure that the battery operates efficiently and without any issues. Follow the instructions below to complete this step:
Insert one end of the vent tube into the vent fitting
Take one end of your vent tube and carefully insert it into the vent fitting. Make sure to use a gentle twisting motion to ensure a snug fit. This connection will allow any excess gases or fumes to escape, preventing the build-up of pressure inside the battery.
Secure it tightly using a hose clamp
Once you have inserted the vent tube, it is essential to secure it tightly using a hose clamp. This will prevent any accidental disconnections or leaks that could compromise the battery’s performance. Follow these steps to attach the hose clamp:
- Slide the hose clamp over the vent tube, ensuring it is positioned close to the vent fitting.
- Tighten the hose clamp by turning the screw in a clockwise direction until it is firmly secured. Make sure not to overtighten, as this may damage the vent tube.
- Inspect the connection to ensure there are no kinks or twists in the vent tube. Ensure that it is aligned properly with the vent fitting.
By following these steps, you have successfully attached the vent fitting and secured the vent tube to your battery. This installation is crucial for maintaining the battery’s functionality and preventing any potential hazards. Remember to double-check all connections and fittings to ensure everything is secure before proceeding to the next step.
Step 5: Install The Vent Cap
Step 5: Install the Vent Cap
In order to complete the installation of the battery vent tube, you will need to attach the vent cap to the other end of the tube. The vent cap is an essential component as it helps to regulate the pressure inside the battery and prevent any leaks or spills. Follow the steps below to securely install the vent cap:
Attach the vent cap to the other end of the vent tube
The first step is to locate the vent cap. It is typically a small plastic or rubber piece that is designed to fit snugly onto the end of the vent tube. Ensure that you have the correct vent cap for your battery model, as different batteries may have different cap designs.
Once you have identified the vent cap, carefully insert it onto the open end of the vent tube. It should slide on easily, but be firm enough to create a tight seal. Make sure that the cap is aligned properly with the tube to prevent any air or gas leakage.
If needed, you can use your fingers to gently push the vent cap onto the tube until it is fully attached. Take care not to force it too hard, as this could damage the cap or the tube.
Ensure it is securely in place
After attaching the vent cap to the vent tube, it is important to ensure that it is securely in place. This will help to prevent any accidental dislodging or leaks. Here are some tips to ensure that the vent cap is properly secured:
- Inspect the connection: Take a close look at the connection between the vent cap and the vent tube. Ensure that there are no gaps or spaces between the two, as this could allow gas or air to escape.
- Give it a gentle tug: Once the vent cap is attached, gently tug on it to check if it is firmly in place. It should not come off or move easily. If it does, try reattaching it or consider using a different vent cap.
- Double-check the alignment: Verify that the vent cap is still properly aligned with the vent tube. Any misalignment could compromise the performance of the vent system and lead to potential issues with the battery.
By following these steps, you can successfully install the vent cap and complete the installation of the battery vent tube. Remember to refer to the manufacturer’s instructions for your specific battery model, as the installation process may vary slightly.
Step 6: Reconnect The Battery
Step 6: Reconnect the Battery
Now that you’ve successfully installed the battery vent tube, it’s time to reconnect the battery and ensure everything is securely in place. Following the correct steps will prevent any potential hazards and ensure your battery is functioning properly.
Double-check all connections
The first thing you need to do is double-check all the connections you made during the previous steps. Take a moment to make sure everything is properly tightened and aligned. This will help to avoid any loose connections that could potentially cause issues down the line.
Reconnect the battery terminals
Next, it’s time to reconnect the battery terminals. The terminals are typically labeled with a “+” for positive and a “-” for negative. Make sure you connect the correct terminal to the corresponding battery post. This is important to maintain the proper flow of electrical current.
If you are unsure which terminal is positive and which is negative, refer to your battery manual or consult a professional. It’s better to be safe than sorry when it comes to this step.
Here’s a step-by-step guide to reconnecting the battery terminals:
- Take the terminal cover off if you had removed it earlier.
- Place the positive terminal clamp over the corresponding positive battery post. Ensure that it fits snugly.
- Tighten the nut on the positive terminal clamp using a wrench. Make sure it is secure but be careful not to overtighten it, as this can damage the battery.
- Repeat the same process for the negative terminal. Place the negative terminal clamp over the negative battery post and tighten the nut with a wrench. Again, be cautious not to overtighten.
- Once both terminals are securely connected, give them a gentle wiggle to ensure they are firmly in place.
Now that you have successfully reconnected the battery terminals, you can rest assured that your battery is ready to go. Take a moment to double-check all the connections one more time to ensure everything is secure.
Remember, safety should always be your top priority when working with batteries. If you encounter any difficulties during the installation process, don’t hesitate to seek assistance from a professional.
Conclusion
Following these steps and guidelines will enable you to confidently install a battery vent tube and reconnect the battery terminals. By taking the time to ensure all connections are secure, you can avoid potential issues and enjoy the peace of mind that comes with a well-installed battery.
Troubleshooting Common Issues
Even though installing a battery vent tube might seem like a straightforward process, there can be some common issues that you may encounter along the way. This section will guide you through troubleshooting these issues and help you complete the installation successfully.
Leakages from the vent tube
If you notice leakages from the vent tube after the installation, it is important to address this issue promptly. A leaking vent tube can lead to acid corrosion or damage to other components of your battery. Here are a couple of steps you can take to troubleshoot and fix this problem:
- Check the tightness of connections: Ensure that all the connections between the vent tube and the battery are securely tightened. Loose connections can cause leaks. If you find any loose connections, tighten them using pliers or a wrench.
- Inspect the vent tube for damage: Carefully examine the vent tube for any visible cracks, holes, or other damages. Even a small damage can cause leaks. If you notice any damage, replace the vent tube with a new one.
- Apply sealant: If the connections and the vent tube are in good condition but the leaks persist, you can apply a small amount of battery sealant or silicone around the connections. This can help create a tight seal and prevent further leakage.
Difficulty in removing the old vent tube
Removing an old vent tube can sometimes be challenging, especially if it has become stuck over time. If you are facing difficulties in removing the old vent tube, follow these troubleshooting steps to make the process easier:
- Apply lubricant: Before attempting to remove the vent tube, you can apply a small amount of lubricant such as WD-40 to the connections. This can help loosen any rust or corrosion that may be holding the tube firmly in place. Give it some time to penetrate and then try removing the tube again.
- Use pliers or a wrench: If the lubricant doesn’t solve the issue, you can try using pliers or a wrench to gently twist and turn the vent tube. Be cautious not to use excessive force as it can cause damage to the battery or its connections.
- Heat the connections: If all else fails, you can use a heat gun or a hairdryer to apply gentle heat to the connections. Heating the metal slightly can cause it to expand, making it easier to remove the vent tube. Once heated, try twisting the tube again, and it should come off more easily.
Incorrect size of the new vent tube
Using an incorrect size of the vent tube can lead to improper ventilation, affecting the overall performance and lifespan of your battery. Here’s what you can do if you encounter this issue:
- Measure the correct size: Take the time to accurately measure the diameter of the old vent tube before purchasing a new one. Use calipers or a measuring tape to ensure you get the right size.
- Consult the manufacturer: If you are unsure about the size or having trouble finding the correct vent tube, don’t hesitate to check the manufacturer’s website or contact their customer support for guidance. They can provide you with the recommended size or suggest compatible alternatives.
- Return or exchange: If you accidentally purchased an incorrect vent tube, most sellers allow returns or exchanges. Check the return policy and initiate the appropriate steps to get the right size.
By troubleshooting these common issues, you can ensure a successful and hassle-free installation of your battery vent tube. Remember to follow the manufacturer’s instructions and take necessary safety precautions throughout the process.
Maintenance Tips For Battery Vent Tube
Proper maintenance of your battery vent tube is essential to ensure the efficient and safe operation of your battery. Regularly checking for any signs of damage or wear, cleaning the vent tube and fittings periodically, and ensuring the vent cap is securely fastened at all times are vital to keeping your battery in peak condition. By following these maintenance tips, you can extend the lifespan of your battery and prevent any potential issues.
Regularly check for any signs of damage or wear
It is important to regularly inspect your battery vent tube for any signs of damage or wear. Exposure to the elements and the vibrations of your vehicle can cause the vent tube to deteriorate over time. Check for cracks, holes, or any other visible signs of damage that could lead to leaks or improper venting of gases. If you notice any abnormalities, it is crucial to replace the vent tube immediately to prevent any further damage.
Clean the vent tube and fittings periodically
To ensure optimal functionality, it is recommended to clean the battery vent tube and fittings periodically. Accumulated dirt, debris, or corrosion can obstruct the vent tube’s airflow, leading to poor battery performance. Use a soft cloth or brush to remove any dirt or residue from the tube and fittings. For stubborn deposits, you can use a mild detergent diluted in water. However, avoid using harsh chemicals or abrasive materials, as they can damage the tube and fittings. Cleaning the vent tube regularly will promote better ventilation and overall battery health.
Ensure the vent cap is securely fastened at all times
The vent cap, often located on top of the battery, plays a crucial role in preventing the build-up of gases inside the battery. It is essential to ensure that the vent cap is securely fastened at all times. Check for any looseness or signs of a poor seal that may allow gas leakage. Tighten the cap if necessary, but be cautious not to overtighten it, as this can damage the cap or the battery. By keeping the vent cap properly secured, you can prevent the escape of hazardous gases and maintain the optimal performance of your battery.
By following these maintenance tips for your battery vent tube, you can keep your battery in excellent condition, minimize the risk of leaks, and prolong its lifespan. Remember to regularly inspect for any damage, clean the vent tube periodically, and ensure the vent cap is securely fastened. These simple steps will contribute to a safer and more reliable battery system for your vehicle.
Frequently Asked Questions
How Do I Install A Battery Vent Tube?
To install a battery vent tube, follow these steps:
1. Identify the venting holes on the battery and the corresponding ventilation cap. 2. Fit the vent tube into the designated holes on the battery. 3. Attach one end of the tube to the ventilation cap. 4. Secure the ventilation cap tightly onto the battery to ensure a proper seal. 5. Verify that the tube is connected securely and properly installed.
Conclusion
Installing a battery vent tube is a crucial step in maintaining the safety and longevity of your vehicle’s battery. By following the simple steps outlined in this guide, you can ensure proper ventilation and prevent the buildup of harmful gases.
Remember to handle the task with caution, using the appropriate tools and adhering to safety guidelines. With a properly installed battery vent tube, you can enjoy peace of mind knowing that your battery is operating at its best.