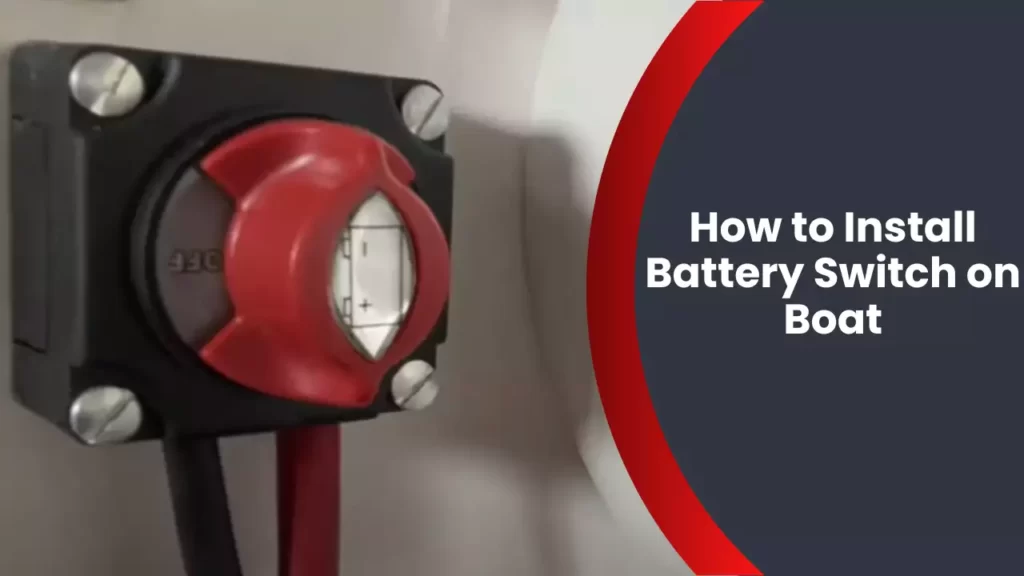
To install a battery switch on a boat, follow these steps: Disconnect the negative cable from the battery, remove the old switch, attach the new switch, and reconnect the negative cable. Installing a battery switch on a boat is a straightforward process that ensures better control over electrical systems and prevents battery drain when the boat is not in use.
By following a few simple steps, boat owners can install a new battery switch and easily manage the power supply on their vessel. This article provides a concise guide on how to install a battery switch on a boat, offering step-by-step instructions for a successful installation.
Why You Need A Battery Switch
A battery switch is an essential component for any boat owner. It plays a crucial role in protecting your boat’s electrical system, extending battery life, and ensuring safety when working on the electrical system. Let’s dive into each of these benefits in more detail.
Protecting your boat’s electrical system
Installing a battery switch on your boat provides a reliable and convenient way to disconnect the power supply. This helps protect your boat’s electrical system from potential damage caused by short circuits or unexpected power surges. By simply turning off the battery switch, you can instantly cut off the power flow to all devices and prevent any accidental damage.
Extending battery life and preventing draining
One of the major advantages of using a battery switch is the ability to extend the life of your boat’s batteries. When your boat is not in use, turning off the battery switch completely isolates the batteries and prevents them from losing charge unnecessarily. This is particularly beneficial during long periods of storage or when you’re not planning to use your boat for an extended period of time.
Furthermore, a battery switch helps prevent battery draining caused by parasitic loads. Parasitic loads refer to the small amounts of power consumed by devices that remain connected to the battery even when the boat is not in use. With a battery switch, you can easily disconnect these devices, ensuring that your batteries remain fully charged when you need them.
Ensuring safety when working on the electrical system
Working on your boat’s electrical system can be potentially dangerous if proper safety measures are not taken. A battery switch provides an added layer of safety by allowing you to disconnect the power supply before conducting any maintenance or repairs. This greatly reduces the risk of electrical shocks or fires, ensuring that you can work on your boat’s electrical system with peace of mind.
In addition, a battery switch also simplifies the process of troubleshooting any electrical issues on your boat. By isolating specific batteries or circuits using the switch, you can easily identify and address any problems without impacting the rest of the electrical system.
All in all, a battery switch is a must-have for every boat owner. It not only protects your boat’s electrical system and extends battery life but also enhances safety when working on electrical components. Invest in a quality battery switch and enjoy worry-free boating adventures.
Choosing The Right Battery Switch
Types of Battery Switches
When it comes to installing a battery switch on your boat, choosing the right one is crucial for the overall performance and safety of your electrical system. There are several types of battery switches available, each with its own unique features and advantages. By understanding the different types of battery switches, you can make an informed decision that suits your specific needs.
Selector Switch
One popular type of battery switch is the selector switch. This switch allows you to select between multiple batteries or battery banks, depending on your power needs. With a selector switch, you can easily switch between batteries to ensure a constant power supply. This is particularly useful for boats equipped with multiple batteries, such as those used for engine starting and house power.
On/Off Switch
Another commonly used battery switch is the on/off switch. As the name suggests, this switch simply turns the battery on or off. It is a simple and straightforward option that is often used for single-battery systems. When the switch is in the “off” position, the battery is completely disconnected, which helps to prevent any power drain when the boat is not in use.
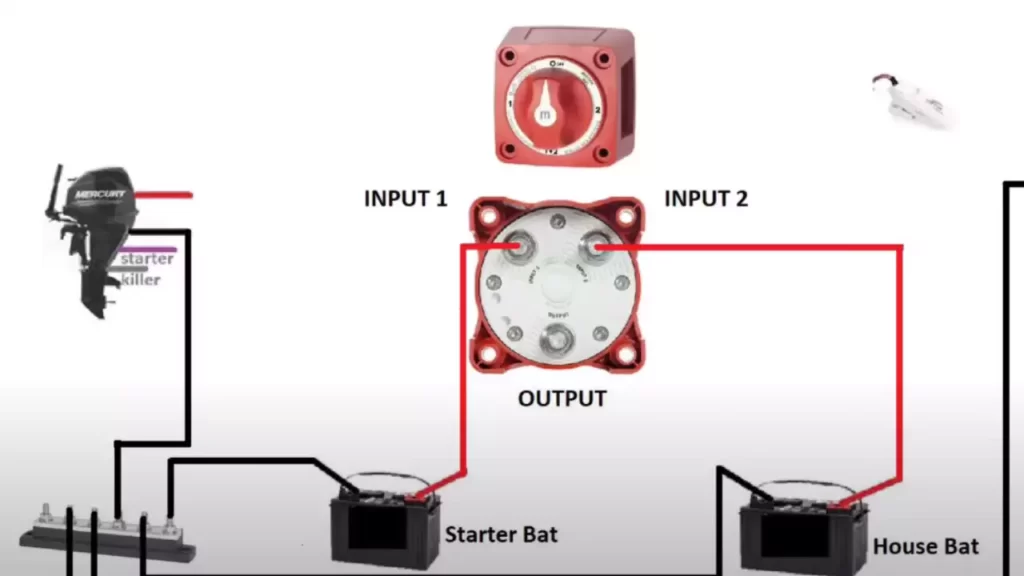
Dual-Circuit Switch
If you have a boat that requires both a starting battery and a house battery, a dual-circuit switch may be the ideal choice. This type of switch allows you to control two independent electrical circuits with a single switch. You can easily switch between the starting and house batteries, ensuring proper power distribution and efficient operation.
Factors to Consider
When selecting a battery switch for your boat, there are several important factors to consider. These factors will help you choose the right switch that meets your specific requirements and ensures optimal performance.
Amp Rating
One of the key considerations is the amp rating of the switch. The amp rating indicates the maximum amount of current that the switch can handle. It is important to choose a switch with an amp rating that matches or exceeds the total current draw of your boat’s electrical system. This will help prevent any overload or damage to the switch and ensure reliable operation.
Size and Dimensions
The size and dimensions of the switch are also important factors to consider. You’ll want to choose a switch that fits properly in the available space on your boat. It should be easily accessible and mounted securely. Additionally, considering the size and weight of the switch is crucial, as it should not add unnecessary bulk or weight to your boat.
Mounting Options
Different battery switches offer various mounting options. Some switches can be surface-mounted, while others are designed for panel mounting. Consider the available mounting options on your boat and choose a switch that can be easily installed in the desired location. It is recommended to choose a switch with a secure and stable mounting mechanism to ensure longevity and reliability.
Price Range
Last but not least, the price range is an important factor to consider. Battery switches are available in a wide range of prices, depending on their features and quality. Set a budget and look for switches that offer the desired functionality within your budget. Remember, it is crucial not to compromise on quality to avoid any potential safety risks or frequent replacements.
In conclusion, choosing the right battery switch for your boat is an essential step in ensuring the proper functioning of your electrical system. Consider the different types of battery switches available, such as selector switches, on/off switches, and dual-circuit switches. Take into account important factors like amp rating, size and dimensions, mounting options, and price range. By carefully considering these factors, you can select a battery switch that meets your needs and ensures a reliable and efficient electrical system on your boat.
Gathering The Necessary Tools And Materials
Before you dive into the process of installing a battery switch on your boat, it’s essential to gather all the necessary tools and materials. This ensures that you have everything you need to complete the installation smoothly and efficiently.
Battery Switch
The first item you’ll need is a battery switch itself. This device allows you to isolate your boat’s battery from the rest of the electrical system, helping to prevent draining when the boat is not in use and protecting against electrical issues.
Battery Cables
To connect the battery switch, you’ll need battery cables. These cables should be sized appropriately for your boat’s electrical system. Ensure that you select high-quality cables that are corrosion-resistant, as they will provide a reliable and long-lasting connection.
Wire Stripper
A wire stripper is a must-have tool when working with electrical wiring. It allows you to remove the insulation from the ends of the wires, exposing the metal strands for proper connection. Invest in a quality wire stripper to ensure clean and precise strips without damaging the wire.
Crimping Tool
A crimping tool is essential for securely attaching terminal connectors to the battery cables. This tool compresses the metal sleeve around the wire and connector, creating a tight and reliable connection. Choose a crimping tool that is suitable for the size of connectors you’ll be working with.
Terminal Connectors
Terminal connectors are needed to connect the battery cables to the battery switch. There are various types of terminal connectors available, such as ring terminals or spade terminals. Select the ones that are compatible with your battery switch and cables, ensuring a proper fit and secure connection.
Screwdriver
A screwdriver is a versatile tool that you’ll need for various steps of the installation process. Make sure you have a few different sizes and types of screwdrivers on hand to accommodate different types of screws.
Wrench
A wrench will come in handy for tightening nuts and bolts during the installation. Choose a wrench size that matches the fasteners you’ll be working with to ensure a snug and secure fit.
Voltage Meter
A voltage meter is a useful tool for troubleshooting and verifying connections. It allows you to measure the voltage levels in your boat’s electrical system, ensuring that everything is functioning correctly. Having a voltage meter handy will help you identify any potential issues during the installation process.
Now that you have gathered all the necessary tools and materials, you’re ready to move on to the next step of installing the battery switch on your boat.
Preparing For Installation
Before installing a battery switch on your boat, it is important to properly prepare. Taking the time to disconnect the battery, identify the positive and negative terminals, assess the existing electrical system, plan the switch location, and measure and cut battery cables will ensure a smooth and successful installation.
Disconnecting the battery
The first step in preparing for the installation of a battery switch is to disconnect the battery. This is a crucial safety measure and will prevent any accidental electrical shocks or short circuits during the installation process. It is recommended to wear appropriate protective gloves before starting this process.
Identifying the positive and negative terminals
Once the battery is disconnected, it is important to identify the positive and negative terminals. These terminals are usually marked with a plus (+) and a minus (-) sign respectively. Identifying these terminals correctly will ensure that the battery switch is installed with the proper orientation.
Assessing the existing electrical system
Before installing a battery switch, it is important to assess the existing electrical system on your boat. This will help you determine the appropriate size and capacity of the battery switch to install. Take into consideration the number and types of electrical devices on your boat to ensure that the battery switch can handle the load.
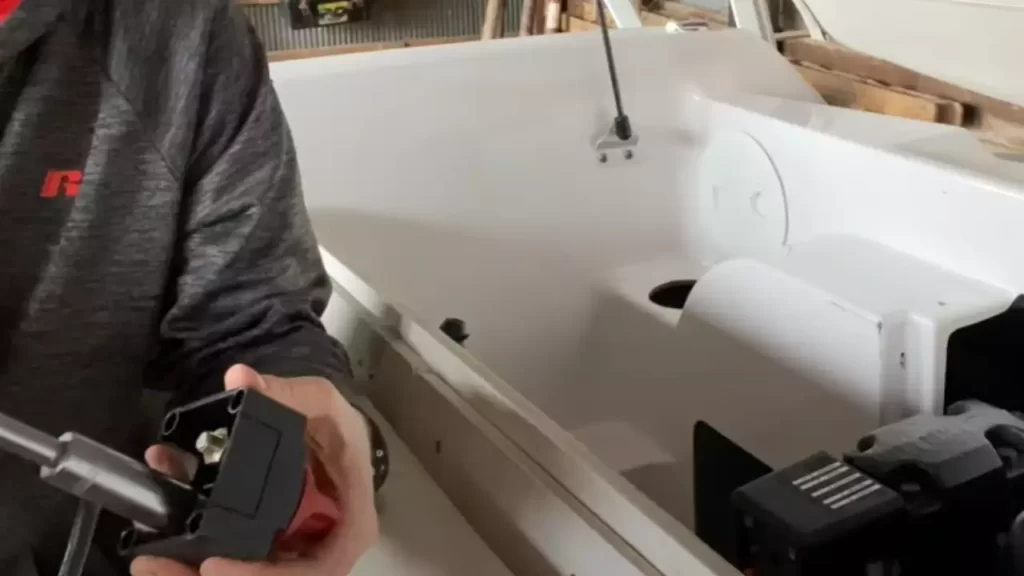
Planning the switch location
Once you have assessed the existing electrical system, you can start planning the location for the battery switch. Consider factors such as accessibility, visibility, and ease of use when selecting a suitable location. It is recommended to choose a location that is easily reachable and provides clear visibility of the switch’s ON/OFF position.
Measuring and cutting battery cables
Finally, before installing the battery switch, it is important to measure and cut the battery cables to the appropriate length. This will ensure that there is enough cable length to connect the switch to the battery terminals. Use a cable cutter or appropriate tool to cut the cables, making sure to leave enough slack for easy installation.
By following these steps and properly preparing for the installation of a battery switch on your boat, you can ensure a safe and successful installation. Take the time to disconnect the battery, identify the positive and negative terminals, assess the existing electrical system, plan the switch location, and measure and cut the battery cables. This will provide a solid foundation for the rest of the installation process.
Step-By-Step Installation Process
Installing a battery switch on your boat is an essential task to ensure proper control and safety of your boat’s electrical system. By following a step-by-step installation process, you can easily add a battery switch to your boat. In this guide, we will walk you through the detailed installation process, from mounting the battery switch to testing its functionality.
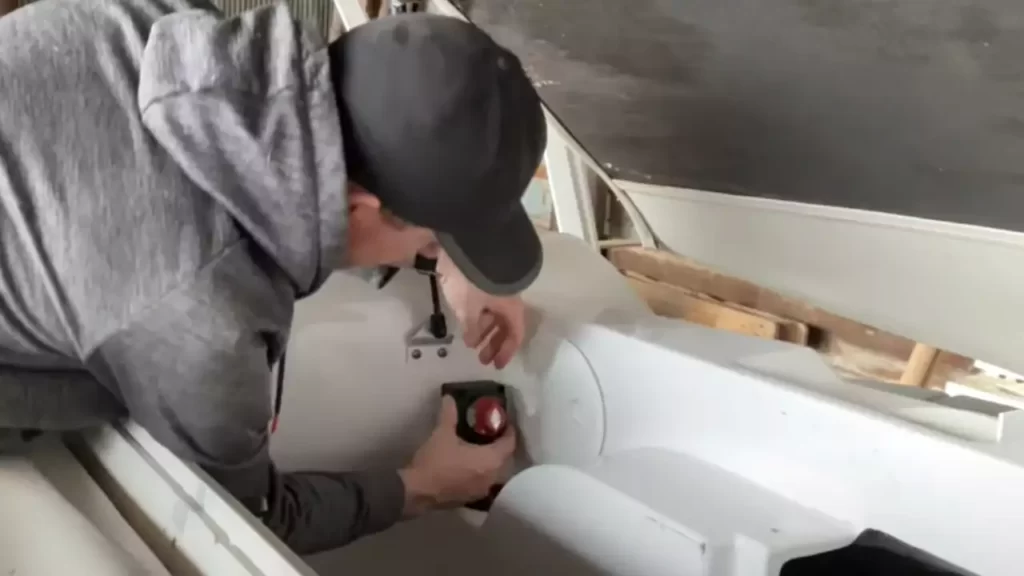
Mounting the battery switch
To begin the installation process, you need to mount the battery switch in a suitable location on your boat. This should be a secure and easily accessible spot that is easily reachable in case of an emergency. Ensure that the switch is mounted in a manner that allows for easy switching between battery power sources.
Connecting the negative cable
Once the battery switch is securely mounted, it’s time to connect the negative cable. Start by disconnecting the negative cable from your boat’s battery. Remember to always disconnect the negative cable first to prevent any electrical mishaps.
- Locate the negative terminal on your battery.
- Attach the negative cable to the negative terminal, ensuring a tight connection.
- Secure the negative cable to the battery switch by tightening the appropriate terminal screw.
Installing the positive cable
With the negative cable securely connected, it’s now time to install the positive cable.
- Identify the positive terminal on your boat’s battery.
- Attach the positive cable to the positive terminal, making sure it is tightly connected.
- Secure the positive cable to the battery switch by tightening the corresponding terminal screw.
Connecting additional cables (if applicable)
If you have any additional cables that need to be connected, such as cables for accessories or secondary batteries, now is the time to do so.
- Identify the appropriate terminals on the battery switch for each additional cable.
- Attach and secure the additional cables to their respective terminals using proper terminal screws.
Securing cables and ensuring proper connections
Once all cables are connected, it’s essential to secure them properly to avoid any loose connections.
- Inspect each cable connection to ensure they are secure and tightly fastened.
- Use cable ties or clamps to secure cables to prevent them from moving or coming loose.
- Double-check all connections to ensure they are properly terminated and free from any signs of corrosion.
Testing the switch and system functionality
After completing the installation, it’s crucial to test the battery switch and the overall system functionality.
- Switch the battery switch to each position (battery 1, battery 2, both, or off) to ensure proper switching between power sources.
- Verify that all accessories and systems powered by the battery switch are functioning correctly.
- If any issues arise, carefully inspect connections and troubleshoot accordingly.
By following this step-by-step installation process, you can successfully install a battery switch on your boat, ensuring optimal control and safety of your electrical system. Take the time to double-check all connections and test the system before hitting the water for a worry-free boating experience.
Troubleshooting And Safety Tips
Now that you have installed your battery switch on your boat, it’s essential to ensure that everything is functioning correctly. In this section, we will discuss common installation issues and how to resolve them, testing the battery switch, as well as safety measures to follow during installation. Additionally, we will explore proper handling and disposal of old batteries. Let’s dive right in!
Common installation issues and how to resolve them
During the installation process, you might encounter a few common issues. However, with the right troubleshooting techniques, you can easily resolve them on your own. Here are some common problems and their solutions:
| Issue | Solution |
|---|---|
| The battery switch fails to turn on or off | Check the connections to ensure they are tight and secure. If the problem persists, you may need to replace the switch. |
| The battery switch becomes hot during use | Verify that the switch is appropriately sized for your boat’s electrical system and replace it with a higher-rated one if necessary. It’s also crucial to check for any loose connections. |
| The battery switch sparks when turning on or off | Inspect the connections for any loose wiring. If you notice any damaged cables or terminals, replace them immediately to prevent further issues. |
By following these troubleshooting tips, you can quickly identify and address any common installation issues that may arise.
Testing the battery switch
Before you rely on your battery switch during your boating adventures, it’s crucial to conduct a thorough test. This will help ensure that the switch is functioning properly and providing the desired functionality. Here’s a simple step-by-step guide to testing your battery switch:
- Disconnect the boat’s electrical system from the mains or shore power.
- Turn off all electrical devices powered by the battery.
- Switch on the battery switch to the desired position (e.g., “1,” “2,” or “Both”).
- Check that the corresponding batteries are supplying power to the boat systems.
- Ensure that the battery voltage remains stable and doesn’t drop significantly during the test.
- Repeat the test by switching to different battery positions to verify proper functionality.
By following these testing procedures, you can gain confidence in your battery switch’s reliability and troubleshoot any potential issues before they impact your boating experience.
Ensuring safety during installation
When installing a battery switch on your boat, safety should be your top priority. Here are a few key safety measures to keep in mind:
- Always wear appropriate personal protective equipment, such as safety glasses and gloves, to prevent any potential injuries.
- Disconnect the boat’s electrical system from the mains or shore power before starting the installation to avoid electrical shocks.
- Ensure that the battery switch is compatible with your boat’s electrical system and rated for the appropriate voltage and amperage.
- Follow the manufacturer’s instructions carefully and avoid taking shortcuts.
- Double-check all connections to ensure they are secure and properly insulated to avoid any short circuits or potential fire hazards.
- If you are not confident in your installation skills, it’s recommended to seek professional help to ensure a safe and reliable setup.
By adhering to these safety tips, you can minimize the risk of accidents or damage during the installation process.
Proper handling and disposal of old batteries
As part of the battery switch installation process, you may need to remove and replace old batteries. It’s crucial to handle and dispose of them properly to protect the environment and comply with local regulations. Here’s what you need to know:
- Handle old batteries with care, as they contain hazardous materials and potential electrical charges.
- When removing old batteries, ensure that you do not touch the terminals or accidentally short them.
- Wear protective gloves when handling old batteries and avoid allowing any battery acid to come into contact with your skin or clothing.
- Take used batteries to an authorized recycling center or collection point for proper disposal.
- Do not dispose of old batteries in regular waste bins or landfill sites as they can harm the environment.
By following these guidelines, you can safely handle and dispose of old batteries, contributing to a cleaner and greener boating experience.
Maintenance And Best Practices
Proper maintenance of your battery switch is crucial to ensure its optimal performance and longevity. By regularly inspecting and cleaning the switch, testing the battery charge and voltage levels, replacing worn-out cables or connectors, and following manufacturer guidelines and recommendations, you can ensure a reliable power supply for your boat. Let’s dive deeper into these maintenance and best practices.
Regularly inspecting and cleaning the battery switch
Inspecting and cleaning your battery switch regularly is essential to prevent corrosion and ensure a solid electrical connection. Here are a few steps you can take:
- Visually examine the switch for signs of corrosion, such as rust or greenish deposits.
- Check for any loose connections or frayed wires.
- Use a corrosion cleaner and a wire brush to remove any buildup on the switch terminals and cables.
- Apply a corrosion inhibitor spray to protect the connections.
Testing the battery charge and voltage levels
To determine the health and charge of your battery, it’s important to regularly test its charge and voltage levels. Here are the steps to follow:
- Use a multimeter or voltmeter to measure the voltage across the battery terminals.
- A fully charged battery should read around 12.6 to 12.8 volts. Anything below 12 volts indicates a partially discharged or weak battery.
- If the voltage is low, charge the battery using an appropriate charger until it reaches the recommended voltage.
Replacing worn-out cables or connectors
Over time, cables and connectors can become worn-out or damaged, leading to poor electrical connections and voltage drops. It’s essential to replace them as needed. Here’s how:
- Inspect the cables and connectors for signs of wear, such as fraying or cracks.
- If any damage is found, disconnect the battery and remove the old cables or connectors.
- Ensure the replacement cables or connectors are compatible and properly sized for your battery switch.
- Install the new cables or connectors, ensuring a secure and tight connection.
Following manufacturer guidelines and recommendations
Each battery switch may have specific guidelines and recommendations provided by the manufacturer. It’s important to adhere to these instructions for proper installation and maintenance. These guidelines may include:
- Recommended torque specifications for terminal connections.
- Recommended maintenance intervals and procedures.
- Specific requirements for battery type and capacity.
- Any additional safety precautions or considerations.
By following the manufacturer’s guidelines, you can ensure the longevity and optimal performance of your battery switch.
Frequently Asked Questions
How Do I Install A Battery Switch On My Boat?
To install a battery switch on your boat, you’ll need to disconnect the boat’s battery cables, attach the switch’s positive and negative cables to the battery posts, and mount the switch in a convenient location. Make sure to follow the manufacturer’s instructions and consult a professional if needed.
Why Should I Install A Battery Switch On My Boat?
Installing a battery switch on your boat offers several benefits. It allows you to easily disconnect the battery when the boat is not in use, preventing drain on the battery. It also provides a safety feature, as you can quickly isolate the battery in case of an electrical issue or emergency.
What Types Of Battery Switches Are Available For Boats?
There are several types of battery switches available for boats. The most common ones include manual battery switches, which require physically turning the switch to connect or disconnect the battery, and automatic battery switches, which disconnect the battery when the boat is not in use to prevent drain.
Can I Install A Battery Switch Myself, Or Do I Need A Professional?
While it is possible to install a battery switch yourself, it’s recommended to consult a professional if you’re unsure or inexperienced. A professional can ensure the installation is done correctly, following all safety guidelines and manufacturer instructions, and provide advice tailored to your specific boat and battery setup.
Conclusion
To conclude, installing a battery switch on your boat is a crucial step for maintaining safety and efficiency. By following the step-by-step guide provided in this blog post, you can easily complete the installation process. Remember to consider the size and type of switch that best suits your boat’s requirements.
With a properly installed battery switch, you can conveniently control the flow of power and ensure the longevity of your boat’s battery life. Enjoy your boating adventures with peace of mind!