To install a battery isolator switch, disconnect the negative cable from the battery, connect the switch to the positive cable, and mount the switch in a convenient location. This will allow you to easily and safely disconnect the battery to prevent power drain.
Battery isolator switches are commonly used in boats, RVs, and vehicles that may sit unused for extended periods of time. By following these steps, you can install a battery isolator switch and ensure the longevity of your battery.
Understanding The Importance Of A Battery Isolator Switch
Why a Battery Isolator Switch is Crucial for Your Vehicle’s Electrical System
A battery isolator switch is an essential component for maintaining the health and functionality of your vehicle’s electrical system. This device acts as a barrier between your vehicle’s battery and the rest of the electrical circuits, allowing you to conveniently cut off power supply to various components when needed.
There are several reasons why a battery isolator switch is considered a crucial addition to your vehicle. Let’s explore them in detail:
Protecting Your Vehicle’s Battery from Draining and Potential Damage
One of the primary benefits of installing a battery isolator switch is its ability to protect your vehicle’s battery from unnecessary drain and potential damage. When your vehicle is not in use or parked for an extended period, several electrical components may continue drawing power, depleting the battery’s charge. This continuous drain can lead to premature battery failure and require costly replacements.
By simply flipping the battery isolator switch, you can disconnect your vehicle’s battery from the circuits, preventing parasitic power drain. This ensures that when you return to your vehicle after a break or prolonged storage, the battery remains charged and ready to start the engine.
Isolating Specific Electrical Circuits for Maintenance or Repair
Another significant advantage of a battery isolator switch is its ability to isolate specific electrical circuits for maintenance or repair. In complex vehicle electrical systems, it can be challenging to work on specific components without risking accidental damage or electric shock. However, by using the battery isolator switch to cut off power supply to these circuits, you can work on them safely without worrying about any unwanted mishaps.
Whether you are replacing a faulty fuse, installing a new accessory, or troubleshooting electrical issues, the battery isolator switch provides a convenient way to ensure the safety of both yourself and the vehicle’s electrical system.
Emergency Shut-off in Case of Electrical Malfunctions
Electrical malfunctions can pose significant risks to your vehicle and personal safety. Luckily, the battery isolator switch acts as a reliable emergency shut-off solution in such situations. In the event of a sudden short circuit or any other electrical malfunction, quickly cutting off power to the circuits using the battery isolator switch can prevent further damage and potentially dangerous situations such as fire or overheating.
Having a battery isolator switch within your reach ensures that you can respond promptly to unexpected electrical problems and reduce the likelihood of severe damage to your vehicle or the risk of personal injury.
In conclusion, understanding the importance of a battery isolator switch is crucial for every vehicle owner. By protecting your battery from draining and potential damage, allowing you to isolate specific circuits for maintenance or repair, and providing a reliable emergency shut-off solution, the battery isolator switch enhances the safety and performance of your vehicle’s electrical system.

Tools And Materials You’Ll Need
List of tools required for the installation process
Before you start installing a battery isolator switch, it’s crucial to gather all the necessary tools. Having these tools on hand will make the installation process smooth and hassle-free. Here is a comprehensive list of tools you’ll need:
- Screwdriver set
- Wrench set
- Drill
- Wire cutter/stripper
- Electrical tape
- Soldering iron (optional)
- Heat shrink tubing (optional)
Materials needed for a successful installation
Aside from the tools, you must also gather certain materials that are essential for a successful battery isolator switch installation. These materials will ensure that your battery isolator switch functions effectively. Here are the materials you’ll need:
- Battery isolator switch
- Mounting bracket or panel
- Electrical cables
- Fuses and fuse holders
- Ring terminals
- Heat shrink terminals (optional)
- Insulated cable connectors
To further protect your installation from corrosion or damage, you may also consider using additional materials such as wire loom or conduit to cover the cables, as well as protective caps for the battery terminals.
Preparing For Installation: Safety And Precautions
Before diving into the installation process of a battery isolator switch, it is crucial to prioritize safety measures and take necessary precautions. By doing so, you can ensure a safe and successful installation that will protect both you and your vehicle. In this section, we will discuss the importance of safety measures during the installation process and provide you with tips to help you ensure a smooth and secure installation.
Importance of Safety Measures During the Installation Process
Installing a battery isolator switch involves working with electrical components, which can pose potential risks if not approached with caution. Taking the following safety measures will help minimize the chances of accidents and ensure your well-being:
- Always wear safety goggles and gloves to protect your eyes and hands from any potential harm or contact with electrical components.
- Prior to the installation, disconnect the negative terminal of the battery to prevent any electrical current from flowing through the system.
- Only work on the installation in a well-ventilated area, as it may involve the release of gases during the process.
- Read and understand the manufacturer’s instructions thoroughly before beginning the installation, ensuring you are well-informed about the process.
- Ensure all tools used during the installation are specifically designed for electrical work and are in good condition, reducing the risk of accidents or damage.
- Keep your work area clean and organized, minimizing the chances of tripping or falling and preventing any damage to the electrical components.
Tips for Ensuring a Safe and Successful Installation
Following these tips will help facilitate a secure and effective installation process:
- Plan the installation process in advance, considering the recommended location for the battery isolator switch in your vehicle.
- Ensure you have all the necessary tools and equipment readily available before starting the installation, saving time and preventing any interruptions.
- Securely mount the battery isolator switch in a convenient and easily accessible location, allowing for seamless operation and maintenance in the future.
- Route the wiring carefully, avoiding areas prone to excessive heat, vibrations, or moisture that could potentially damage the electrical connections.
- Double-check all connections and ensure they are tight and secure to prevent any loose connections that could cause electrical malfunctions or accidents.
- Test the functionality of the battery isolator switch after the installation to ensure it is working properly and effectively isolating the power source.
By prioritizing safety measures and following these tips, you can perform a battery isolator switch installation with confidence and peace of mind, knowing that you have taken the necessary precautions to protect yourself and your vehicle. Remember, safety should always come first!
Locating The Ideal Position For The Battery Isolator Switch
When installing a battery isolator switch, one of the key considerations is determining the ideal position for the switch. The location you choose will determine how easily accessible and visible the switch is, which is crucial for its effective use. In this section, we will explore the factors you need to consider when deciding the best location for the battery isolator switch.
Factors to Consider When Deciding the Best Location for the Switch
When it comes to locating the battery isolator switch, there are several factors that you should take into account. These factors will help ensure that the switch is conveniently positioned and easy to use when needed. Let’s explore these factors:
- Proximity to the Vehicle Battery: It is essential to position the switch as close as possible to the vehicle’s battery. By doing so, you minimize the length of the cable required, reducing the risk of voltage drop and ensuring efficient power transmission.
- Accessible Yet Protected: The switch should be easily accessible so that it can be quickly operated in case of an emergency or when you need to disconnect the battery. However, it should also be protected from accidental activation to prevent unnecessary power loss or electrical damage.
- Visibility: Another crucial factor to consider is the visibility of the switch. You want to ensure that the switch is easily noticeable, especially in low light conditions or when you are in a rush. Opting for a clear and well-lit location will make it easier for you to locate and operate the switch.
- Convenience: Choose a location that offers convenience when it comes to accessing the switch. Installing it in an area that is easily reachable without requiring you to stretch or bend too much will ensure optimal ease of use.
- Protection from Environmental Factors: It is important to protect the battery isolator switch from extreme temperatures, moisture, and other environmental factors that could compromise its functionality. Take into account the areas in your vehicle that are less exposed to these elements and select a suitable location.
By considering these factors, you will be able to identify the best position for your battery isolator switch. This will ensure ease of access, visibility, and optimal protection for the switch, facilitating its efficient operation when you need it the most.
Installing The Battery Isolator Switch: Step-By-Step Instructions
Installing a battery isolator switch is a crucial step in ensuring the safety and proper functioning of your vehicle’s electrical system. This simple yet essential device helps prevent battery drain and protects your vehicle’s electrical components from damage. In this guide, we will take you through the step-by-step process of installing a battery isolator switch to give you a hassle-free experience.
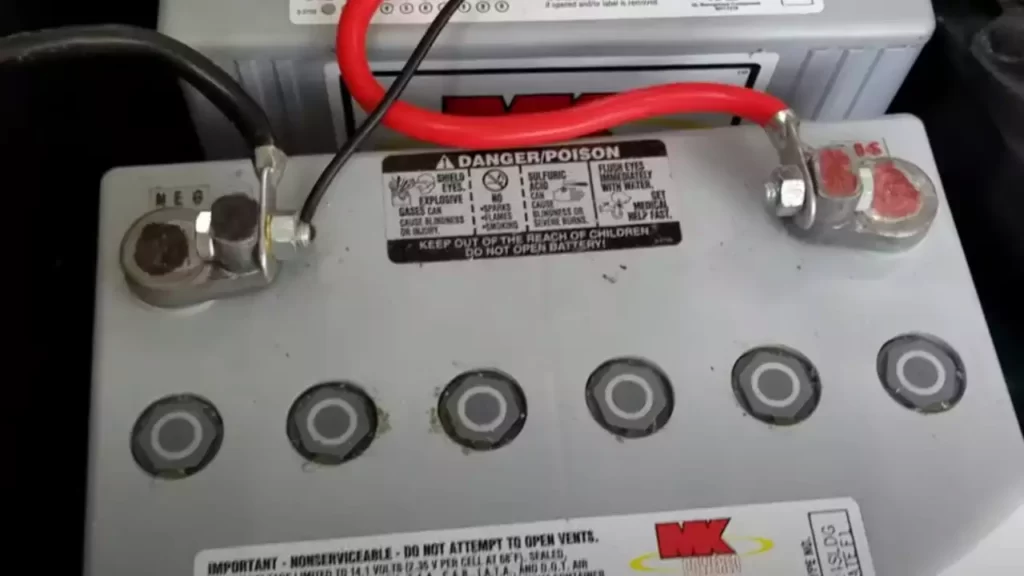
Step 1: Disconnecting the negative terminal of the vehicle’s battery
The first step is to disconnect the negative terminal of your vehicle’s battery. This is vital to ensure your safety and prevent any accidental short circuits during the installation process.
To disconnect the negative terminal, follow these simple steps:
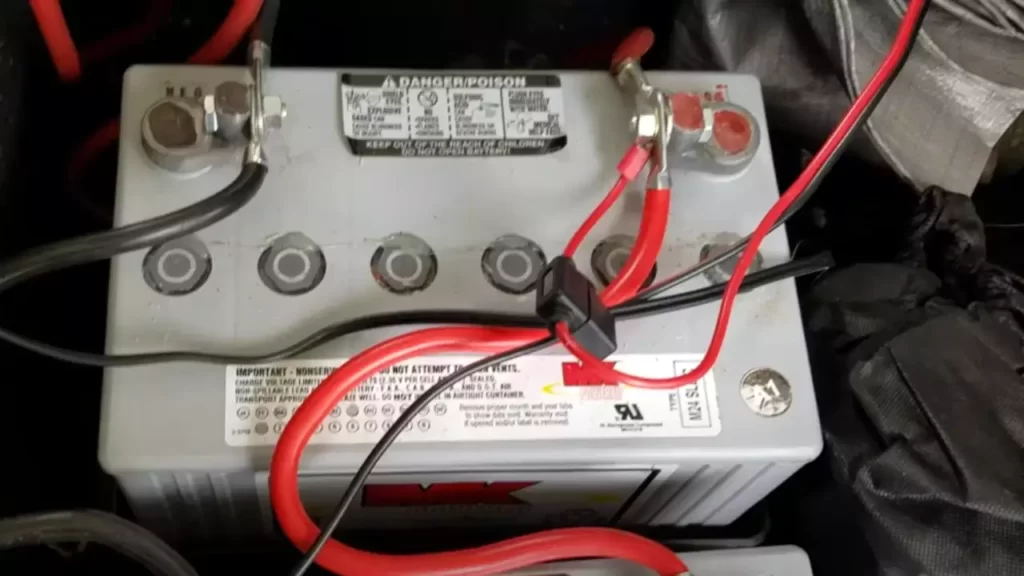
- Open the hood of your vehicle and locate the battery.
- Identify the negative terminal, usually marked with a “-” symbol.
- Using a wrench or pliers, carefully loosen and remove the nut or bolt securing the negative terminal.
- Once the terminal is loose, gently lift the cable off the terminal and set it aside.
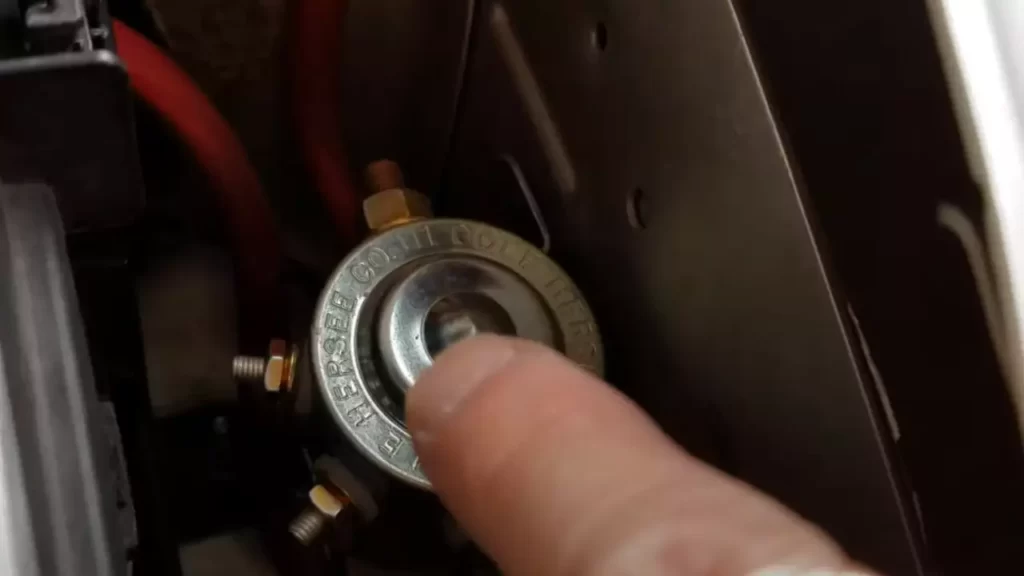
Step 2: Mounting the isolator switch on the chosen location
Now that you have disconnected the battery, it’s time to mount the isolator switch in a suitable location within your vehicle. Remember to choose an easily accessible and safe spot for convenient operation. Here’s how to mount the switch:
- Identify the desired location for the switch. This could be on the dashboard, console, or any other suitable area.
- Using screws or adhesive, securely attach the switch mount to the chosen location.
- Ensure the switch mount is sturdy and can hold the weight of the switch without any movement.
Step 3: Connecting the switch to the vehicle’s electrical system
With the switch mount securely in place, it’s time to connect the switch to your vehicle’s electrical system to enable its functionality. Follow these steps carefully:
- Identify the positive and negative wires on the back of the switch.
- Strip a small portion of the insulation from the end of each wire.
- Connect the positive wire to an accessory or ignition-controlled power source.
- Connect the negative wire to a suitable ground point, such as the vehicle’s chassis or a designated grounding point.
- Ensure all connections are secure and free from any loose wires or exposed metal.
Step 4: Testing the functionality of the switch
Once you have completed the installation process, it’s important to test the functionality of the battery isolator switch to ensure it operates as intended. Here’s how you can test the switch:
- Reconnect the negative terminal of the vehicle’s battery.
- Turn on the switch and check if there is power flowing in the electrical system.
- Switch off the isolator switch and observe if there is no power flowing.
- Repeat the process a few times to ensure consistent results.
By following these step-by-step instructions, you can easily install a battery isolator switch and protect your vehicle’s electrical system from potential damage. Remember to prioritize safety, attention to detail, and proper connection during the installation process for optimal results.
Troubleshooting Common Issues And Faqs
Tips for Identifying and Resolving Common Problems During Installation
When it comes to installing a battery isolator switch, it is not uncommon to encounter common issues. The good news is that most of these problems can be easily identified and resolved with a little troubleshooting. Here are some tips to help you along the way:
Frequently Asked Questions About Battery Isolator Switch Installation
1. Can I install a battery isolator switch on my own?
Yes, installing a battery isolator switch is a task that can be accomplished by most DIY enthusiasts. However, it is important to have a basic understanding of automotive electrical systems and follow the manufacturer’s instructions carefully. If you are unsure about any step of the installation process, it is always best to consult a professional.
2. How do I know if my battery isolator switch is working properly?
A properly working battery isolator switch should allow you to start your vehicle’s engine when it is in the “on” position and prevent it from starting when it is in the “off” position. To test the switch, turn it to the “off” position and try starting your vehicle. If the engine does not start, the switch is functioning correctly.
3. What should I do if my battery isolator switch gets hot?
If you notice that your battery isolator switch is getting hot during use, it is important to take action immediately. A hot switch may indicate a problem with the installation, such as a loose or corroded connection. Check all connections and tighten them if necessary. If the issue persists, consult a professional for further assistance.
4. Can I install a battery isolator switch on any vehicle?
In general, a battery isolator switch can be installed on most vehicles. However, it is important to consider the specific requirements of your vehicle and the switch you are using. Some vehicles may require additional wiring modifications or adapters to ensure proper installation. Always refer to the manufacturer’s instructions and consult a professional if needed.
5. How often should I check and maintain my battery isolator switch?
It is recommended to periodically check and maintain your battery isolator switch to ensure proper functionality. Regularly inspect the switch for any signs of damage or corrosion. Clean the switch and its connections if necessary. Additionally, check the switch operation by testing it periodically as mentioned in question 2. By doing so, you can catch any potential issues early on and prevent unexpected problems.
By following these troubleshooting tips and understanding the frequently asked questions about battery isolator switch installation, you will be well-prepared to tackle any challenges that may arise during the installation process. Remember to always prioritize safety and consult a professional if needed. With proper installation and maintenance, your battery isolator switch will provide you with reliable protection for your vehicle’s electrical system.
Wrapping Up
Final thoughts on the importance of a battery isolator switch
Throughout this blog post, we have discussed the various benefits and installation process of a battery isolator switch. As we conclude, let’s take a moment to summarize the significance of this small yet essential component in your vehicle’s electrical system.
A battery isolator switch acts as a safeguard, protecting your battery and preventing drainage. It allows you to easily disconnect the battery when your vehicle is not in use, ensuring that there is no power drain from devices like alarms, radios, or other electrical components. This helps to extend the life of your battery and eliminates the need for jump-starts or recharging.
Moreover, a battery isolator switch provides added safety by preventing accidental electrical shocks during maintenance or when working on your vehicle’s electrical system. In case of an emergency or electrical malfunction, it allows for a quick and easy cut-off of power supply, ensuring your safety and the safety of others.
Investing in a high-quality battery isolator switch is not only a wise decision for vehicle owners, but also for marine enthusiasts, RV owners, and anyone else relying on batteries for power. It ensures a reliable and efficient power management system, saving you time, money, and potential headaches in the long run.
Recap of the installation process and key takeaways
Now, let’s briefly recap the installation process of a battery isolator switch and highlight the key takeaways you need to remember.
- Park your vehicle in a safe and well-ventilated area.
- Disconnect the negative terminal of the battery using the appropriate size wrench.
- Choose a suitable location for the battery isolator switch, ensuring it is easily accessible.
- Drill a hole for the switch, if necessary, and mount it securely using screws or bolts.
- Connect the battery cable to the switch, ensuring a tight and secure connection.
- Reconnect the negative terminal of the battery.
- Test the functionality of the battery isolator switch by toggling it on and off.
Remember, safety should always be a priority during the installation process. Take necessary precautions, such as wearing gloves and eye protection, to avoid any potential accidents.
As we conclude, keep in mind that a battery isolator switch is a valuable asset for any vehicle owner. It not only protects your battery from drainage but also adds an extra layer of safety to your electrical system. By following the simple installation process outlined in this blog post, you can enjoy the benefits of a battery isolator switch and ensure a reliable power supply for your vehicle.
Frequently Asked Questions
Do You Put A Battery Isolator On Positive Or Negative?
A battery isolator is typically installed on the positive side of the battery.
How Do You Wire A Battery Isolator?
To wire a battery isolator, follow these steps: 1. Disconnect the negative terminal of the battery. 2. Connect the isolator’s positive terminal to the battery’s positive terminal. 3. Connect the accessories to the isolator’s other positive terminals. 4. Ground the isolator’s negative terminal to the vehicle’s chassis.
5. Reconnect the negative terminal of the battery. Ensure safety precautions and consult a professional if needed.
Should 12V Isolator Switch Be Positive Or Negative?
A 12v isolator switch can be either positive or negative, depending on the wiring configuration and the specific needs of the electrical system it is being used in. It is important to follow the manufacturer’s instructions and consult with a professional electrician to ensure proper installation and functionality.
Do I Really Need A Battery Isolator?
Yes, you really need a battery isolator. It prevents your battery from draining when your vehicle is off. By separating your main battery and your auxiliary battery, it ensures that you always have enough power to start your vehicle. Avoid the inconvenience of a dead battery by using a battery isolator.
Conclusion
To sum up, installing a battery isolator switch is a crucial step in ensuring the safety and efficiency of your vehicle’s electrical system. This simple yet powerful device allows you to disconnect the battery when not in use, preventing drain and extending its lifespan.
With the step-by-step guide provided in this blog post, you can confidently and easily install a battery isolator switch on your own. Enjoy the peace of mind that comes with having control over your vehicle’s power supply. Happy isolating!