To install the battery in the Wahl Micro Groomsman, open the battery compartment and insert the battery following the indicated polarity. Introducing the Wahl Micro Groomsman, an essential grooming tool that requires a straightforward battery installation process.
By simply opening the battery compartment and correctly inserting the battery according to the indicated polarity, you can ensure smooth and effortless operation of this handy device. Whether you’re trimming nose hair or perfecting your facial hair, the Wahl Micro Groomsman is designed to provide precise results with maximum convenience.
Stay tuned as we delve into the step-by-step instructions for installing the battery, allowing you to effortlessly maintain your grooming regimen.
Why A Proper Battery Installation Is Important For The Wahl Micro Groomsman
Proper battery installation is crucial for the optimal performance and longevity of your Wahl Micro Groomsman. When it comes to grooming your facial hair, you want a trimmer that works efficiently and reliably. A well-installed battery ensures that your Wahl Micro Groomsman operates smoothly, enabling you to achieve the desired results with ease.
Ensure optimal performance and longevity
The Wahl Micro Groomsman is designed to deliver exceptional performance, but without a properly installed battery, its potential may be compromised. Placing the battery correctly allows seamless power transmission, ensuring that the trimmer operates at its full capacity.
A properly installed battery guarantees that the Wahl Micro Groomsman will provide consistent power throughout your grooming session. You won’t have to worry about the trimmer losing power or performing inconsistently, allowing you to achieve precise and uniform results every time you use it.
In addition to optimal performance, a proper battery installation also contributes to the longevity of your Wahl Micro Groomsman. When the battery is correctly placed, it minimizes the risk of damage to the internal components caused by poor electrical connections or sudden power surges. This helps extend the lifespan of your trimmer, allowing you to enjoy many years of hassle-free grooming.
Prevent malfunction or operation issues
One of the main reasons why a proper battery installation is important for the Wahl Micro Groomsman is to prevent malfunction or operation issues. Correctly inserting the battery ensures that it remains securely in place, reducing the chances of it dislodging during use.
Improper battery installation can lead to various problems, such as the trimmer not turning on, turning off unexpectedly, or experiencing intermittent power disruptions. These issues can be frustrating and hinder your grooming routine. By taking the time to install the battery correctly, you can avoid such malfunctions and ensure smooth operation every time.
Moreover, a proper battery installation also helps prevent damage to the trimmer itself. When the battery is correctly inserted, it minimizes the risk of the components getting jostled or damaged due to loose connections. This ensures the durability of your Wahl Micro Groomsman, allowing you to rely on it for a long time to come.
Tools Required For Installing A Battery In The Wahl Micro Groomsman
When it comes to replacing the battery in your Wahl Micro Groomsman, there are a few essential tools that you will need. Having these tools ready will ensure a smooth installation process and help you get your grooming tool back up and running in no time.
Small Philips head screwdriver
The first tool you will need is a small Philips head screwdriver. This type of screwdriver is commonly used for small electronics and is the perfect size for removing the screws that hold the battery compartment cover in place.
Be sure to select a screwdriver that fits securely in the screw head to avoid stripping the screws. If the screwdriver is too large or too small, it can cause damage to the screw, making it difficult to remove.
Replacement battery
The second tool you will need is a replacement battery specifically designed for the Wahl Micro Groomsman. It is important to use the correct battery to ensure proper functionality and avoid potential damage to the grooming tool.
The Micro Groomsman typically requires a small button cell battery, such as a CR2032. It is recommended to purchase a high-quality battery from a reputable brand to ensure optimal performance and longevity.
Make sure to carefully inspect the replacement battery for any signs of damage or leaks before installing it. A damaged battery should not be used and should be disposed of properly.
To install a battery in the Wahl Micro Groomsman, you will need a small Philips head screwdriver and a replacement battery. These tools will allow you to remove the battery compartment cover and replace the old battery with a new one. Remember to select a screwdriver that fits securely and avoid using damaged batteries. With the right tools and a few simple steps, you can have your Wahl Micro Groomsman ready for use again in no time.
Step 1: Preparing For Battery Installation
Before you begin installing the battery in your Wahl Micro Groomsman, it’s essential to prepare yourself adequately. This step ensures that you have all the necessary tools and a clean, well-lit workspace, allowing for a smooth and hassle-free installation process.
Gather necessary tools
To get started, gather the following tools:
- A small Phillips head screwdriver
- A fresh LR44 battery
Having these tools readily available will make the battery installation process much easier.
Find a clean, well-lit workspace
Next, locate a clean and well-lit area where you can comfortably work on the battery installation. Follow these guidelines to ensure an optimal workspace:
- Choose a well-ventilated area to prevent any buildup of fumes or odors.
- Ensure there’s enough space to lay out your tools and have easy access to them.
- Keep the workspace free from clutter to avoid any distractions or accidents.
- Work on a stable surface, such as a table or workbench, to prevent any accidental slippage or damage to your device.
By finding a suitable workspace, you create a conducive environment for a smooth battery installation process.
Once you have gathered your tools and found a clean, well-lit workspace, you are now ready to proceed with the installation of the battery in your Wahl Micro Groomsman. Follow the next steps to ensure a successful and efficient installation.
Step 2: Opening The Battery Compartment
In this step, we will guide you through the process of opening the battery compartment of the Wahl Micro Groomsman. This is an important step to ensure that you can properly install the battery and have your grooming tool working seamlessly. Follow the instructions below to open the battery compartment effortlessly.
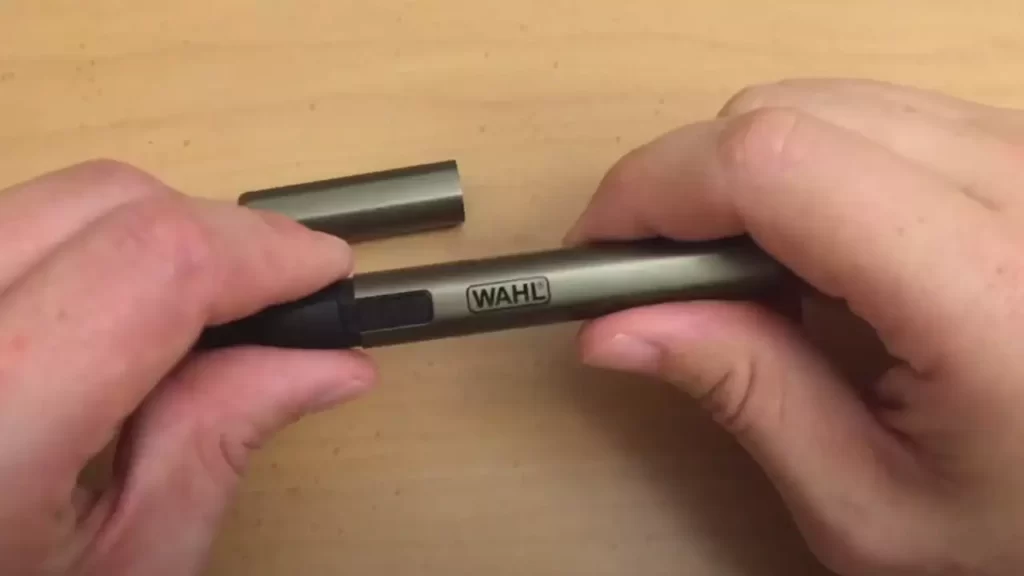
Locate the battery compartment on the Wahl Micro Groomsman
Before you start opening the battery compartment, you need to locate it on your Wahl Micro Groomsman. The battery compartment is usually located at the bottom of the grooming tool, near the handle. Look for a small, marked area on the device that indicates the presence of the battery compartment. Ensure you have a clear view of the compartment and have your small Phillips head screwdriver ready.
Use the small Phillips head screwdriver to unscrew the compartment cover
Now that you have located the battery compartment, it’s time to open it up. To do this, you will need a small Phillips head screwdriver. Insert the tip of the screwdriver into the screw that is securing the compartment cover. Apply gentle pressure in an anti-clockwise direction to loosen and unscrew the screw. Make sure to hold the grooming tool firmly in one hand and the screwdriver in the other to ensure stability while unscrewing.
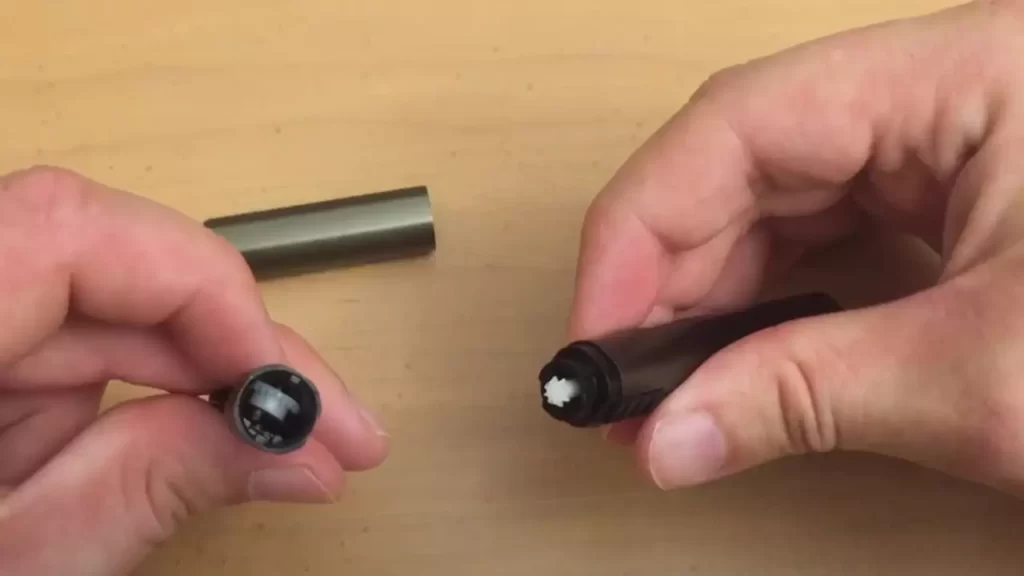
Once the screw is completely loose, remove it from the compartment cover carefully. Keep it in a safe place so that you can easily find it later for closing the battery compartment. Now, you can remove the compartment cover by gently pulling it away from the grooming tool body. Take your time and ensure that you do not apply excessive force as it may damage the cover or the device itself.
As you remove the compartment cover, you will see the space where the battery is housed. This space will be clearly marked and designed to fit the specific battery required for your Wahl Micro Groomsman. Take note of the battery’s orientation to ensure correct installation in the next step.
With the battery compartment cover successfully removed, you have now completed step two of the battery installation process for your Wahl Micro Groomsman. In the next step, we will guide you through the process of inserting the battery into the compartment, ensuring a secure fit to power your grooming tool. Stay tuned!
Step 3: Removing The Old Battery
Before you can install a new battery in your Wahl Micro Groomsman, it is important to safely remove the old battery from the compartment. This step is crucial to ensure the proper functioning of your grooming tool. Follow the instructions below to complete this step without any hassle.
Safely remove the old battery from the compartment
To remove the old battery, you will need a small screwdriver or a coin. Here’s a simple step-by-step guide:
- Locate the battery compartment on your Wahl Micro Groomsman. It is typically located at the bottom of the device.
- Using a small screwdriver or a coin, twist the battery compartment cover counterclockwise to unlock it. This should loosen the cover and allow you to remove it easily.
- Once the cover is removed, you will see the old battery inside the compartment.
- Carefully lift the old battery out of the compartment, making sure not to damage the contacts or any other components.
- Dispose of the old battery properly to minimize environmental impact and follow local regulations for battery disposal.
Dispose of the old battery properly
When disposing of the old battery, it is important to do so responsibly. Batteries contain hazardous materials that can harm the environment if not disposed of correctly. Here are a few guidelines to ensure you dispose of the old battery properly:
- Check with your local recycling center or waste management facility to determine if they accept batteries for recycling. If they do, follow their instructions for battery disposal.
- If recycling is not available in your area, place the old battery in a sealable bag or container to prevent leakage and dispose of it in accordance with local regulations for household hazardous waste.
- Never throw batteries in the trash or burn them, as this can release harmful chemicals into the environment.
By following these steps, you can safely remove the old battery from your Wahl Micro Groomsman and dispose of it properly. Once you have disposed of the old battery, you can move on to the next step of installing the new battery.
Step 4: Installing The New Battery
After successfully removing the old battery from your Wahl Micro Groomsman, it’s time to proceed with installing the replacement battery. This step is crucial to ensure that your grooming tool continues to function flawlessly. Follow the instructions below to complete the process smoothly.
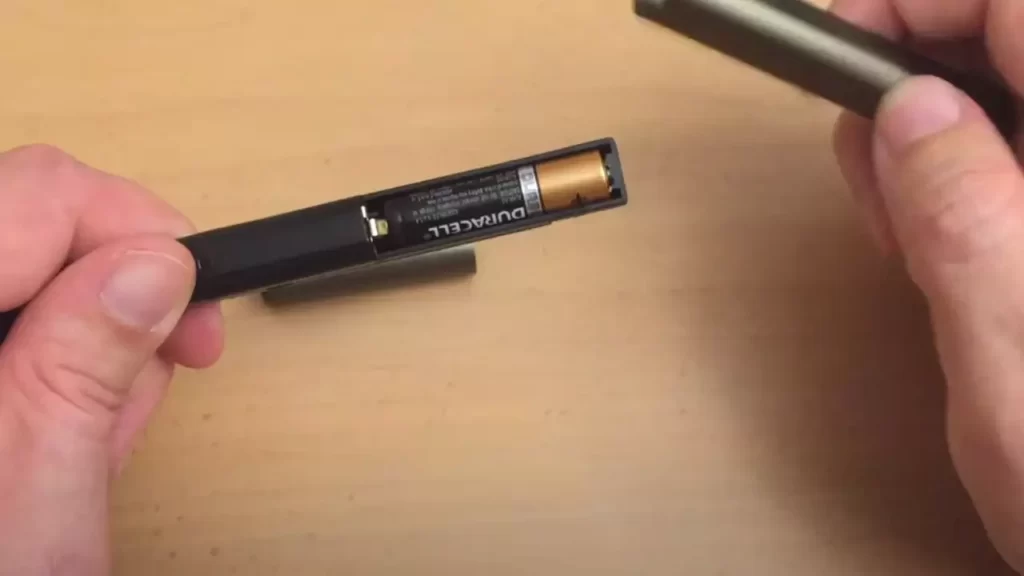
Insert the replacement battery into the compartment, ensuring proper orientation
Now, take the new battery in your hand and identify the polarity markings. You will notice that one end of the battery has a plus symbol (+), while the other end has a minus symbol (-). It is essential to insert the battery correctly, aligning it with the polarity markings inside the compartment.
Carefully position the replacement battery inside the battery compartment, ensuring the plus symbol on the battery aligns with the corresponding plus symbol in the groomer. Conversely, ensure that the minus symbol on the battery aligns with the minus symbol in the compartment. This proper orientation will ensure that the electrical current flows correctly, enabling the groomer to function optimally.
Use gentle pressure to seat the battery securely
With the battery correctly aligned, apply gentle pressure to seat it securely in the compartment. Make sure the battery fits snugly and does not move or rattle within the compartment. This will prevent any interruptions in the electrical connection and ensure optimal performance of your Wahl Micro Groomsman.
Remember not to exert excessive force while seating the battery, as it may damage the battery or the groomer. Take your time and apply gentle but firm pressure until the battery is firmly in place.
By following these instructions, you have successfully installed the new battery in your Wahl Micro Groomsman. Now, you can proceed to reassemble the groomer and enjoy the convenience of a fully functional grooming tool.
Step 5: Closing The Battery Compartment
Now that you have successfully inserted the battery into your Wahl Micro Groomsman, it’s time to close the battery compartment securely. This step is important to ensure that the battery stays in place and the trimmer functions properly. Follow the instructions below to complete the process effortlessly.
Align the compartment cover and screw it back into place
After inserting the battery, you will find a compartment cover that needs to be aligned and screwed back into place. This cover protects the battery and keeps it secure during usage. To align the cover correctly, follow the steps below:
- Hold the Wahl Micro Groomsman trimmer in one hand and locate the battery compartment cover.
- Align the cover with the compartment by matching the grooves on the cover with the corresponding slots on the trimmer.
- Ensure that the cover is positioned correctly and sits flush with the trimmer body.
Ensure the cover is snug but not over-tightened
After aligning the compartment cover, it is essential to secure it properly. However, be cautious not to over-tighten it, as this might damage the cover or the trimmer. To ensure a snug fit without over-tightening, follow the steps below:
- Take the screw provided with the trimmer and insert it into the hole on the cover.
- Using a small screwdriver or your fingers, gently tighten the screw until you feel resistance.
- Stop tightening once you feel the cover is snug against the trimmer body, ensuring it is securely in place.
Remember, over-tightening can lead to difficulties in removing the cover for future battery replacements, so it’s crucial to strike the right balance during this step.
By following these simple steps, you can successfully close the battery compartment of your Wahl Micro Groomsman trimmer. This ensures that the battery remains securely in place and allows you to enjoy the convenience of a well-functioning grooming tool. Now you’re ready to effortlessly groom your beard or trim your nose and ear hair with the power of your Wahl Micro Groomsman!
Step 6: Testing The Battery Installation
Once you’ve successfully installed the battery in your Wahl Micro Groomsman, it’s time to test whether the installation was done correctly. Testing the battery functionality is crucial to ensure that your device operates smoothly and functions as intended. Follow the steps below to confirm the battery installation and ensure proper functionality of your Wahl Micro Groomsman.
Turn on the Wahl Micro Groomsman to confirm battery functionality
The first step in testing the battery installation is to turn on the Wahl Micro Groomsman. Locate the power switch or button on your device, typically found on the handle or main body. Press the power switch or button to turn on the device. If the battery installation was successful, the device should power on and be ready for use.
Ensure all operations are smooth and device functions as intended
After turning on the Wahl Micro Groomsman, it’s important to ensure that all operations are smooth and the device functions as intended. Test each function of the device, such as trimming, grooming, or shaving, depending on the specific features of your model. Check for any irregularities, such as unusual noises, vibrations, or inconsistencies in performance.
If you notice any issues or abnormalities during the testing process, double-check the battery installation and ensure it is securely in place. Make sure the connections are clean and free from any dirt or debris that may affect the device’s performance.
Additionally, it’s a good idea to refer to the product manual or user guide for troubleshooting tips or specific guidelines related to your Wahl Micro Groomsman model. The manufacturer usually provides detailed information and troubleshooting instructions to help you resolve any issues you may encounter.
In conclusion, testing the battery installation of your Wahl Micro Groomsman is crucial to confirm proper functionality and performance of the device. By following the steps outlined above, you can ensure that your device is working as intended, giving you a hassle-free grooming experience.
Tips And Precautions For Battery Installation In The Wahl Micro Groomsman
Proper battery installation is essential for the efficient operation of the Wahl Micro Groomsman. Ensuring the correct battery orientation and avoiding over-tightening the compartment cover are critical steps to prevent damage and maintain the longevity of your grooming tool. In this section, we will guide you through some important tips and precautions to take when installing the battery in your Wahl Micro Groomsman to get the best out of your grooming experience.
Double-check the battery orientation before closing the compartment
Before closing the compartment of your Wahl Micro Groomsman, it’s crucial to double-check the battery orientation. Placing the battery incorrectly can hinder the performance of the grooming tool or even cause irreversible damage. To avoid any mishaps, follow these steps:
- Remove the compartment cover by sliding it in the direction indicated by the arrow.
- Take note of the positive (+) and negative (-) markings inside the compartment.
- Insert the replacement battery, aligning the positive (+) and negative (-) ends with the corresponding markings.
- Make sure the battery is snugly secured in place.
- Gently slide the compartment cover back into position, ensuring it has fully clicked into place.
By double-checking the battery orientation, you can rest assured that your Wahl Micro Groomsman will function optimally and provide precise grooming results.
Avoid over-tightening the compartment cover to prevent damage
One common mistake during battery installation is over-tightening the compartment cover. While it’s important to ensure a secure fit, excessive force can lead to damage to the cover or even strip the threading. To avoid this, follow these guidelines:
- Gently tighten the compartment cover until it feels snug, but do not apply excessive force. The cover should close smoothly without any resistance.
- Ensure the cover aligns perfectly with the grooming tool and sits flush.
- Do not use any tools or excessive pressure to tighten the cover.
By avoiding over-tightening, you can prevent potential damage and ensure that the battery compartment remains intact for future replacements.
Only use replacement batteries recommended by Wahl
When it comes to replacements, it’s essential to use batteries that are recommended by Wahl. Wahl’s recommended batteries are specifically designed to meet the requirements of the Micro Groomsman, ensuring optimal performance and longevity of your grooming tool.
The Wahl Micro Groomsman employs a specific battery model, so it’s crucial to use the correct type to prevent any issues. Using unauthorized or incompatible batteries can lead to diminished performance or damage to the device.
When purchasing replacement batteries, refer to the user manual or Wahl’s official website for the recommended battery model. Investing in the right replacement batteries will help you achieve consistent grooming results and prolong the overall lifespan of your Wahl Micro Groomsman.
By adhering to these tips and precautions, you can confidently install the battery in your Wahl Micro Groomsman, ensuring its proper functioning and longevity. Taking a few extra moments to double-check the orientation, avoid over-tightening the compartment cover, and using recommended replacement batteries will help you groom with precision and maintain your grooming tool effectively.
Frequently Asked Questions
How Do I Install The Battery In Wahl Micro Groomsman?
To install the battery in your Wahl Micro Groomsman, simply unscrew the bottom cap, remove the old battery, and insert the new one. Make sure to align the battery correctly and screw the cap back on securely. It’s that easy!
What Type Of Battery Does Wahl Micro Groomsman Use?
The Wahl Micro Groomsman uses a single AAA battery. It’s easily available in most stores and online. Make sure to use a high-quality battery for optimal performance and longer battery life.
How Long Does The Battery Last In Wahl Micro Groomsman?
With a fresh AAA battery, the Wahl Micro Groomsman can last for several months of regular use. However, the battery life can vary depending on usage frequency and battery quality. It’s always a good idea to keep an extra battery on hand, just in case.
Can I Use Rechargeable Batteries In Wahl Micro Groomsman?
Yes, you can use rechargeable AAA batteries in the Wahl Micro Groomsman. Just make sure they are fully charged before installing them. Rechargeable batteries are a great eco-friendly option and can save you money in the long run.
Conclusion
Installing a battery in the Wahl Micro Groomsman is a simple process that can enhance your grooming experience. By following the step-by-step instructions provided, you can ensure a hassle-free installation. The convenience of a battery-operated trimmer allows for on-the-go grooming without compromising on performance.
With proper installation, you can achieve precise grooming results and maintain your desired style effortlessly. Say goodbye to tangled cords and hello to a seamlessly groomed appearance. Embrace the ease and efficiency of the Wahl Micro Groomsman by installing its battery today.