To install the battery in a Fitbit Zip, open the battery door and insert a new CR2025 battery. Fitbit Zip is a popular fitness tracker that helps users track their steps, distance, and calories burned throughout the day.
Like any electronic device, the Fitbit Zip requires a battery to operate properly. If you’re unsure of how to install the battery in your Fitbit Zip, don’t worry. In this guide, we’ll walk you through the process step by step.
By following these simple instructions, you’ll have your Fitbit Zip up and running in no time. So let’s get started!
Understanding The Battery Replacement Process
If you own a Fitbit Zip, it’s important to understand the process of replacing the battery. By knowing how to properly install a new battery, you can ensure that your device continues to function optimally. In this section, we will discuss how long the battery of Fitbit Zip typically lasts, signs that indicate your battery needs replacing, and the importance of maintaining a charged battery.
How long does the battery of Fitbit Zip last?
The battery life of your Fitbit Zip is an important factor to consider. Generally, the Fitbit Zip battery has a lifespan of approximately 6 months, depending on how frequently you use your device. However, it’s worth noting that the actual battery life may vary based on factors such as usage, activity level, and even environmental conditions. Keeping track of your battery life is crucial to ensure uninterrupted performance from your Fitbit Zip.
Signs that your Fitbit Zip battery needs replacement
Once you start noticing certain signs, it’s likely that your Fitbit Zip battery needs to be replaced. Here are a few indicators to look out for:
- Decreased battery life: If your Fitbit Zip battery drains significantly faster than before, it could be a sign that it’s time for a replacement.
- Inaccurate tracking: A dying battery may affect the accuracy of your Fitbit Zip’s tracking capabilities, resulting in incorrect or inconsistent data.
- Failure to sync: If your Fitbit Zip fails to sync with your smartphone or computer, despite trying various troubleshooting methods, it may be due to a worn-out battery.
- Unresponsive device: When your Fitbit Zip becomes unresponsive or fails to turn on even after pressing the buttons, it’s a strong indication that the battery needs replacing.
Importance of maintaining a charged battery
Maintaining a charged battery in your Fitbit Zip is crucial to enjoy a seamless tracking experience. Regularly charging your device helps ensure accurate and reliable data tracking, allowing you to monitor your fitness activities effectively. Additionally, a charged battery prevents any potential interruptions during your daily routine or workout sessions, providing you with uninterrupted access to your fitness data.
Now that you have a clear understanding of the battery replacement process, including the typical lifespan of the Fitbit Zip battery, signs indicating replacement is necessary, and the importance of a charged battery, you can confidently take the necessary steps to keep your Fitbit Zip functioning optimally.

Gathering The Required Tools
Before you start the process of replacing the battery in your Fitbit Zip, it is essential to gather all the necessary tools. Having the right tools at hand will ensure a smooth and efficient battery replacement job. In this section, we will discuss the tools needed, where to find them, and provide some tips for selecting high-quality replacement batteries.
Tools needed for replacing the battery in Fitbit Zip
Here are the tools you will require to replace the battery in your Fitbit Zip:
| Tools | Description |
| Screwdriver | A small screwdriver, typically Phillips or flathead, to remove the screws holding the battery cover in place. |
| Tweezers | Tweezers are handy for handling small components during the battery replacement process. |
| Replacement Battery | A high-quality replacement battery that is compatible with the Fitbit Zip. Make sure to check the battery specifications. |
Where to find the necessary tools
You can find the tools required for replacing the battery in your Fitbit Zip at various places. Here are some common sources:
- Local Electronics Stores: Visit your nearest electronics store, as they often carry a range of tools suitable for small device repairs.
- Online Retailers: Online platforms like Amazon, eBay, or specialized electronic component websites offer a wide selection of tools specifically designed for electronics repairs.
- Fitbit Service Centers: If you prefer, you can contact Fitbit’s official service centers for assistance in finding the necessary tools.
Tips for selecting high-quality replacement batteries
When selecting a replacement battery for your Fitbit Zip, it is crucial to choose a high-quality one. Here are a few tips to ensure you get the best battery:
- Check Compatibility: Make sure the replacement battery is compatible with the Fitbit Zip model. Consult the Fitbit website or user manual for compatibility information.
- Read Reviews: Before purchasing a replacement battery, read reviews from other customers to ensure its reliability and performance.
- Consider Brand Reputation: Opt for batteries from reputable brands that have a track record of providing quality and long-lasting products.
- Verify Battery Specifications: Check the battery specifications such as voltage and capacity to ensure they match the original battery’s requirements.
By gathering the necessary tools, finding them at reliable sources, and selecting a high-quality replacement battery, you will be well-equipped to successfully replace the battery in your Fitbit Zip.
Step-By-Step Guide To Installing The Battery
In this step-by-step guide, we will show you how to install the battery in your Fitbit Zip. Follow the instructions carefully to ensure a smooth and successful replacement.
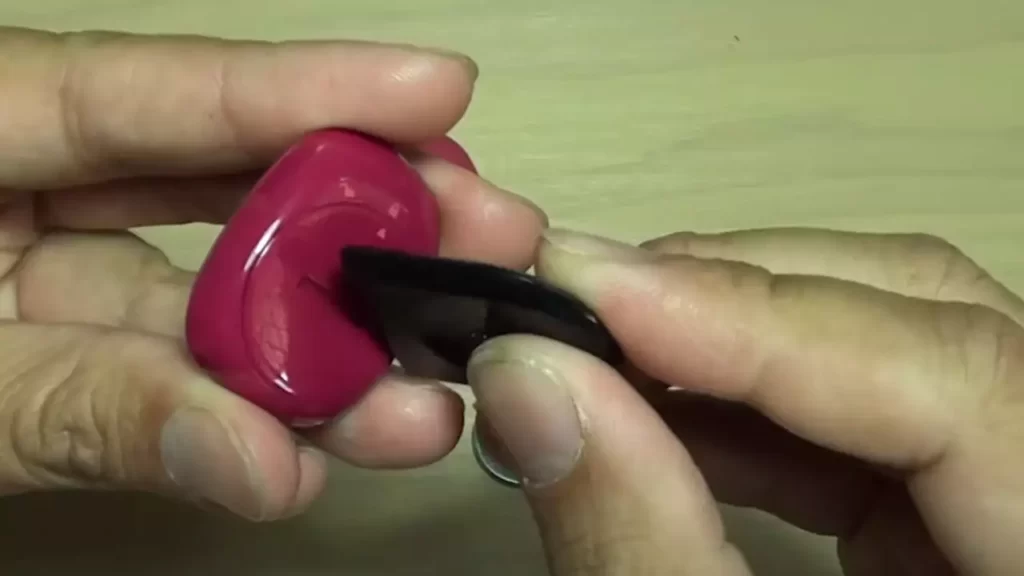
Safely Removing the Back Cover of the Fitbit Zip
The first step in installing a new battery is to safely remove the back cover of your Fitbit Zip. To do this, locate the small groove on the side of the device. Insert your fingernail or a small, flat tool into the groove and gently pry the back cover off. Be careful not to force it or use excessive pressure, as this may damage the device.
Locating the Battery Compartment
Once the back cover is removed, you will see the battery compartment. It is a small, circular opening on the inner side of the cover. Take a moment to locate this compartment before proceeding.
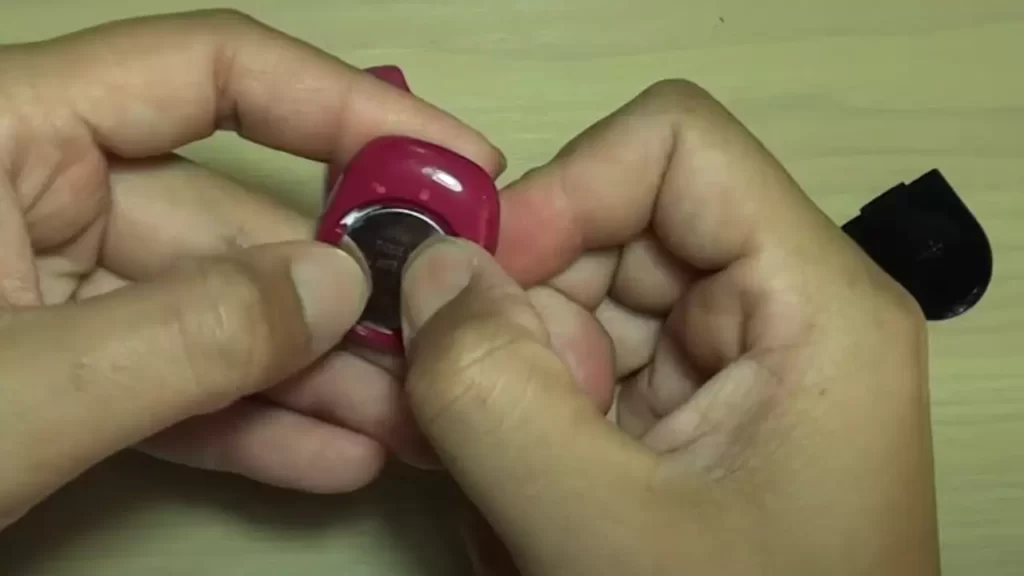
Removing the Old Battery
To remove the old battery, use a small tool or your fingers to gently nudge it out of the battery compartment. Take care to remember the battery’s orientation, noting which side is facing up. Dispose of the old battery properly, following local recycling guidelines for electronic waste.
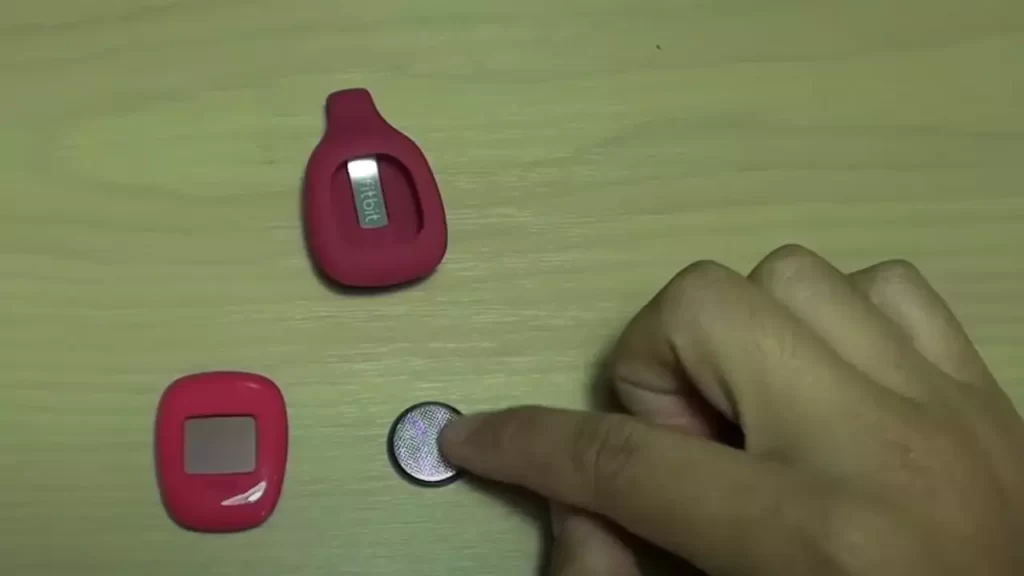
Inserting the New Battery Correctly
Before inserting the new battery, ensure that it is the correct size and type recommended by Fitbit. Carefully align the new battery with the contacts inside the battery compartment, making sure the positive side (+) is facing up. Gently press the battery into place until it sits snugly in the compartment.
Reattaching the Back Cover Securely
Lastly, it’s time to reattach the back cover securely. Align the cover with the device and press it down firmly until you hear a click or feel it snap into place. Ensure that all edges are flush and there are no gaps between the cover and the device. This will help to protect the battery and keep the Fitbit Zip functioning properly.
Congratulations! You have successfully installed the battery in your Fitbit Zip. Put the device back on and enjoy tracking your daily activities once again.
Tips For Ensuring A Successful Battery Replacement
If you’re looking to replace the battery in your Fitbit Zip, there are a few tips you’ll want to keep in mind to ensure a successful battery replacement. By maintaining cleanliness during the process, checking for any damage or corrosion, calibrating the Fitbit Zip after installing the battery, and troubleshooting common issues, you can ensure a seamless battery replacement experience.
Maintaining cleanliness during the battery replacement process
When it comes to replacing the battery in your Fitbit Zip, it’s important to maintain cleanliness throughout the process. Before you begin, make sure to wash your hands thoroughly to avoid any dirt or debris from transferring to the device. Additionally, you may want to have a clean cloth or towel on hand to wipe down the Fitbit Zip and remove any dust or fingerprints.
Checking for any damage or corrosion
Prior to replacing the battery, it’s crucial to check for any signs of damage or corrosion on your Fitbit Zip. Inspect the battery compartment for any visible damage, such as broken or loose parts. If you notice any corrosion, which may appear as a green or white residue, gently clean it using a cotton swab dipped in rubbing alcohol.
Calibrating the Fitbit Zip after installing the battery
After successfully installing the new battery, it’s important to calibrate your Fitbit Zip to ensure accurate tracking. To do this, simply place the device in the charging cable and connect it to a power source. Allow the Fitbit Zip to charge for at least three hours, ensuring a full battery. Once charged, remove the device from the charging cable and proceed with the setup process as necessary.
Troubleshooting common issues after battery replacement
If you encounter any issues after replacing the battery in your Fitbit Zip, there are a few troubleshooting steps you can take. First, ensure that the battery is securely placed and properly aligned within the device. If the Fitbit Zip still does not power on, try performing a reset by holding down the button for at least 10 seconds. If the issue persists, consider contacting Fitbit customer support for further assistance.
Extending The Battery Life Of Your Fitbit Zip
If you’re a Fitbit Zip user, you know how important it is to keep your device powered up. Whether you’re tracking your steps, monitoring your sleep, or staying connected with friends, having a long-lasting battery is crucial. In this post, we’ll explore the best practices for maximizing battery performance on your Fitbit Zip.
Best Practices for Maximizing Battery Performance
To ensure your Fitbit Zip battery lasts as long as possible, it’s important to follow these best practices:
- Keep Bluetooth connectivity to a minimum when not in use.
- Limit the number of alarms and notifications you have set on your Fitbit Zip.
- Turn off All-Day Sync if you don’t need to sync your data in real-time.
- Avoid overcharging your device by disconnecting it from the charger once it’s fully powered.
- Update your Fitbit Zip’s software regularly to take advantage of any battery-saving improvements.
Adjusting Settings to Conserve Battery Life
Fitbit Zip provides you with options to adjust your settings to conserve battery life. By making a few tweaks, you can extend the life of your battery:
-
- Reduce the brightness of the display:
Lowering the brightness level of your Fitbit Zip’s display can significantly conserve battery life. Access the settings on your device and adjust the brightness accordingly.
-
- Shorten the timeout duration:
Set your Fitbit Zip to have a shorter time before the display turns off when not in use. This will prevent the device from wasting battery power when it’s not being actively used.
-
- Enable Sleep Mode:
Using the Sleep Mode feature on your Fitbit Zip helps conserve battery life while you’re sleeping. It turns off the display and minimizes other battery-draining features while still tracking your sleep patterns accurately.
Charging Recommendations for Long-Term Battery Health
Properly charging your Fitbit Zip can have a significant impact on its long-term battery health. Keep the following recommendations in mind:
- Avoid charging your Fitbit Zip in extreme temperatures (too hot or too cold).
- Use the original charging cable and adapter that came with your device to ensure optimal charging.
- Regularly clean the charging contacts on your Fitbit Zip and the charging cable to maintain a solid connection.
- Charge your device when the battery level is low rather than letting it fully drain.
How to Check the Battery Status on Your Fitbit Zip
Checking the battery status on your Fitbit Zip is simple and easy. Just follow these steps:
- From the Fitbit dashboard, tap on the device icon in the top-left corner of the screen.
- Select your Fitbit Zip from the Devices list.
- Scroll down and tap on the “Battery” option.
- Here, you’ll see the remaining battery percentage on your Fitbit Zip.
By following these tips and tricks, you’ll be able to extend the battery life of your Fitbit Zip and enjoy uninterrupted tracking throughout the day.
Frequently Asked Questions
How Do I Install The Battery In Fitbit Zip?
To install the battery in Fitbit Zip, simply remove the device from the clip and open the battery door. Take out the old battery carefully and insert the new battery, ensuring it is properly aligned. Close the battery door and reinsert the device into the clip.
Conclusion
Installing a battery in your Fitbit Zip is a simple process that can be done in a few steps. By following the guidelines mentioned in this blog post, you can ensure a smooth and successful battery replacement, keeping your Fitbit Zip up and running for your fitness tracking needs.
Remember to always handle the battery with care and seek professional assistance if needed. Start enjoying your Fitbit Zip again with a fresh battery today!