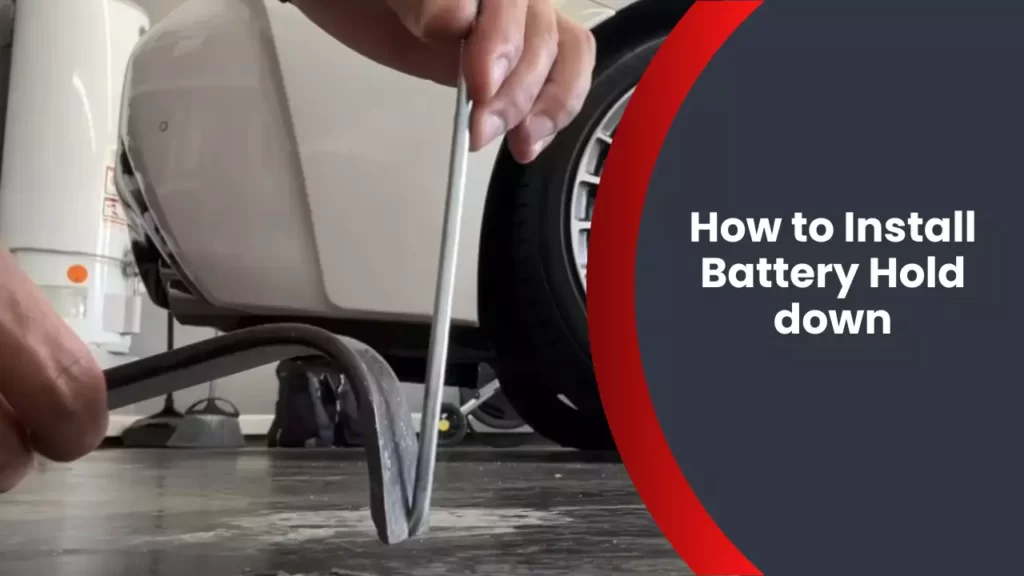
To install a battery hold down, first, position the hold down bracket over the battery. Then, secure the bracket tightly using the screws provided.
This ensures that the battery remains securely in place. When installing a battery hold down, it is essential to properly secure the battery to prevent any movement or damage. The hold down bracket is designed to keep the battery in position, especially during vehicle movement or vibrations.
To install it, simply place the hold down bracket over the battery, aligning the screw holes with the battery tray. Then, tighten the screws provided in order to secure the bracket firmly in place. This installation is vital for maintaining the stability and safety of the battery within your vehicle.
Preparing For The Installation
Preparing for the Installation
The installation of a battery hold down is a relatively simple process that can be completed by anyone with basic mechanical skills. Before you begin, it is important to get organized and gather the necessary tools and equipment. Ensuring safety precautions are also essential to prevent accidents or injuries during the installation. In this section, we will discuss checking the tools and equipment needed as well as the safety precautions that should be taken.
Checking the Tools and Equipment
Before you start the installation process, check whether you have all the necessary tools and equipment. Having them on hand will save you time and frustration during the installation. Here is a list of what you will need:
- Wrench or socket set
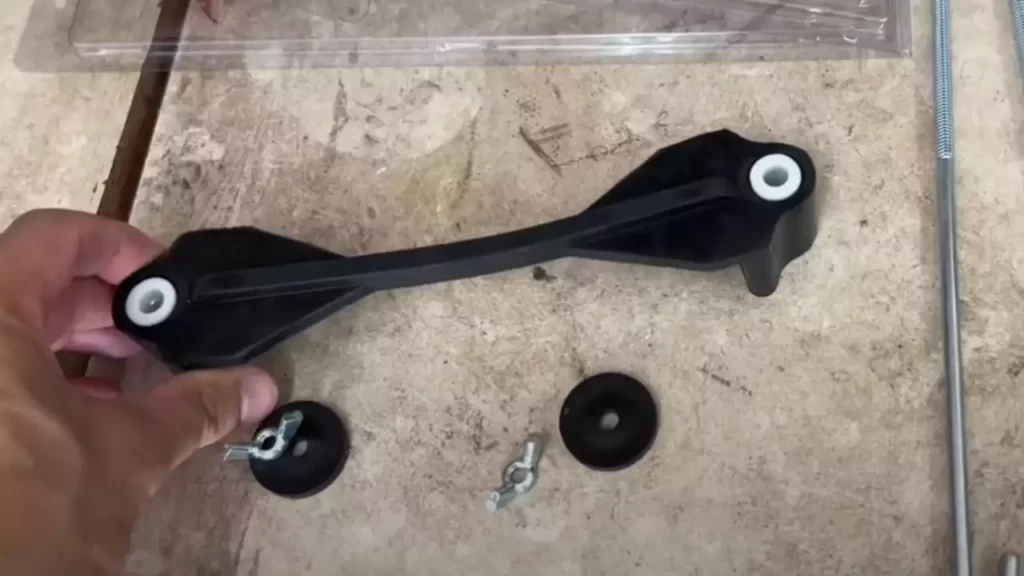
- Battery hold down kit (includes hold down bracket, bolts, and nuts)
- Cleaning brush or cloth
- Safety goggles
Ensure that you have these tools readily available and in good condition. If any of the tools are damaged or broken, it is important to replace them before proceeding with the installation.
Ensuring Safety Precautions
Safety should always be a top priority when working with any automotive component or electrical system. Follow these safety precautions before starting the installation:
- Make sure the engine is turned off and the car is in park with the parking brake engaged.
- Wear safety goggles to protect your eyes from any potential debris or sparks.
- Avoid smoking or using any open flames in the vicinity of the battery, as it may produce flammable gases.
- If the battery is corroded, take precautions by wearing gloves and using a cleaning brush or cloth to remove any grime or dirt.
- When handling the battery, always grip it from the sides to avoid accidental contact with the battery terminals.
By following these safety precautions, you can complete the installation process without any accidents or injuries. Taking a few extra minutes to ensure your safety will be well worth it in the long run.
Now that you have checked your tools and equipment and taken the necessary safety precautions, you are ready to begin the installation process. The next section will provide step-by-step instructions on how to install the battery hold down securely. Stay tuned!
Removing The Old Battery Hold Down
When it comes to installing a new battery hold down, one of the first steps you’ll need to take is removing the old one. This is an important task that ensures a secure fit for your new battery. In this section, we’ll guide you through the process of removing the old battery hold down, step by step.
Identifying the Battery Hold down
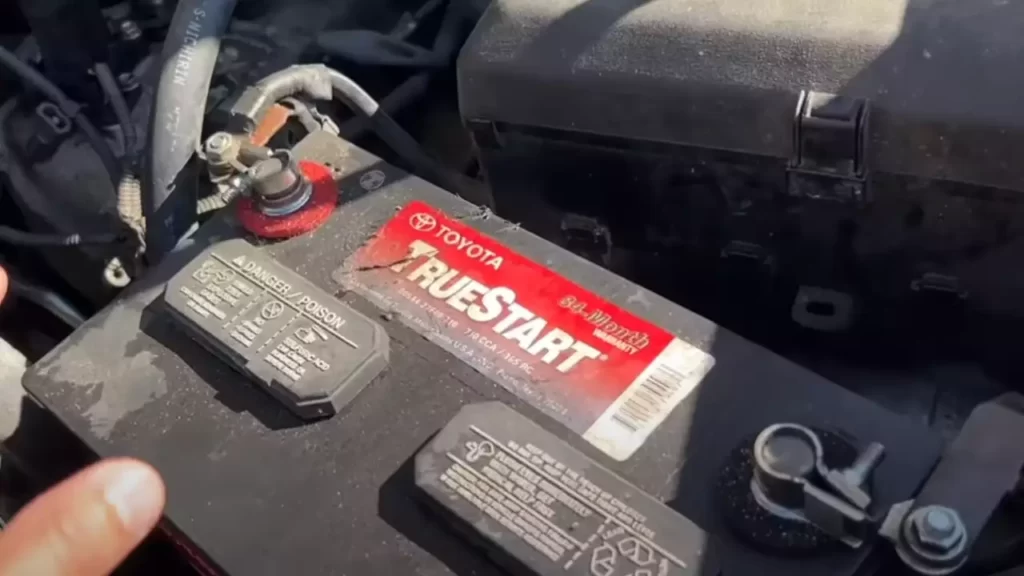
Before you can remove the old battery hold down, you’ll need to identify its location. The battery hold down is a metal bracket that keeps the battery in place and prevents it from sliding or moving during normal vehicle operation. Typically, it is positioned over the top of the battery, securing it to the battery tray or frame of the vehicle.
Loosening the Bolts and Nuts
With the location of the battery hold down identified, the next step is to loosen the bolts and nuts that are holding it in place. These fasteners are typically located on the underside of the battery tray or frame. To loosen them, you’ll need a suitable wrench or socket set. Simply place the wrench or socket onto the bolt or nut and turn it counterclockwise to loosen. Repeat this step for all the bolts and nuts holding the battery hold down.
Once the bolts and nuts are loosened, you can now remove the old battery hold down. Carefully lift the hold down bracket off the battery, ensuring that you don’t damage any surrounding components or wiring. It’s important to handle the old hold down with caution, as it may have sharp edges or corroded surfaces.
If the battery hold down is stuck or difficult to remove, you can use some penetrating oil to help loosen it. Apply the oil to the fasteners, allowing it to penetrate for a few minutes before attempting to remove the hold down again.
After successfully removing the old battery hold down, inspect it for any signs of damage or corrosion. If it’s still in good condition, you can keep it as a spare or consider recycling it. However, if the hold down is damaged or corroded, it’s recommended to replace it with a new one to ensure proper battery installation and safety.
In conclusion, removing the old battery hold down is an essential step in installing a new one. By following these simple steps, you can safely and effectively remove the old hold down bracket, allowing for a secure fit of your new battery.
Choosing The Right Battery Hold Down
When it comes to installing a battery hold down, it is imperative to choose the right one for your vehicle. The battery hold down plays a crucial role in ensuring that the battery remains secure and in place. Without a proper hold down, the battery may be at risk of moving around, causing damage to other components or even dislodging while driving. In this article, we will guide you through the process of choosing the right battery hold down, taking into account factors such as different types, compatibility with your vehicle, and suitable materials.
Understanding Different Types of Battery Hold down
There are various types of battery hold downs available in the market. Each type has its own unique design and method of installation. Before finalizing your choice, it is important to understand the pros and cons of each type. Here are some commonly used types of battery hold downs:
| Type | Description |
|---|---|
| Clamp Style | This type of hold down uses a clamp mechanism to secure the battery in place. It usually consists of a metal bracket and a bolt that tightens the clamp around the battery. |
| J-Bolt Style | This style utilizes a J-shaped bolt that goes through the battery tray and secures the battery from the top. It provides a strong hold without the need for additional brackets. |
| Strap Style | Strap style hold downs use a nylon or metal strap that wraps around the battery and holds it firmly. This type of hold down is adjustable and can accommodate different sizes of batteries. |
Considering Compatibility with Your Vehicle
When selecting a battery hold down, it is essential to consider its compatibility with your specific vehicle make and model. The battery hold down should fit snugly in your vehicle’s battery tray to ensure a secure and proper installation. Refer to your vehicle’s manual or consult with a professional to determine the appropriate size and type of hold down for your specific vehicle.
Selecting the Suitable Material
The material of the battery hold down is another crucial factor to consider. Different materials offer varying degrees of durability, resistance to corrosion, and strength. Here are some commonly used materials for battery hold downs:
- Stainless Steel: Offers excellent corrosion resistance and durability.
- Aluminum: Lightweight and corrosion-resistant, but may have lower strength compared to steel.
- Plastic: Lightweight and corrosion-resistant, but may not be as durable as metal options.
- Heavy-Duty Plastic Coated Steel: Combines the strength of steel with the corrosion resistance of plastic coating.
Consider the conditions in which your vehicle operates and choose a material that best suits your needs. Keep in mind that a high-quality and durable material will ensure the longevity and reliability of your battery hold down.
By understanding the different types of battery hold downs, considering compatibility with your vehicle, and selecting the suitable material, you can confidently choose the right battery hold down for your vehicle. Remember, a secure battery not only ensures the smooth functioning of your vehicle but also provides peace of mind during your journeys.
Installing The New Battery Hold Down
When it comes to installing a new battery hold down in your vehicle, it may seem like a daunting task. However, with the right tools and a little know-how, you can easily complete this DIY project yourself. In this article, we will guide you through the step-by-step process of installing a new battery hold down, ensuring a secure and stable battery placement.
Positioning the New Battery Hold down
The first step in installing your new battery hold down is to properly position it in your vehicle’s battery tray. The battery hold down ensures that the battery stays securely in place, preventing it from moving or shifting while you’re on the road.
To position the new battery hold down correctly, follow these steps:
- Remove the old battery hold down, if you haven’t done so already. This may involve using a wrench or socket set to loosen and remove the bolts and nuts holding it in place.
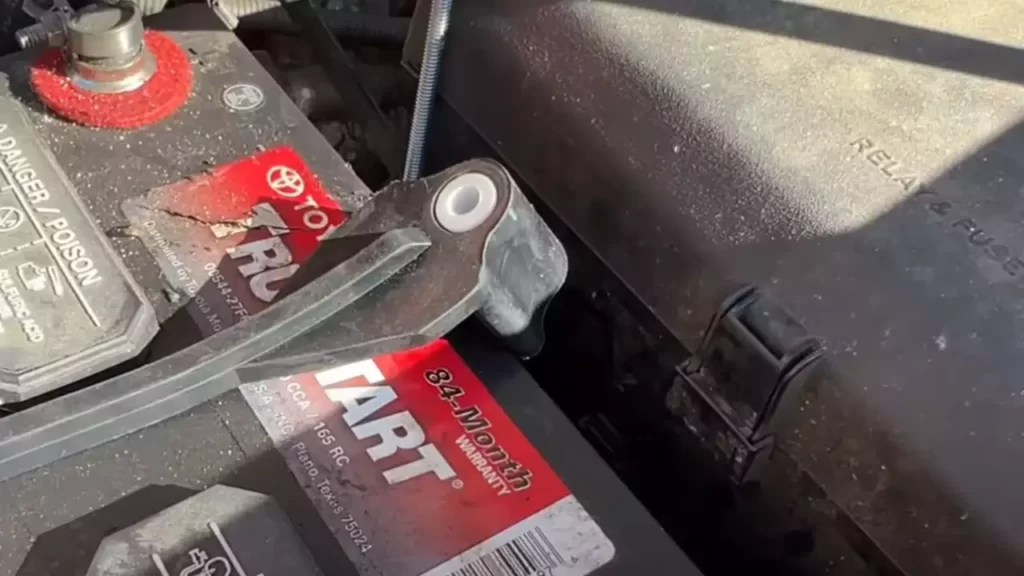
- Place the new battery hold down over the battery, aligning the holes in the hold down with the corresponding holes in the battery tray. Make sure the hold down is centered and level.
- Insert the bolts through the holes in the battery hold down and into the holes in the battery tray.
- Tighten the bolts and nuts securely, but be careful not to overtighten them, as this could damage the hold down or battery tray.
Tightening the Bolts and Nuts
Once the new battery hold down is properly positioned, the next step is to tighten the bolts and nuts. Tightening them properly will ensure that the hold down is securely fastened to the battery tray, providing the necessary stability to keep the battery in place.
To tighten the bolts and nuts, follow these steps:
- Using a wrench or socket set, tighten each bolt and nut alternately in a crisscross pattern. This will help distribute the pressure evenly and prevent the hold down from becoming lopsided.
- Continue tightening until the bolts and nuts are snug and secure. Avoid overtightening, as this can cause damage to the hold down or battery tray.
Checking for Proper Installation
After you have tightened the bolts and nuts, it’s essential to check for proper installation. This will ensure that the battery hold down is securely in place and that your battery is well-protected while driving.
To check for proper installation, follow these steps:
- Give the battery hold down a gentle shake to see if there is any movement. If the hold down feels loose or wobbly, you may need to retighten the bolts and nuts.
- Inspect the hold down and battery tray for any signs of damage or wear. If you notice any cracks, corrosion, or other issues, it’s best to replace the hold down or consult a professional for further assistance.
By following these steps, you can easily install a new battery hold down in your vehicle. Remember to always refer to your vehicle’s specific instructions or consult a professional if you are unsure about any aspect of the installation process.
Securing The Battery Hold Down
Securing the battery hold down is an essential step in installing a battery in your vehicle. It ensures that the battery stays in place even under the harshest driving conditions. In this section, we will walk you through the process of securing the battery hold down, step by step.
Adjusting the Hold down for a Perfect Fit
Before you secure the battery hold down, it is essential to ensure that it is adjusted for a perfect fit. This will prevent any movement or vibrations that could potentially damage the battery or other components of your vehicle. Here’s how you can adjust the hold down:
- Start by positioning the hold down over the battery, ensuring that it aligns with the designated mounting holes.
- Check if the hold down is too loose or too tight. It should snugly fit over the battery without applying excessive pressure.
- If the hold down is too loose, use spacers or adjusters to fill the gaps between the hold down and the battery.
- If the hold down is too tight, consider removing some spacers or adjusters to achieve a proper fit.
By adjusting the hold down for a perfect fit, you will ensure that the battery remains securely in place while allowing for easy removal when needed.
Double-Checking the Tightness
Once you have adjusted the hold down for a perfect fit, it’s time to double-check the tightness. This step is crucial to prevent any loosening of the hold down over time. Follow these simple steps to double-check the tightness:
- Using a wrench or a socket, tighten the hold down bolts or screws. Start by gently tightening them and then gradually increase the torque.
- Make sure not to overtighten the bolts or screws, as this can lead to battery damage or even breakage.
- After tightening, try gently shaking the battery to ensure that it remains fixed firmly in its position.
By double-checking the tightness of the hold down, you will significantly minimize the risk of the battery coming loose during driving, which can cause electrical system problems or even accidents.
Ensuring Stability and Security
To ensure the utmost stability and security of the battery, here are a few additional steps you can take:
- Inspect the hold down periodically to ensure that it remains in good condition and free from any cracks or damages. If you notice any issues, replace the hold down immediately.
- Consider using corrosion-resistant materials, such as stainless steel, for the hold down to prevent rusting or deterioration over time.
- If your vehicle experiences rough terrain or extreme conditions, use additional securing methods, such as bracket reinforcements or auxiliary straps, for added stability.
By following these additional steps, you can further enhance the stability and security of the battery hold down, giving you peace of mind while on the road.
Remember, securing the battery hold down is a crucial aspect of battery installation that should never be overlooked. By adjusting it for a perfect fit, double-checking the tightness, and ensuring stability and security, you can ensure the longevity and efficiency of your vehicle’s electrical system.
Final Steps And Safety Measures
Final Steps and Safety Measures:
Now that you have inspected and cleaned the battery hold down, it’s time to proceed with the final steps and ensure your safety throughout the process. Following these safety guidelines is crucial to prevent accidents and maintain the functionality of your battery hold down. Let’s go over these final steps and safety measures to help you install the battery hold down effectively:
Inspecting the Battery Hold down
Before installing the battery hold down, it’s essential to inspect it thoroughly. Check for any signs of damage, such as cracks or corrosion. A damaged hold down can compromise the stability of the battery, leading to potential hazards. If you notice any issues, replace the battery hold down with a new one before continuing with the installation process.
Cleaning and Maintaining the Hold down
A clean and well-maintained battery hold down ensures proper functioning and longevity. Start by removing any dirt, debris, or residue from the hold down using a damp cloth or mild cleaning solution. Avoid using harsh chemicals that may cause damage. After cleaning, inspect the hold down again to ensure it is free of any remaining particles. Regularly checking and cleaning the hold down will prevent corrosion and extend its lifespan.
Reviewing Safety Guidelines
Prioritize safety throughout the battery hold down installation process by following these guidelines:
- Wear protective eyewear and gloves to protect yourself from potential hazards during the installation.
- Ensure the engine is turned off and the key is removed from the ignition before starting the installation.
- Keep all flammable materials away from the battery and the installation area to prevent accidents.
- Check the polarity of the battery connections and make sure they are properly aligned.
- Securely tighten the hold down bolts, but avoid over-tightening as it may cause damage.
- After installing the hold down, test its stability by gently shaking the battery. If there is any movement, recheck the installation.
- Regularly inspect the battery hold down afterwards to ensure it remains in good condition and make necessary adjustments or replacements as needed.
Frequently Asked Questions
Is A Car Battery Hold Down Necessary?
Yes, a car battery hold down is necessary. It secures the battery in place to prevent movement and damage while driving.
What Is Hold Down On A Car Battery?
A hold down on a car battery is a device used to secure the battery in place to prevent movement or displacement during vehicle operation. It helps maintain the battery’s position, ensuring a stable and safe environment inside the engine compartment.
Do You Connect Positive Or Negative First When Installing A Battery?
Connect the positive terminal first, then the negative terminal.
How Do You Install A Battery Clamp?
To install a battery clamp, follow these steps: 1. Disconnect the car battery’s negative terminal by loosening the clamp nut. 2. Remove any corrosion or debris from the clamp and battery terminal using a wire brush. 3. Slide the clamp over the battery terminal and tighten the nut securely.
4. Reconnect the negative terminal to the battery. 5. Ensure the clamp is properly tightened to prevent any loose connections.
Conclusion
Installing a battery hold down is a crucial step in ensuring the stable and secure positioning of your battery. By following the simple steps outlined in this guide, you can easily complete the installation process. Remember to always prioritize safety by following best practices and using the proper tools.
With a properly installed battery hold down, you can have peace of mind knowing that your battery is secure and functioning optimally. Happy DIY-ing!