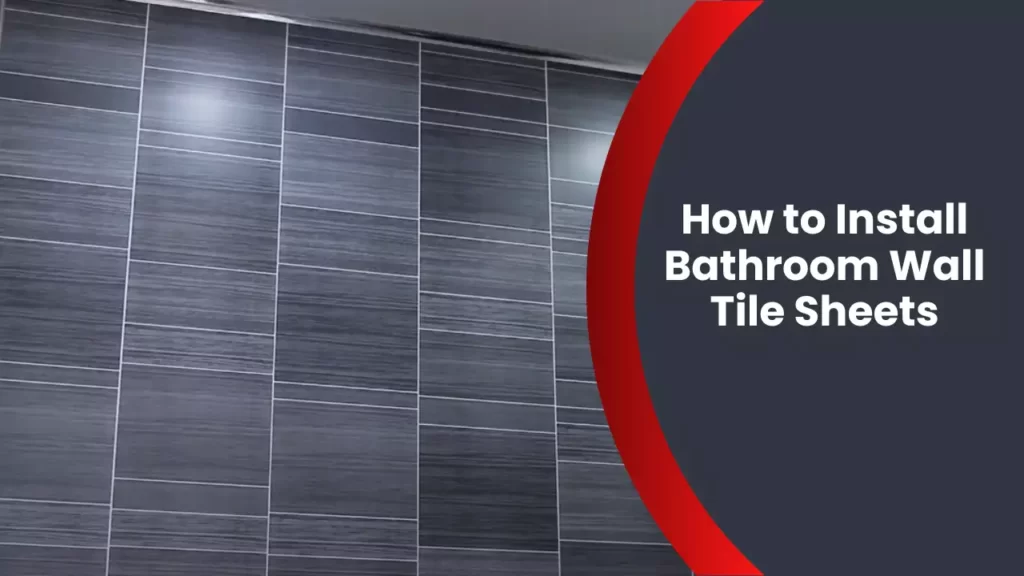
To install bathroom wall tile sheets, measure and mark the area, apply adhesive, press the sheets onto the wall, and let them dry for 24 hours. Transform your bathroom with a fresh, modern look by installing wall tile sheets.
Whether you’re replacing outdated tiles or want to add a stylish touch, this guide will walk you through the process. By following these simple steps, you’ll be able to achieve professional results and enjoy a beautiful, durable wall surface that will withstand moisture and daily use.
From measuring and marking the area to applying adhesive and mounting the tile sheets, this installation method is quick and easy. Before you know it, you’ll have a stunning bathroom wall that will impress anyone who enters. Let’s get started!
Choosing The Right Tiles And Supplies
Are you looking to revamp your bathroom with some stylish wall tiles? Choosing the right tiles and supplies is the first step towards achieving a beautifully tiled bathroom. In this section, we will guide you on considering the tile material, size, and design options, as well as gathering the necessary tools and materials for the installation process.
Consider Tile Material, Size, and Design Options
When it comes to bathroom wall tiles, selecting the right material is essential for durability and visual appeal. Let’s take a look at some popular tile materials:
| Tile Material | Benefits | Drawbacks |
|---|---|---|
| Porcelain | Durable, low maintenance, water-resistant | Relatively higher cost |
| Ceramic | Affordable, wide range of designs | Prone to chips and cracks |
| Glass | Modern and stylish option, reflects light | Requires frequent cleaning |
Once you’ve chosen the material, you need to consider the tile size and design. Larger tiles can create an illusion of a spacious bathroom, while smaller tiles are ideal for intricate patterns or mosaic designs. Additionally, selecting a design that complements your bathroom’s overall aesthetic is essential for achieving a cohesive look.
Gather Necessary Tools and Materials
Before diving into the installation process, gather the following tools and materials:
- Tile adhesive: Ensure you have the appropriate adhesive for your chosen tile material. Consult the manufacturer’s recommendations.
- Trowel: A notched trowel will help evenly spread the adhesive onto the wall.
- Tile spacers: These will ensure consistent spacing between the tiles for a professional finish.
- Grout: Choose a grout color that complements your tiles and helps showcase their design.
- Grout float: This tool is essential for spreading and smoothing the grout between the tiles.
- Sponge and bucket of water: To clean excess grout and ensure a neat finish.
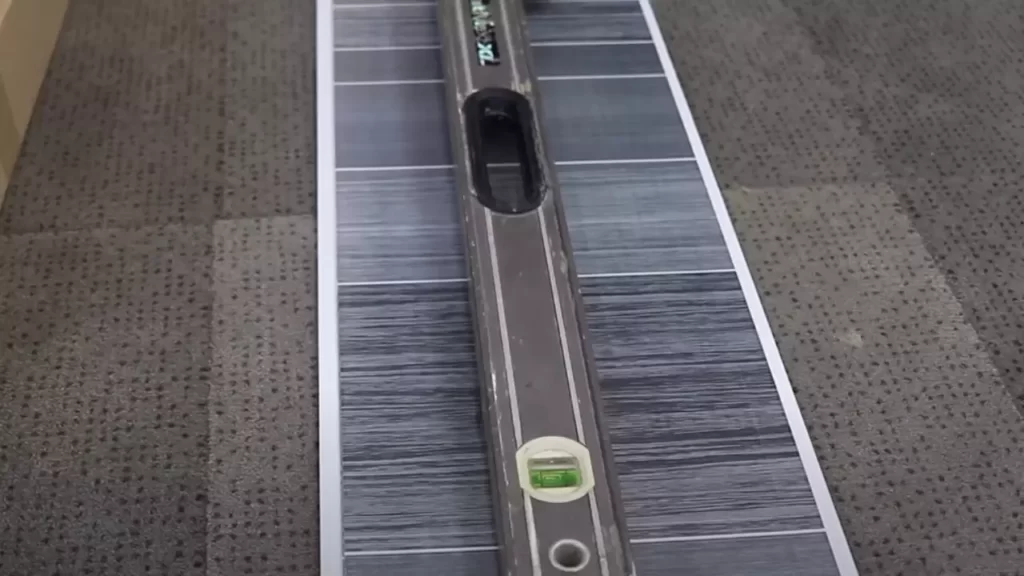
- Level and measuring tape: Essential for ensuring the tiles are straight and properly aligned.
- Tile cutter or wet saw: Depending on your chosen tile, you may need a tool to cut tiles to fit around edges and corners.
- Safety equipment: Don’t forget to wear safety goggles and gloves to protect yourself during the installation process.
By gathering these tools and materials, you’ll be well-prepared to begin the installation process and achieve professional-looking results.
Preparing The Surface For Tile Installation
Before you embark on the exciting journey of installing beautiful bathroom wall tile sheets, it’s crucial to ensure that your surface is properly prepared. Preparing the wall surface is a vital step that sets the foundation for a successful tile installation. Here’s a step-by-step guide on how to prepare your wall for tile installation.
Remove any existing wallpaper or paint
If your bathroom walls are adorned with wallpaper or paint, it’s essential to remove it before installing tile sheets. Wallpaper or paint can hinder the adhesion of the tile sheets, leading to potential issues down the line. Use a scraper or putty knife to carefully remove the wallpaper or paint layer from the wall surface.
Clean the wall surface thoroughly
Once you’ve removed any existing wallpaper or paint, it’s time to give the wall surface a good cleaning. Use a mild detergent and warm water solution to scrub away any dirt, grease, or grime that may be present. Make sure to rinse the wall thoroughly and allow it to dry completely before proceeding to the next step.
Repair any cracks or damages on the wall
Before applying the tile sheets, it’s essential to repair any cracks or damages on the wall to ensure a smooth and even surface. Use a spackling compound or wall repair putty to fill in any cracks or holes, then sand the area until it is flush with the surrounding wall. This will ensure that your tile sheets adhere properly and create a seamless finish.
Apply a layer of primer to the wall
Applying a layer of primer to the wall surface is an important step in the tile installation process. Primer helps to create a stable and adhesive-friendly surface for the tile sheets. Use a paint roller or brush to evenly apply the primer, covering the entire wall surface. Allow the primer to dry as per the manufacturer’s instructions before moving forward.
By following these preparatory steps, you’ll ensure that your bathroom wall is ready for tile installation. Taking the time to properly prepare the surface will not only help the tile sheets adhere better but also contribute to the longevity and durability of your bathroom wall. Now that you’ve prepared the surface, you’re one step closer to transforming your bathroom into a stylish and inviting space!
Applying Adhesive And Setting The Tiles
Mix the tile adhesive according to the manufacturer’s instructions
Before you can start applying the adhesive to the wall, you need to mix it properly. Follow the manufacturer’s instructions to ensure the adhesive has the right consistency. This step is crucial as it ensures the adhesive will bond the tiles securely to the wall, giving you a long-lasting installation. Properly mixing the adhesive also helps to prevent any lumps or inconsistencies that could affect the tile placement. Take your time during this step to ensure you have a smooth and workable adhesive.
Start applying the adhesive to the wall using a notched trowel
Once you have mixed the adhesive, it’s time to start applying it to the wall. A notched trowel is the best tool for this job as it allows you to spread the adhesive evenly and create ridges that help with tile adhesion. Begin by scooping up a generous amount of adhesive on the flat side of the trowel. Then, hold the trowel at a 45-degree angle and start spreading the adhesive on the wall using smooth, sweeping motions. Make sure to cover the entire area where you will be placing the tiles. The ridges created by the notched trowel will help create a strong bond between the tiles and the wall.
Begin setting the tiles from the bottom, ensuring proper alignment
Now that the adhesive is applied, it’s time to start setting the tiles on the wall. Begin from the bottom and work your way up. This way, any excess adhesive or grout can easily fall onto the tiles below, which can be cleaned later. To ensure proper alignment, use a level to keep the tiles straight both vertically and horizontally. Take your time during this step to ensure each tile is perfectly aligned before moving on to the next one. Remember, a straight and organized tile layout will result in a professional and visually appealing installation.
Press each tile firmly into the adhesive
As you place each tile onto the wall, press it firmly into the adhesive. This ensures that the tile makes full contact with the adhesive and creates a strong bond. By applying even pressure to the tile, you help eliminate any air pockets that could weaken the bond. Pressing firmly also helps to ensure that the tile is flush with the wall and does not protrude or sink in, which could affect the overall appearance of the installation. Take your time and be thorough with each tile, ensuring that it is securely set into the adhesive.
Use tile spacers to maintain consistent spacing between tiles
Consistent spacing between tiles is essential for a professional and polished look. To achieve this, use tile spacers during the installation process. Tile spacers come in different sizes and can be easily inserted between the tiles, helping to maintain a uniform gap. These gaps allow room for grout application and ensure that the tiles are evenly spaced. Be sure to place the spacers consistently throughout the installation to achieve a cohesive and visually appealing result.
Trim tiles to fit around corners or edges
During the installation process, you may come across corners or edges that require trimmed tiles. To accomplish this, carefully measure the space that needs to be covered and mark the tile accordingly. Use a tile cutter or a wet saw to make precise cuts. Take your time and work slowly to ensure accurate results. Once the tile is trimmed, apply adhesive to the back of the tile and press it firmly into place, making sure it fits seamlessly into the surrounding tiles. Properly trimmed tiles will add to the overall aesthetic of your bathroom wall tile installation.

Grouting The Tile Joints
Grouting is an essential step in completing the installation of your bathroom wall tile sheets. Grout not only fills the gaps between the tiles but also provides stability and prevents moisture from seeping in. Here is a step-by-step guide on how to grout the tile joints to achieve a professional and polished finish.
Allow the adhesive to dry according to the specified time
Before applying grout, it’s crucial to ensure that the adhesive holding the tiles to the wall has fully dried. Refer to the manufacturer’s instructions for the recommended drying time, as it may vary depending on the adhesive type and environmental conditions. This waiting period is essential to ensure the tiles are firmly adhered and ready for grouting.
Mix the grout according to the manufacturer’s instructions
Mixing the grout correctly is key to achieving the desired consistency and ensuring a long-lasting finish. Follow the manufacturer’s instructions for the grout-to-water ratio and use a bucket or mixing container to combine the components thoroughly. Using a margin trowel or grout float, mix the grout until it reaches a smooth and lump-free consistency.
Apply the grout using a grout float, working it into the joints
Once the grout is ready, it’s time to apply it to the tile joints. Take a dollop of grout on the edge of the grout float and hold it at a 45-degree angle. Begin spreading the grout diagonally across the joints, ensuring it fills each crevice completely. Work in small sections to prevent the grout from drying before you can clean it off.
- Hold the grout float at a 45-degree angle
- Spread the grout diagonally across the joints
- Ensure the grout fills each crevice completely
- Work in small sections to prevent premature drying
Remove any excess grout using a damp sponge
As you apply the grout, it’s inevitable that some excess will get on the tiles’ surfaces. To achieve a clean and neat finish, use a damp sponge to wipe away any excess grout before it dries. Rinse the sponge frequently and be careful not to remove too much grout from the joints. Continue wiping until the tile surfaces are free from grout residue.
Allow the grout to cure for the recommended time
After completing the grouting process, it’s essential to allow the grout to cure fully. This curing time is usually specified by the grout manufacturer and may range from 24 to 48 hours. During this period, avoid wetting or disturbing the grouted area to ensure a strong and durable bond. Once the recommended time has passed, your bathroom wall tile sheets will be ready to showcase their beauty and functionality.
Grouting the tile joints is a crucial step in the installation of bathroom wall tile sheets. Following the proper procedure, including allowing the adhesive to dry, mixing the grout correctly, applying it with a grout float, removing excess grout with a damp sponge, and allowing it to cure, will result in a professional and visually appealing finish. Remember to read and follow the manufacturer’s instructions for each step of the grouting process.
Finishing Touches And Clean Up
As the tile installation process nears its end, it’s time to add those finishing touches that will elevate the appearance of your bathroom wall. Additionally, taking the time to clean up any remaining grout residue and properly seal the grout ensures that your tile will be protected from moisture and staining, preserving its beauty for years to come. In this section, we will explore the steps to install trim pieces or edge tiles, clean off any remaining grout residue, and seal the grout.
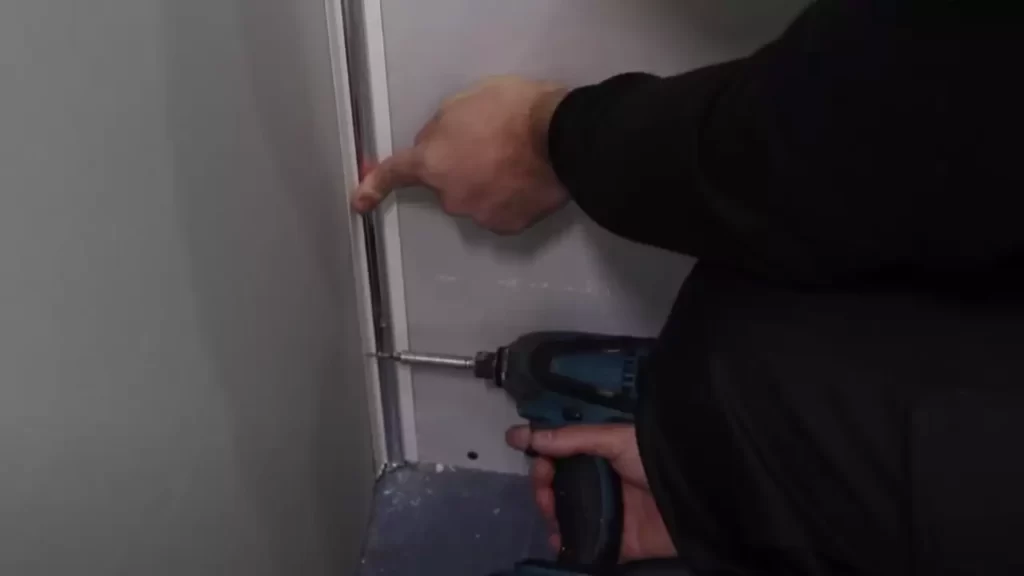
Install trim pieces or edge tiles, if desired
If you wish to give your bathroom wall tile installation a polished look, consider installing trim pieces or edge tiles. These pieces serve two purposes: they enhance the appearance of the tiled surface and they protect the exposed edges of the tile from chipping or damage.
To install trim pieces or edge tiles, follow these steps:
- Cut the trim pieces or edge tiles to the desired length using a tile cutter.
- Apply a thin layer of tile adhesive to the back of each trim piece or edge tile using a notched trowel.
- Press the trim pieces or edge tiles firmly onto the exposed edges of the tiled surface, making sure they are flush with the tiles.
- Allow the adhesive to dry according to the manufacturer’s instructions.
Clean off any remaining grout residue from the tiled surface
After completing the grouting process, it’s common to find some grout residue left on the surface of the tiles. To ensure a clean and polished look, it’s essential to remove this excess residue. Follow these steps to clean off any remaining grout residue:
- Fill a bucket with clean water.
- Dampen a sponge in the water and wring out any excess moisture.
- Gently wipe the tiled surface with the damp sponge, using circular motions.
- Rinse the sponge frequently and change the water in the bucket as needed.
- Continue wiping the tiled surface until all the grout residue has been removed.
- Allow the tiled surface to dry completely before proceeding to the next step.
Seal the grout to protect it from moisture and staining
Sealing the grout is a crucial step to ensure the longevity and durability of your bathroom wall tile installation. By creating a protective barrier, the sealer prevents moisture from seeping into the grout and causing damage. It also helps to repel stains, making it easier to maintain the cleanliness of your tiled surface.
To seal the grout, follow these steps:
- Choose a high-quality grout sealer that is suitable for your specific type of grout.
- Use a small brush or applicator to apply the sealer onto the grout lines.
- Ensure that all the grout lines are evenly coated with the sealer.
- Allow the sealer to penetrate the grout for the recommended time specified by the manufacturer.
- Wipe off any excess sealer from the tiles using a clean, dry cloth.
- Allow the sealer to cure according to the manufacturer’s instructions before exposing it to moisture or traffic.
By following these steps to install trim pieces or edge tiles, clean off any remaining grout residue, and seal the grout, you will put the final touches on your bathroom wall tile sheets installation. These finishing touches not only enhance the visual appeal but also ensure the durability and longevity of your tiled surface. With proper care and maintenance, your bathroom wall tiles will continue to shine for years to come.
Final Inspection And Tips For Maintenance
Inspect the installed tiles for any imperfections or loose tiles
Before considering the bathroom wall tile installation complete, it is crucial to conduct a thorough inspection to ensure there are no imperfections or loose tiles. This final step will help you detect any issues that may have been overlooked earlier to guarantee a flawless result. Take the time to go over the entire tiled surface, paying close attention to corners, edges, and areas around fixtures.
During the inspection process:
- Look for imperfections: Examine each tile carefully for any visible imperfections, such as cracks, uneven spacing, or chipped edges. It is essential that all installed tiles meet your quality standards and contribute to the overall aesthetic of the bathroom.
- Check for loose tiles: Gently tap each tile with a rubber mallet or the handle of a screwdriver to check for any signs of movement. Loose tiles can jeopardize the integrity of the entire wall and may require immediate attention.
Make any necessary repairs or adjustments
If you discover any imperfections or loose tiles during the final inspection, it is essential to address them promptly. Repairing and adjusting the tiles will help achieve a polished and professional appearance for your bathroom wall. Here are a few steps to follow:
- Replace cracked or damaged tiles: If you encounter any tiles with cracks, chips, or significant imperfections, remove them using a grout scraper or chisel. Carefully replace the damaged tile with a new one that matches the rest of the tiled wall, ensuring proper alignment.
- Reapply adhesive for loose tiles: For tiles that display movement during the tapping process, carefully lift them using a putty knife or tile pry bar. Remove the existing adhesive from both the tile and the wall using a scraper. Apply fresh adhesive to the back of the tile and firmly press it back into place, ensuring even coverage.
- Adjust uneven spacing: In case you notice uneven spacing between tiles, use tile spacers or a level to make the necessary adjustments. This step will ensure an aesthetically pleasing appearance with consistent spacing throughout the entire tiled wall.
Tips on how to properly maintain and clean the tiled wall
To preserve the beauty and longevity of your bathroom wall tile sheets, it is vital to incorporate proper maintenance and cleaning practices into your routine. Follow these tips to keep your tiled wall looking fresh and pristine:
- Regular cleaning: Wipe down the tiled surface regularly using a non-abrasive cleaner and a soft cloth or sponge. Avoid harsh chemicals or abrasive tools that may damage the tile or grout.
- Avoid excess moisture: Limit excessive moisture exposure on the tiled wall by using proper ventilation in the bathroom. Excess moisture can lead to mold or mildew growth. If you notice any signs of mold or mildew, address it promptly using a suitable antibacterial cleaner.
- Seal the grout: Apply a grout sealer to protect the grout lines from moisture and staining. Regularly reapply the sealer as recommended by the manufacturer to maintain its effectiveness.
- Prevent damage: Use caution when placing or hanging objects on the tiled wall. Avoid using sharp or abrasive materials that may scratch the tile surface.
- Inspect for any issues: Regularly inspect the tiled wall for any signs of loose tiles, cracked grout, or other problems. Address these issues promptly to prevent further damage.
By following these simple maintenance tips, you can ensure that your bathroom wall tile sheets remain in excellent condition for years to come. Regular inspections, repairs, and proper cleaning practices will help maintain the beauty and functionality of your tiled wall, creating a stunning and durable bathroom space.
Frequently Asked Questions
How Do You Stick Bathroom Wall Panels?
To stick bathroom wall panels, follow these steps: 1. Prepare the surface by cleaning it thoroughly. 2. Apply adhesive to the back of the panel in a zigzag pattern. 3. Press the panel firmly onto the wall, ensuring it is level.
4. Use screws or nails to secure the panel in place, if needed. 5. Allow the adhesive to dry completely before using the bathroom.
What Is The Best Adhesive For Bathroom Wall Panels?
For bathroom wall panels, the best adhesive is a waterproof construction adhesive. It provides strong and long-lasting bond, ensuring the panels stay securely in place. Waterproof adhesive prevents moisture damage and ensures the panels withstand bathroom conditions effectively.
How Do You Install Wall Paneling Sheets?
To install wall paneling sheets, follow these steps: 1. Measure and mark the wall to determine the panel layout. 2. Apply adhesive or nails to secure the panels in place. 3. Use a level to ensure panels are straight and aligned.
4. Cut panels to fit around outlets, windows, and corners. 5. Apply matching trim for a finished look.
How Do You Install Waterproof Wall Panels?
To install waterproof wall panels, follow these steps: 1. Measure and mark the panel area. 2. Prepare the surface by cleaning and removing any old materials. 3. Apply adhesive to the panels and press them onto the wall. 4. Leave a small expansion gap between panels for expansion and contraction.
5. Secure the panels with screws or nails, and caulk the edges to ensure a waterproof seal.
Conclusion
To sum up, installing bathroom wall tile sheets can be a simple and rewarding DIY project. By following the step-by-step instructions outlined in this blog post, you can achieve a professional-looking result. Remember to gather all the necessary tools and materials beforehand, take your time, and ensure proper adhesive application.
Whether you’re updating your bathroom aesthetics or improving functionality, this guide will help you achieve the desired outcome. Happy tiling!