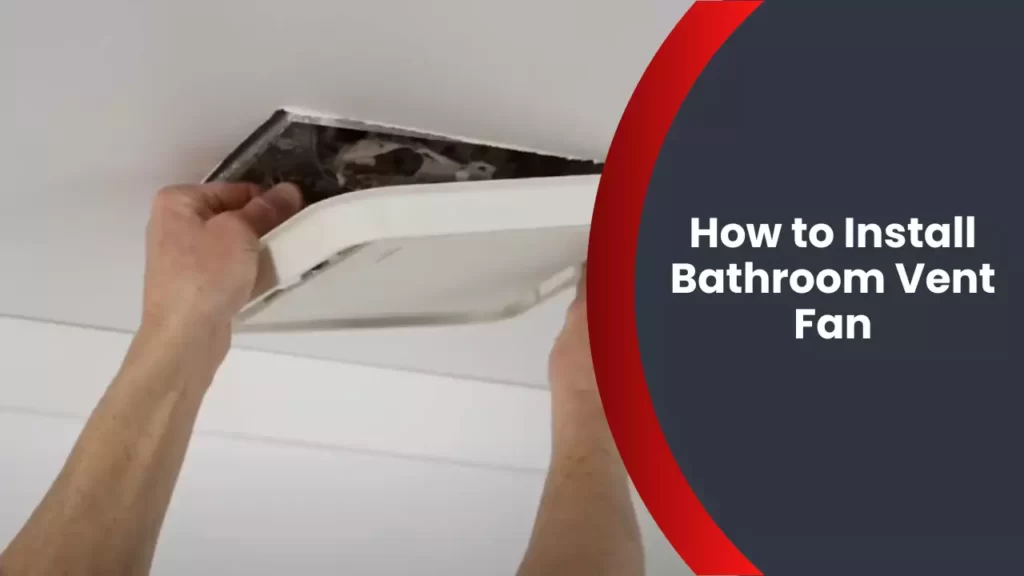
To install a bathroom vent fan, first, turn off the power, then remove the old fan and disconnect the wiring. Next, install the new fan, connect the wiring, and secure it to the ceiling or wall.
Now, turn the power back on and test the fan to ensure it is working correctly. Proper ventilation in a bathroom is crucial for maintaining good air quality and preventing issues like mold and mildew. Installing a bathroom vent fan is a simple and effective way to achieve this.
In this guide, we will walk you through the process of installing a bathroom vent fan step by step. By following these instructions carefully, you can complete the installation and enjoy a well-ventilated bathroom in no time. So, let’s get started with the installation process without any delay.
Factors To Consider When Selecting A Bathroom Vent Fan
When it comes to choosing the right bathroom vent fan, there are several factors that you should consider. By taking the time to evaluate these factors, you can ensure that you select a fan that meets your needs in terms of performance, noise level, and energy efficiency. Let’s dive into the key considerations.
Size and Capacity of the Vent Fan
The size and capacity of the vent fan are crucial aspects to consider when selecting one for your bathroom. You want to choose a fan that has the appropriate capacity to adequately vent the size of your bathroom. The capacity is typically measured in cubic feet per minute (CFM) and indicates the amount of air the fan can move in one minute. To determine the suitable CFM rating for your bathroom, use the following guidelines:
- For bathrooms that are 50 square feet or smaller, aim for a fan with a CFM rating of at least 50.
- For bathrooms between 50 and 100 square feet, consider a fan with a CFM rating between 50 and 100.
- If your bathroom is larger than 100 square feet, you may need a more powerful fan with a CFM rating of 100 or higher.
By selecting the appropriate fan size and capacity, you can ensure that your bathroom is properly ventilated, reducing the risk of mold, mildew, and unpleasant odors.
Noise Level of the Vent Fan
Noise level is another important factor to take into account when choosing a bathroom vent fan. Ideally, you want a fan that operates quietly, allowing you to enjoy a peaceful bathroom experience. Noise levels are usually measured in sones, with lower sone values indicating quieter operation.
Consider the following noise level recommendations:
- For a whisper-quiet fan, look for a model with a noise level rating of 1 sone or less.
- A fan with a noise level rating of 2-3 sones is considered reasonably quiet and should be suitable for most bathrooms.
- Fans with a noise level rating above 3 sones may be too loud and may cause discomfort during use.
Remember, a quiet fan not only adds to your comfort but also ensures that the fan won’t disturb others in adjacent rooms.
Energy Efficiency of the Vent Fan
Energy efficiency is an important consideration to minimize your electricity usage and reduce utility costs in the long run. Look for vent fans with an ENERGY STAR® certification, as they are designed to meet strict energy efficiency guidelines set by the Environmental Protection Agency (EPA).
ENERGY STAR® certified fans are equipped with advanced features such as energy-efficient motors and timers that help optimize energy consumption. These fans can effectively remove moisture without wasting excessive energy, resulting in significant savings over time.
Consider the cost-effectiveness of the fan in terms of energy efficiency to ensure you are making a wise investment in both comfort and savings.
Importance Of Proper Ventilation In A Bathroom
A well-ventilated bathroom is essential for maintaining a clean and healthy living environment. Proper ventilation helps to prevent the growth of mold and mildew, remove unpleasant odors and excess moisture, and improve overall air quality. Whether you are remodeling your bathroom or simply looking to upgrade your existing ventilation system, installing a bathroom vent fan should be a top priority. In this article, we will discuss the importance of proper ventilation in a bathroom, focusing on the three key benefits it provides: preventing mold and mildew growth, removing odors and moisture, and improving air quality.
Preventing Mold and Mildew Growth
Mold and mildew are not only unsightly but also pose serious health risks. Bathrooms create an ideal environment for mold and mildew growth due to the high levels of moisture and humidity typically present. Without proper ventilation, excess moisture lingers in the bathroom, allowing mold and mildew to thrive. Installing a bathroom vent fan is an effective solution to combat these problems. The fan helps to expel moist air, reducing the chances of mold and mildew growth on walls, ceilings, and other surfaces. By preventing mold and mildew, you can safeguard the health and well-being of your family.
Removing Odors and Moisture
One of the common issues in bathrooms is the unpleasant odors left behind after using the facilities. These odors can linger for hours, making the bathroom an uncomfortable space. Additionally, bathrooms tend to get steamy during showers or hot baths, resulting in excess moisture in the air. A bathroom vent fan can efficiently remove odors and excess moisture by drawing them out of the bathroom and expelling them outside. This not only improves the overall air quality but also helps to keep the bathroom smelling fresh and free from the musty odor that often accompanies excessive moisture.
Improving Air Quality
A well-ventilated bathroom contributes to better air quality throughout your home. Without proper ventilation, harmful pollutants, bacteria, and allergens can accumulate in the bathroom, compromising the air you breathe. The presence of these pollutants can aggravate respiratory conditions or allergies. By installing a bathroom vent fan, you can expel stale air, pollutants, and allergens, replacing them with fresh, clean air from outside. This helps to create a healthier indoor environment, reducing the risk of respiratory illnesses and promoting overall well-being.
In conclusion, proper ventilation is vital for a bathroom to maintain a clean and healthy living environment. By installing a bathroom vent fan, you can prevent mold and mildew growth, remove unpleasant odors and excess moisture, and improve the overall air quality. Investing in a reliable and efficient vent fan ensures that your bathroom remains a comfortable and inviting space while promoting the well-being of your entire household.
Gathering The Necessary Tools And Materials
In order to successfully install a bathroom vent fan, you will need to gather the necessary tools and materials beforehand. This will ensure a smooth and efficient installation process. Here are the key items you will need:
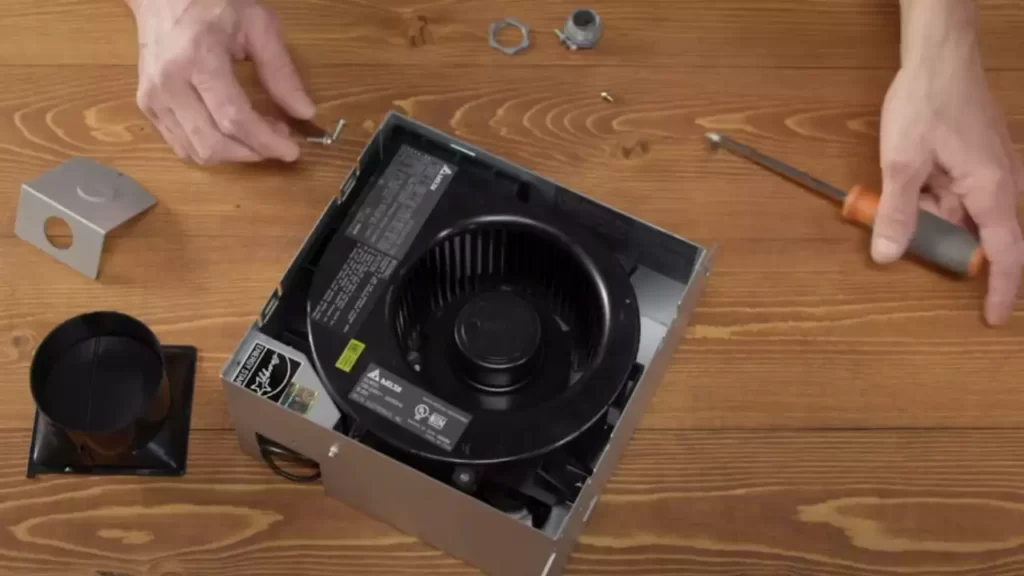
Vent Fan Unit
The vent fan unit is the heart of the ventilation system. It is responsible for extracting damp air and odors from your bathroom. Before purchasing a vent fan unit, consider the size of your bathroom and the recommended air-exchange rate per hour. Measure the dimensions of the fan and ensure it fits in your desired location. Look for a vent fan unit that offers sufficient airflow capacity and noise control.
Ductwork and Connectors
Ductwork and connectors are essential components that ensure the airflow from the vent fan reaches the exterior of your home. You will need flexible or rigid ductwork, depending on your preferences and the constraints of your bathroom’s layout. Measure the length of the required ductwork, allowing for any bends or turns needed to navigate around obstructions. Additionally, gather the necessary connectors, such as elbows and couplers, to ensure a proper and secure connection between the vent fan unit and ductwork.
Venting Kit
A venting kit is a comprehensive package that includes all the essential accessories needed for a successful bathroom vent fan installation. It typically includes a wall or roof cap, backdraft damper, and mounting hardware. Ensure the venting kit is compatible with your chosen vent fan unit and suitable for the specific installation location. The kit should also include clear instructions to guide you through the installation process.
Screwdrivers and Drill
To secure the vent fan unit and the ductwork, you will need screwdrivers and a drill. Screwdrivers, both flathead and Phillips, are necessary for tightening screws and fasteners. Consider a cordless drill for ease of use and maneuverability. Make sure you have the appropriate drill bits for the specific materials you will encounter during the installation process, such as wood or drywall.
Measuring Tape
Accurate measurements are crucial for a precise and seamless installation. A measuring tape will allow you to determine the required dimensions for the vent fan unit, ductwork, and any additional components. Measure twice to ensure accuracy and prevent any unnecessary rework. Having a measuring tape on hand will save you time and frustration during the installation process.
Summary
Gathering the necessary tools and materials is a crucial first step in installing a bathroom vent fan. Ensure you have the vent fan unit, ductwork and connectors, venting kit, screwdrivers and drill, and a measuring tape. Having these items within reach will streamline the installation process and help you achieve a well-ventilated and comfortable bathroom space.
Determining The Installation Location
Installing a bathroom vent fan is essential in maintaining proper ventilation and preventing excess moisture build-up. However, determining the right location for installation plays a crucial role in its overall effectiveness. In this section, we will explore two key factors that need to be considered when choosing the perfect spot for your bathroom vent fan: the position of existing ductwork and the identification of the optimal area for ventilation.
Considering the Position of Existing Ductwork
If your bathroom already has a ductwork system in place, it is important to take its location into account when determining where to install your vent fan. By aligning your new fan with the existing ductwork, you can ensure a smoother installation process and avoid any additional modifications that might be required.
Identifying the Optimal Area for Ventilation
When it comes to ventilation, choosing the right location for your bathroom vent fan is essential. You will want to optimize airflow and ventilation efficiency by finding a spot that allows for the most effective extraction of moisture and odors. Here are a few guidelines to help you identify the optimal area:
- Position the vent fan near the source of moisture: Ideally, the fan should be installed close to the shower or bath area where moisture levels are the highest. This will ensure that the fan effectively removes excess moisture before it spreads to other areas of your bathroom.
- Consider the proximity to exterior walls: Installing the fan near an exterior wall makes it easier to create a venting path to the outside. This not only improves the efficiency of the fan but also helps in maintaining a healthier indoor environment.
- Avoid installing the fan near obstacles: Make sure to place the fan away from any obstructions such as light fixtures, electrical wirings, or plumbing pipes. This will allow for proper airflow and minimize the risk of any damage or interference.
By carefully considering the existing ductwork and identifying the optimal area for ventilation, you can ensure that your bathroom vent fan is installed in the most effective location. This will not only enhance the performance of the fan but also contribute to a healthier and more comfortable bathroom environment.
Attaching The Vent Fan To The Ceiling
Marking the Position for Mounting
Before you can attach the vent fan to the ceiling, you need to mark the position for mounting. To do this, locate the ideal spot where you want your vent fan to be placed. It’s important to choose a location that allows for proper ventilation and air circulation in the bathroom.
Using a measuring tape, ensure that there is enough space for the vent fan, taking into consideration any obstructions such as joists or electrical wiring. Once you have determined the position, mark it using a pencil or a marker.
Remember: It’s essential to consult the manufacturer’s instructions for the specific measurements and guidelines for your particular vent fan model.
Cutting the Ceiling Opening
Once you have marked the position for mounting, it’s time to cut the ceiling opening. Begin by using a stud finder to locate any joists in the ceiling. This will help you avoid cutting into a structural component.
Using a keyhole saw or a drywall saw, carefully cut along the marked lines. Take your time and use steady, controlled movements to ensure a clean cut. Make sure to wear safety goggles and a dust mask to protect yourself from any debris.
Tip: If your vent fan comes with a template, you can use it as a guide to ensure a precise cut.
Securing the Vent Fan Unit in Place
With the ceiling opening cut, it’s time to secure the vent fan unit in place. Start by positioning the unit in the opening, ensuring that it fits snugly. You may need to adjust the housing or brackets as necessary.
Note: Some vent fan units come with mounting brackets or clips that need to be installed before securing the unit.
Once the vent fan unit is properly positioned, use screws or nails to secure it to the ceiling. Make sure to follow the manufacturer’s instructions for the correct type and size of fasteners to use. It’s important to secure the unit firmly to prevent any vibrations or movement that could affect its performance.
Tip: If you’re unsure about the installation process or encounter any difficulties, it’s best to consult a professional electrician or contractor for assistance.
By following these steps, you can successfully attach your bathroom vent fan to the ceiling. Proper installation ensures optimal ventilation and helps maintain a clean and fresh bathroom environment.
Connecting The Ductwork
When it comes to installing a bathroom vent fan, connecting the ductwork is a crucial step in ensuring proper ventilation and removing excess moisture from your bathroom. In this section, we will guide you through the process of measuring, cutting, attaching, and securing the ductwork for your bathroom vent fan.
Measuring and Cutting the Ductwork
The first step in connecting the ductwork is to accurately measure and cut the necessary pieces to fit your bathroom vent fan. Follow these steps:
- Take measurements: Measure the distance between the vent fan and the exterior vent. This will determine the length of the ductwork required.
- Choose the right duct material: Decide on the type of duct material suitable for your bathroom. Common options include flexible aluminum ducts and rigid metal ducts.
- Cut the ductwork: Using a sharp pair of metal shears, cut the ductwork according to the measurements you obtained. Ensure the cuts are clean and straight for proper airflow.
Attaching the Ductwork to the Vent Fan
Once you have the appropriately sized ductwork, it’s time to attach it to the vent fan. Follow these steps:
- Locate the duct connection point: Identify the specific location on the vent fan where the ductwork will be attached. Typically, this is located on the back or side of the fan housing.
- Secure the duct clamp: Slide a duct clamp over the end of the ductwork and position it near the opening of the vent fan.
- Insert the ductwork: Carefully insert the end of the ductwork into the designated connection point on the vent fan. Make sure it is fully seated and aligned properly.
- Tighten the clamp: Using a screwdriver, tighten the clamp securely around the ductwork to create a tight seal. This will prevent any air leakage.
Securing the Ductwork to the Exterior Vent
After attaching the ductwork to the vent fan, the next step is to secure it to the exterior vent. Follow these steps:
- Locate the exterior vent opening: Identify the exterior opening where the ductwork will be connected. This is usually located on an exterior wall or the roof of your home.
- Attach the duct to the exterior vent: Position the end of the ductwork over the exterior vent opening and ensure a proper fit.
- Secure with clamps or screws: Depending on the type of duct and exterior vent, use appropriate clamps or screws to secure the ductwork to the exterior vent. This will prevent any movement or dislodging.
- Inspect for proper connection: Once secured, visually inspect the connection to ensure a tight and secure fit. No gaps or loose connections should be present.
Wiring The Vent Fan
Installing a bathroom vent fan is a crucial step to ensure proper air circulation and eliminate excess moisture. When it comes to the electrical aspect of the installation process, it’s important to follow the correct steps to guarantee safety and functionality. This section will guide you through the process of wiring your vent fan, covering three key steps.
Ensuring Power is Turned Off
Before you begin wiring the vent fan, it’s essential to ensure the power is turned off to avoid any electrical accidents. Safety should always be your priority when working with electrical components. To turn off the power, follow these steps:
- Locate your home’s electrical panel.
- Identify the circuit breaker that controls the bathroom’s power supply. It may be labeled accordingly, but if not, you can test by switching off one breaker at a time until the bathroom lights and outlets are no longer working.
- Double-check the power is completely off by using a non-contact voltage tester. This device will alert you if there is any live current present.
Ensuring the power is turned off will provide a safe environment for you to proceed with the wiring process.
Connecting the Electrical Wires
Once the power is safely turned off, you can move on to connecting the electrical wires of your bathroom vent fan. Follow these steps:
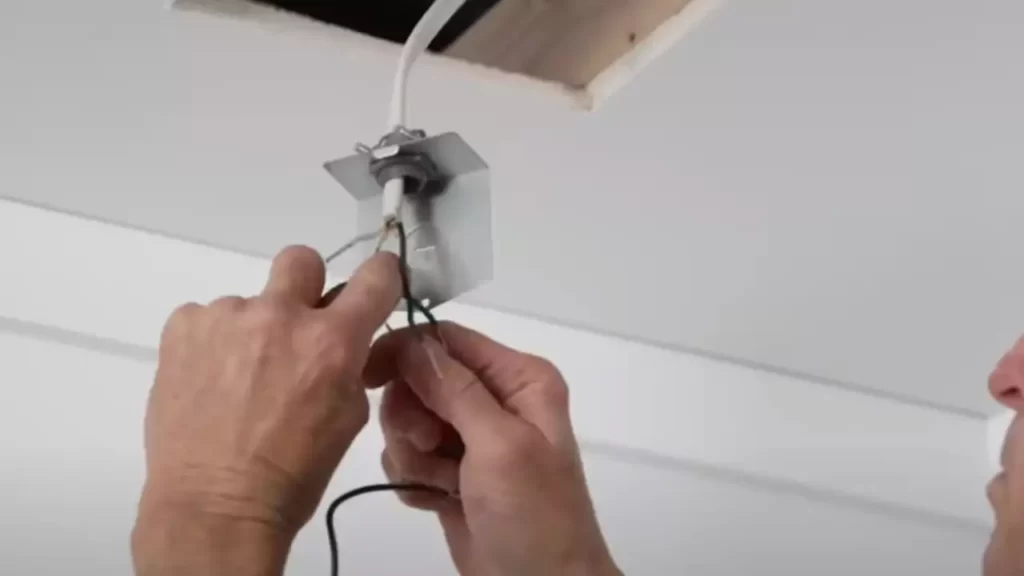
- Identify the wiring junction box in the ceiling where the vent fan will be installed.
- Remove the cover plate of the junction box.
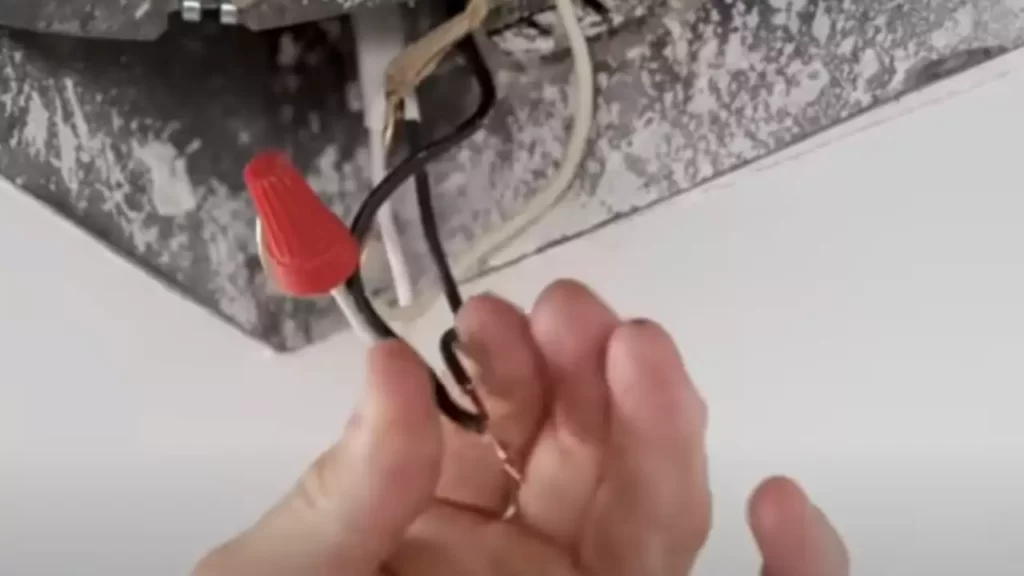
- Connect the white wire from the fan to the white wire in the ceiling using wire connectors.
- Connect the black wire from the fan to the black wire in the ceiling.
- If your fan has a separate green or bare copper ground wire, connect it to the grounding wire in the ceiling.
- Tighten the wire connectors securely to ensure a strong connection.
Connecting the electrical wires properly will enable your vent fan to function effectively and safely.
Securing the Connections and Covering with Electrical Tape
After connecting the wires, it’s crucial to secure the connections and protect them with electrical tape. Follow these steps:
- Twist the wire connectors clockwise to tighten them further, ensuring the wires are secure.
- Wrap electrical tape around each wire connector, covering the exposed wires.
- Ensure the tape is tightly wrapped and covers the entire wire connector to guard against any potential electrical hazards.
Securing the connections and covering them with electrical tape adds an extra layer of protection, minimizing the risk of accidents and ensuring the longevity of your bathroom vent fan.
By following these three essential steps – Ensuring Power is Turned Off, Connecting the Electrical Wires, and Securing the Connections and Covering with Electrical Tape – you will successfully wire your bathroom vent fan while prioritizing safety and functionality.
Testing And Adjusting The Vent Fan
After successfully installing your bathroom vent fan, it’s important to test and adjust it to ensure optimal functionality. This step is crucial to ensure that the fan is effectively removing moisture and odors from your bathroom. In this section, we will cover the steps to turn on the power and check for proper operation of the fan, as well as how to adjust the fan speed and direction if it is adjustable.
Turning on the Power and Checking for Proper Operation
Before testing the fan, make sure it is properly connected to the power supply. Locate the circuit breaker or fuse associated with the fan and ensure it is switched on. Once the power is on, follow these steps to check for proper operation:
- Remove any obstructions or objects blocking the vent fan.
- Turn on the fan switch or pull the chain to activate the fan.
- Stand near the vent opening and listen for the sound of the fan operating.
- Feel for airflow near the vent opening to ensure the fan is properly sucking out the air from the bathroom.
- If you have a vented fan, go outside to check if air is properly exhausted through the vent hood.
If you notice any unusual noises or if there is no airflow, there may be an issue with the fan’s installation or wiring. In such cases, it’s best to consult a professional electrician or a licensed installer.
Adjusting the Fan Speed and Direction if Adjustable
Some modern bathroom vent fans come with adjustable features such as fan speed and direction. Here’s how you can adjust these settings:
| Step | Instructions |
|---|---|
| 1 | Locate the fan control switch, which is usually located near or on the fan housing. |
| 2 | If the fan speed is adjustable, use the switch to increase or decrease the fan speed according to your preference. Higher fan speeds effectively remove moisture and odors more quickly. |
| 3 | If the fan direction is adjustable, use the switch to change the direction of airflow. Adjusting the direction can help optimize the fan’s performance based on the specific layout of your bathroom. |
By adjusting the fan speed and direction, you can customize the operation of your bathroom vent fan to suit your needs and ensure efficient ventilation.
Remember, regular maintenance and cleaning of your bathroom vent fan are essential to keep it functioning properly. Follow the manufacturer’s instructions for maintenance and replace any worn-out parts as needed.
Now that you know how to test and adjust your bathroom vent fan, you can enjoy a well-ventilated and fresh bathroom environment, free from excess moisture and unpleasant odors.
Regular Cleaning And Maintenance
Regular cleaning and maintenance are crucial for keeping your bathroom vent fan functioning efficiently. By following a few simple steps, you can ensure that your fan lasts longer and provides optimum performance. This section will guide you through the process of removing dust and debris, lubricating moving parts if necessary, and checking for loose connections and secure mounting.
Removing Dust and Debris from the Grilles and Fan Blades
Step 1: Begin by turning off the bathroom vent fan and unplugging it from the power source to ensure safety. You don’t want any accidents while cleaning the fan.
Step 2: Carefully remove the fan cover or grille by unscrewing the fasteners. Place the screws in a secure place for reinstallation later.
Step 3: Once the cover or grille is removed, wipe away any visible dust or debris using a damp cloth or a soft brush. Ensure that you clean both the front and back of the grilles thoroughly.
Step 4: Next, inspect the fan blades for any built-up dust. Gently wipe the blades using a soft cloth or brush to remove any accumulated dirt. Make sure you reach all the blades, including the edges.
Step 5: After cleaning the grilles and fan blades, allow them to dry completely before reassembling. Remember, moisture can damage the fan motor, so ensure all parts are dry before proceeding.
Lubricating Moving Parts if Necessary
Step 1: Check the manufacturer’s instructions to determine if your bathroom vent fan requires lubrication. Some models may have sealed bearings or self-lubricating parts and don’t need additional lubrication.
Step 2: For fans that require lubrication, locate the lubrication points indicated in the instructions or manual. Once located, apply a few drops of lubricant to each point. Be sure to use a lubricant recommended by the manufacturer.
Step 3: After lubricating the necessary parts, run the fan briefly to ensure the lubricant is distributed evenly. This will help prevent the fan from running into any issues due to lack of lubrication.
Checking for Loose Connections and Secure Mounting
Step 1: With the fan turned off and unplugged, inspect the wiring connections to ensure they are securely connected. Check for any loose wires or damaged insulation that may need repair.
Step 2: Examine the mounting of the fan to ensure it is securely fastened to the ceiling or wall. Tighten any loose screws or mounting brackets that may cause the fan to vibrate or make unnecessary noise.
Step 3: Once you have checked the wiring connections and mounting, reconnect the power and turn on the fan. Ensure it operates smoothly without any unusual sounds or vibrations. If you detect any issues, consult a professional or the manufacturer for further assistance.
By regularly cleaning and maintaining your bathroom vent fan, you can prolong its lifespan and ensure optimal performance. Follow these simple steps to remove dust and debris, lubricate moving parts, and check for loose connections and secure mounting. With proper care, your bathroom vent fan will continue to keep your bathroom fresh and odor-free for years to come.
Common Issues And Troubleshooting Tips
Installing a bathroom vent fan can greatly improve the air quality and reduce moisture in your bathroom. However, like any electrical appliance, bathroom vent fans can encounter common issues. In this section, we will discuss the most common issues that you may encounter while installing a bathroom vent fan and provide troubleshooting tips to help you resolve them.
Fan Not Working or Turning On
If your bathroom vent fan is not working or turning on, it can be frustrating and lead to inadequate ventilation. Here are a few troubleshooting tips to help you resolve this issue:
- Check the power supply – Ensure that the fan is properly connected to a power source. Check the circuit breaker or fuse to ensure there is no electrical fault.
- Inspect the wiring connections – Examine the fan’s wiring connections to verify if they are securely connected. Loose or damaged wiring may prevent the fan from turning on.
- Test the fan switch – If your fan has a switch, check if it is working correctly. This can be done by testing the switch with a multimeter or by replacing the switch altogether.
- Examine the fan motor – The fan motor may be faulty or damaged. Check if the motor is making any noise or has any visible signs of damage. If so, it may need to be replaced.
Excessive Noise or Vibration
If you notice excessive noise or vibration coming from your bathroom vent fan, it can be an annoyance and disrupt the peaceful ambiance of your bathroom. Here are a few troubleshooting tips to help you address this issue:
- Check for loose screws or mounting – Ensure that all screws and mountings are tight and secure. Loose components can cause vibration and noise.
- Inspect the fan blades – Dust or debris may have accumulated on the fan blades, causing imbalance and noise. Clean the blades thoroughly and ensure they are free from any obstructions.
- Consider a fan damper – Installing a fan damper can help reduce noise and prevent backdraft. This is especially useful if your vent fan is connected to a long duct.
Inadequate Ventilation or Airflow
If your bathroom vent fan is not providing adequate ventilation or airflow, it may not be effectively removing moisture and odors from your bathroom. Here are a few troubleshooting tips to help you improve ventilation:
- Check the fan size – Ensure that you have chosen a fan with an appropriate size for your bathroom. A fan that is too small may not have enough power to adequately ventilate the space.
- Inspect the ductwork – Check for any obstructions or bends in the ductwork that may be restricting airflow. Clean or repair the ductwork if necessary.
- Upgrade the fan – If your fan is old or outdated, it may not be providing sufficient airflow. Consider upgrading to a more powerful fan that can effectively ventilate your bathroom.
By following these troubleshooting tips, you can overcome common issues that may arise when installing a bathroom vent fan. Remember, it’s essential to ensure proper ventilation in your bathroom to maintain a clean and healthy environment.
Consulting A Professional For Complex Installations Or Repairs
When it comes to the installation or repair of a bathroom vent fan, there are some cases where consulting a professional is the best course of action. While simple installations or minor repairs can often be done by homeowners, complex installations or major repairs may require the expertise of a ventilation specialist. In this article, we will discuss when it is appropriate to seek professional help and provide tips on finding a qualified specialist for your bathroom vent fan needs.
When to Seek Professional Help
While DIY projects can be rewarding and cost-effective, there are certain situations where it is best to leave the task to a professional. Here are a few instances when you should consider consulting a ventilation specialist:
- If you have limited experience or knowledge about electrical wiring and installation.
- If the installation requires extensive modifications to your bathroom ceiling or walls.
- If your bathroom is located on an upper floor and accessing the vent ductwork is difficult.
- If you are replacing an outdated vent fan with a newer model that requires different wiring or ductwork.
In these situations, hiring a professional can ensure that the installation or repair is done correctly and safely. It can also save you time and prevent costly mistakes that may occur from attempting a complex project on your own.
Finding a Qualified Ventilation Specialist
When it comes to finding a qualified ventilation specialist, there are a few key factors to consider:
- Look for professionals with relevant experience and certifications in ventilation installation and repair.
- Ask for recommendations from friends, family, or trusted contractors who have had similar work done.
- Research and compare multiple specialists to get a sense of their expertise and pricing.
- Check online reviews and ratings to gauge the quality of their previous work.
- Request a free consultation or quote to discuss the scope of the project and ensure that they understand your specific requirements.
Taking the time to find a qualified ventilation specialist can give you peace of mind knowing that your bathroom vent fan installation or repair is being handled by a professional with the necessary skills and knowledge.
Frequently Asked Questions
Do Bathroom Exhaust Fans Need To Be Vented Outside?
Yes, bathroom exhaust fans need to be vented outside to effectively remove moisture, odors, and pollutants from the bathroom space. Venting outside helps prevent condensation and mold growth, promoting a healthier and more comfortable environment.
Can I Install A Bathroom Exhaust Fan Myself?
Yes, you can install a bathroom exhaust fan by yourself. Just make sure to follow the instructions carefully and use proper tools. It’s a simple process that can help in proper ventilation and reducing moisture in your bathroom.
How Are Bathroom Exhaust Fans Installed?
Bathroom exhaust fans are installed by following these steps: 1. Choose the right location on the ceiling or wall. 2. Turn off the power and cut a hole using a template. 3. Connect the wiring and secure the fan housing.
4. Attach the ductwork and vent cap. 5. Finally, test the fan to make sure it operates correctly.
Should Bathroom Exhaust Fan Go Through Wall Or Roof?
The bathroom exhaust fan should ideally be vented through a wall to ensure efficient ventilation and prevent roof issues. Venting through the wall is easier to install and maintain, while avoiding potential leaks and damage to the roof.
Conclusion
Installing a bathroom vent fan is an essential step in maintaining proper air circulation and preventing moisture buildup. With the right tools and careful placement, you can enjoy a fresh and humidity-free bathroom. From choosing the right fan to installing it properly, this guide has provided you with all the necessary steps to ensure a successful installation.
So, go ahead and take control of your bathroom’s air quality to enhance your comfort and protect your home from potential damage.