To install barrel hinges, first mark the desired location on the door and frame, then drill pilot holes and screw the hinges into place. Barrel hinges are a popular choice when it comes to installing doors or cabinets as they provide smooth and seamless movement.
Whether you are a DIY enthusiast or a professional, learning how to install barrel hinges can come in handy for various projects. In this guide, we will walk you through the step-by-step process of installing barrel hinges, ensuring a secure and functional installation.
By following these instructions, you will be able to effortlessly add or replace barrel hinges on your doors or cabinets, enhancing both the aesthetics and functionality of your spaces. So let’s dive in and discover how to install barrel hinges accurately and efficiently.
Understanding Barrel Hinges
Welcome to our comprehensive guide on barrel hinges! In this section, we will provide you with a clear understanding of barrel hinges and how they work. As one of the most popular types of hinges on the market, barrel hinges are known for their durability and versatility. Whether you are a DIY enthusiast or a professional carpenter, knowing how to install barrel hinges is an essential skill that can greatly enhance the functionality and aesthetic appeal of your doors and cabinets. So, let’s dive right into it!
What are barrel hinges and how do they work?
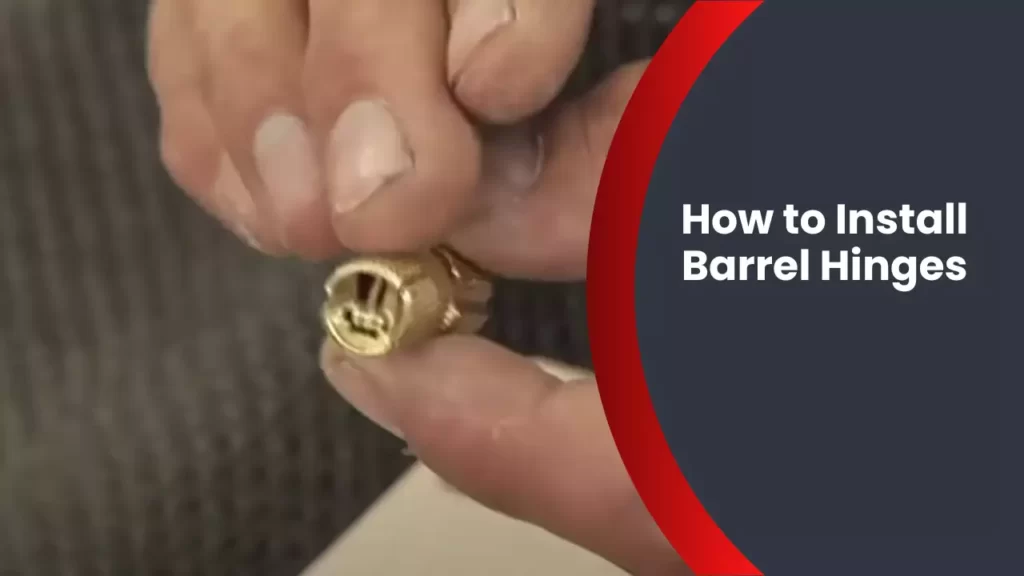
Barrel hinges, also known as continuous hinges or piano hinges, are long, slender hinges that run the entire length of a door or cabinet. They consist of two cylindrical barrels, one barrel is fixed to the door frame, while the other is attached to the door or cabinet itself. When installed, barrel hinges provide a smooth and silent pivoting motion, allowing the door or cabinet to swing effortlessly.
What makes barrel hinges unique is their uninterrupted design. Unlike traditional hinges, which are made up of individual knuckles, barrel hinges distribute the weight of the door evenly along the entire length of the hinge, ensuring maximum stability and strength.
Barrel hinges work by inserting a metal rod through the length of the barrels, effectively joining them together. This rod acts as the fulcrum point for the door’s movement, allowing it to swing open and closed. When properly installed, barrel hinges offer a seamless appearance, as they are nearly invisible when the door or cabinet is closed.
Different types of barrel hinges available in the market
Now that we have a basic understanding of how barrel hinges work, let’s explore the different types of barrel hinges available in the market. This knowledge will help you choose the right type of hinge for your specific needs and preferences.
Inset Barrel Hinges:
Inset barrel hinges are the most common type used in cabinetry. These hinges are designed to be recessed into the frame and the door, creating a clean and concealed hinge installation. Inset barrel hinges offer a wide range of motion and are ideal for cabinets, as they allow the door to swing open a full 180 degrees.
Overlay Barrel Hinges:
Overlay barrel hinges are commonly used in flush-mounted doors. These hinges are visible when the door is closed, as they attach to the face of the door and the door frame. Overlay barrel hinges are available in various sizes and offer different degrees of overlay, allowing you to achieve the desired look and functionality for your doors.
Half Overlay Barrel Hinges:
Half overlay barrel hinges are similar to overlay hinges, but they are designed specifically for doors that partially overlay the frame. These hinges are commonly used when you want the door to cover only a portion of the frame, leaving a small gap between the door and the cabinet. Half overlay barrel hinges offer a sleek and modern look, making them popular for contemporary-style cabinets.
Full Overlay Barrel Hinges:
Full overlay barrel hinges are another variation of overlay hinges, but they are designed for doors that completely cover the frame, leaving no visible gaps. These hinges are ideal for achieving a seamless and streamlined appearance. They are commonly used in modern and European-style cabinets.
Understanding the different types of barrel hinges available in the market will help you make an informed decision when it comes to selecting the right hinge for your project. Each type has its own pros and cons, so consider your specific needs and the aesthetic you want to achieve.
Now that you have a solid understanding of what barrel hinges are and how they work, it’s time to move on to the next step: the actual installation process. Stay tuned for our upcoming guide on how to install barrel hinges like a pro!
Tools And Materials Needed
Installing barrel hinges is a straightforward process, but it requires the right tools and materials to ensure a successful installation. In this section, we will explore the essential tools and types of materials you will need to complete the job effectively. Let’s dive in!
List of tools required for installing barrel hinges
Before you begin the installation process, make sure you have the following tools at hand:
- Screwdriver – A screwdriver is an essential tool that will allow you to fasten the hinge screws securely. Depending on the size of the hinge screws, you may need a Phillips or flathead screwdriver.
- Drill – If you are installing barrel hinges on a wooden door or frame, a drill will come in handy for creating pilot holes to guide the screws and prevent any splitting.
- Measuring Tape – Accurate measurements are crucial for properly aligning the hinges. A measuring tape will help you ensure precise spacing and positioning.
- Pencil – A pencil will allow you to mark the positions for the hinge screw holes, ensuring an accurate installation.
- Chisel – In situations where you need to install a recessed hinge, a chisel will be necessary to create a recessed pocket for the hinge plates.
- Hammer – For any minor adjustments or tapping the hinges into place, a hammer will be useful.
Types of materials required for a successful installation
Aside from the tools mentioned above, you will also need the following materials to ensure a successful installation of barrel hinges:
- Barrel Hinges – The primary material you will need are the barrel hinges themselves. Choose hinges that are suitable for your door or project, considering factors such as weight capacity and the desired aesthetic.
- Screws – Depending on the thickness of your door or frame, you will need screws that are long enough to securely fasten the hinges in place.
- Wood Filler – In case you encounter any gaps or holes during the installation process, having wood filler on hand will allow you to fill them up and ensure a smooth finish.
- Sanding Block or Sandpaper – To refine the edges or remove any rough spots after installation, a sanding block or sandpaper will come in handy.
- Finishing Materials – If you are looking to give your project a polished look, consider having paint, stain, or another type of finish on hand to complete the installation.
With the listed tools and materials readily available, you’re well-equipped to tackle the installation of barrel hinges efficiently. Let’s move on to the next section and discuss the step-by-step process of installing barrel hinges on your desired project.

Step 1: Preparing The Door And Frame
Before you can install barrel hinges on your door, it’s important to properly prepare both the door and the frame. This step ensures that the hinges are installed correctly and securely, providing smooth operation and long-lasting performance.
Inspecting the door and frame for any damages or repairs needed
Before installing barrel hinges, take a close look at both the door and the frame to identify any damages or repairs that may be required. Look out for cracks, dents, warping, or any other structural issues that could affect the installation or function of the hinges.
If you notice any damages, it’s essential to address them before proceeding with the installation. Repairing the door or frame ensures optimal alignment and stability, allowing the barrel hinges to function properly.
Removing the existing hinges (if any)
If your door already has hinges installed, it’s necessary to remove them before proceeding with the installation of barrel hinges. This step ensures a clean slate for a successful installation.
To remove the existing hinges, follow these simple steps:
- Begin by opening the door to a 90-degree angle to provide easy access to the hinges.
- Using a screwdriver or a power drill, carefully unscrew and remove the screws attaching the existing hinges to the door and frame.
- Once all screws have been removed, gently lift the door off the hinges.
- Inspect the removed hinges for any damages or signs of wear. If necessary, replace them with new barrel hinges before continuing with the installation.
By removing the existing hinges, you ensure a clean and secure surface for the installation of the new barrel hinges.
Now that you have inspected the door and frame for any damages or repairs needed and removed any existing hinges, your door is ready for the installation of barrel hinges. In the next step, we will guide you through the process of installing the barrel hinges to ensure a smooth and secure installation.
Step 2: Choosing The Right Barrel Hinges
Installing barrel hinges on your door can greatly enhance its functionality and aesthetics. However, selecting the right barrel hinges for your specific needs is crucial to ensure a proper fit and long-lasting performance. In this step, we will explore the key factors to consider when choosing barrel hinges and provide a sizing and compatibility guide for a seamless installation.
Factors to Consider When Selecting Barrel Hinges for Your Door
Before purchasing barrel hinges, it’s essential to take into account several factors to ensure that you make the right choice. Considering these factors will help you select hinges that seamlessly integrate with your door, providing smooth operation and durability. Here are the key factors to consider:
- Door Material: The material of the door plays a vital role in determining the type of barrel hinges you should choose. Wooden doors, metal doors, or composite materials all have different stress points and weight distributions. Therefore, it’s important to select hinges specifically designed for the material of your door to ensure optimal performance.
- Door Size and Weight: The size and weight of your door directly impact the type and size of barrel hinges required. Larger and heavier doors will require sturdier hinges with higher load-bearing capacities. Consider the dimensions and weight of your door to select hinges that can adequately support the door without placing excessive strain on them.
- Opening Direction: The direction in which your door opens is another essential consideration when choosing barrel hinges. Whether your door swings clockwise or counterclockwise, you need hinges that allow for smooth movement in the desired direction. This ensures that the door opens and closes without any hindrance, providing convenience and ease of use.
- Finish and Style: Along with functionality, the aesthetic appeal of your door hinges shouldn’t be overlooked. Barrel hinges are available in various finishes and styles, allowing you to match them seamlessly with your door and overall décor. Consider the design elements of the door and the desired visual impact to select hinges that blend harmoniously with the aesthetics.
Sizing and Compatibility Guide for Proper Fitting
Proper fitting is crucial to ensure smooth operation and long-term functionality of your barrel hinges. Here’s a sizing and compatibility guide to help you select the right hinges for your door:
| Door Thickness | Hinge Size | Minimum Number of Hinges |
|---|---|---|
| Up to 1.5 inches | 2 inches | 2 hinges |
| 1.5 to 2 inches | 2.5 inches | 2 hinges |
| Above 2 inches | 3 inches or more | 3 hinges |
Remember, these are general guidelines, and it’s crucial to consult the manufacturer’s recommendations for specific hinge sizes and quantities based on your door’s dimensions and weight.
By considering factors such as door material, size, weight, opening direction, and aesthetic requirements, and following a sizing and compatibility guide, you can confidently choose the right barrel hinges for your door. This will ensure a proper fit, smooth operation, and enhance the overall functionality and appeal of your door.

Step 3: Marking The Placement
Determining the Correct Placement of Barrel Hinges on the Door and Frame
Once you have gathered all the necessary tools and materials for installing barrel hinges, it’s time to determine the correct placement of these hinges on both the door and frame. This step is crucial to ensure the proper functioning of the hinges and the overall security of the door.
Measuring and Marking the Precise Locations
To begin, carefully measure the door and frame to determine the precise locations where the barrel hinges will be installed. Using a tape measure, measure the height and width of the door, as well as the height and width of the door frame. This will allow you to determine the exact placement of the hinges.
Next, mark the locations on both the door and frame where the barrel hinges will be installed. It is important to be precise in your measurements and markings to ensure that the hinges will be properly aligned.
You can use a pencil or a marker to make the markings. In order to maintain accuracy and consistency, it can be helpful to use a square to ensure that the marks are perfectly aligned with the edges of the door and frame.
Additionally, if you are installing multiple barrel hinges on a single door, it is important to measure and mark the locations for each hinge individually. This will help maintain symmetry and distribute the weight of the door evenly.
Remember to measure and mark the locations on both the door and frame. This will ensure that the barrel hinges align correctly and that the door will function properly once installed.
Step 4: Drilling Holes
When it comes to installing barrel hinges, Step 4 is all about drilling the holes. This is a crucial step in ensuring that your hinges are properly installed and your door functions smoothly. In this step, we will discuss the importance of using the appropriate drill bit size for the hinge holes and how to drill the holes on both the door and frame following the marked locations. Let’s get started with the detailed instructions.
Using the appropriate drill bit size for the hinge holes
Choosing the right size of the drill bit is essential to ensure that the hinge holes are neither too loose nor too tight. For barrel hinges, it is recommended to use a drill bit that matches the diameter of the hinges. This will ensure a secure fit for the hinges and prevent any unnecessary movement or misalignment.
If you are not sure about the exact size of the drill bit you should use, you can either refer to the manufacturer’s instructions or measure the diameter of the hinges using a caliper or ruler. Once you have determined the correct size, make sure to select a drill bit of the same size or slightly smaller to avoid any complications during the drilling process.
Drill holes on both the door and frame following the marked locations
Now that you have the right drill bit size, it’s time to drill the holes on both the door and frame. Before proceeding, double-check the marked locations to ensure accurate placement of the hinges. This will prevent any issues with the door’s alignment and ensure a smooth operation.
Start by securing the door and frame in a stable position. You can use clamps or ask someone to hold them securely while you drill. Position the drill bit at a right angle to the surface and slowly start drilling, applying consistent pressure. Allow the drill bit to penetrate the material gradually, controlling the speed and making sure not to rush or force it.
Remember to keep the drill bit perpendicular to the surface to ensure straight and properly aligned holes. It is highly recommended to use a drill guide or template if you are not confident in drilling straight holes freehand.
After drilling the first set of holes, move on to the remaining hinge locations and repeat the process. Once all the holes are drilled, remove any excess dust or debris using a brush or compressed air. This will ensure a clean and precise fit for the barrel hinges.
Follow the same drilling process for both the door and frame, making sure to maintain consistent drilling angles and depths. Once the holes are drilled, you are now ready to move on to the next step of installing the barrel hinges.
Step 5: Installing The Barrel Hinges
Once you have prepared the door and frame for installation, it’s time to attach the barrel hinges. This step is crucial to ensure the proper functioning and stability of your door. In this section, we will guide you through the process of attaching the hinges to the door and frame using screws, and how to ensure they are securely fastened.
Attaching the barrel hinges to the door and frame using screws
The first step in attaching the barrel hinges is to position them correctly on both the door and frame.
Here’s a step-by-step guide:
- Place the first hinge on the open side of the door, making sure it is aligned with the edge.
- Using a pencil or marker, mark the screw holes on the door and frame through the hinge’s pre-drilled holes.
- Repeat the process for the remaining hinges, spacing them evenly along the edge of the door.
With the screw holes marked, it’s time to secure the hinges using screws.
Follow these steps:
- Using a drill or screwdriver, insert the screws into the pre-drilled holes on the hinge and tighten them gently. Avoid overtightening, as it can strip the holes or damage the hinge.
- Repeat the process for each hinge, ensuring they are all firmly attached to both the door and the frame.
Ensuring the hinges are securely fastened
Once the hinges are attached, it’s essential to ensure that they are securely fastened to prevent any issues in the future.
Here are a few tips:
- Inspect each screw to make sure it is tightly secured. If any screws appear loose, use your screwdriver to tighten them.
- Test the door by gently swinging it open and closed. Pay attention to any squeaking or misalignment, as it may indicate loose hinges.
- If necessary, tighten the screws further, but be careful not to overtighten as it can affect the smooth functioning of the door.
By following these steps and ensuring that the hinges are securely fastened, you can have confidence in the stability and durability of your newly installed barrel hinges.
Step 6: Checking Alignment And Smooth Functioning
Step 6: Checking Alignment and Smooth Functioning
Once you have successfully installed the barrel hinges on your door, it’s important to verify that the door opens and closes smoothly. This step ensures that the hinges are aligned properly and that there are no obstructions or issues with the door’s functioning. If the door doesn’t open and close smoothly, it may cause unnecessary strain on the hinges or result in the door not closing properly.
Verifying that the door opens and closes smoothly
To ensure that the door opens and closes smoothly, follow these steps:
- First, fully open the door and observe if it moves freely without any resistance. Use your hands to gently push and pull the door to check for any stiffness or friction.
- Next, slowly close the door and pay attention to how smoothly it moves. Make sure there are no abrupt stops or jerky movements.
- Listen for any unusual sounds like scraping, grinding, or squeaking, as these can indicate misalignment or other issues with the hinges.
- If the door opens and closes smoothly with no issues, move on to the next step. Otherwise, continue to the next heading for making adjustments.
Making adjustments if necessary to ensure proper alignment
If you encounter any problems with the door’s alignment or smooth functioning, don’t worry. You can make adjustments to ensure that the barrel hinges work properly. Here’s what you need to do:
- Start by checking if any screws on the hinges are loose. Tighten them using a screwdriver, but be careful not to overtighten as it may cause damage.
- If the door is sticking or rubbing against the frame, try adjusting the hinges vertically or horizontally. Loosen the screws slightly, reposition the hinges, and then tighten them again.
- Check the levelness of the door by using a spirit level. If it’s not level, adjust the hinges accordingly until the door is properly aligned.
- For heavy or oversized doors, you may need to add an additional hinge to distribute the weight more evenly and improve the overall functioning.
By following these steps, you can ensure that your barrel hinges are correctly aligned and that your door opens and closes smoothly. Taking the time to check alignment and perform any necessary adjustments will not only improve the functionality of the door but also extend the lifespan of the hinges.
Step 7: Testing And Finalizing
Once you have successfully installed the barrel hinges on your door, it is time to move on to the final step: testing and finalizing. This step is crucial to ensure that your door functions properly and has a smooth range of motion. Additionally, applying any finishing touches, such as lubrication, will ensure the longevity of your hinges.
Testing the door’s functionality and range of motion
To ensure the functionality of your door, it is important to test its range of motion. Begin by gently opening and closing the door to evaluate if it moves smoothly and without any obstructions. Pay close attention to any signs of friction or sticking points, as these can indicate misalignment or inadequate installation.
- Check for any resistance or difficulty when opening or closing the door. The movement should be effortless and smooth.
- Verify that the door remains properly aligned throughout its range of motion. It should not sag or bind in any particular position.
- Inspect the clearance between the door and the frame. There should be a uniform gap on all sides when the door is closed.
If you notice any issues during the testing process, such as sticking or misalignment, you may need to adjust the position of the hinges. This may involve loosening the screws and repositioning the hinge plates to achieve proper alignment. Once adjusted, repeat the testing process to ensure the corrections have resolved the issue.
Applying any finishing touches, such as lubrication, if needed
After ensuring your door’s functionality, it is essential to apply any finishing touches required, such as lubrication, to optimize the performance and lifespan of the barrel hinges.
If you observe resistance or hear squeaking noises during the testing, applying a suitable lubricant to the hinge mechanism can resolve these issues. Be sure to use a lubricant specifically designed for hinges, as using the wrong type may cause damage or attract dirt and debris over time.
Apply a small amount of lubricant to each hinge pivot point and movable parts. Use a clean cloth to wipe away any excess and prevent staining or buildup. Regularly inspect and reapply lubrication as needed to maintain optimal functionality.
By thoroughly testing and finalizing the installation of your barrel hinges, you can ensure that your door operates smoothly and securely. Taking the time to check the functionality and apply any necessary finishing touches will result in a long-lasting and reliable door.
Additional Tips And Troubleshooting
Installing barrel hinges can be a straightforward process, but occasionally, you may encounter some common installation issues. Thankfully, most of these issues can be easily addressed with a few simple troubleshooting steps. Additionally, proper maintenance and care tips can help ensure the longevity and smooth functioning of your barrel hinges. In this section, we will explore some common installation issues and how to fix them, as well as provide essential maintenance and care tips for your barrel hinges.
Common Installation Issues and How to Fix Them
If you experience any of the following common installation issues when installing barrel hinges, don’t worry! Here are some simple solutions to help you troubleshoot and overcome these challenges:
- Hinge alignment: Improper alignment of the hinges can result in difficulties when opening and closing doors. To fix this issue, ensure that the hinge leaf plates are properly aligned with each other and the door and frame. You can use a level or a straight edge to ensure accurate alignment.
- Screws pulling out: If the screws used to secure the hinges start to pull out over time, the door may become loose and sag. To resolve this problem, consider using longer screws or anchors for additional support. Alternatively, you can insert wooden dowels into the screw holes and then reinsert the screws for a more secure hold.
- Sticking hinge pins: Over time, hinge pins can become sticky or difficult to move, resulting in a door that doesn’t swing smoothly. To address this issue, remove the hinge pins and wipe them clean with a cloth. Apply a small amount of lubricant, such as WD-40, to the pins before reinserting them into the hinges. This should help the door swing freely again.
Maintenance and Care Tips for Barrel Hinges
Proper maintenance and care are essential to ensure the optimal performance and longevity of your barrel hinges. Here are some tips to help you keep your barrel hinges in top condition:
- Regular cleaning: Clean the hinges periodically by wiping them down with a soft cloth or sponge dampened with warm water and mild soap. Avoid using harsh chemicals or abrasive cleaners that can damage the finish.
- Lubrication: Apply a thin layer of lubricant, such as silicone spray or graphite powder, to the hinge pins and moving parts of the hinges regularly. This helps reduce friction and prevents sticking or squeaking.
- Inspect for wear and tear: Regularly check your barrel hinges for any signs of wear and tear, such as loose screws, damaged hinge plates, or excessive movement. If you notice any issues, take immediate steps to repair or replace the hinges to avoid further damage.
By following these simple tips and troubleshooting steps, you can ensure the smooth installation, functioning, and maintenance of your barrel hinges. Taking care of your hinges will not only enhance the look and performance of your doors but also contribute to the overall longevity of your home’s hardware.
Frequently Asked Questions
How Do You Install Barrel Hinge?
To install a barrel hinge, follow these steps: 1. Determine the placement of the hinge on the door and frame. 2. Pre-drill pilot holes for the screws. 3. Screw the hinge onto the door and frame. 4. Adjust the hinge to ensure proper alignment.
5. Test the door to ensure it swings smoothly.
What Are The Disadvantages Of Barrel Hinges?
Barrel hinges have a few drawbacks. They can be difficult to adjust and may require maintenance over time. They also have limited weight-bearing capacity and may not be suitable for heavier doors.
Why Use Barrel Hinges?
Barrel hinges are a popular choice because they provide smooth operation and reliable support for doors and cabinets. Their sturdy construction ensures durability, while their design allows for easy installation and adjustment. Whether for residential or commercial use, barrel hinges are a practical and efficient choice.
Are Barrel Hinges Strong?
Yes, barrel hinges are strong. They provide stability and support to doors and cabinets, making them a reliable choice. With their cylindrical shape and solid construction, they can handle heavy loads and withstand everyday use. Barrel hinges are a durable option for various applications.
Conclusion
Installing barrel hinges can seem daunting at first, but with these simple steps, you’ll be able to accomplish it flawlessly. By following the guidelines and using the right tools, you can transform your door or gate into a smooth-operating masterpiece.
Remember to be patient and take your time, ensuring each step is done correctly. With a bit of practice, you’ll become a pro at installing barrel hinges in no time. So, go ahead and give it a try – the results will speak for themselves!