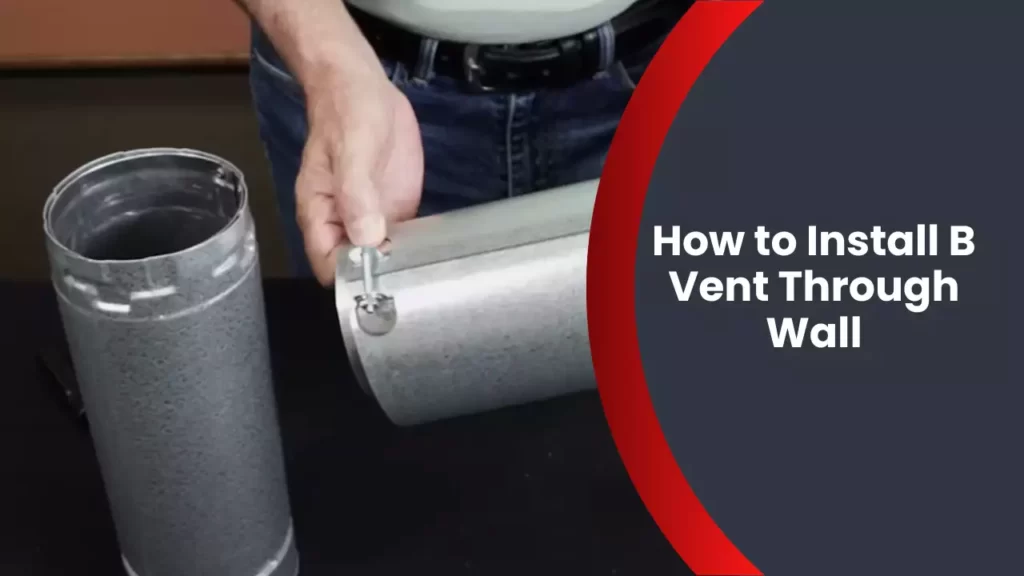
To install B vent through a wall, begin by carefully measuring the vent diameter and the wall thickness. Cut a hole in the wall with a reciprocating saw based on the measurements, ensuring it corresponds with the vent size.
Install a vent section through the hole and secure it using wall straps at appropriate intervals. Seal the joint between the vent and wall using high-temperature silicone sealant. Finally, apply insulation around the vent to minimize heat loss. Follow local codes and manufacturer instructions when installing B vent to ensure proper and safe installation.
Planning And Preparation
In order to successfully install a B vent through a wall, proper planning and preparation are essential. This section will guide you through the steps you need to take before you begin the installation process.
Determine the location for the B vent installation
The first step in the planning process is to determine the best location for the B vent installation. This will depend on a few factors, such as the type of appliance you’re venting and the layout of your home. Take into consideration the shortest and most direct route to an exterior wall, as well as any obstacles that may be in the way.
Consider local building codes and regulations
Before beginning any construction or installation project, it’s important to familiarize yourself with the local building codes and regulations. These codes are put in place to ensure the safety and efficiency of the vent installation. Check with your local building authority to determine what permits you may need and what specific requirements must be met.
Gather the necessary tools and materials
Once you have determined the location and reviewed the building codes, gather all the tools and materials necessary for the installation. Here is a list of the most common tools and materials you will need:
| Tools | Materials |
|---|---|
|
|
Measure and mark the wall for the vent opening
With the tools and materials ready, it’s time to measure and mark the wall for the vent opening. Use a tape measure to determine the appropriate size of the vent opening, taking into account the dimensions of the B vent pipe. Mark the measurements on the wall using a pencil or marker.
Once you have marked the wall, it’s important to double-check your measurements to ensure accuracy. This will help prevent any complications or errors during the installation process.
Now that you have completed the planning and preparation phase, you’re ready to move on to the next step of the B vent installation process. Stay tuned for the next section, where we will guide you through the actual installation.
Cutting The Vent Opening
When installing a B vent through a wall, one of the crucial steps is cutting the vent opening. This is where the vent pipe will pass through the exterior wall of your home, allowing the harmful gases to be safely expelled. In this section, we will discuss how to cut the vent opening using a reciprocating saw, creating a template for accuracy, removing any obstacles or obstructions, and ensuring a smooth and clean vent opening.
Use a reciprocating saw to cut through the exterior wall
To start the process, you will need a reciprocating saw. This powerful tool is ideal for cutting through various materials, including exterior walls. When using the reciprocating saw, make sure to wear safety goggles and gloves for protection.
Create a template to ensure accuracy
Before cutting into the wall, it is essential to create a template that will guide you through the process and ensure accuracy. You can use a durable material such as cardboard or plywood to trace the shape and size of the vent opening onto the wall. Once the template is in place, you can use it as a guide for cutting.
Remove any obstacles or obstructions
Prior to cutting, inspect the area where the vent opening will be located and remove any obstacles or obstructions. These could include electrical wires, plumbing pipes, or any other potential hindrances. It is crucial to ensure a clear path for the vent pipe to pass through.
Smooth and clean the edges of the vent opening
Once the vent opening is cut, it is important to smooth and clean the edges for a secure fit. Use a file or sandpaper to remove any rough edges, ensuring a clean and snug opening for the vent pipe.
By following these steps, you can successfully cut the vent opening for your B vent installation. Remember to prioritize safety throughout the process and take the necessary precautions. Now that the vent opening is complete, you can proceed with the installation of the B vent with confidence.
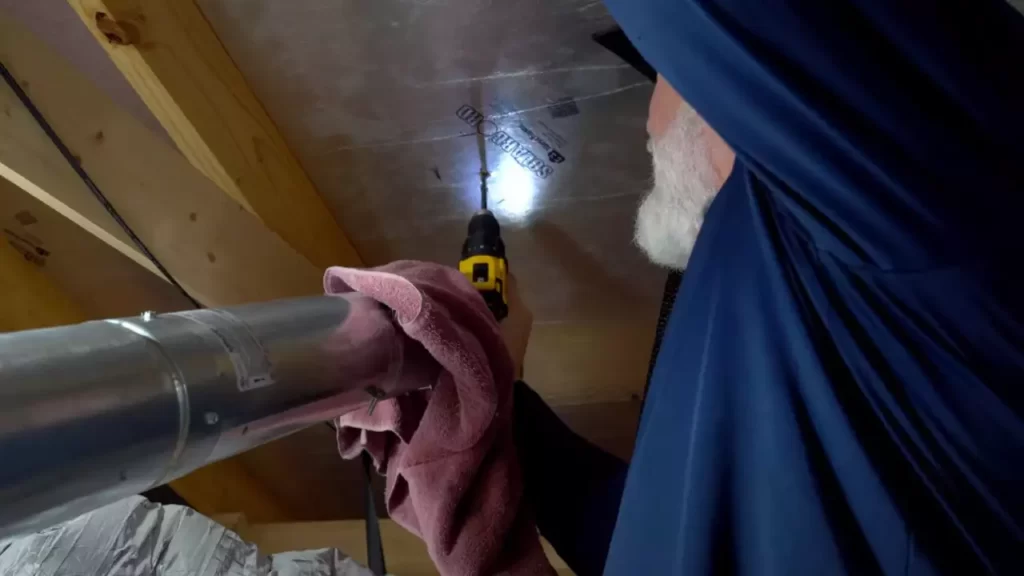
Installing The B Vent Components
Proper installation of the B vent components is crucial to ensure the safe and efficient operation of your venting system. This step-by-step guide will walk you through the process, from attaching the vent cap to sealing any gaps or joints with high-temperature silicone sealant.
Attach the vent cap to the exterior wall
The first step in installing your B vent is attaching the vent cap to the exterior wall. This cap serves as a protective covering for the vent pipe and helps to prevent rain, snow, or debris from entering the system.
To attach the vent cap, follow these steps:
- Identify the desired location for the vent cap on the exterior wall.
- Using a level, ensure the cap is perfectly horizontal.
- Mark the screw hole locations on the wall.
- Drill pilot holes at the marked locations.
- Securely attach the cap to the wall using screws.
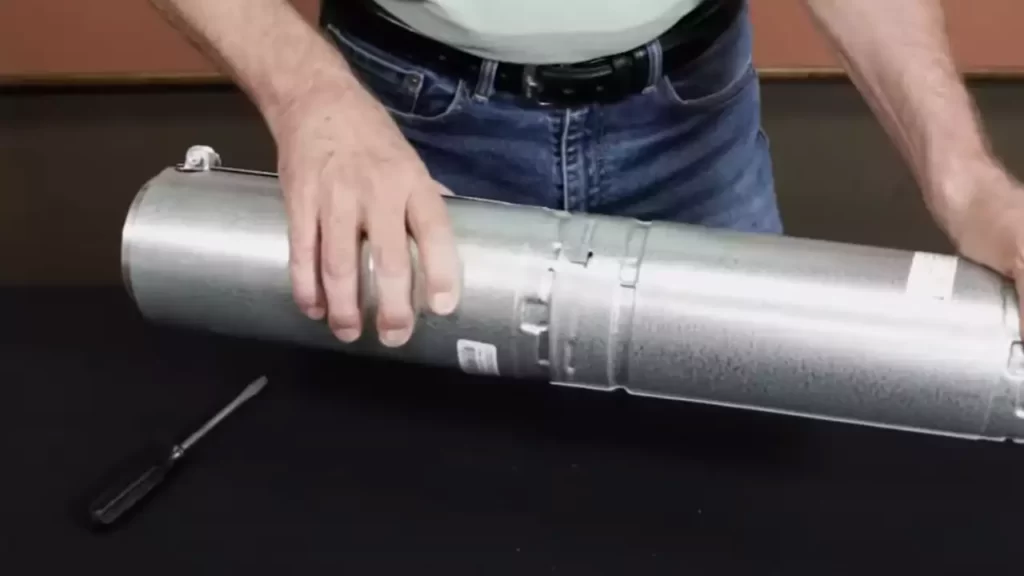
Connect the vent pipe sections using manufacturer-recommended methods
Once the vent cap is securely attached, it’s time to connect the vent pipe sections. The manufacturer of your B vent system will provide specific guidelines on how to connect the sections, so be sure to follow their instructions carefully.
To connect the vent pipe sections, adhere to the following steps:
- Apply a thin layer of high-temperature silicone sealant to the male end of the first vent pipe section.
- Insert the male end of the first section into the female end of the second section.
- Twist the sections clockwise until they are snugly connected.
Ensure proper alignment and secure connections
Proper alignment and secure connections are essential for the efficient operation of your B vent system. Take the time to ensure that each vent pipe section is aligned correctly and that the connections are secure.
To ensure proper alignment and secure connections, follow these steps:
- Double-check that each vent pipe section is properly aligned, with no gaps or misalignments.
- If necessary, twist the sections clockwise or counterclockwise until the alignment is correct.
- Once aligned, tighten any clamps or locking mechanisms to secure the connections.
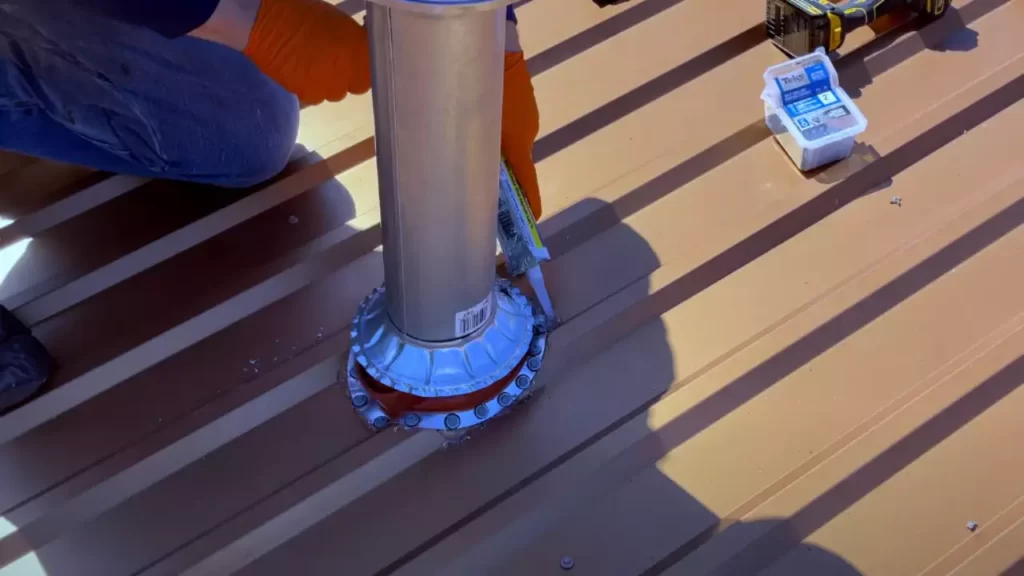
Seal any gaps or joints with high-temperature silicone sealant
Finally, it’s essential to seal any gaps or joints in your B vent system to prevent the leakage of combustion products and ensure the system operates safely and efficiently.
To seal any gaps or joints, follow these steps:
- Inspect the entire venting system for any visible gaps or joints.
- If any gaps or joints are found, apply a generous amount of high-temperature silicone sealant to fill the gaps.
- Smooth the sealant with a sealant tool or your finger to ensure a proper seal.
By following these steps and using manufacturer-recommended methods, you can install your B vent system with confidence, knowing that it will provide optimal performance and safety for years to come.
Connecting To The Appliance
Determine the appropriate location on the appliance for the vent connection
Before you begin connecting the B vent pipe to your appliance, it is crucial to determine the correct location on the appliance for the vent connection. This will largely depend on the type of appliance you are working with, whether it is a furnace, hot water heater, or fireplace.
Look for the designated vent connection point on the appliance. This is typically located on the top or back of the unit. Refer to the appliance’s installation manual or consult a professional if you are unsure of the specific location.
Attach the vent pipe to the appliance using the correct fittings
Once you have identified the vent connection point on the appliance, it is time to attach the vent pipe. Use the appropriate fittings to ensure a secure and leak-free connection.
Start by inserting one end of the vent pipe into the appliance’s vent connection point. Make sure the pipe is aligned correctly and fits snugly into place. Use clamps or screws, depending on the type of fittings provided, to secure the pipe to the appliance.
Remember, the fittings may vary depending on the type of vent pipe you are using (such as single-wall or double-wall) and the requirements of the appliance. Again, consult the appliance’s manual or seek professional guidance if needed.
Ensure a tight and secure connection
Ensuring a tight and secure connection between the vent pipe and the appliance is crucial for proper functionality and safety. Take the time to double-check that the fittings are tightened appropriately to prevent any leaks or disconnections.
If using clamps, make sure they are securely fastened, but be careful not to overtighten as this can damage the vent pipe or appliance.
For screws, tighten them firmly without stripping or damaging the threads. You may need to use a screwdriver or wrench, depending on the type of screws used.
Confirm proper alignment and clearance between the vent pipe and appliance
Once the vent pipe is securely attached to the appliance, confirm that there is proper alignment and clearance between the two. This is important for optimal airflow and efficiency.
Check that the vent pipe is aligned straight and level with the appliance. Use a level or measuring tape if necessary to ensure accuracy. An improper alignment may lead to restricted airflow or inefficient venting.
Additionally, make sure there is adequate clearance between the vent pipe and any surrounding walls, furniture, or combustible materials. Check the appliance’s installation manual for the recommended clearance distances, and make adjustments as needed to comply with safety guidelines.
By following these steps, you can confidently connect the B vent pipe to your appliance, ensuring a secure, tight, properly aligned, and safe installation.
Inspecting And Testing
Conduct a Visual Inspection of the Completed Installation
Once the B vent installation is complete, it is crucial to conduct a visual inspection to ensure everything is in order. Start by visually examining the vent system, paying close attention to the joints, connections, and overall condition of the materials used. Look for any signs of leaks, cracks, or damage that could potentially compromise the integrity of the installation.
During the visual inspection, check for proper alignment of the B vent and ensure that it is securely fastened to the wall. Look for any gaps or misalignments that may occur during the installation process, as these can affect the proper functioning of the vent system. Additionally, inspect the clearance requirements that the manufacturer has specified and make sure they are strictly followed.
Check for Any Signs of Leaks or Damage
Next, it is important to thoroughly check for any signs of leaks or damage in the B vent system. Inspect each joint and connection point for any visible gaps or cracks. Look for signs of rust, corrosion, or deterioration, as these can indicate potential leaks or weaknesses in the vent system.
Additionally, examine the surrounding area for any signs of gas leaks, such as an unusual smell or hissing noises. Any leaks or damages found should be addressed immediately to prevent further complications or safety hazards. It is recommended to consult with a professional technician or HVAC specialist for any necessary repairs or replacements.
Test the Vent System for Proper Airflow and Functionality
Once the visual inspection and leak check are completed, it is time to test the B vent system for airflow and functionality. This step is crucial to ensure that the vent system is operating as intended and effectively removing combustion byproducts from the designated area.
To test the airflow, hold a tissue near the vent opening while the heating appliance is in operation. Observe the tissue movement, ensuring that it is being drawn towards the vent rather than being blown away. This indicates proper airflow through the vent system.
In addition to airflow, test the functionality of the vent system by operating the heating appliance for a sufficient amount of time. Monitor the exhaust gases emitted from the vent, ensuring that they are clear and free from excessive smoke or abnormal smells. Any unusual observations should be addressed promptly to ensure the safe functioning of the B vent system.
Address Any Issues or Concerns Before Finalizing the Installation
During the inspecting and testing phase, it is essential to address any issues or concerns that arise before finalizing the B vent installation. If any leaks, damages, or functionality problems were identified, take immediate measures to rectify them. This may involve repairing or replacing faulty components, adjusting the vent system’s alignment, or consulting with a professional for further guidance.
By addressing any issues or concerns at this stage, you can ensure the optimal performance and longevity of the B vent system. It is best to seek professional assistance when required to guarantee a safe and efficient installation. Once all necessary adjustments are made and all concerns are resolved, you can proceed with confidence and finalize the installation of the B vent system through the wall.
Maintenance And Safety Considerations
When it comes to installing a B vent through a wall, it’s important to prioritize regular maintenance and safety considerations. By taking the necessary precautions and staying vigilant, you can ensure that your vent system operates efficiently and poses minimal risks. In this section, we’ll explore some key practices to keep in mind for the maintenance and safety of your B vent installation.
Regularly inspect and clean the vent system to prevent blockages
Proper maintenance of the B vent system involves regular inspection and cleaning to prevent blockages. Over time, debris, dust, and other particles can accumulate inside the vent, obstructing the flow of gases. To maintain optimal performance, inspect the vent regularly and clear out any blockages that might have formed. This can be done by using a brush or vacuum cleaner specifically designed for vent cleaning. By keeping the vent system clear, you can ensure that harmful gases are efficiently expelled from your home.
Keep the area around the vent clear of debris and flammable materials
In addition to cleaning the vent system itself, it’s crucial to keep the area around the vent clear of debris and flammable materials. Inspect the immediate vicinity of the vent regularly and remove any leaves, twigs, or other debris that may have gathered. Additionally, ensure that there are no flammable materials such as gasoline, paint, or propane tanks stored nearby. By maintaining a clear and safe area around the vent, you can reduce the risk of accidental fires and optimize the performance of the B vent.
Monitor carbon monoxide levels and install detectors if necessary
Carbon monoxide is a silent and potentially deadly gas that can be produced through the combustion process. To ensure the safety of your household, it’s important to monitor carbon monoxide levels and take appropriate measures. Install carbon monoxide detectors in your home, particularly in areas near the B vent system. These detectors should be placed at a height of around 5 feet above the floor and regularly checked to ensure they are functioning correctly. In the event of elevated carbon monoxide levels, take immediate action by ventilating the area and contacting a professional for further assistance.
Stay updated on any relevant building codes or regulations related to B vent installations
Building codes and regulations regarding B vent installations may vary depending on your location. To ensure that your installation complies with the appropriate standards, it’s essential to stay updated on any relevant building codes or regulations. Familiarize yourself with the requirements and guidelines set forth by your local authorities or consult with a professional HVAC contractor. By adhering to these codes and regulations, you can ensure the safety and efficiency of your B vent installation for years to come.
Frequently Asked Questions
How Do You Install B Vent Through A Wall?
To install B vent through a wall, first, mark the location for the vent on the wall. Next, cut a hole in the wall using a reciprocating saw. Install a firestop and secure it with screws. Connect the vent pipe, aligning the seams properly, and secure it with screws.
Finally, seal any gaps with high-temperature silicone to ensure proper ventilation.
Can B Vent Be Installed Horizontally?
No, B vent should not be installed horizontally. It is designed to function vertically, allowing for the natural flow of exhaust gases. Installing B vent horizontally can disrupt the airflow, resulting in poor ventilation and potentially hazardous conditions. It is essential to follow the manufacturer’s instructions and local building codes for the proper installation of B vent.
What Size B Vent Do I Need?
The size of the B vent you need depends on the appliance being vented. Consult the manufacturer’s guidelines or the building codes in your area to determine the appropriate size. Factors such as the BTU rating of the appliance and the length of the vent system will also influence the required B vent size.
It is crucial to choose the correct size to ensure proper ventilation and safety.
Conclusion
Installing a B vent through a wall is a crucial step in ensuring optimum ventilation for your home. By following the steps outlined in this guide, you can successfully complete the installation process. Remember to check local building codes, use appropriate materials, and take safety precautions.
With proper installation, you can enjoy improved air circulation and the peace of mind that comes with a well-ventilated space. Start installing your B vent today and breathe easier in your home.