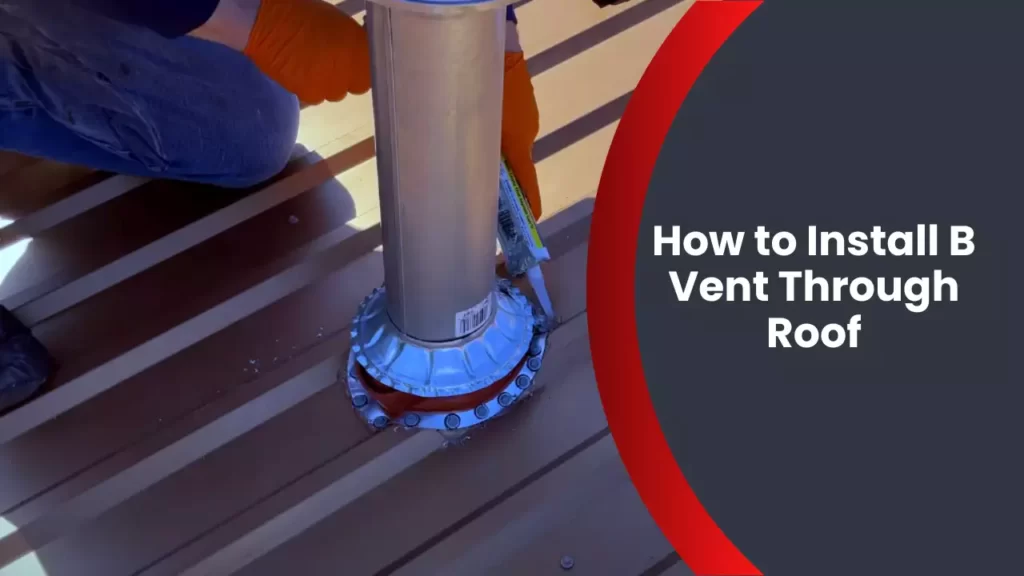
To install B vent through the roof, follow these steps: Determine the location on the roof, cut a hole for the vent pipe, secure the flashing, attach the vent pipe, and seal any gaps. Installing a B vent through the roof is a straightforward process when following these steps.
Proper installation ensures a safe and functional venting system for your home. It is important to carefully plan the location and take necessary precautions to avoid any damage to the roof. By following the correct installation procedure, you can ensure that the B vent is securely installed and effectively removes combustion gases from your living space.
Understanding The Purpose And Benefits Of B Vent
The installation of a proper ventilation system is crucial for maintaining a healthy and efficient home or building. One popular choice for roof venting solutions is the B Vent. In this article, we will delve into the purpose and benefits of B Vent, helping you understand why it is commonly used for roof installations.
What is B Vent and why is it used?
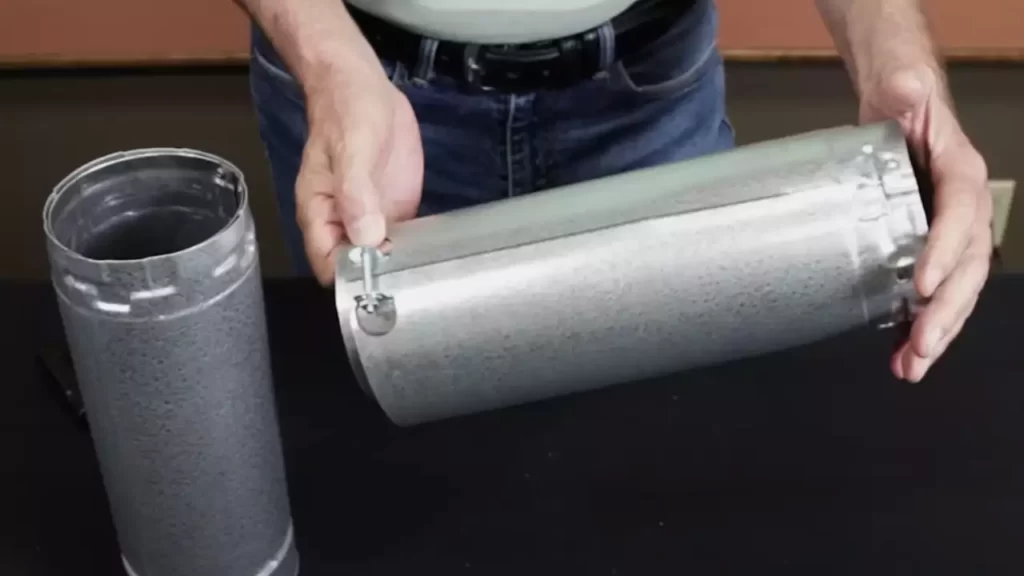
B Vent, also known as Type B gas vent, is a specially designed pipe used for venting appliances that burn natural gas or propane. It is made from double-walled galvanized steel with air insulation between the walls, allowing for safe and efficient venting of combustion gases.
The primary purpose of B Vent is to safely remove the byproducts of combustion, such as carbon monoxide and other harmful gases, from the interior of a building. By venting these gases to the outside, B Vent protects the occupants from potential health hazards and prevents damage to the structure.
Advantages of using B Vent for roof venting solutions
Using B Vent for roof venting offers several advantages over other venting options. Here are some key benefits:
- Efficient venting: B Vent is specifically designed to optimize the removal of combustion gases, ensuring optimal performance of appliances and reducing the risk of backdraft or poor airflow.
- High temperature resistance: B Vent can handle high temperatures produced by combustion appliances, making it a safe and reliable choice for venting a wide range of devices.
- Durability: Made from double-walled galvanized steel, B Vent is highly durable and resistant to rust and corrosion. This ensures its long lifespan and minimizes the need for regular maintenance or replacement.
- Easy installation: Thanks to its lightweight design and various connection options, such as twist-lock or snap-lock systems, B Vent is relatively easy to install. This makes it a preferred choice for contractors, ensuring efficient and timely installations.
Overall, B Vent is a trusted and popular choice for roof venting solutions due to its safety, efficiency, durability, and ease of installation. If you are considering installing or upgrading your roof venting system, consulting with a professional to determine if B Vent is suitable for your specific needs can help ensure a well-ventilated and secure home or building.
Assessing If B Vent Installation Is Appropriate For Your Roof
When it comes to installing a B Vent through your roof, it’s important to assess whether it is appropriate for your specific roofing structure. Several factors need to be considered to ensure a successful installation. By thoroughly assessing the roof’s structural integrity, slope and pitch, as well as identifying the appropriate B Vent size and material, you can confidently proceed with the installation.
Checking Roof Structural Integrity
The first step in determining whether B Vent installation is suitable for your roof is to assess its structural integrity. You need to ensure that your roof is strong enough to support the weight of the vent and withstand potential wind loads or other external forces.
Consider hiring a professional roofer or structural engineer to evaluate your roof’s condition. They will inspect for any signs of damage, such as sagging, cracking, or rot. Additionally, they will assess the overall stability and load-bearing capacity of the roof. By addressing any structural issues beforehand, you can prevent potential complications during the B Vent installation.
Roof Slope and Pitch Considerations
The slope and pitch of your roof are crucial factors to consider when installing a B Vent. The slope refers to the steepness of the roof, while the pitch measures the vertical rise of the roof over a horizontal distance. Together, they determine the angle at which your roof is inclined.
Check the specifications provided by the B Vent manufacturer to determine the maximum slope or pitch requirements for installation. If your roof exceeds these specifications, additional measures may be necessary, such as using roof flashing or adjusting the vent angle to ensure proper ventilation and prevent water infiltration.
Identifying the Appropriate B Vent Size and Material
Choosing the correct size and material for your B Vent is essential for efficient performance and safety. The size of the vent should be based on the heating appliance’s output, which typically includes the BTU (British Thermal Unit) rating. The vent must be able to handle the exhaust gases produced by the appliance.
Consult the manufacturer’s guidelines or seek advice from a professional to identify the right B Vent size and material for your specific heating system and roof configuration. Consider factors such as height restrictions, code compliance, and weather conditions in your area when selecting the appropriate material, ensuring long-term durability and reliability.
In conclusion, assessing whether B Vent installation is appropriate for your roof involves evaluating its structural integrity, considering the slope and pitch, and identifying the correct vent size and material. By paying careful attention to these factors, you can ensure a successful installation that promotes proper ventilation and enhances the overall performance of your heating system.
Gathering The Tools And Materials You’Ll Need
Before you start installing a B vent through your roof, it’s important to gather all the necessary tools and materials. This will ensure a smooth installation process and prevent any delays due to missing items. In this section, we will discuss the list of required tools and materials needed for the installation process.
List of Required Tools for B Vent Installation
Here is a comprehensive list of the tools you’ll need to install a B vent through your roof:
- Safety goggles
- Gloves
- Tape measure
- Level
- Drill
- Hole saw
- Tin snips
- Wrench
- Screwdriver
- Roofing hammer
Having these tools on hand will make it easier to navigate the installation process and ensure that everything fits properly.
Materials Needed for the Installation Process
In addition to the tools, you’ll need a variety of materials to complete the installation. These materials include:
- B vent pipe
- Storm collar
- Roof flashing
- Silicone sealant
- Screws and fasteners
- Firestop/spacer
- Support brackets
- Insulation (if required)
- Caulking
These materials are essential for creating a secure and functional B vent system. It’s important to ensure that you have all the necessary materials before starting the installation to avoid any interruptions.
Now that you’re familiar with the list of required tools and materials for installing a B vent through your roof, you’re ready to move on to the next steps of the installation process. Stay tuned for our next section, where we will walk you through the preparation steps.
Preparing The Roof For B Vent Installation
Before installing a B vent through the roof, it’s crucial to properly prepare the roof to ensure a secure and stable installation. This involves locating the optimal installation position, ensuring proper support and stabilization for the B vent, and clearing the area around the installation site.
Locating the Optimal Installation Position on the Roof
When it comes to installing a B vent through the roof, one of the first and most important steps is to locate the optimal installation position. This will depend on various factors, including the type of appliance being vented, local building codes, and the layout of the roof.
To determine the best position, it’s crucial to consider the following:
- The proximity to the appliance: The B vent should be located as close to the appliance as possible to ensure efficient venting.
- Clearance from other obstructions: Ensure that there is enough space between the B vent and any other obstructions, such as trees, chimneys, or other vents, to prevent any potential issues.
- Roof structure: Take into account the structural integrity of the roof, including the presence of rafters or trusses, to determine the best location for the B vent.
Ensuring Proper Support and Stabilization for the B Vent
To ensure the B vent is properly supported and stable, it’s important to follow these guidelines:
- Inspect the roof structure: Before installation, carefully examine the roof structure to ensure it is in good condition and can support the weight of the B vent.
- Use appropriate roof supports: Install roof supports, such as roof jacks or brackets, to provide additional stability for the B vent.
- Fasten the B vent securely: Use roofing screws or nails to fasten the B vent to the roof supports, ensuring a tight and secure fit.
Clearing the Area Around the Installation Site
Prior to installing the B vent, it’s essential to clear the area around the installation site to ensure a safe and proper installation:
- Remove any debris: Clear away any debris, such as leaves, branches, or loose shingles, from the roof surface to prevent interference with the installation process.
- Avoid nearby electrical wires: Ensure that there are no electrical wires or cables in close proximity to the installation site to prevent potential hazards.
- Provide adequate ventilation: Ensure that there is enough space around the installation site for adequate ventilation to promote proper airflow and prevent any potential issues.
By following these guidelines and properly preparing the roof for B vent installation, you can ensure a secure and efficient venting system for your appliance.
Measuring And Cutting B Vent Pipes
One crucial step in installing a B Vent through a roof is measuring and cutting the vent pipes accurately. This ensures a proper fit and optimal performance of the ventilation system. In this section, we will discuss how to determine the correct length of B Vent pipes and the appropriate tools to use for cutting the pipes.
Determining the correct length of B Vent pipes
Before you start cutting the B Vent pipes, it is essential to determine the correct length you will need for your installation. This can be done by measuring the distance between the appliance where the B Vent begins and the roof penetration where it will exit.
To measure the distance accurately:
- Locate the starting point of the B Vent, typically the appliance or furnace outlet.
- Measure the distance from the appliance outlet to the desired roof penetration point.
- Make sure to consider any clearance requirements or local building codes that may affect the length of the B Vent pipes.
- Take note of this measurement as it will be crucial for cutting the pipes to the correct length.
Using the appropriate tools to cut the pipes accurately
Once you have determined the correct length of B Vent pipes, the next step is to cut them accurately. Using the proper tools for cutting is essential to ensure clean, precise cuts.
Here are some tools commonly used for cutting B Vent pipes:
| Tool | Description |
|---|---|
| Hacksaw | A hacksaw with a fine-toothed blade can be used to make straight cuts on B Vent pipes. |
| Tin Snips | Tin snips are suitable for cutting B Vent pipes with less precision, such as when making small adjustments or trimming. |
| Tube Cutter | A tube cutter is a specialized tool that provides clean and precise cuts on B Vent pipes. It can be particularly useful for cutting pipes with larger diameters. |
When using these tools, it is important to follow manufacturer’s instructions and take necessary safety precautions. Ensure that the blades are sharp, and make slow and steady cuts to prevent any damage to the B Vent pipes.
By measuring and cutting your B Vent pipes accurately, you will be well on your way to a successful installation. Remember to double-check your measurements and use the appropriate tools for clean and precise cuts. In the next section, we will discuss the process of assembling and connecting the B Vent pipes.
Connecting B Vent Pipes And Fittings
When installing a B Vent system through the roof, it is crucial to have a solid understanding of how to connect the B Vent pipes and fittings properly. This step ensures a secure and leak-free installation, allowing for efficient and safe ventilation of gas appliances. In this section, we will explore the different types of B Vent fittings, the correct way to join the pipes and fittings, and how to secure the connections for a leak-free installation.
Understanding the different types of B Vent fittings
Before you start connecting B Vent pipes and fittings, it is essential to familiarize yourself with the various types of fittings available. These fittings are specifically designed to provide a proper connection between the B Vent pipes and ensure optimal performance. Here are some common types of B Vent fittings:
| Type of B Vent Fitting | Description |
|---|---|
| Elbows | Elbows are used to change the direction of the B Vent pipe, allowing it to navigate around obstacles such as walls or ceilings. |
| Tees | Tees are T-shaped fittings that enable the B Vent system to branch out in multiple directions, accommodating various venting configurations. |
| Adapters | Adapters serve as connectors between different sizes of B Vent pipes, ensuring a secure and tight fit. |
| Increasers and reducers | Increasers and reducers are used to adjust the diameter of the B Vent pipe, allowing for a smooth transition between different sections of the vent system. |
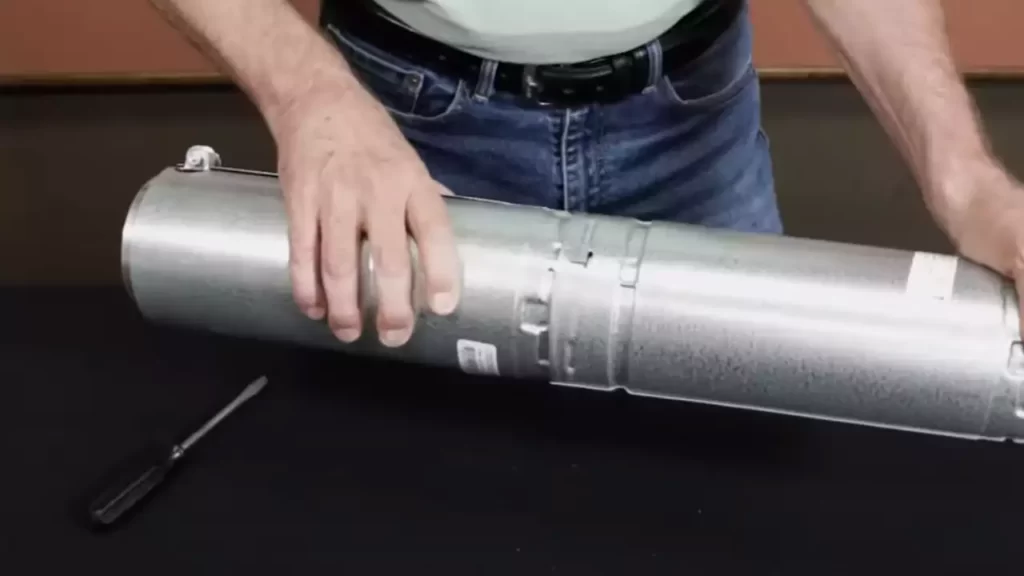
Properly joining the B Vent pipes and fittings
Once you have identified and obtained the appropriate fittings for your B Vent system, it is crucial to connect the pipes and fittings properly. Follow these steps to ensure a secure connection:
- Clean the ends of the B Vent pipes and fittings to remove any debris or dirt that could hinder the connection.
- Apply a high-temperature silicone sealant to the ends of the pipes and fittings.
- Slide the pipe into the fitting, ensuring a snug fit.
- If necessary, use clamps or screws to secure the pipe and fitting together.
- Repeat the above steps for each connection, ensuring that all joints are properly sealed and connected.
Securing the connections to ensure a leak-free installation
To ensure a leak-free installation and optimal performance of your B Vent system, it is essential to properly secure all the connections. Here are some tips to help you secure the connections effectively:
- Use metal clamps or screws to secure the pipes and fittings together.
- Ensure the clamps or screws are tightened enough to create a secure connection, but be cautious not to overtighten and damage the pipes or fittings.
- Inspect each connection visually to ensure there are no visible gaps or signs of leakage.
- If any gaps or leaks are found, reapply silicone sealant and tighten the connection further until the issue is resolved.
- Finally, conduct a thorough inspection of the entire B Vent system after installation to ensure all connections are secure and leak-free.
A well-connected and secure B Vent system is crucial for the safe and efficient venting of gas appliances. By understanding the different types of B Vent fittings, properly joining the pipes and fittings, and securing the connections, you can ensure a leak-free installation that will provide reliable ventilation for years to come.
Securing B Vent Through The Roof
Creating an Opening in the Roof for the B Vent
Before installing a B Vent through the roof, you will first need to create an opening in the roof to accommodate the vent pipe. This step is crucial to ensure proper ventilation and prevent any issues with smoke or fumes escaping into your home. Here’s how to create an opening in the roof for the B Vent:
- Begin by selecting the ideal location for the vent pipe on the roof. It is essential to position the vent away from any obstructions and at a safe distance from windows, doors, or other vents.
- Use a measuring tape to determine the appropriate size of the opening. The size of the opening should match the diameter of the vent pipe plus the required clearance distance specified by the manufacturer.
- Mark the center of the opening on the roof using a pencil or marker.
- Using a reciprocating saw or a circular saw equipped with a metal-cutting blade, carefully cut along the marked lines to create the opening.
- Remove any shingles or roofing materials from the opening, ensuring a clear path for the vent pipe. Take care not to damage the adjacent roofing materials during this step.
Installing Roof Flashing to Prevent Water Leakage
One of the crucial steps in securing a B Vent through the roof is installing roof flashing. Flashing acts as a protective barrier against water leakage, ensuring that the installation remains watertight. Follow these steps to install roof flashing:
- Clean the area around the opening thoroughly, removing any debris or dirt.
- Apply a layer of roofing cement around the edges of the opening using a putty knife.
- Place the flashing over the opening, positioning it in line with the roof slope.
- Secure the flashing in place by nailing it down or using roofing screws, ensuring a tight fit against the roof surface.
- Apply an additional layer of roofing cement over the edges of the flashing to create a watertight seal.
- Inspect the flashing for any gaps or areas that may need additional sealing. Use roofing cement to fill any gaps and ensure proper water protection.
Safely Positioning and Securing the B Vent on the Roof
Once the opening in the roof is prepared and the flashing is installed, it’s time to safely position and secure the B Vent on the roof. Follow these steps to ensure a secure installation:
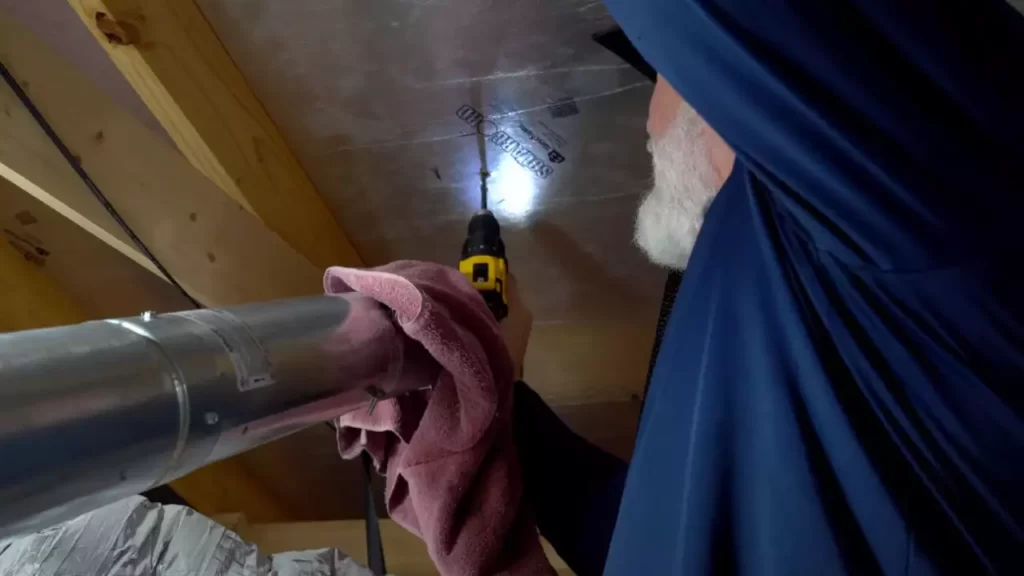
- Slide the B Vent pipe through the opening in the roof, ensuring that it extends up beyond the roofline.
- Position the B Vent pipe according to the manufacturer’s instructions, ensuring the correct orientation.
- Secure the B Vent pipe to the roof by attaching metal brackets or clamps around the pipe. Make sure to use appropriate fasteners that are suitable for the roof material.
- Tighten the brackets or clamps securely, ensuring that the B Vent pipe is stable and won’t shift or move with strong winds or other external factors.
- Inspect the entire installation to ensure it is secure and aligned correctly. Double-check all attachments and connections to make sure everything is tightly fastened and properly sealed.
- Consider applying a layer of roofing cement or sealant around the pipe and flashing for additional protection against water leakage.
Insulating And Sealing The B Vent System
Installing insulation around the B Vent pipes and connections
Insulating the B Vent system is a crucial step to ensure its efficiency and prevent heat loss. Proper insulation helps maintain the temperature inside the vent, mitigates the risk of condensation, and minimizes the chance of cold air infiltration. To insulate the B Vent pipes and connections, follow these steps:
1. Measure the dimensions of the B Vent pipes and determine the required thickness of insulation. This will depend on the type of vent and the local building codes. Most commonly used insulation materials include fiberglass, foam, or mineral wool.
2. Cut the insulation material into appropriate lengths to fit around the B Vent pipes and connections. Ensure that the insulation pieces are securely wrapped around the pipes, leaving no gaps or spaces.
3. Use high-temperature-resistant tape or wire to fasten the insulation in place. This will prevent the insulation from slipping or moving over time.
4. Pay special attention to the connections between the B Vent pipes. Insulate both the male and female ends of the pipes to maintain a consistent level of insulation throughout the vent system.
Remember, proper insulation is crucial for preventing heat loss and ensuring the B Vent system functions optimally.
Applying sealant to ensure an airtight seal
Creating an airtight seal is essential to prevent gas leaks, maintain air quality, and increase the overall efficiency of the B Vent system. Here’s how you can apply sealant for an airtight seal:
1. Clean the surface of the B Vent pipes and connections using a damp cloth or brush, removing any dust, debris, or grease. This step ensures proper adhesion of the sealant.
2. Choose a high-temperature-resistant sealant suitable for your specific B Vent system. Silicone-based or high-temperature caulk are commonly used sealants for B Vent installations.
3. Apply the sealant evenly around the pipe joints and connections. Use a caulking gun or a putty knife to spread the sealant smoothly, ensuring it fills any gaps or spaces.
4. Pay extra attention to pipe connections, as they are more prone to leakage if not sealed properly. Apply an ample amount of sealant to ensure a tight and secure seal.
5. Allow the sealant to dry completely before testing the B Vent system for any leaks or issues. Follow the manufacturer’s instructions regarding drying time.
By applying sealant, you ensure an airtight seal, preventing any potential gas leaks and maximizing the efficiency of the B Vent system.
Remember, insulation and sealing are crucial steps in the installation process of a B Vent system, promoting safety, efficiency, and a longer lifespan for your installation. By following these guidelines, you can ensure that your B Vent is properly insulated and sealed, providing optimal ventilation for your home or building.
Testing And Maintaining The B Vent System
Conducting a Thorough Inspection After Installation
After installing a B Vent system through the roof, it is crucial to conduct a thorough inspection to ensure everything is in proper working order. This inspection can help identify any potential issues or damage that may have occurred during installation. Here are the key steps to follow when inspecting your B Vent system:
- Start by visually examining the vent pipe for any signs of damage, such as dents, corrosion, or cracks. Make sure there are no loose connections or gaps between the sections of the vent pipe.
- Check the flashing around the roof penetration. It should be tightly sealed and free from any cracks or gaps. If there are any signs of damage, it is essential to repair or replace the flashing to ensure proper weather protection.
- Inspect the support brackets and make sure they are securely fastened to the roof structure. Loose or damaged brackets can cause the vent pipe to sag or shift, which can impact the efficiency and safety of the system.
- Examine the termination cap at the top of the vent pipe. It should be intact and properly sealed to prevent any water or debris from entering the system. If there are any damages or obstructions, they should be addressed immediately.
By conducting a thorough inspection after installation, you can identify and address any potential issues with your B Vent system, ensuring its optimal functionality and safety.
Performing Regular Maintenance to Keep the B Vent System in Optimal Condition
Regular maintenance plays a crucial role in keeping your B Vent system in optimal condition. By following these maintenance practices, you can extend the lifespan of the system and prevent potential problems:
- Clean the vent pipe regularly to remove any debris or blockages that can hinder the flow of combustion gases. Use a suitable brush or vacuum cleaner to remove any obstructions
- Inspect the inside of the vent pipe for the accumulation of soot or creosote. If significant buildup is present, it is essential to clean it using appropriate cleaning agents or hire a professional chimney sweep to do the job.
- Check the carbon monoxide (CO) detectors regularly to ensure they are functioning correctly. These detectors are crucial for detecting any leaks or malfunctions that can pose a risk to your health and safety.
- Monitor the flame pattern of your appliance regularly. A steady blue flame indicates proper combustion, while an erratic or yellow flame may indicate an issue with the venting system. If you notice any irregularities, it is crucial to contact a qualified technician for further inspection and repairs.
- Keep an eye on the surrounding area of the B Vent system for any signs of water leaks or damage. Water intrusion can lead to corrosion and deterioration of the vent pipe and other components. If you notice any leaks, it is crucial to address them promptly to prevent further damage.
By performing regular maintenance on your B Vent system, you can ensure its long-term performance, efficiency, and safety. Plus, you’ll have peace of mind knowing that your venting system is in optimal condition.
Ensuring Compliance With Local Building Codes And Regulations
Familiarizing yourself with local regulations pertaining to B Vent installation
Installing a B Vent system through the roof requires careful adherence to local building codes and regulations. These codes and regulations ensure the safety and efficiency of your B Vent installation, and it is important to familiarize yourself with them before beginning the installation process. Each municipality may have its own specific requirements, so taking the time to research and understand these regulations is crucial.
To begin, visit the website of your local building department or contact them directly to obtain a copy of the building codes related to B Vent installation. These codes typically outline requirements for materials, clearances, and proper installation techniques. Reading through and understanding these codes will provide you with a solid foundation for a compliant installation.
Obtaining necessary permits and inspections
Once you have familiarized yourself with the local building codes, the next step is to obtain the necessary permits and inspections for your B Vent installation. Failure to secure the proper permits and inspections can lead to costly delays, fines, or even having to redo the entire installation.
Start by checking with your local building department to determine which permits are required for your specific installation. Common permits may include a mechanical permit, a plumbing permit, or a building permit. Fill out the necessary permit application forms, providing details about your B Vent installation project.
After submitting your permit application, the building department will review it and may request additional information or documentation. Once your permit is approved, you will receive an official permit document that should be prominently displayed at the job site throughout the installation process.
During the course of your B Vent installation, scheduled inspections will be necessary to ensure compliance with the building codes and regulations. These inspections may include a rough-in inspection, where the installation is assessed before it is concealed, and a final inspection, where the completed installation is reviewed for code compliance. It is important to schedule these inspections in advance and prepare the installation for inspection according to the building codes.
By following these steps of familiarizing yourself with local regulations and obtaining the necessary permits and inspections, you can confidently install a B Vent system through the roof while adhering to the local building codes and regulations. This not only ensures the safety of your installation but also helps avoid potential penalties and problems in the future. Remember, compliance with local codes and regulations is crucial for every successful B Vent installation.
Frequently Asked Questions
How Much Does It Cost To Install A B Vent Through The Roof?
Installing a B vent through the roof can cost anywhere from $500 to $1500 depending on factors such as roof type, height, and amount of work required. It is best to consult with a professional HVAC contractor for an accurate cost estimate.
What Are The Steps To Install A B Vent Through The Roof?
To install a B vent through the roof, follow these steps:
1. Determine the optimal location for the vent. 2. Cut a hole in the roof and install the vent flashing. 3. Connect the B vent pipe to the appliance and secure it with fasteners. 4. Install storm collars and seal all connections with high-temperature silicone. 5. Ensure proper clearance from combustibles and test for proper venting.
Can A Diyer Install A B Vent Through The Roof?
While experienced DIYers may have the skills to install a B vent through the roof, it is recommended to hire a professional HVAC contractor. A correctly installed B vent is crucial for proper ventilation and safety, so it’s best to leave it to the experts who have the necessary knowledge and equipment.
Conclusion
Installing B vent through the roof may seem complicated, but with the right knowledge and tools, it can be done easily. By following the step-by-step instructions provided, homeowners can ensure a safe and efficient installation process. Remember to prioritize safety precautions and consult a professional if needed.
With a properly installed B vent system, you can enjoy the benefits of a well-functioning and reliable ventilation system in your home. So, get started on your project and enjoy the peace of mind that comes with a job well done.