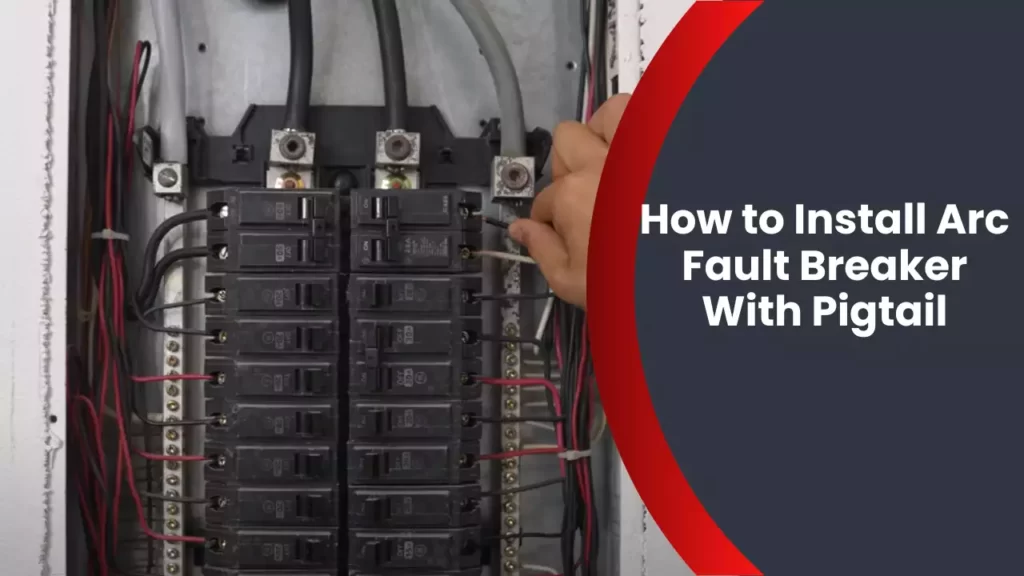
To install an arc fault breaker with a pigtail, follow these steps: Turn off the power supply, remove the breaker panel cover, disconnect the old breaker, connect the pigtail wire to the neutral bus bar, attach the other end of the pigtail to the new arc fault breaker, position the breaker into the panel, and secure it by tightening the screws. Are you looking for a concise guide on how to install an arc fault breaker with a pigtail?
This article will provide you with step-by-step instructions that are easy to follow. An arc fault breaker helps protect your electrical circuits from dangerous arcs or sparks that may cause fires. With the addition of a pigtail, you can connect the breaker to the neutral bus bar, ensuring proper grounding.
So, let’s get started and make sure your electrical system is safe and up-to-code.
What Is An Arc Fault Breaker?
Definition of Arc Fault Breaker
An arc fault breaker, also known as an arc fault circuit interrupter (AFCI), is a special type of circuit breaker that is designed to detect and prevent electrical arcs (sparks) in an electrical system. It is a device that provides protection against electrical fires caused by arcs, which are a common cause of residential electrical fires.
Importance of using Arc Fault Breakers in Electrical Systems
Arc fault breakers play a crucial role in maintaining the safety and integrity of electrical systems, especially in residential buildings. Here are some reasons why it is important to use arc fault breakers:
- Fire Prevention: Electrical arcs can occur due to damaged wires, loose connections, or faulty appliances. These arcs can generate high temperatures and ignite nearby flammable materials, leading to fires. Arc fault breakers are specifically designed to detect these hazardous arcs and interrupt the electrical circuit before a fire can occur.
- Enhanced Safety: By installing arc fault breakers, you significantly reduce the risk of electrical fires, making your home or building safer for occupants. These breakers can quickly detect and respond to dangerous arcs, preventing potential fire hazards and protecting lives.
- Code Compliance: In many jurisdictions, the installation of arc fault breakers is required by electrical codes and regulations. These codes aim to ensure the safety of electrical systems in residential and commercial buildings. By using arc fault breakers, you ensure that your electrical system complies with these requirements.
- Liability Protection: In the unfortunate event of an electrical fire, insurance companies may deny coverage if it is found that the building did not have arc fault breakers installed as per code requirements. By using these breakers, you protect yourself from potential liability issues and ensure that your insurance coverage remains valid.
- Technology Advances: Arc fault breakers have evolved over the years with advancements in technology. They are now more sensitive and capable of detecting even subtle arcs, reducing the possibility of fires caused by minor faults in the electrical system. Using these advanced breakers ensures that you have the latest and most effective protection against electrical arc hazards.
Overall, arc fault breakers provide an essential layer of protection against electrical fires caused by arcs. By using these breakers in your electrical system, you prioritize safety, comply with electrical codes, and actively prevent potential fire hazards.
Advantages Of Using Arc Fault Breakers
Increased safety in residential and commercial buildings
Protection against electrical fires caused by arcing faults
Arc fault breakers are a crucial component in maintaining a safe electrical system in both residential and commercial buildings. These innovative devices offer multiple advantages that make them indispensable for protecting your property and ensuring the safety of everyone inside.
Increased safety in residential and commercial buildings
One of the major advantages of using arc fault breakers is the increased safety they provide in residential and commercial buildings. Traditional circuit breakers are designed to detect overloads and short circuits, but they often fail to detect and protect against dangerous arcing faults. Unlike their conventional counterparts, arc fault breakers are designed specifically to detect and respond to these hazardous conditions, minimizing the risk of electrical accidents and subsequent injuries.
By installing arc fault breakers, you are taking a proactive approach to safeguarding your property and the people who inhabit it. Whether it’s your cherished family or valuable employees, their safety is paramount, and arc fault breakers provide an added layer of protection to ensure peace of mind.
Protection against electrical fires caused by arcing faults
Arcing faults are one of the main causes of electrical fires in residential and commercial buildings. These faults can occur due to loose connections, damaged wiring, or corroded conductors. Without proper protection, arc faults can go unnoticed and continue to generate excessive heat, leading to fire hazards.
With arc fault breakers, you can effectively prevent electrical fires caused by arcing faults. These intelligent devices are equipped with advanced detection technology that can identify the distinctive waveforms generated by arcing faults. Once detected, the breaker will trip, interrupting the circuit and preventing the fault from escalating into a potentially devastating fire.
The installation of arc fault breakers is a proactive measure to mitigate the risk of electrical fires and the catastrophic consequences they can bring. By investing in these breakers, you are making a wise choice for the safety and well-being of your property, its occupants, and your overall peace of mind.

Step 1: Gathering The Necessary Tools And Equipment
Before you begin the installation process of an arc fault breaker with pigtail, it is important to ensure you have all the required tools and equipment handy. Gathering the necessary tools beforehand will not only save you time but also ensure a smooth and hassle-free installation process. In this step, we will discuss the list of tools and equipment you need for the installation and the importance of using the right tools for safety purposes.
List of tools and equipment required for the installation process
To install an arc fault breaker with pigtail, make sure you have the following tools and equipment:
- Electrical tape
- Screwdriver set
- Wire strippers
- Needle-nose pliers
- Combination pliers
- Voltage tester
- Wire nuts
- Electrical connectors
- Wire cutter
- Wire fish tape
Having these tools readily available will ensure that you have everything you need to complete the installation process without any interruptions.
Importance of using the right tools and equipment for safety purposes
Using the right tools and equipment is crucial when it comes to electrical installations. Here’s why:
- Safety: The correct tools ensure your safety throughout the installation process. Insulated screwdrivers and appropriate wire strippers help prevent accidental shocks, reducing the risk of injury.
- Precision: Each tool is designed for a specific purpose, allowing you to work with precision. This precision is essential to ensure proper connections, which in turn prevents potential hazards like short circuits or fires.
- Durability: Proper tools and equipment are built to withstand the demands of electrical work. Using low-quality or inadequate tools may lead to breakage or malfunctioning, compromising the quality and longevity of the installation.
- Efficiency: Having the right tools ensures an efficient installation process. Proper tools allow you to work faster and more effectively, minimizing the chances of mistakes or delays.
Remember, using the right tools not only ensures your safety but also contributes to the overall success and longevity of the arc fault breaker installation.
Step 2: Turn Off Power Supply
One of the most crucial steps in installing an arc fault breaker with pigtail is to turn off the power supply. This step ensures your safety and prevents any accidental electrical shock or damage. By cutting off the flow of electricity, you create a safe working environment for the installation process. In this step, we will take a look at the importance of turning off the power supply and provide an overview of the process.
Importance of turning off the power supply before starting the installation
Before proceeding with any electrical installation, it is paramount to turn off the power supply. This step eliminates the risk of electrocution and protects both you and the electrical components from potential damage. By shutting off the power, you minimize potential hazards and create a safe environment to work in.
Overview of the process of turning off the power supply
Turning off the power supply may seem like a straightforward task, but it is crucial to follow the proper procedure to ensure safety. Here’s an overview of the steps involved:
- Locate the main electrical service panel in your home.
- Open the panel door by using a screwdriver or a designated tool, following the manufacturer’s instructions.
- Inside the panel, locate the main circuit breaker that controls the entire electrical supply. This breaker is typically larger than the individual circuit breakers.
- Flip the main circuit breaker to the “Off” position. This action cuts off the power supply to the entire house.
- Double-check that the power is indeed off by attempting to turn on lights or appliances in the home. If there is no power, it is safe to proceed with the installation.
Once you have successfully turned off the power supply, you can confidently proceed with the installation of the arc fault breaker with pigtail. Remember, safety should always be a top priority when working with electricity, and turning off the power supply is a crucial step to ensure a secure and successful installation process.
Step 3: Remove The Old Breaker
Removing the old breaker is an important step in installing an arc fault breaker with a pigtail. By following the correct instructions, you can ensure a safe and proper installation. In this step, we will guide you through the process of removing the old breaker and provide essential safety precautions to take.
Instructions on removing the old breaker
Before proceeding, make sure you have switched off the main power supply to avoid any electrical accidents. Once the power is shut down, follow these instructions to remove the old breaker:
- Start by carefully loosening the screws that secure the breaker’s panel cover using a suitable screwdriver.
- Gently remove the panel cover and set it aside in a safe place. Ensure no wires are attached to the panel cover.
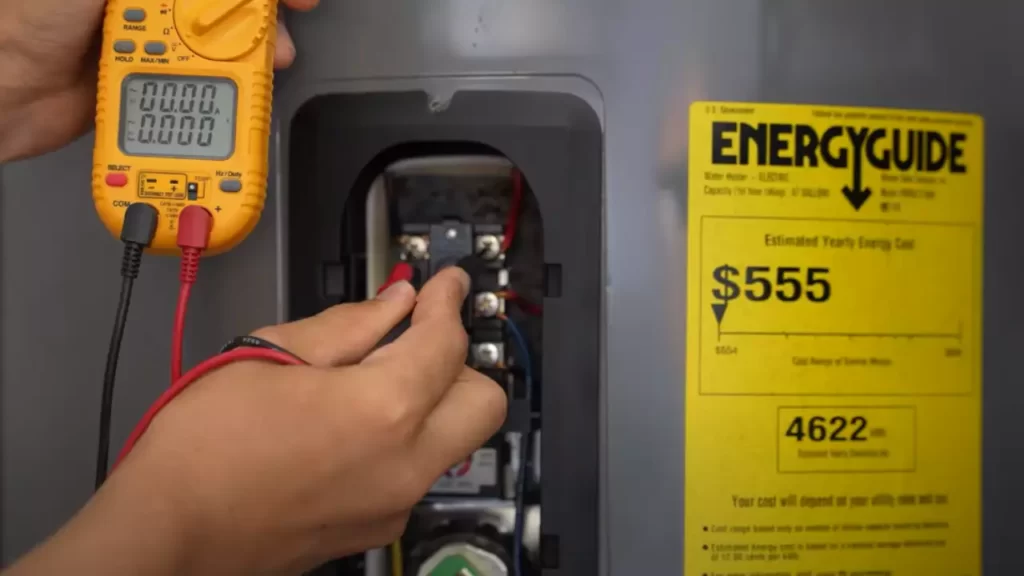
- With caution, use a voltage tester to confirm that there is no electricity flowing through the breaker. This step is crucial for your safety.
- Locate the old breaker you wish to remove. Identify the connection points where the wires are attached.
- Using a screwdriver or a suitable tool, loosen the screws that secure the wires to the breaker. Carefully detach the wires one by one, ensuring they do not touch any other metal parts.
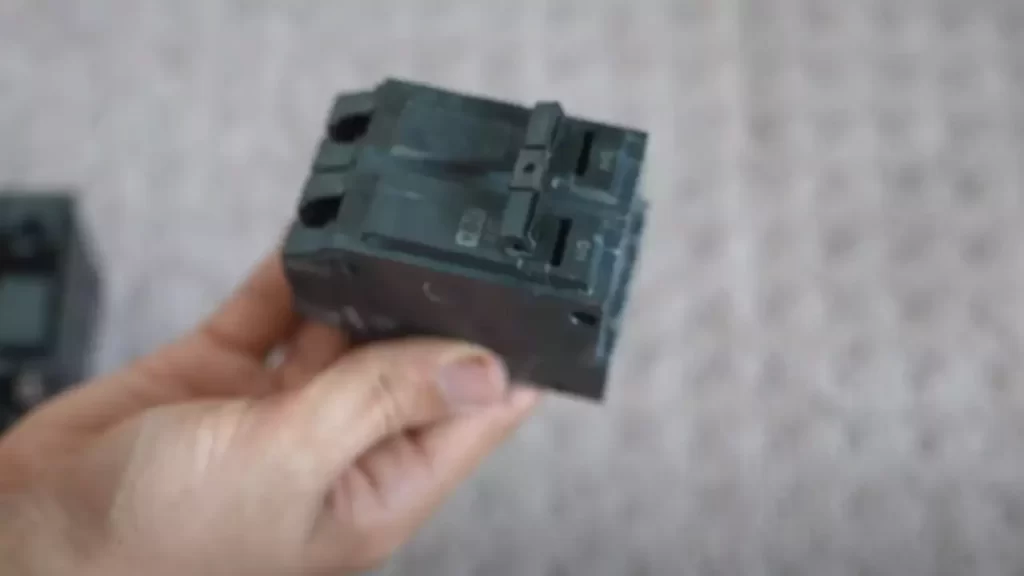
- Once all wires are detached, gently pull the old breaker out of the panel box. Make sure to avoid putting any stress or pressure on the other breakers.
- Inspect the old breaker for any signs of damage or wear. If you notice any issues, it is recommended to replace the breaker entirely.
- Dispose of the old breaker responsibly and in accordance with local regulations.
Safety precautions to take during this step
Removing the old breaker involves working with electricity, so it’s crucial to prioritize safety. Take the following precautions to minimize risks:
- Always wear electrical safety gloves and safety goggles to protect yourself from potential electrical shocks.
- Handle all tools and equipment with care, ensuring they are in good condition and suitable for the task.
- Only work with the breaker box when the main power is switched off. Double-check with a voltage tester to ensure no live electricity is present.
- Avoid touching any exposed wires or metal parts while removing the old breaker.
- If you are unsure or uncomfortable with any step, it’s advised to seek assistance from a qualified electrician.
By following these instructions and safety precautions, you can safely remove the old breaker from your electrical panel. Now that you have completed this step, you are ready to move on to the next phase of installing the arc fault breaker with a pigtail.
Step 4: Prepare The Pigtail Wiring
Explanation of pigtail wiring and its purpose in the installation process
Preparing the pigtail wiring is an essential step in installing an arc fault breaker with a pigtail. The pigtail wiring is a short length of wire that is used to connect the arc fault breaker to the circuit. It serves as a bridge between the breaker and the circuit, ensuring a secure connection and proper functionality. The pigtail wiring acts as an intermediary, allowing the breaker to detect and respond to any potential arc faults that may occur within the circuit. Without the pigtail wiring, the breaker would not be able to effectively monitor the circuit and protect against dangerous electrical arcing. Understanding the purpose and importance of the pigtail wiring is key to ensuring a successful installation.
Steps to prepare the pigtail wiring for installation
Preparing the pigtail wiring for installation is a straightforward process that can be broken down into the following steps:
1. Gather the necessary materials: Before you begin, make sure you have all the required materials readily available. This includes the arc fault breaker with pigtail, wire strippers, wire nuts, and electrical tape.
2. Measure and cut the pigtail wire: Start by measuring the appropriate length for the pigtail wire. It should be long enough to comfortably reach the circuit without any strain. Use wire cutters to trim the wire to the desired length.
3. Strip the ends of the pigtail wire: Once the wire has been cut to the appropriate length, use wire strippers to remove the insulation from both ends of the wire. This step is important to ensure a clean and secure connection when attaching the wire to the breaker and the circuit.
4. Connect the pigtail wire to the breaker: Take one end of the pigtail wire and insert it into the designated terminal on the arc fault breaker. Make sure the wire is fully inserted and secure. Tighten any screws or clamps to firmly hold the wire in place.
5. Connect the pigtail wire to the circuit: With the other end of the pigtail wire, connect it to the designated terminal on the circuit. Again, ensure the wire is fully inserted and securely fastened. Use wire nuts and electrical tape to provide additional protection and insulation.
6. Double-check the connections: Once the pigtail wire has been connected to both the breaker and the circuit, double-check all the connections to ensure they are tight and secure. This step is crucial for the proper functioning and safety of the arc fault breaker.
By following these steps, you can effectively prepare the pigtail wiring for installation, ensuring a reliable and efficient connection between the arc fault breaker and the circuit. Remember to always adhere to safety guidelines and consult a professional if you are unsure about any aspect of the installation process.
Step 5: Connect The Pigtail Wiring
Once you have positioned the arc fault breaker in the electrical panel and made the necessary connections, it is time to connect the pigtail wiring. This step is crucial for ensuring the proper functioning of the arc fault breaker. The pigtail wiring connects the breaker to the electrical circuit, allowing it to detect and protect against dangerous arcing faults.
Instructions on how to properly connect the pigtail wiring to the arc fault breaker
To connect the pigtail wiring to the arc fault breaker, follow these simple yet essential instructions:
- Strip about 1 inch of the insulation from the end of the pigtail wire using a wire stripper. This will expose the bare copper wire.
- Locate the terminal screw on the arc fault breaker. It is usually marked as “Load” or indicated by a symbol.
- Loosen the terminal screw using a screwdriver, making sure it is wide enough to accommodate the diameter of the bare copper wire.
- Insert the exposed end of the pigtail wire into the terminal screw opening.
- Tighten the terminal screw securely to ensure a solid and reliable connection. This will help maintain the integrity of the electrical circuit and prevent any potential hazards.
- Check the connection by gently pulling on the pigtail wire. It should be firmly held in place by the terminal screw.
By following these instructions carefully, you can ensure that the pigtail wiring is connected properly and the arc fault breaker is ready to provide the required protection against arcing faults.
Importance of ensuring secure connections for safety purposes
Ensuring secure connections when connecting the pigtail wiring to the arc fault breaker is of utmost importance for safety purposes. A loose or inadequate connection can lead to electrical hazards, including overheating, arcing, and potential fires. Therefore, it is crucial to follow the instructions provided and make sure that the terminal screw is tightly secured.
Remember, a securely connected pigtail wire guarantees that the arc fault breaker detects arcing faults accurately and responds appropriately to mitigate any potential dangers. So, take your time and double-check the connection to ensure the safety of your electrical system and peace of mind.
Step 6: Install The Arc Fault Breaker
Now that you have prepared the electrical panel and pigtail, it’s time to install the crucial component of an arc fault circuit breaker – the breaker itself.
1. Detailed steps on installing the arc fault breaker into the electrical panel:
Follow these steps carefully to ensure a successful installation:
- Begin by turning off the main power switch in the electrical panel. This essential safety precaution will prevent any electrical shock during the installation process.
- Locate the open slot in the electrical panel where the arc fault breaker will be installed. Consult the manufacturer’s instructions or panel diagram if needed to find the appropriate location.
- Hold the arc fault breaker with the pigtail connection facing the back of the panel. Align the breaker’s slots with the panel’s bus bar, ensuring it fits securely.
- Gently push the breaker into place, applying even pressure until it snaps securely onto the bus bar. Ensure that the breaker is in the “off” position before proceeding.
- Take the pigtail wire connected to the breaker and route it towards the neutral or ground bar, depending on your electrical system’s requirements.
- Remove the appropriate knockouts from the panel and feed the pigtail wire through them, carefully avoiding any sharp edges that may damage the insulation.
- Using wire strippers, strip about ½ inch of insulation from the end of the pigtail wire.
- Safely secure the stripped end of the wire to the neutral or ground bar, ensuring that it forms a solid connection. Refer to the manufacturer’s instructions for details on the specific connection method.
- Tighten any screws or clamps that secure the pigtail wire, ensuring it is firmly held in place.
- Lastly, double-check all connections and ensure that the breaker is securely installed. Reinstall any removed panel covers and turn the main power switch back on.
2. Safety precautions to follow during the installation process:
While installing an arc fault breaker, it is crucial to prioritize safety at all times. Follow these safety precautions:
- Always turn off the main power switch before working on or near the electrical panel to prevent electric shock.
- Wear appropriate personal protective equipment (PPE), such as safety glasses and insulated gloves, to protect yourself from potential hazards.
- Handle the arc fault breaker with caution, avoiding any unnecessary forces or impacts that may damage it.
- Route the pigtail wire carefully, ensuring it is protected from sharp edges and not exposed to potential damage.
- Consult the manufacturer’s instructions and adhere to the recommended installation guidelines to ensure proper functioning and compliance with safety standards.
- If unsure about any aspect of the installation process, consult a qualified electrician for assistance.
By following these step-by-step instructions and safety precautions, you can confidently install an arc fault breaker with a pigtail connection, improving the safety of your electrical system and minimizing the risk of arc faults.
Step 7: Test The Arc Fault Breaker
Step 7: Test the Arc Fault Breaker
Guidelines for Testing the Functionality of the Arc Fault Breaker after Installation
Now that you have successfully installed the arc fault breaker with pigtail, it is crucial to test its functionality. Testing the arc fault breaker ensures that it is working as intended, providing the necessary protection against electrical hazards. Here are some guidelines to follow while testing the arc fault breaker:
- Begin by switching off the main breaker in your electrical panel to ensure your safety during the testing process.
- Make sure that all the electrical devices connected to the arc fault breaker are turned off before proceeding with the testing. This includes lights, appliances, and any other electrical equipment.
- Locate the test button on the arc fault breaker. It is typically labeled as “TEST” or a similar indication.
- Press and hold the test button firmly for a few seconds. This action simulates an arc fault condition, allowing you to verify if the breaker responds accordingly.
- While holding the test button, observe the status of the breaker. It should trip or switch to the “OFF” position, indicating that it is functioning correctly.
- If the breaker does not trip or switch off during the test, refer to the troubleshooting steps below to identify and resolve any issues.
- After testing the arc fault breaker, release the test button and reset the breaker by switching it back on. This step ensures that the breaker is ready to protect your electrical circuit from potential arc faults.
Explanation of How to Troubleshoot any Issues that May Arise During Testing
If you encounter any issues or the arc fault breaker fails to trip during the testing process, it is essential to troubleshoot and address the problem promptly. Follow these steps to troubleshoot any potential issues:
- Double-check the wiring connections of the arc fault breaker. Ensure that all connections are secure and properly tightened.
- Inspect the wiring connected to the breaker for any signs of damage or loose connections. If you identify any issues, you may need to repair or replace the wiring accordingly.
- Check if there are any electrical devices or appliances causing false trips of the arc fault breaker. Remove any suspicious devices and retest the breaker to determine if the issue persists.
- If the troubleshooting steps above do not resolve the problem, it is advisable to consult a qualified electrician to diagnose and rectify the issue. They have the expertise to identify any underlying electrical problems and ensure that the arc fault breaker operates effectively.
By following these guidelines and troubleshooting steps, you can ensure the proper functioning of the arc fault breaker and enhance the safety of your electrical system. Testing the breaker not only verifies its functionality but also promotes peace of mind, knowing that your home or establishment is protected against the potential hazards of arc faults.
Step 8: Restore Power Supply
Instructions on how to safely restore the power supply after the installation is complete
After successfully installing the arc fault breaker with pigtail, it’s time to restore the power supply to your electrical system. This final step is crucial to ensure that everything is functioning properly and that you can safely resume using electricity in your home or office. To help you navigate this step with ease, follow the instructions below.
1. Double-check your work: Before restoring the power supply, take a moment to review your installation. Make sure that all connections are secure and that the arc fault breaker is properly installed in the electrical panel.
2. Turn off all appliances and devices: To prevent any potential electrical issues, make sure to turn off all appliances, devices, and lights throughout your home or office. This will reduce the load on the electrical system when it is re-energized.
3. Flip the main circuit breaker: Locate the main circuit breaker in your electrical panel. It is usually the largest breaker and is typically labeled. Slowly flip the main circuit breaker back to the “On” position. This will restore power to your entire electrical system.
4. Gradually turn on devices: Once the main circuit breaker is turned on, start gradually turning on your devices one by one. This will help you identify any potential electrical issues that may have been caused during the installation process.
Importance of checking for any potential electrical issues before re-energizing the system
Ensuring the safety of your electrical system is of utmost importance. Before re-energizing the system, it is crucial to check for any potential electrical issues. This step helps to minimize the risk of electrical shock, fires, or damage to your devices. By following these guidelines, you can proactively identify and address any problems that may have occurred during the installation. Taking the time to check for potential issues will give you peace of mind and ensure the long-term functionality of your electrical system.
Frequently Asked Questions
Why Do Some Arc Fault Breakers Have A Pigtail?
Arc fault breakers have a pigtail to provide better electrical connection. It ensures proper connection with the circuit breaker and improves performance, reducing the risk of false trips.
Can You Trim The Pigtail On Afci Breaker?
No, it is not recommended to trim the pigtail on an AFCI breaker. The pigtail is an essential part of the breaker’s wiring and should not be altered. Modifying or cutting it can lead to electrical hazards and can void the warranty.
Always consult a qualified electrician for any modifications or installations.
How Long Is The Pigtail On An Afci Breaker?
The pigtail length on an AFCI breaker varies depending on the manufacturer. It is generally designed to be a suitable length for easy installation. Check the specific product instructions or consult the manufacturer to determine the exact pigtail length for your AFCI breaker.
Where Does Pigtail On Gfci Breaker Go?
The pigtail on a GFCI breaker should be connected to the grounding terminal on the breaker.
Conclusion
Installing an arc fault breaker with a pigtail doesn’t have to be a daunting task. By following the step-by-step instructions provided in this blog post, you can easily ensure the safety of your electrical system. Remember to turn off the power before starting, use the right tools, and consult a professional if needed.
By taking these precautions, you’ll have peace of mind knowing that your home is protected from potential electrical hazards. Get started today and enhance the safety of your electrical system.