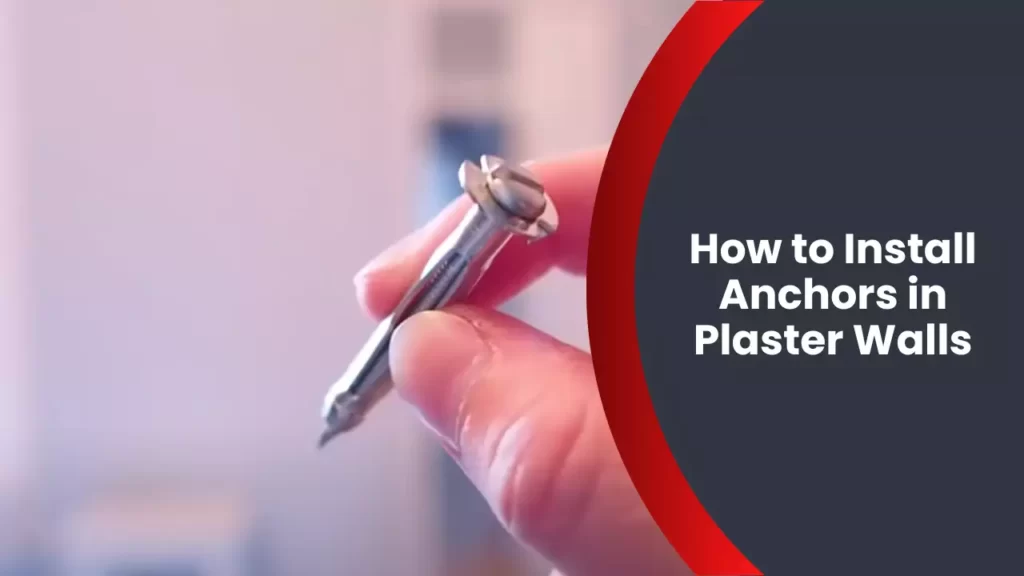
To install anchors in plaster walls, first determine the location, then drill a hole, and insert the anchor using a hammer or screwdriver handle. Plaster walls are a common feature in many homes, but when it comes to hanging heavy objects such as mirrors, shelves, or artwork, you need to ensure they are securely mounted.
One of the most effective ways to achieve this is by using anchors. Anchors provide additional support and stability, preventing your objects from coming loose and potentially causing damage. In this guide, we will walk you through the step-by-step process of installing anchors in plaster walls.
By following these instructions, you can confidently hang your belongings on your plaster walls, knowing they are securely in place. So, let’s get started and learn how to install anchors in plaster walls.
Understanding Plaster Walls
If you live in an older home, chances are you have plaster walls. Plaster walls, also known as lime plaster walls, were commonly used in construction until the mid-20th century when drywall became more popular. Understanding how to work with plaster walls is essential for homeowners and DIY enthusiasts, as they require a different approach compared to other wall materials. In this section, we will explore what plaster walls are, the advantages they offer, as well as the challenges that come with working on them.
What are Plaster Walls?
Plaster walls are made by applying layers of wet plaster mixture onto a lath, which is essentially a wooden framework. This traditional method of wall construction has been used for centuries and is prized for its durability and timeless aesthetic appeal. Plaster walls have a unique texture and charm that is hard to replicate with modern materials like drywall.
Advantages of Plaster Walls
There are several advantages to having plaster walls in your home. First and foremost, plaster walls are incredibly durable and long-lasting. When properly cared for, they can stand the test of time, often outlasting other types of wall materials. Additionally, plaster walls offer superior soundproofing compared to drywall, which can be particularly beneficial if you live in a noisy neighborhood or have multiple generations under one roof. Another advantage of plaster walls is their ability to resist fire, making them a safer choice for homeowners.
Challenges of Working with Plaster Walls
While plaster walls have their merits, they also present some unique challenges when it comes to installation and repair. One of the main challenges is their tendency to crack and develop surface imperfections over time. Plaster walls can also be more fragile than drywall, so extra care must be taken when installing anchors or making repairs. Additionally, it can be more difficult to find specialized tools and materials specifically designed for working with plaster walls. However, with the right techniques and know-how, these challenges can be overcome, allowing you to successfully install anchors in your plaster walls.
No matter the challenges, understanding how to work with plaster walls can help you maintain the integrity and beauty of your home. Now that we have explored what plaster walls are, their advantages, and challenges, let’s dive into the process of installing anchors in plaster walls.

Choosing The Right Anchors And Tools
Choosing the Right Anchors and Tools. When it comes to installing anchors in plaster walls, choosing the right anchors and tools is crucial for a successful installation. Plaster walls can be delicate and require special considerations. In this section, we will discuss the different types of anchors suitable for plaster walls, essential factors to consider when selecting anchors, and the necessary tools for a hassle-free installation process.
Different types of anchors for plaster walls
Before diving into the installation process, it’s essential to understand the different types of anchors suitable for plaster walls. Each type has its unique strengths and purposes. Here are some popular anchor options:
| Type of Anchor | Best Use |
|---|---|
| Metal toggle bolts | Perfect for heavy objects like shelves and mirrors. |
| Plastic expansion anchors | Ideal for light to medium-weight objects such as picture frames and lightweight shelves. |
| Molly bolts | Great choice for medium-weight items like towel racks and curtain rods. |
Factors to consider when selecting anchors
When selecting anchors for plaster walls, several factors need to be taken into account. These factors will ensure that you choose the most suitable anchors for your specific needs. Consider the following:
- The weight of the object you are hanging – Make sure to choose anchors that can support the weight of your object.
- The type of wall surface – Plaster walls require anchors that can penetrate and grip the delicate material.
- The location of the installation – Different areas of your home may have specific requirements. For instance, bathrooms and kitchens may require anchors that are resistant to moisture.
Essential tools for installing anchors in plaster walls
Having the right tools can make a massive difference in the ease and success of installing anchors in plaster walls. Ensure you have the following tools before you begin:
- A drill with the appropriate drill bit
- Screwdriver
- Hammer
- Level
- Tape measure
- Wire hanger (for measuring depth)
- Pencil or marker
- Masking tape
With these essential tools and a good understanding of the different anchor types and factors to consider, you are well-equipped to install anchors in your plaster walls successfully. Remember, choosing the right anchors and using the appropriate tools will ensure a secure and long-lasting installation.

Preparing The Wall For Anchors
Anchors are essential for securely hanging items on plaster walls. Before installing anchors, it is crucial to prepare the wall properly to ensure a sturdy hold. In this section, we will guide you through the steps of inspecting the plaster wall for stability, identifying the location for anchor installation, and preparing the surface for anchor installation.
Inspecting the plaster wall for stability
The first step in preparing your wall for anchors is to inspect the plaster for stability. A stable wall is necessary to prevent any damage or cracks during the installation process. Here’s how you can inspect your wall:
- Start by visually examining the entire wall surface, looking for any visible cracks, flaking, or peeling paint.
- Gently tap the wall using a rubber mallet or your knuckles to detect any hollow sounds. Hollow sounds may indicate a weakened area.
- If you notice any cracks or hollow sounds, it is important to repair these issues before proceeding with anchor installation. This will ensure a strong and secure hold for your anchors.
Identifying the location for anchor installation
After inspecting the stability of your plaster wall, you need to identify the precise locations where you will install the anchors. Follow these steps to determine the optimal anchor placement:
- Consider the weight and size of the item you plan to hang. This will help you determine the number of anchors needed and distribute the weight evenly.
- Find the studs in the wall using a stud finder. Anchoring to studs provides the strongest hold.
- If a stud is not available in the desired location, mark the spot and proceed to the next step.
- Use a hollow wall anchor (such as toggle bolts or molly bolts) for non-stud locations. These anchors provide additional support in walls with no stud support.
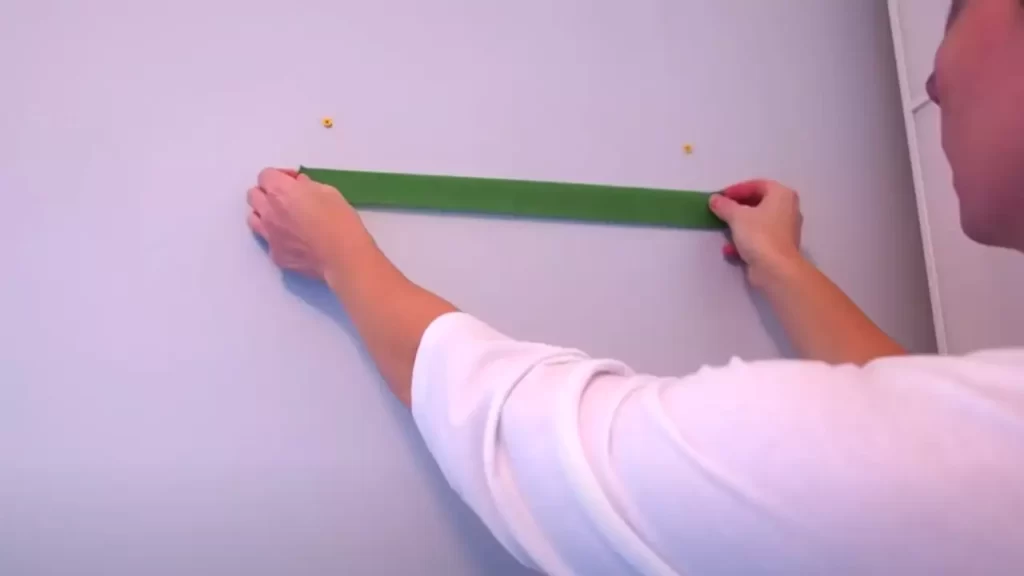
- Mark the exact positions where you will install the anchors using a pencil or small piece of tape. Take into account the desired height and position of the item you are hanging.
Preparing the surface for anchor installation
Now that you have identified the locations for anchor installation, it’s time to prepare the surface. Follow these steps to ensure a secure anchor installation:
- Gently remove any loose plaster or debris using a brush or vacuum cleaner. This will provide a clean surface for the anchor.
- If there are any existing holes in the wall, fill them with spackling paste or joint compound. Smooth it out with a putty knife and let it dry before proceeding.
- If you are installing a hollow wall anchor, use a drill bit that matches the size specified by the anchor manufacturer. Carefully drill holes at the marked locations, making sure to follow the instructions provided.
- To prevent plaster from chipping or cracking, apply a small piece of masking tape over the spot where you will drill.
- Finally, clean the wall surface with a damp cloth or sponge to remove any dust or debris.
By properly preparing your plaster wall for anchor installation, you can ensure a secure and lasting hold for your hung items. Next, we will guide you through the process of installing the anchors in the prepared wall.

Installing Expansion Anchors
When it comes to hanging heavy objects on plaster walls, it’s important to have a secure anchor that will support the weight. Expansion anchors are a popular choice for this purpose, as they provide strong and reliable support. In this step-by-step guide, we’ll walk you through the process of installing expansion anchors in plaster walls to ensure your objects stay securely in place.
Step-by-step guide to installing expansion anchors in plaster walls
1. Drilling the pilot hole
The first step in installing expansion anchors is to drill a pilot hole. This hole should be slightly smaller than the diameter of the anchor. To do this, follow these steps:
- Mark the spot on the wall where you want to install the anchor.
- Use a pencil or a marker to make a small dot on the marked spot.
- Attach a masonry drill bit to your drill.
- Hold the drill perpendicular to the wall and start drilling slowly.
- Apply light pressure and gradually increase the speed of the drill until the pilot hole is complete.
Keep in mind that plaster walls can be delicate, so it’s important to be gentle while drilling to avoid causing any damage.
2. Inserting the anchor into the hole
Once the pilot hole is drilled, it’s time to insert the expansion anchor into the hole. Follow these steps:
- Take the expansion anchor and align it with the pilot hole.
- Insert the anchor into the hole, making sure it goes in all the way.
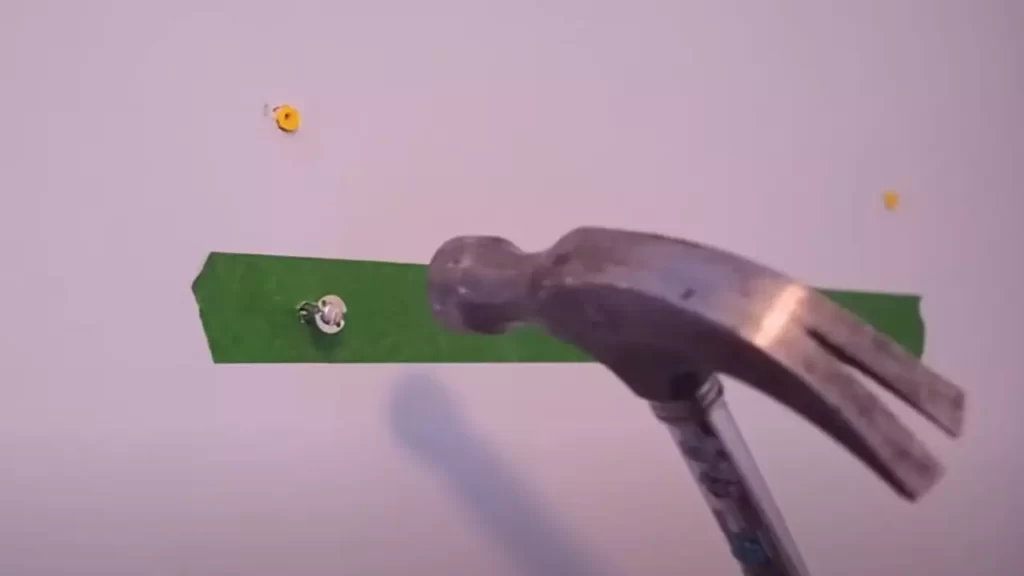
- Gently tap the anchor with a hammer to ensure it is fully seated in the hole.
Make sure the anchor is straight and flush with the wall surface before proceeding to the next step.
3. Tightening the anchor with a screwdriver or wrench
The final step is to tighten the expansion anchor to secure it in place. You can use a screwdriver or a wrench for this step. Follow these steps:
- Insert the screw into the anchor.
- Hold the anchor with one hand and use the screwdriver or wrench with the other hand to turn the screw clockwise.
- Continue tightening the screw until the anchor feels secure and does not move when pulled gently.
Ensure that the screw is tightened securely to provide a strong anchor for your hanging object.
By following these step-by-step instructions, you can easily install expansion anchors in your plaster walls to provide reliable support for hanging heavy objects. Remember to choose the appropriate anchor size and weight capacity for your specific needs, and always take extra care to avoid damaging the plaster while drilling.

Installing Toggle Bolts
When it comes to hanging heavy items on plaster walls, toggle bolts are a reliable choice. These sturdy anchors provide excellent support and stability. In this step-by-step guide, we will walk you through the process of installing toggle bolts in plaster walls, ensuring a secure and long-lasting installation.
Step-by-step guide to installing toggle bolts in plaster walls
Drilling the holes for the bolts
- Begin by identifying the spot on the plaster wall where you want to install the toggle bolts. Use a pencil to mark the exact location.
- Next, grab your power drill equipped with a masonry or multipurpose drill bit, suitable for drilling into plaster walls.
- Position the drill bit on the marked spot and apply gentle pressure to start drilling. Be sure to hold the drill straight and steady to prevent any damage to the plaster. Slowly drill into the wall until the desired depth is reached.
- Repeat the drilling process for each hole you need to create, ensuring they are spaced appropriately based on the size and weight of the item you will be hanging.
Inserting the toggle bolts into the holes
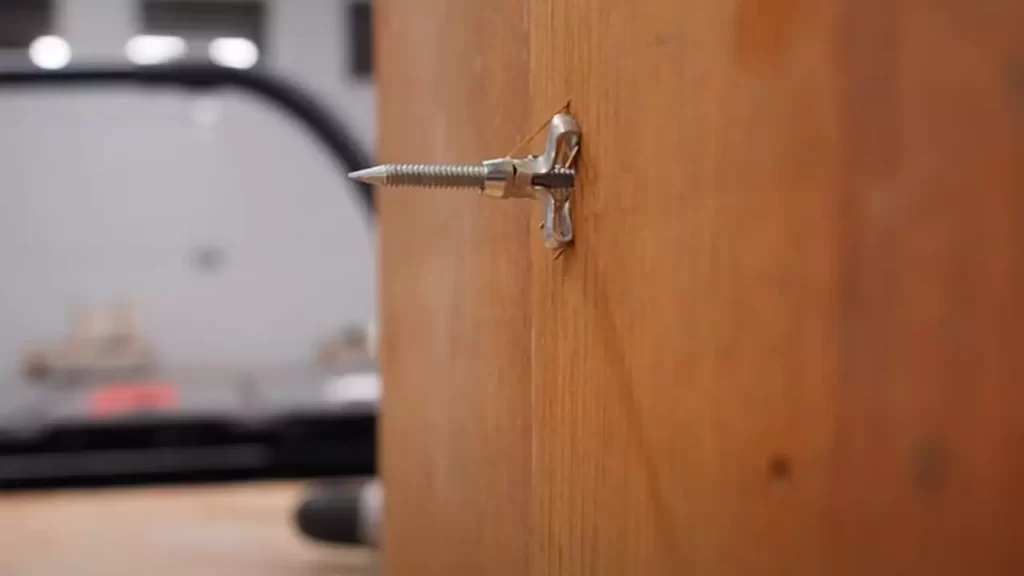
- Once the holes are drilled, take the toggle bolts and thread the wings onto the bolts, making sure they are secured tightly.
- Insert the bolts into the holes you drilled, ensuring the wings remain folded against the bolt shaft during insertion.
- Apply gentle pressure while pushing the toggle bolts into the holes, ensuring they are inserted all the way to the wall surface.
- Once fully inserted, pull back on the bolt slightly to engage the wings against the inner side of the plaster wall.
Securing the toggle bolts with wing nuts
- Finally, grab a wing nut for each toggle bolt and thread it onto the exposed end of the bolt.
- Tighten the wing nuts by hand until they are snug against the wall. Avoid over-tightening, as it may cause damage to the plaster.
- If needed, use a wrench or pliers to provide additional tightening, but be cautious not to apply excessive force.
- Ensure that each toggle bolt is securely fastened with the wing nut, providing the necessary support for your heavy item.
By following these steps, you can confidently install toggle bolts in plaster walls, providing a strong and reliable support system for your hanging needs. Remember to always choose the appropriate size of toggle bolt and carefully consider the weight and size of the item you are hanging to ensure a secure installation. Happy hanging!
Installing Screw Anchors
Step-by-step guide to installing screw anchors in plaster walls
When it comes to installing anchors in plaster walls, using screw anchors is a reliable and secure method. Screw anchors provide a strong hold, making them suitable for hanging heavy objects such as shelves, mirrors, or artwork. To help you navigate the process with ease, here is a step-by-step guide to installing screw anchors in plaster walls.
Preparing the pilot hole
To begin the installation process, you’ll need to prepare a pilot hole in the plaster wall. This is crucial as it ensures the screw anchor goes in smoothly and securely. Follow these steps:
- Start by selecting the appropriate size of the screw anchor for your project. The size will depend on the weight and size of the object you plan to hang. Refer to the packaging or consult a hardware store expert for guidance.
- Using a drill bit that matches the size of the screw anchor, create a pilot hole in the plaster wall. Make sure to hold the drill perpendicular to the wall and apply gentle pressure to prevent any damage.
- Clean the pilot hole by carefully removing any dust or debris using a brush or vacuum cleaner. A clean pilot hole allows for a better fit and stronger hold.
Inserting the screw anchor into the hole
With the pilot hole prepared, it’s time to insert the screw anchor into the plaster wall. Follow these steps for a hassle-free installation:
- Take the screw anchor and gently place it into the pilot hole. Ensure that it goes in flush with the surface of the wall.
- Apply firm but controlled pressure as you push the screw anchor into the hole. It should fit snugly and not require excessive force.
- If needed, use a hammer lightly to tap the screw anchor flush with the wall surface. Be cautious and avoid using too much force to prevent damaging the plaster.
Tightening the screw anchor with a screwdriver or drill
The final step in the installation process is tightening the screw anchor to secure it in place. This will provide a sturdy foundation for hanging your object. Here’s what you need to do:
- Choose a screwdriver or drill bit that matches the head of the screw provided with the anchor. This ensures a proper fit and prevents any damage to the screw or anchor.
- Using the screwdriver or drill, begin tightening the screw into the screw anchor. Apply steady pressure and make sure the screw is going in straight.
- Continue tightening until the screw is fully secured in the screw anchor, but be cautious not to overtighten as it may cause damage to the plaster.
- Check the stability of the screw anchor by giving it a gentle tug. If it feels sturdy and doesn’t move, you’re good to go!
Installing screw anchors in plaster walls is a straightforward process that provides a reliable solution for hanging objects securely. By following this step-by-step guide, you can ensure a successful installation and enjoy the peace of mind that comes with knowing your items are safely mounted.
Tips And Tricks For Successful Anchor Installation
Proper installation of anchors is crucial when it comes to hanging objects on plaster walls. Without the right technique, you risk damaging the wall or causing items to fall. To ensure a successful anchor installation, follow these helpful tips and tricks.
Proper alignment and positioning of anchors
Before installing anchors, it is essential to ensure proper alignment and positioning. This will ensure that your item hangs straight and securely. Here are a few tips to keep in mind:
- Measure and mark the desired location of the anchor using a pencil or tape measure.
- Use a level to ensure that the mark is straight and aligned.
- If you’re hanging multiple items, ensure proper spacing between each anchor.
- Consider the weight and size of the item to determine the number of anchors needed.
Ensuring adequate support for heavy items
If you’re hanging heavy items, it is vital to provide adequate support to prevent them from falling. Follow these tips to ensure your anchors can handle the weight:
- Choose the appropriate anchor type for the weight of the item. Plastic anchors are suitable for lightweight items, while metal or toggle anchors are best for heavier objects.
- Drill a hole slightly smaller than the anchor size to ensure a tight fit.
- For added support, consider using multiple anchors spaced evenly across the item.
- Insert the anchor into the wall until it is flush with the surface.
- Tighten the screw until it is secure, but be careful not to overtighten and cause damage.
Avoiding common mistakes during anchor installation
Even with careful planning, mistakes can happen during anchor installation. By avoiding these common errors, you can ensure a successful and secure installation:
| Mistake | Solution |
|---|---|
| Not using the right type of anchor for the wall material | Choose an anchor that is suitable for plaster walls, such as a toggle or expansion anchor. |
| Not drilling the hole deep enough | Ensure the hole is drilled deep enough to accommodate the entire length of the anchor. |
| Overtightening the screw | Tighten the screw until it is snug but avoid overtightening, as this can weaken the anchor or damage the wall. |
| Not adequately supporting the item | For heavy items, use multiple anchors or consider alternative hanging methods to provide proper support. |
By following these tips and tricks, you can ensure a successful anchor installation in plaster walls. Proper alignment and positioning, adequate support for heavy items, and avoiding common mistakes will result in secure and long-lasting wall hangings.
Final Thoughts And Additional Resources
Summary of Anchor Installation in Plaster Walls
When it comes to installing anchors in plaster walls, it’s important to follow the correct steps to ensure a secure and reliable result. First, identify the type of anchor suitable for your project. Whether it’s a toggle bolt, expansion anchor, or molly bolt, choose the one that matches your wall thickness and weight requirements. Next, mark the spot on the wall where you want to install the anchor, ensuring it is not too close to any electrical wiring or plumbing.
Using a drill with the appropriate size bit, carefully create a pilot hole at the marked spot. Be sure to drill straight and avoid applying too much pressure, as this can damage the plaster. Once the pilot hole is ready, insert the anchor into the hole, making sure it sits flush with the wall surface. Gently tap it in using a hammer if needed.
To complete the installation, tighten the anchor using a screwdriver or a wrench, depending on the type of anchor. Make sure it is secure and does not wiggle. Finally, trim off any excess anchor material, leaving a clean and polished finish.
Recommended Resources for Further Guidance and Support
Installing anchors in plaster walls can sometimes be a challenging task, especially for beginners. However, with the right resources, you can gain the knowledge and confidence needed to tackle this project successfully. Here are some recommended resources that provide further guidance and support:
- “How to Choose and Use Concrete Fasteners: Anchor Screws” – Family Handyman
- “How to Install Drywall Anchors” – The Spruce
- “How to Install an Anchor” – Bob Vila
- “How to Fasten Anything to Plaster Walls” – DoItYourself.com
These resources offer comprehensive step-by-step instructions, helpful tips, and visual aids to make the installation process easier. Additionally, they provide valuable information on different types of anchors, their strengths, and best practices for installation.
By utilizing these resources, you can enhance your understanding of anchor installation in plaster walls and ensure a successful and durable result for your next home improvement project.
Frequently Asked Questions
Can You Use Anchors In Plaster Walls?
Yes, anchors can be used in plaster walls.
How Do You Put An Anchor In A Plaster Wall Without A Drill?
To anchor a plaster wall without a drill, you can use adhesive hooks or wall anchors. Adhesive hooks stick directly onto the wall, while wall anchors provide extra support. Ensure the wall is clean and dry, and follow the instructions provided with the hooks or anchors for proper installation.
How Do You Put A Screw Anchor In Plaster?
To put a screw anchor in plaster, follow these steps: 1. Determine the location and mark it. 2. Use a drill to create a pilot hole. 3. Insert the screw anchor into the hole. 4. Twist it clockwise to secure it in the plaster.
5. Finally, insert the screw into the anchor and tighten.
How Do You Drill Into Plaster Without Cracking It?
To drill into plaster without cracking it, follow these steps: 1. Choose the right drill bit, such as a carbide-tipped or masonry bit. 2. Mark the drilling spot with a pencil or masking tape. 3. Use a low drilling speed or set the drill to the hammer mode.
4. Apply steady, gentle pressure while drilling. 5. Clean away dust and debris with a brush.
Conclusion
Installing anchors in plaster walls is a simple and practical task that anyone can do with the right tools and knowledge. By following the step-by-step guide outlined in this blog post, you can ensure that your anchors are securely fastened, allowing you to hang objects of various weights without the risk of damaging your walls.
Remember to choose the appropriate anchors for your needs and always take the necessary safety precautions. With this information at hand, you can confidently tackle any wall hanging project. Happy DIY-ing!
