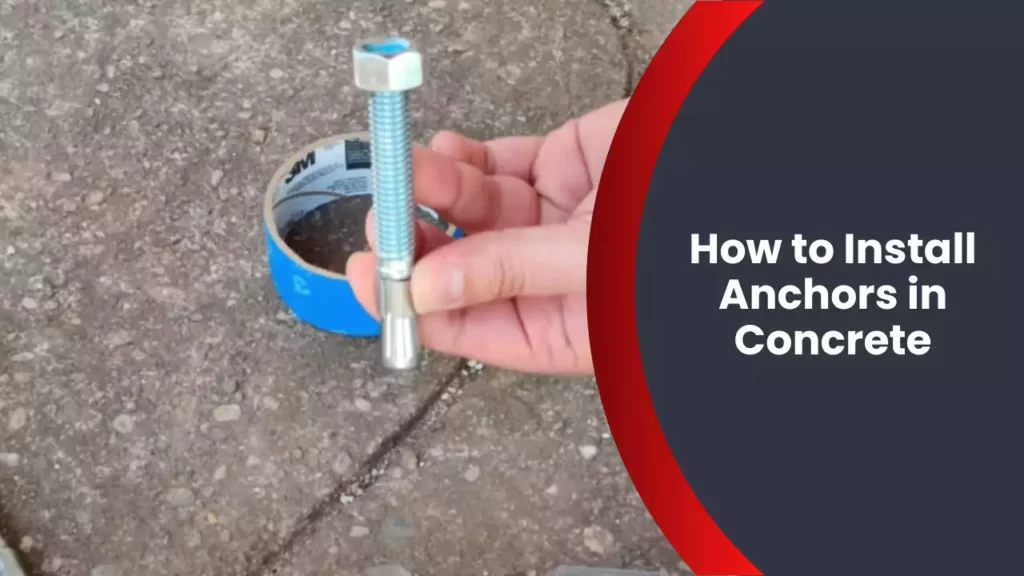
To install anchors in concrete, carefully measure and mark the desired location, drill a hole using a masonry drill bit, insert the anchor into the hole, and tighten it securely using a wrench. Installing anchors in concrete requires a precise and methodical approach.
Whether you’re mounting shelves, securing fixtures, or anchoring heavy objects, properly installed anchors provide stability and prevent damage. In this guide, we’ll walk you through the step-by-step process of installing anchors in concrete. You’ll learn the essential tools required, the correct technique to drill into concrete, and how to secure the anchors effectively.
By following these instructions, you’ll be able to confidently handle various installation projects on concrete surfaces. So let’s delve into the details of how to install anchors in concrete.
Understanding The Basics Of Anchors
When it comes to concrete installations, anchors play a crucial role in providing stability and strength to various structures. Understanding the basics of anchors is essential to ensure a successful installation. In this section, we will explore what anchors are and why they are important in concrete installations. We will also discuss the different types of anchors commonly used in such installations.
What are anchors and why are they important in concrete installations?
Anchors are devices used to secure objects to concrete surfaces, preventing them from moving or falling. They are crucial in concrete installations to ensure structural integrity and safety. Anchors are typically used in applications such as attaching shelves, cabinets, handrails, or heavy machinery to concrete walls, floors, or ceilings. They provide a secure connection between the object and the concrete surface, giving it enough support to withstand external forces or loads.
The different types of anchors commonly used in concrete installations
There are several types of anchors available for concrete installations, each with its own unique characteristics and applications. The three main types of anchors commonly used are expansion anchors, mechanical anchors, and chemical anchors.
Expansion anchors
Expansion anchors are one of the most popular choices for concrete installations. They work by expanding within the concrete hole, creating a tight and secure fit. The expansion force is typically generated by tightening a screw or bolt, which pushes against the walls of the hole. Expansion anchors are available in various designs, such as wedge anchors, sleeve anchors, and drop-in anchors. They are suitable for both light and heavy-duty applications, depending on their size and design.
Mechanical anchors
Mechanical anchors, also known as friction anchors, utilize friction to secure objects to concrete surfaces. They rely on the mechanical interlocking between the anchor and the concrete for stability. Mechanical anchors come in different forms, including lag shields, drive anchors, and screw anchors. These anchors are generally easier to install compared to expansion anchors and are suitable for medium to heavy loads.
Chemical anchors
Chemical anchors provide an excellent solution for applications where maximum strength and durability are required. They rely on a chemical reaction to bond the anchor with the concrete. Chemical anchors are commonly used when attaching heavy structural elements or equipment to concrete surfaces. They offer exceptional load-bearing capabilities and are often preferred in critical installations.
In conclusion, understanding the basics of anchors is crucial when it comes to concrete installations. Anchors provide the necessary stability and strength to ensure the safety and longevity of various structures. By selecting the appropriate type of anchor for your specific application, you can ensure a secure and reliable installation. Whether you choose expansion anchors, mechanical anchors, or chemical anchors, it is essential to follow the manufacturer’s instructions and guidelines for proper installation and maximize the effectiveness of your anchors.
Preparing For Anchor Installation
Before installing anchors in concrete, it is essential to take the necessary preparation steps to ensure a successful and secure installation. This section will guide you through the important considerations and tasks to complete before you begin. Follow these steps for a reliable anchor installation:
Assessing the Concrete Surface for Suitability
The first step in preparing for anchor installation is to assess the suitability of the concrete surface. While concrete is generally a strong and durable material, it is crucial to examine its condition to determine if it can properly support the intended load. Look for any signs of deterioration, cracks, or uneven surfaces that may affect the anchor’s performance. A structurally sound and high-quality concrete surface is imperative for a secure installation.
Choosing the Right Anchor for the Intended Load and Application
Once you have assessed the concrete surface, the next step is to select the appropriate anchor for the intended load and application. There are various types of anchors available, each designed to accommodate different weights, fixtures, and installation methods. It is crucial to choose the anchor that can handle the load and provide the necessary stability for the specific application. Whether you need a sleeve anchor, wedge anchor, or epoxy anchor, consider the weight, material, and conditions of the project to make an informed decision.
Gathering the Necessary Tools and Materials
Before starting the installation, gather all the necessary tools and materials required for the job. This ensures a smooth and efficient process, eliminating the need for repeated trips to the hardware store. Basic tools such as a hammer drill with the appropriate drill bit, a wrench, and a measuring tape are essential. Additionally, ensure you have the correct anchors, concrete screws, or chemical adhesive as per the chosen anchor type. Having everything readily available saves time and allows you to focus on the installation without any interruptions.
Ensuring Proper Safety Measures are in Place
Finally, before commencing with the installation, it is crucial to prioritize safety. Concrete anchor installation involves using power tools and working with concrete, which can be hazardous if proper precautions are not taken. Prioritize wearing personal protective equipment (PPE) such as safety glasses, gloves, and ear protection. Additionally, make sure the work area is clear of any obstructions and that you have a stable and secure footing. Always follow the manufacturer’s instructions and guidelines to minimize the risk of accidents and ensure a safe installation.

Step-By-Step Guide: Installing Anchors In Concrete
Installing anchors in concrete is a crucial step in various construction and DIY projects. Whether you’re hanging shelves, mounting a television, or securing heavy equipment, anchors provide the strength and stability needed to keep things safely in place. In this step-by-step guide, we will walk you through the process of installing anchors in concrete, from marking the anchor locations to testing their stability and reliability.
Marking the Anchor Locations on the Concrete Surface
Before you can start installing anchors in concrete, it’s important to carefully mark the locations where you want them to be placed. This step helps ensure proper alignment and spacing. To mark the anchor locations:
- Clean the concrete surface to remove any dust or debris that may make it difficult to mark accurately.
- Measure and mark the desired positions for the anchors using a pencil or marker.
- Double-check the markings to ensure they are accurate and aligned with your project’s requirements.
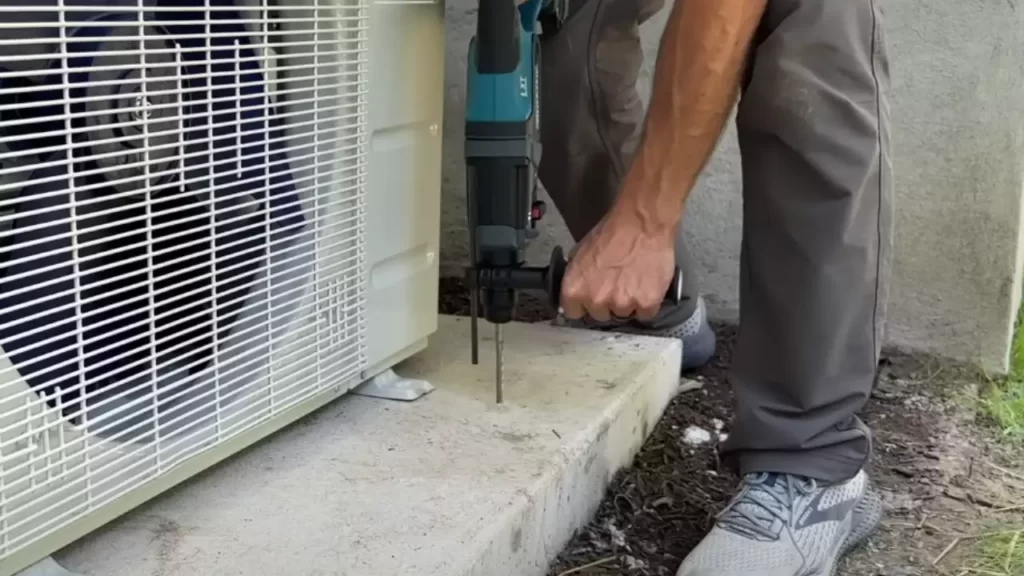
Drilling the Holes for the Anchors
Once you have marked the anchor locations, it’s time to drill the holes that will accommodate the anchors. Follow these steps:
- Put on safety goggles and a dust mask to protect yourself from flying debris.
- Select the appropriate drill bit size for the anchors you are using.
- Position the drill bit perpendicular to the surface and start drilling the hole at a slow speed.
- Apply gentle, consistent pressure while drilling, and periodically remove the bit to clear away any accumulated dust.
Cleaning the Holes and Removing Debris
After drilling the holes, it’s essential to clean them thoroughly to ensure proper anchor insertion. Here’s what you need to do:
- Use a brush, vacuum, or compressed air to remove any loose debris and dust from the holes.
- Inspect each hole to ensure there is no remaining debris that could hinder the anchoring process.
Inserting the Anchors into the Holes
Now that the holes are clean and ready, it’s time to insert the anchors. Follow these steps:
- Insert the anchor into the hole, making sure it sits flush with the surface of the concrete.
- If necessary, lightly tap the anchor with a hammer to secure it firmly.
- Repeat the process for each anchor, ensuring they are all installed correctly.
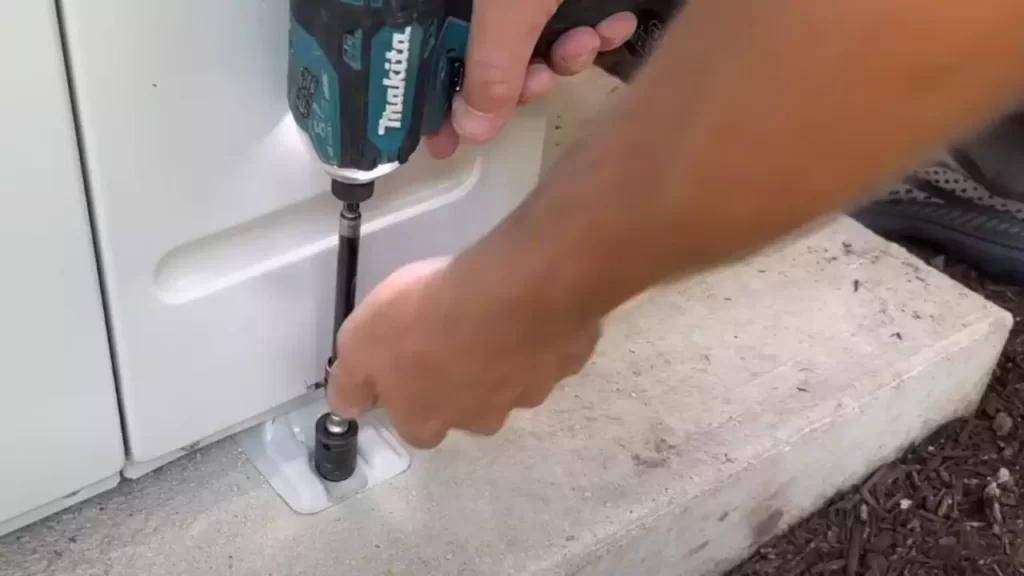
Setting the Anchors Securely in Place
To ensure the anchors are secure and provide maximum stability, follow these steps:
- Tighten the anchor securely using an appropriate tool, such as a wrench or screwdriver.
- Check each anchor to ensure it is properly tightened and securely in place.
- Do not over-tighten, as this can damage the anchor or the concrete.
Testing the Anchors for Stability and Reliability
Once the anchors are securely in place, it’s essential to test their stability and reliability before putting any load on them. Here’s how:
- Apply gentle pressure or give a small tug to each anchor to check if it feels firmly held in the concrete.
- If any anchor feels loose or unstable, remove it and reinstall it following the previous steps.
By following this step-by-step guide, you can confidently install anchors in concrete and ensure the stability and reliability of your construction or DIY projects. Remember to always choose the appropriate anchors and tools for your specific needs, and follow manufacturer instructions for best results.
Best Practices For Installing Anchors In Concrete
In order to ensure a secure and reliable anchor installation in concrete, it is essential to follow best practices. By adhering to these guidelines, you can ensure the longevity and effectiveness of your anchors. In this article, we will explore the proper spacing and positioning of anchors, the correct depth and diameter of the drilled holes, how to adjust for various concrete thicknesses and strengths, tips for handling different types of anchors, and common mistakes to avoid during installation.
Proper spacing and positioning of anchors
One of the key aspects of anchor installation in concrete is determining the proper spacing and positioning. This plays a crucial role in distributing the load evenly and preventing any structural failures. You should consider the weight and tension of the object being secured, as well as the type of anchor being used.
To ensure a secure and balanced installation, follow these recommendations:
– Maintain a minimum distance of 10 anchor diameters between anchors.
– Keep a minimum edge distance of three times the anchor diameter to prevent concrete splitting.
– Place anchors at a distance of at least two anchor diameters from corners or edges.
– For heavy loads, consult a structural engineer for specific spacing requirements.
Ensuring the correct depth and diameter of the drilled holes
Another crucial factor in successful anchor installation is drilling the correct depth and diameter of the holes. The depth and diameter should match the specifications provided by the anchor manufacturer. This ensures that the anchor can penetrate the concrete adequately and provides sufficient depth for the expansion mechanism to operate effectively.
Ensure the following when drilling holes for anchors:
– Use a carbide-tipped masonry drill bit that matches the diameter specified by the anchor manufacturer.
– Drill the hole to the required depth, typically at least one inch deeper than the length of the anchor.
– Clean the hole to remove any debris or dust before inserting the anchor.
– Use a brush or compressed air to blow out the hole, ensuring it is free from any obstructions.
Adjusting for various concrete thicknesses and strengths
Concrete can vary in thickness and strength, requiring adjustments during anchor installation. Consider the following when working with different concrete conditions:
Concrete thickness:
– For thin concrete, use a shorter anchor length or consider using adhesive anchors.
– For thicker concrete, use longer anchors to ensure sufficient embedment depth.
Concrete strength:
– Consult the anchor manufacturer’s guidelines to select anchors suitable for the specific concrete strength.
– Choose anchors with higher load capacities for stronger concrete.
Tips for handling different types of anchors
Different types of anchors require specific handling techniques to ensure proper installation. Here are some tips for handling common anchor types:
Wedge anchors:
– Install wedge anchors by hammering them into the pre-drilled hole until the washer is flush with the surface.
– Ensure the nut is tightened correctly to achieve the desired load capacity.
Drop-in anchors:
– Insert drop-in anchors into the pre-drilled hole, ensuring they are flush with the surface.
– Set the anchor by lightly tapping it with a hammer until the lip is fully engaged.
Chemical anchors:
– Follow the manufacturer’s instructions for mixing and applying the adhesive.
– Place the anchor into the hole immediately after applying the adhesive to prevent it from curing before installation.
Avoiding common mistakes during anchor installation
To ensure a successful anchor installation, it is important to avoid common mistakes that can compromise the integrity of the anchoring system. Here are some mistakes to steer clear of:
– Over-tightening the anchor: This can lead to the fastener or concrete cracking, reducing the anchor’s holding capacity.
– Underestimating load requirements: Always consider the weight and force that will be exerted on the anchor and select the appropriate load capacity.
– Using incorrect tools or materials: Ensure you use the recommended tools and materials specified by the anchor manufacturer for optimal installation.
– Neglecting to clean the hole: A clean hole free of debris and dust is crucial for proper anchor embedment.
By following these best practices for installing anchors in concrete, you can ensure a secure and reliable anchoring solution for a wide range of applications. Taking the time to properly space and position anchors, drill holes to the correct depth and diameter, adjust for different concrete conditions, handle different anchor types, and avoid common mistakes will ultimately lead to a successful installation that can withstand the test of time.
Safety Considerations When Installing Anchors In Concrete
When it comes to installing anchors in concrete, safety should always be your top priority. This task requires proper care and attention to ensure the protection of yourself and others. In this section, we will discuss some essential safety considerations that you need to keep in mind during the installation process.
Wearing Appropriate Protective Gear
Wearing the right protective gear is crucial to safeguard yourself from potential hazards while installing anchors in concrete. Make sure you have the following items:
- Safety goggles: Protect your eyes from flying debris or dust that can cause harm.
- Protective gloves: Shield your hands from sharp edges and potential injuries.
- Hard hat: Guard your head against falling objects and accidental impacts.
- Ear protection: Block excessive noise produced during drilling to prevent hearing damage.
- Dust mask: Prevent inhaling harmful particles generated during the drilling process.
Using Caution when Drilling and Handling Tools
Proper handling of tools is essential to avoid accidents or injuries. Follow these precautions:
- Ensure your drilling machine is in good working condition before starting.
- Double-check that the drill bits are sharp and appropriate for concrete drilling.
- Hold the drill firmly with both hands and maintain a stable stance.
- Apply steady and even pressure while drilling, avoiding sudden jerks or excessive force.
- When changing drill bits or handling other tools, always switch off the power.
Avoiding Potential Hazards during the Installation Process
During the anchor installation, it is crucial to be mindful of potential hazards that may arise. Consider the following:
- Be aware of cables, pipes, or other hidden obstacles within the concrete to avoid damaging them.
- Keep the work area clean and free from clutter to prevent tripping or slipping hazards.
- Do not work in wet conditions to minimize the chances of slipping or electric shock.
- Ensure proper ventilation if working indoors and be cautious of harmful fumes.
Checking for Structural Integrity and Load Limitations
Before proceeding with the anchor installation, you must evaluate the concrete structure’s integrity and load limitations. Consider the following:
- Inspect the concrete for cracks, spalling, or other signs of damage that may compromise its strength.
- Ensure the concrete has sufficient thickness and density to support the intended load.
- Refer to the manufacturer’s guidelines or consult an expert to determine the appropriate anchor type and size for your specific application.
By following these safety considerations, you can minimize the risk of accidents, injuries, or structural failure. Remember, safety should always be the primary concern when installing anchors in concrete.
Troubleshooting Common Issues With Anchor Installation
While installing anchors in concrete may seem like a straightforward task, there can be common issues that arise during the process. These issues can compromise the effectiveness and reliability of the anchors, which is why troubleshooting is essential. In this section, we will discuss some of the most common problems encountered during anchor installation and the steps to address them.
Loose or Unstable Anchors
One common issue that may arise is loose or unstable anchors. This can happen when the anchor does not grip the concrete properly, resulting in a weak connection. There are several possible causes for this problem:
- Inadequate drilling depth or diameter
- Insufficient cleaning of the hole before installation
- Using the wrong type of anchor for the concrete material
- Inadequate torque or tightening of the anchor
To troubleshoot this issue, follow these steps:
- Verify that the drilling depth and diameter are sufficient for the anchor.
- Thoroughly clean the hole using a brush or compressed air.
- Ensure you are using the correct type of anchor for the specific concrete material.
- Tighten the anchor according to the manufacturer’s specifications, using the appropriate tools.
Anchors Failing to Grip or Hold Securely
Another common problem that may occur is when the anchors fail to grip or hold securely. This can result in a weak connection that can compromise the overall stability and safety of the installation. The following factors can contribute to this issue:
- Presence of dust, debris, or oil on the hole or anchor
- Using the wrong anchor size or type for the application
- Failure to properly align the anchor with the hole
- Incorrect installation technique
To troubleshoot this problem, follow these steps:
- Clean the hole and anchor thoroughly, removing any dust, debris, or oil.
- Ensure you are using the appropriate anchor size and type for the specific application.
- Align the anchor properly with the hole, ensuring a precise fit.
- Follow the correct installation technique, including using the right amount of force and torque.
Dealing with Damaged or Compromised Anchors
In some cases, you may encounter damaged or compromised anchors during installation. This can happen due to various reasons, such as:
- Mishandling during transport or storage
- Inadequate quality or manufacturing defects
- Exposure to extreme temperatures or corrosive environments
If you discover damaged or compromised anchors, it is crucial to address the issue promptly to ensure the stability and effectiveness of the installation. Follow these steps to deal with this problem:
- Identify the damaged or compromised anchors by conducting a thorough inspection.
- Remove the affected anchors carefully, avoiding any further damage.
- Replace the damaged anchors with new ones of the same type and specifications.
- Follow the proper installation procedure for the replacement anchors.
By troubleshooting and addressing these common issues during anchor installation in concrete, you can ensure a secure and stable connection. Taking the time to troubleshoot and resolve any problems will help maintain the integrity and reliability of your installation, providing peace of mind and safety.
Frequently Asked Questions
Do You Hammer In Concrete Anchors?
Yes, you can use a hammer to install concrete anchors.
How Deep Do Anchor Bolts Need To Be In Concrete?
Anchor bolts need to be embedded in concrete to a depth of at least 8 inches. Proper depth ensures strength and stability for securing structures and prevents them from shifting or collapsing.
Where Do Anchor Bolts Go In Concrete?
Anchor bolts are embedded in concrete to provide a secure connection for structures. They are typically placed at specific locations designated by engineering and construction plans. The positioning and installation of anchor bolts are critical for the stability and strength of the structure.
How Do You Install Plastic Anchors In Concrete?
To install plastic anchors in concrete, follow these steps: 1. Drill a hole in the concrete using the appropriate drill bit. 2. Tap the plastic anchor into the hole using a hammer until it is flush with the surface. 3. Insert the screw into the anchor and tighten it to secure the item to the concrete.
4. Repeat the process for additional anchors as needed. 5. Ensure a firm grip by testing the anchor before placing any weight or load on it. That’s it! Enjoy your securely installed plastic anchors in concrete.
Conclusion
To sum up, installing anchors in concrete can be a straightforward process if you follow the right steps. By carefully selecting the appropriate anchor, drilling the correct size hole, and using the proper installation technique, you can ensure a secure and durable anchoring solution.
Remember to always consider the weight and load requirements of your project and consult professional advice when needed. With the right knowledge and tools, you can confidently tackle concrete anchoring projects with ease.