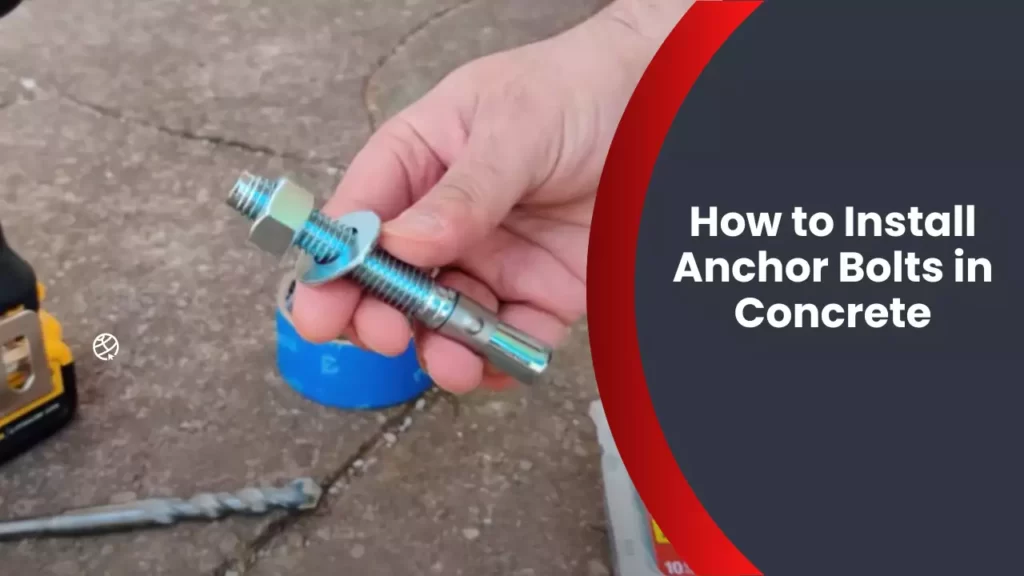
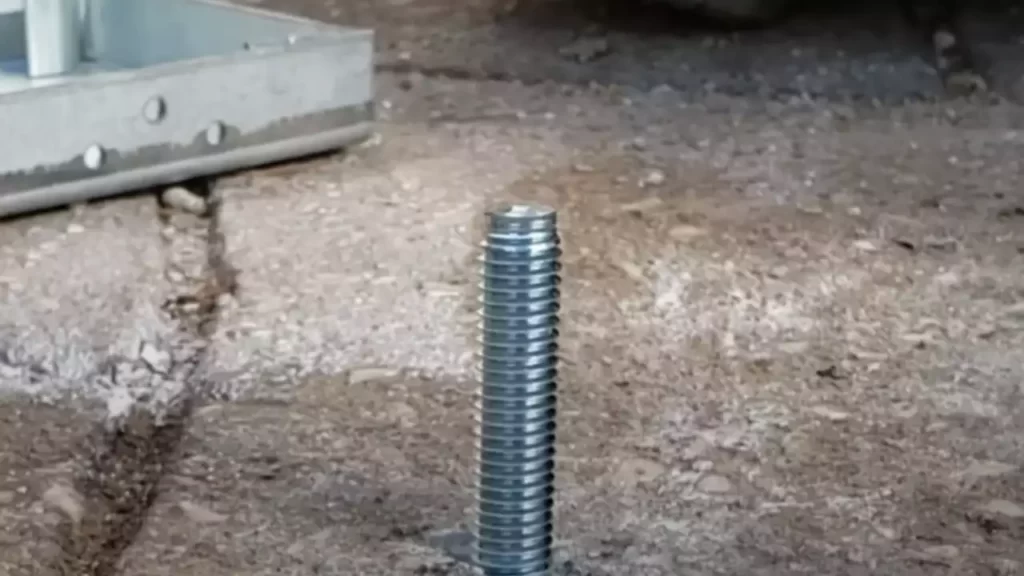
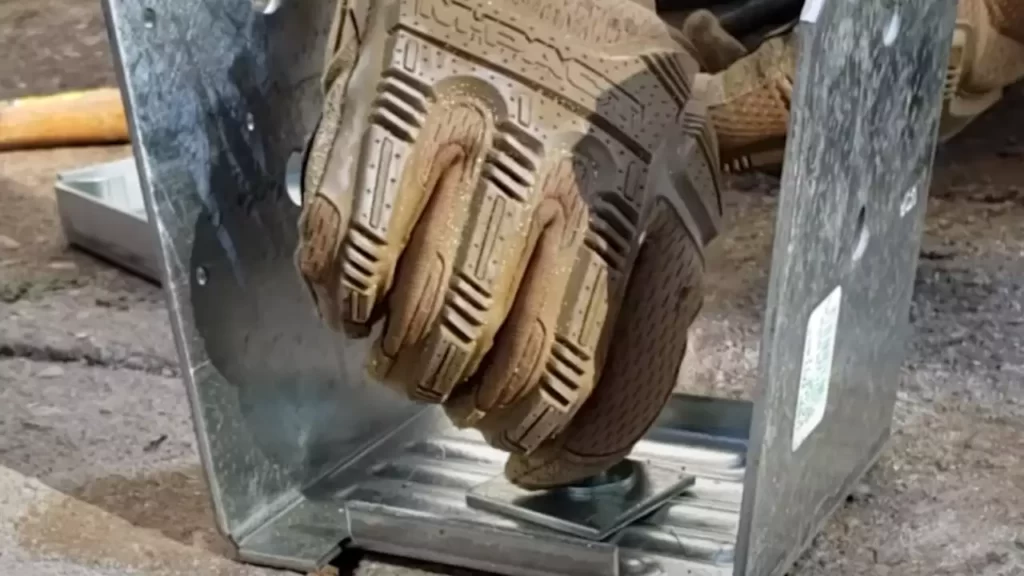
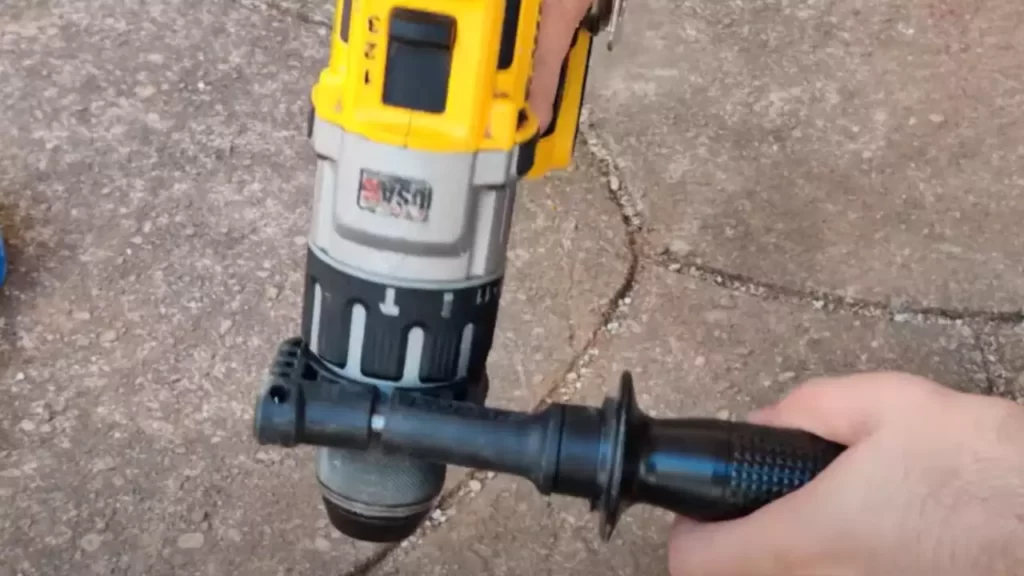
To install anchor bolts in concrete, first, mark the drill locations and ensure the correct size and depth of holes. Then, drill the holes using a hammer drill and a masonry bit.
Insert the anchor bolts into the holes and tighten them with a wrench until they are snug.
Importance Of Anchor Bolts In Concrete Structures
The Role of Anchor Bolts in Providing Stability and Strength
Anchor bolts play a crucial role in ensuring the stability and strength of concrete structures. By securely anchoring various elements to the foundation, they provide the necessary support to withstand various forces, such as wind, earthquakes, and structural loads. These bolts are specially designed to resist both shear and tension forces, making them an essential component in maintaining the integrity of the entire structure.
Key Considerations for Anchor Bolt Installation in Concrete Structures
Proper installation of anchor bolts is vital to ensure their effectiveness in providing stability. Here are some key considerations when installing anchor bolts in concrete structures:
- Choosing the Right Type of Anchor Bolt:
- Accurate Placement and Alignment:
- Adequate Embedment Depth:
- Proper Torque Tightening:
There are different types of anchor bolts available, including wedge anchors, sleeve anchors, and epoxy anchors. The choice of anchor bolt depends on factors such as the load requirements, concrete strength, and environmental conditions. It’s crucial to select the appropriate type of anchor bolt that suits the specific application.
Precise placement and alignment of anchor bolts are essential for their effective functionality. The bolts should be positioned in the correct locations according to the structural design. Additionally, ensuring proper alignment ensures a secure connection between the bolt and the attached component.
The embedment depth of anchor bolts in the concrete is another critical factor to consider. The depth depends on the load requirements and the type of bolt used. It’s important to follow the guidelines provided by the manufacturer or consult with a structural engineer to determine the appropriate embedment depth for the specific application.
Correct torque tightening of anchor bolts is essential to achieve the desired strength and prevent loosening. Over-tightening or under-tightening can lead to compromised stability and performance. Utilizing a torque wrench and following the manufacturer’s recommendations for torque values ensures proper and consistent tightening.
By considering these key factors during anchor bolt installation, concrete structures can benefit from increased stability, enhanced durability, and improved resistance to various external forces. It is crucial to prioritize the correct installation process to ensure the long-term performance and safety of the overall structure.

Preparing For Anchor Bolt Installation
Preparing for Anchor Bolt Installation
When it comes to installing anchor bolts in concrete, proper preparation is essential for a successful and secure installation. This involves assessing the load requirements and determining the appropriate anchor bolt type, gathering the necessary tools and materials, and understanding the concrete composition and how it can impact the installation process. In this section, we will delve into each of these steps to ensure a smooth and reliable anchor bolt installation.
Assessing the Load Requirements and Determining the Anchor Bolt Type
Before you begin the installation process, it is crucial to assess the load requirements of your project. This involves calculating the anticipated weight or force that the anchor bolt will need to support. By understanding the load requirements, you can then determine the appropriate anchor bolt type that will provide sufficient strength and stability.
Different anchor bolt types are designed to accommodate various load capacities and environmental conditions. It is essential to select the right anchor bolt type to ensure the safety and longevity of your structure. Whether it is wedge anchors, sleeve anchors, or epoxy anchors, each type has its own specific purpose and installation requirements. By properly assessing the load requirements and choosing the suitable anchor bolt type, you can minimize the chances of anchor failure and maximize the overall integrity of your project.
Gathering the Necessary Tools and Materials for the Installation Process
Once you have determined the anchor bolt type required for your project, the next step is to gather the necessary tools and materials for the installation process. To ensure a smooth and efficient installation, you will need a few essential items.
Here is a list of tools and materials you will need to gather:
- Hammer drill
- Carbide-tipped masonry drill bit
- Wrench or socket set
- Measuring tape
- Level
- Anchors bolts
- Nuts and washers
- Clean rag or brush
- Concrete adhesive (if necessary)
Ensuring you have all the required tools and materials beforehand will save you time and effort during the installation process. It is always wise to double-check your list before starting to avoid any unnecessary interruptions.
Understanding the Concrete Composition and Its Impact on Installation
Concrete composition plays a vital role in anchor bolt installation. Various factors, such as concrete strength, porosity, and aggregate composition, can affect the installation process and the overall integrity of the anchor bolt.
Concrete Strength: The strength of the concrete determines the load capacity it can bear. In general, stronger concrete can accommodate heavier loads. It is essential to consult the concrete strength specifications and ensure it meets or exceeds the requirements for your project.
Porosity: Concrete porosity refers to the presence of small holes or voids within the material. Highly porous concrete can compromise the anchor bolt’s effectiveness and reduce its holding capacity. If you encounter a porous concrete surface, consider using adhesive or smaller anchor bolts designed for such conditions.
Aggregate Composition: The composition of aggregates used in the concrete mixture can influence the drilling process. Harder aggregates can slow down the drilling speed and may require specialized drill bits to penetrate successfully. It is crucial to be prepared with appropriate tools and equipment when dealing with specific concrete compositions.
By understanding the concrete composition and its impact on anchor bolt installation, you can adapt your approach and ensure a secure and durable attachment. Taking these factors into account will minimize potential risks and maximize the strength and reliability of your project.

Measuring And Marking For Anchor Bolt Placement
Measuring and Marking for Anchor Bolt Placement
Proper measuring and marking for anchor bolt placement is crucial to ensure the stability and strength of your structure. A precise installation will prevent any potential issues and costly repairs down the line. In this section, we will discuss two essential aspects of measuring and marking anchor bolt placement: determining the correct spacing and distance between anchor bolts and utilizing templates or jigs to ensure accurate positioning.
Determining the correct spacing and distance between anchor bolts
When it comes to anchor bolt installation, determining the correct spacing and distance between the bolts is crucial. This is because improper spacing can compromise the strength and stability of your structure. To determine the correct spacing, consider the load distribution and the size and type of the structure being anchored.
To calculate the spacing, follow these steps:
- Refer to the building codes or engineering specifications for the recommended minimum spacing requirements.
- Measure the width and length of the baseplate or structure that will be anchored to the concrete.
- Divide the width and length by the desired spacing factor.
- Mark these spacing measurements on the concrete surface using a tape measure, making sure to keep the spacing consistent and evenly distributed.
By following these steps, you can determine the correct spacing between anchor bolts, ensuring the structural integrity of your project.
Utilizing templates or jigs to ensure accurate positioning
Another method to ensure accurate anchor bolt placement is by utilizing templates or jigs. This technique is especially useful when dealing with multiple anchor bolts that need to be installed in precise locations. Templates or jigs help eliminate human error and ensure consistent positioning throughout the installation process.
To utilize templates or jigs:
- Create a template or jig that matches the dimensions and hole patterns of the baseplate or structure being anchored.
- Align the template or jig with the desired location on the concrete surface. Be sure to secure it firmly to prevent any movement during the drilling process.
- Drill the anchor bolt holes through the template or jig, following the pre-determined spacing and depth requirements.
- After drilling all the necessary holes, remove the template or jig and clean any debris from the holes.
- Insert the anchor bolts into the prepared holes, ensuring they are properly aligned with the template or jig.
- Tighten the anchor bolts according to the manufacturer’s specifications, using the appropriate tools.
By utilizing templates or jigs, you can achieve precise and accurate positioning of anchor bolts, ensuring the stability of your structure.
Now that you understand the importance of measuring and marking for anchor bolt placement, as well as the methods to determine the correct spacing and utilize templates or jigs, you are ready for the next step in the anchor bolt installation process. In the upcoming section, we will delve into the crucial task of marking the concrete surface where the anchor bolts will be installed.

Drilling Holes For Anchor Bolts
Installing anchor bolts in concrete requires careful drilling to ensure a secure and durable attachment. To achieve this, it is crucial to follow proper guidelines for drilling holes. This section will cover the key steps involved in drilling holes for anchor bolts, including selecting the appropriate drill bit size and type, maintaining a perpendicular drill position, and using safe drilling techniques.
Selecting the appropriate drill bit size and type for the concrete material
Choosing the right drill bit size and type is essential for effective drilling in concrete. The drill bit should match the diameter of the anchor bolt and be designed specifically for drilling into masonry materials. Here are some guidelines for selecting the appropriate drill bit:
- Refer to the manufacturer’s recommendations for the anchor bolts to determine the required drill bit size.
- Ensure that the drill bit is made of hardened steel or carbide for durability.
- Consider the hardness of the concrete material when choosing a drill bit. Harder materials may require specialized drill bits.
- Use a hammer drill for faster and more efficient drilling in concrete. These drills combine rotary motion with a hammering action to penetrate tough surfaces.
Guidelines for keeping the drill perpendicular to the concrete surface
When drilling holes for anchor bolts, it is crucial to keep the drill perpendicular to the concrete surface to ensure proper alignment and stability. Here are some guidelines to maintain a perpendicular drill position:
- Use a spirit level to check the vertical alignment of the drill before drilling.
- Securely attach a depth stop to the drill bit to control the depth of the hole and help maintain a vertical position.
Safe drilling techniques to prevent damage to the concrete and surrounding area
Drilling holes in concrete should be done with caution to prevent damage to the concrete and the surrounding area. Follow these safe drilling techniques:
- Start drilling at a low speed to prevent the drill bit from wandering and ensure accuracy.
- Apply consistent pressure while drilling, but avoid excessive force to prevent overheating the drill bit.
- Periodically withdraw the drill bit to clear out dust and debris, preventing clogging and maintaining drilling efficiency.
- Wear appropriate personal protective equipment, such as safety goggles and ear protection, to safeguard against flying debris and noise.
- Work in a well-ventilated area or use a dust extraction system to minimize the inhalation of concrete dust.
By following these guidelines for drilling holes for anchor bolts, you can ensure a successful installation process and create a strong and secure foundation for your project.

Inserting And Setting Anchor Bolts
Properly aligning the anchor bolts into the drilled holes
Before inserting anchor bolts into the drilled holes, it is crucial to ensure proper alignment. This step may seem simple, but it is essential for the stability and effectiveness of the anchor bolts. Improper alignment can lead to weakened connections or even failure in holding the structure securely in place.
To align the anchor bolts correctly, begin by cleaning the drilled holes to remove any debris or excess concrete. Then, inspect the holes to ensure they are free from any cracks or irregularities. This step is vital to ensure a proper fit for the anchor bolts.
After inspecting and cleaning the holes, place the anchor bolts into the holes, ensuring their alignment matches the predetermined layout. Be sure to carefully position them, ensuring they are in line with each other and perpendicular to the concrete surface.
Securing the anchor bolts using an appropriate tool, such as a torque wrench
Once the anchor bolts are properly aligned in the drilled holes, the next crucial step is to securely fasten them using an appropriate tool. A torque wrench is highly recommended for this task as it provides accurate and controlled tightening.
Before securing the anchor bolts, refer to the manufacturer’s specifications to determine the required torque value. This information is crucial as overtightening or undertightening can compromise the integrity of the connection.
- Attach the torque wrench to the nut of the anchor bolt.
- Apply steady pressure in a clockwise direction while ensuring the bolt remains aligned and centered.
- Continue tightening until the desired torque value is reached, as specified by the manufacturer.
- Make sure not to exceed the recommended torque, as this can lead to bolt failure or damage to the surrounding concrete.
Ensuring the anchor bolts are set at the correct depth and angle
Setting the anchor bolts at the correct depth and angle is essential for the structural stability of the installation. Failure to do so can result in compromised integrity and potential safety hazards. Follow these steps to ensure proper depth and angle:
- Measure the required embedment depth specified by the manufacturer. This depth is typically determined based on the load requirements and concrete thickness.
- Mark the anchor bolts at the desired depth using tape or a marker.
- Using a measuring tape or depth gauge, check the depth of the drilled holes to verify they match the desired embedment depth.
- If the depth is incorrect, adjust accordingly by adding or removing concrete using a suitable tool, such as a hammer or chisel.
- Ensure that the anchor bolts are properly aligned vertically or at the desired angle by confirming their position using a level or measuring tools.
By following these steps diligently, you can ensure that your anchor bolts are inserted and set correctly in the concrete, providing the necessary strength and support for your structure.
Testing And Verifying Anchor Bolt Installation
Conducting load tests to evaluate the performance of the anchor bolts
Load tests are an essential step in ensuring the reliability and strength of anchor bolts installed in concrete. These tests involve subjecting the anchor bolts to different loads to evaluate their performance. Conducting load tests provides valuable insights into the ability of the anchor bolts to withstand the expected forces and pressures they will encounter.
During a load test, various loads are applied to the anchor bolts, simulating the conditions that they will bear in real-world scenarios. This helps in determining if the installation meets the required specifications and if any adjustments or modifications need to be made. It is essential to ensure that the load tests are conducted following the industry standards and guidelines to ensure accurate and consistent results.
Verifying the anchor bolt installation meets the required specifications and standards
Verifying that the anchor bolt installation meets the required specifications and standards is crucial to ensure the structural integrity and safety of the construction project. It involves a detailed inspection and evaluation of the anchor bolts and their respective installations.
One of the primary considerations during the verification process is to check if the anchor bolts are installed at the correct depth and aligned accurately with the structural load points. This is important as any deviation could lead to compromised stability and pose risks to the structure’s overall integrity.
Additionally, the anchor bolts must meet specific requirements in terms of diameter, length, and material. These requirements are typically defined by industry standards and regulations. Verifying these factors helps ensure that the anchor bolts possess the necessary strength and durability to withstand the intended loads and maintain their structural integrity over time.
To verify the installation, you should also check the effectiveness of the chosen anchoring method, whether through expansion, adhesive bonding, or mechanical interlocking. The compatibility of the anchor bolt materials with the concrete is another aspect to be considered during the verification process.
In conclusion, testing and verifying anchor bolt installation is a critical step in ensuring the overall reliability and safety of a concrete structure. Through load tests and thorough verification, you can gain confidence in the performance of your anchor bolts, knowing that they meet the required specifications and standards. This not only enhances the structural integrity of the project but also provides peace of mind to all stakeholders involved.
Troubleshooting And Maintenance Of Anchor Bolts
When it comes to installing anchor bolts in concrete, proper troubleshooting and maintenance practices are essential for their longevity and effectiveness. Identifying common installation issues, conducting regular inspections, and understanding the process of replacing anchor bolts if necessary are all crucial aspects of ensuring their functionality. In this section, we will explore these topics in detail and provide practical solutions to address any problems that may arise.
Identifying common installation issues and how to address them
During the installation process of anchor bolts in concrete, there are several common issues that may arise. Identifying these issues early on is important to prevent any future problems. Here are some common installation issues and the steps to address them:
- Improper alignment: If the anchor bolt is not properly aligned with the intended location, it can lead to compromised strength and stability. To address this issue, it is important to carefully measure and mark the precise location before drilling the hole in the concrete.
- Inadequate embedment depth: Anchor bolts require a specific embedment depth for optimal performance. If the embedment depth is insufficient, it can cause the bolt to fail under load. To address this issue, ensure that the hole is drilled to the correct depth, considering factors such as the thickness of the concrete and load requirements.
- Insufficient torque: Inadequate torque during the tightening process can result in reduced holding strength of the anchor bolt. To address this issue, use a torque wrench to ensure that the bolt is tightened to the manufacturer’s specifications.
- Poor adhesive bond: If the adhesive bond between the anchor bolt and the concrete is weak, it can lead to premature failure. To address this issue, make sure to follow the manufacturer’s instructions for applying the adhesive, ensuring proper surface preparation and curing time.
- Cracks or voids in the concrete: Cracks or voids in the concrete can compromise the integrity of the anchor bolt installation. To address this issue, fill any cracks or voids with an appropriate concrete repair material before proceeding with the anchor bolt installation.
Regular inspection and maintenance practices to ensure the longevity of anchor bolts
To maintain the longevity and effectiveness of anchor bolts, regular inspection and maintenance practices are essential. Here are some important practices to follow:
- Visual inspection: Regularly inspect the anchor bolts for signs of wear, corrosion, or damage. Look for any signs of movement or loosening.
- Tightening check: Periodically check the tightness of the anchor bolts using a torque wrench. Retighten as necessary to ensure proper holding strength.
- Corrosion prevention: Apply a suitable corrosion-resistant coating or protective sealant to the anchor bolts to prevent corrosion and maintain their structural integrity.
- Cleaning: Remove any debris or contaminants from the anchor bolts using a brush or compressed air. This will prevent potential interference with their performance.
- Record keeping: Maintain a record of inspection and maintenance activities, including dates, findings, and any corrective actions taken. This will help track the condition of the anchor bolts over time.
Understanding when and how to replace anchor bolts if necessary
Although anchor bolts are designed to be durable and long-lasting, there may come a time when replacement is necessary. Here are some factors to consider when deciding to replace anchor bolts:
- Significant damage: If the anchor bolt shows signs of significant damage, such as severe corrosion, deformation, or bending, replacement is usually warranted.
- Loss of holding strength: If the anchor bolt is no longer capable of providing the required holding strength, replacement should be considered. This can occur due to wear, corrosion, or other forms of deterioration.
- Change in load requirements: If there is a change in the load requirements or structural design, it may be necessary to replace the anchor bolts with ones that can accommodate the new specifications.
When replacing anchor bolts, it is important to carefully follow the installation process outlined by the manufacturer. This includes proper alignment, embedment depth, torque, and adhesive application, as discussed earlier.
Frequently Asked Questions
How Deep Do Anchor Bolts Need To Be In Concrete?
Anchor bolts should be embedded into concrete at a depth of at least 8 inches to ensure proper stability and load-bearing capacity.
Can You Install Anchor Bolts In Existing Concrete?
Yes, it is possible to install anchor bolts in existing concrete.
What Is The Minimum Edge Distance For Anchor Bolts In Concrete?
The minimum edge distance for anchor bolts in concrete varies depending on the specific application and building codes. However, as a general guideline, it is recommended to have a minimum edge distance of six times the diameter of the anchor bolt.
It ensures proper load distribution and minimizes the risk of concrete failure.
How Deep Should Anchor Bolts Be Installed In Concrete?
Anchor bolts should be installed at a depth equal to at least four times the diameter of the bolt. This ensures that the bolts have enough embedment to provide sufficient support and prevent them from pulling out of the concrete.
Conclusion
To sum up, installing anchor bolts in concrete is a crucial step in ensuring the stability and durability of structures. By following the step-by-step guide outlined in this blog post, you can successfully install anchor bolts with ease. Remember to choose the right type of anchor bolt, prepare the concrete surface properly, and follow the correct installation process.
With careful consideration and attention to detail, your anchor bolts will provide reliable support for years to come.
