To install an anchor bolt, first, mark the desired location on the wall or surface. Then, drill a hole using a drill bit that matches the size of the anchor bolt.
Insert the anchor bolt into the hole, ensuring it is flush with the surface. Anchor bolts are commonly used in construction projects to secure heavy items, such as shelves or heavy machinery, to walls or floors. They provide stability and prevent movement or collapse.
Understanding how to properly install anchor bolts is crucial to ensuring the safety and durability of the installation. This guide will walk you through the step-by-step process of installing anchor bolts, allowing you to complete your project with confidence. Whether you’re a DIY enthusiast or a professional contractor, this information will prove invaluable in your construction projects.
Understanding Anchor Bolts
Anchor bolts play a crucial role in various construction projects, providing stability and durability to structures. Whether you are building a small wooden shed in your backyard or a high-rise office building, understanding anchor bolts is essential in ensuring the safety and reliability of the structure. In this article, we will dive into the world of anchor bolts, exploring their purpose, different types, and the importance of selecting the right one for your project.
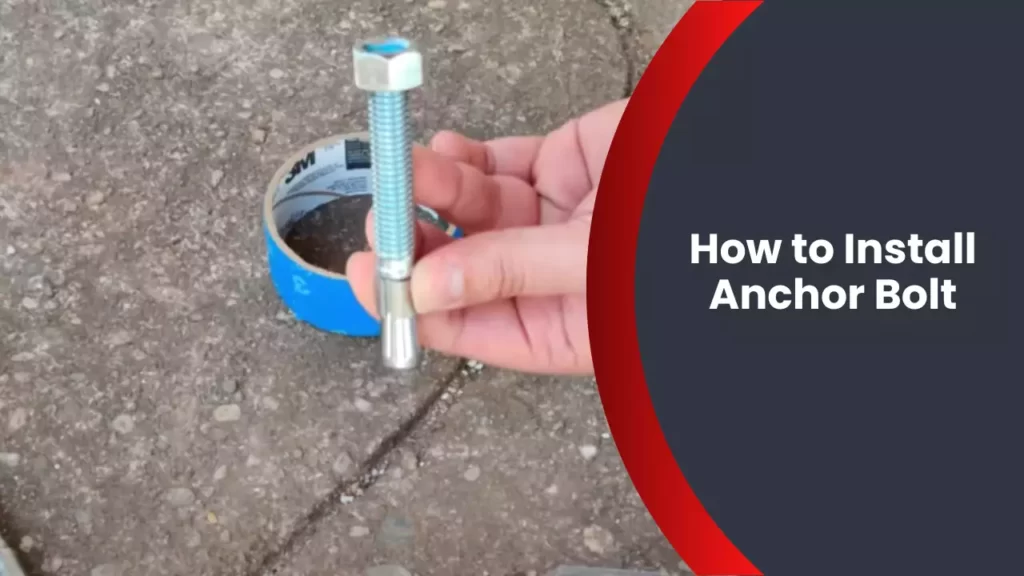
Anchor bolts, also known as anchor rods or wedge anchors, are specialized bolts used to secure objects to concrete, masonry, or other solid materials. These bolts are designed to provide a secure attachment, preventing the object from shifting or becoming loose.
Anchor bolts typically consist of a threaded rod with a nut and washer at one end, while the other end is embedded into the concrete or masonry. The embedded end is usually bent or hooked to increase the anchoring effect and prevent the bolt from pulling out.
There are several types of anchor bolts available, each designed for specific applications based on factors such as load capacity, installation method, and material compatibility. Here are some common types of anchor bolts:
1. Sleeve Anchor Bolts:
Sleeve anchor bolts are versatile and widely used for medium-duty applications in concrete, masonry, and brick. They consist of a threaded bolt and an expandable sleeve that grips the material tightly, providing strong anchorage.
2. Wedge Anchor Bolts:
Wedge anchor bolts are ideal for heavy-duty applications in concrete. They have a tapered end that, when hammered into the concrete, expands and creates a tight hold. These bolts are commonly used in structural and industrial applications.
3. Drop-In Anchor Bolts:
Drop-in anchor bolts are specially designed for applications where flush mounting is required. These bolts require a pre-drilled hole, into which the anchor is inserted. Once the bolt is threaded into the anchor, it expands and secures the object firmly.
4. Expansion Anchor Bolts:
Expansion anchor bolts are designed with expansion sleeves that grip the sides of the hole tightly. They are suitable for a wide range of material and load capacities, making them a popular choice for various construction projects.
5. Chemical Anchor Bolts:
Chemical anchor bolts provide exceptional strength and durability. They involve taking advantage of chemical bonding agents to anchor the bolts securely into the substrate. These bolts are commonly used for heavy-duty load-bearing applications.
Selecting the appropriate anchor bolt is crucial to ensure the long-term stability and safety of your structure. Using the wrong bolt may result in inadequate support, leading to structural failures or potential hazards. Here’s why choosing the right anchor bolt is essential:
- Load Capacity: Different projects require anchor bolts with varying load capacities. Failing to choose a bolt that can handle the anticipated load may compromise the structural integrity of the object.
- Material Compatibility: Consider the material compatibility between the anchor bolt and the substrate to avoid corrosion or incompatibility issues. Using the wrong bolt in corrosive environments can lead to premature failure.
- Installation Method: Each anchor bolt type requires a specific installation method. Ensuring proper installation is vital to achieve the desired anchorage strength. Incorrect installation can weaken the bolt’s holding capacity.
- Environmental Factors: Factors such as temperature variations, moisture, and earthquake-prone regions should be considered when choosing anchor bolts. Some bolts are designed to withstand these conditions better than others.
By carefully considering these factors and consulting with professionals, you can select the appropriate anchor bolt that matches your project’s requirements, ensuring a safe and reliable structure.
Preparing For Anchor Bolt Installation
Before diving into the installation process, it is essential to properly prepare yourself and the area where the anchor bolts will be placed. This preparation will not only ensure a smooth installation but also guarantee the strength and durability of your anchor bolts in the long run. Here are the key steps to follow:
Gathering the necessary tools and materials
Having the right tools and materials at hand is crucial for a successful anchor bolt installation. Here’s a checklist to help you make sure you have everything you need:
| Tools | Materials |
|---|---|
|
|
Assessing the strength and suitability of the anchor bolt location
Prior to installation, it is vital to assess the strength and suitability of the location where the anchor bolts will be positioned. Here are the steps to follow:
- Inspect the surface to ensure it is structurally sound and free of cracks or defects that may compromise the integrity of the anchor bolt.
- Check if the concrete or masonry surface is capable of supporting the anticipated load. Examine the load requirements and consult any applicable engineering specifications for your specific project.
- Verify the concrete thickness and ensure it is sufficient to accommodate the anchor bolt’s embedment depth requirements. If needed, consult an expert to determine if additional measures need to be taken.
Ensuring proper clearance and accessibility for installation
Proper clearance and accessibility are crucial for a hassle-free anchor bolt installation. Follow these steps to ensure an optimal installation process:
- Ensure that there is enough clearance around the planned anchor bolt location to accommodate the drill and other tools necessary for the installation.
- Remove any obstructions, such as debris, dirt, or old anchor bolts, from the area to provide a clean and flat surface for installation.
- Confirm that there are no utilities or hidden pipes in the immediate vicinity of the anchor bolt location. Use a utility locator or consult with professionals if uncertain.
- If necessary, create access holes or pathways to enhance the reachability of the installation area.
By following these steps, you will ensure that your anchor bolt installation is well-prepared, properly assessed, and conveniently accessible. This preparation phase is vital for setting the stage for a secure and successful installation process, ensuring the long-term durability and reliability of your anchor bolts.
Step 1: Marking And Drilling Holes
Installing anchor bolts is a crucial step in ensuring stability and strength for a variety of construction projects. Whether you’re building a fence, setting a post, or installing heavy machinery, properly marking and drilling holes for anchor bolts is essential for a secure and long-lasting foundation. In this step-by-step guide, we’ll walk you through the process of determining anchor bolt layout and spacing, marking positions and depths for drilling, and using the right tools and techniques to achieve precise holes.
Determining the anchor bolt layout and spacing
Before you begin drilling holes for anchor bolts, it’s important to determine the layout and spacing that will provide optimal support. The specific requirements may vary depending on the project and local building codes. Start by consulting the project plans or specifications to identify the recommended anchor bolt layout. This will typically include information on the distance between bolts, their horizontal and vertical positioning, and any requirements for edge distance. Taking the time to carefully plan and measure the layout will help ensure the structural integrity of your installation.
Marking the positions and depths for drilling
Once you have determined the layout and spacing for your anchor bolts, the next step is to mark the positions and depths for drilling. Begin by using a tape measure, a straightedge, and a pencil or marker to make precise marks on the surface where each bolt will be placed. Be sure to follow the measurements and guidelines provided in the project plans to ensure accuracy. Additionally, mark the desired depth for each hole to ensure the anchor bolt fits securely without protruding or sinking too deep.
Using the right tools and techniques to drill precise holes
Now that you have marked the positions and depths for drilling, it’s time to gather the necessary tools and equipment. Depending on the surface material and the size of the anchor bolts, you may need a hammer drill, a rotary drill, or a power drill with masonry bits. Ensure that the chosen drill bit matches the diameter of the anchor bolt for a snug fit.
To drill precise holes, keep the following techniques in mind:
- Start by wearing safety goggles and gloves to protect yourself from debris.
- Hold the drill firmly and position it perpendicular to the marked spot.
- Apply consistent pressure and slowly drill through the surface using a steady, controlled motion.
- For deeper holes, periodically withdraw the drill to clear away any dust or debris.
- Continue drilling until you reach the designated depth, as marked during the positioning step.
Remember, drilling too fast or applying excessive force can lead to irregularly shaped holes or damage to the surrounding surface. Take your time to ensure each hole is drilled accurately, adhering to the marked positions and depths.
By carefully following these steps and using the right tools and techniques, you can successfully mark and drill holes for anchor bolts. This initial phase sets the foundation for a strong and reliable installation, providing the stability and support necessary for your construction project.
Step 2: Cleaning And Preparing The Holes
When it comes to installing anchor bolts, one crucial step that ensures the stability and longevity of the installation is cleaning and preparing the holes. In Step 2 of the process, you need to remove any debris or loose material from the drilled holes, apply a suitable cleaning solution or brush for thorough cleaning, and allow sufficient drying time before proceeding to the next step. Let’s dive into each of these substeps in detail.
Removing any debris or loose material from the drilled holes
Before inserting the anchor bolts, it is essential to clean the drilled holes thoroughly. Start by removing any debris or loose material that might have accumulated in the holes. This can include dirt, dust, leftover concrete, or any other substances that could hinder the proper installation and bonding of the anchor bolts. Use a vacuum cleaner or a brush to remove these particles, ensuring that the holes are completely clean and free from obstructions.
Applying a suitable cleaning solution or brush for thorough cleaning
Once the holes are free from debris, the next step is to apply a suitable cleaning solution or use a brush to ensure thorough cleaning. There are various cleaning solutions available in the market, specifically designed for cleaning anchor bolt holes. Make sure to choose a solution that is compatible with the material of the substrate and the anchor bolts being installed. Apply the cleaning solution generously inside the holes, using a brush to scrub the surfaces. This will help remove any remaining dirt, grease, or contaminants, ensuring a clean and optimal surface for the anchor bolts to bond with.
Allowing sufficient drying time before proceeding to the next step
After cleaning the holes, it is vital to allow sufficient drying time before moving on to the next step of the installation process. Drying time can vary depending on the cleaning solution used, the ambient temperature, and humidity levels. It is recommended to refer to the manufacturer’s instructions for the specific cleaning solution being used, as they will provide guidelines regarding the approximate drying time required. Adequate drying time is essential to ensure a strong and durable bond between the anchor bolts and the substrate. Rushing this step can compromise the overall stability and effectiveness of the anchor installation.
By following these cleaning and preparation steps diligently, you are laying a solid foundation for the anchor bolts, ensuring their optimal performance and longevity. With clean and properly prepared holes, you can proceed confidently to the next step of installing the anchor bolts securely and effectively.

Step 3: Inserting And Securing The Anchor Bolts
Choosing the Appropriate Method for Inserting Anchor Bolts
When it comes to installing anchor bolts, it is crucial to select the right method for inserting them. The choice usually depends on the specific requirements of the project. Two commonly used methods are the wedge anchor method and the epoxy anchor method.
The wedge anchor method involves inserting the anchor bolt into a pre-drilled hole and then expanding a wedge-shaped clip to secure it in place. This method provides excellent holding power and is suitable for both concrete and masonry applications.
On the other hand, the epoxy anchor method involves using an epoxy adhesive to anchor the bolts into the holes. This method is ideal for situations where maximum strength and durability are required. It is commonly used in high-load applications or when dealing with smooth or cracked concrete surfaces.
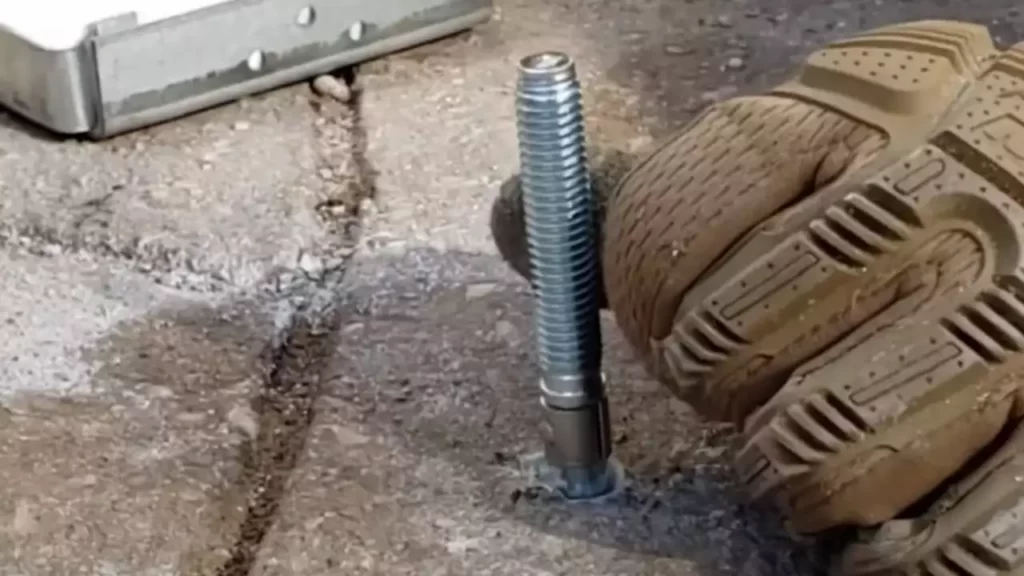
Placing the Anchor Bolts into the Cleaned Holes
Once you have chosen the appropriate method, the next step is to place the anchor bolts into the cleaned holes. Before inserting the bolts, ensure the holes are clean and free from any debris. Use a brush or compressed air to remove any loose material and ensure a proper fit for the anchor bolts.
Next, carefully insert the anchor bolts into the holes, making sure they are aligned correctly. It is important to make sure the bolts are fully inserted and have proper contact with the base material. This will ensure the bolts can provide the necessary support and stability for the intended application.
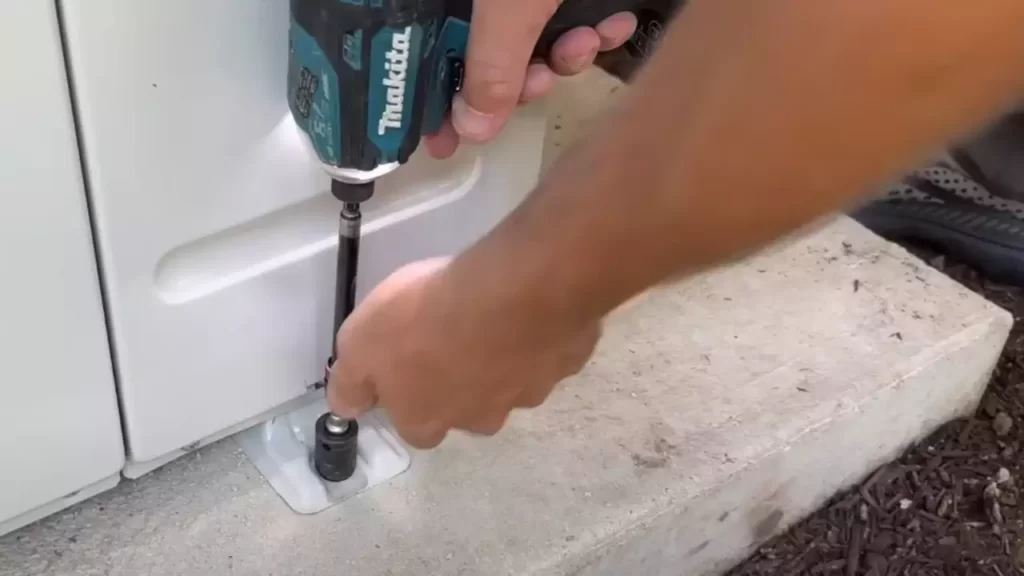
Applying the Necessary Torque or Pressure to Securely Fasten the Anchor Bolts
After placing the anchor bolts into the holes, the final step is to apply the necessary torque or pressure to securely fasten them. The specific torque or pressure requirements will depend on the type and size of the anchor bolts being used. It is essential to follow the manufacturer’s instructions and specifications to ensure proper installation.
Utilize a torque wrench or other appropriate tools to apply the required torque evenly across all anchor bolts. This will ensure uniform tightening and prevent any potential loosening or failure in the future. It is crucial to avoid over-tightening, as this can damage the bolts or the base material.
By following these steps and choosing the appropriate method for inserting anchor bolts, you can ensure a secure and reliable installation. Properly installed anchor bolts provide the necessary strength and stability for a wide range of applications, from building construction to machinery support.
Step 4: Testing And Verifying Proper Installation
Step 4: Testing and Verifying Proper Installation
After completing the installation of anchor bolts, it is crucial to conduct thorough tests to ensure that they are able to withstand the intended load and verify that the installation has been done correctly. This step plays a vital role in guaranteeing the safety and stability of the structure that the anchor bolts are supporting.
Performing load tests to ensure the anchor bolts can withstand the intended load
Load testing is a crucial part of the anchor bolt installation process. It involves subjecting the bolts to the maximum expected load to ensure they can bear the weight without any issues. This test helps identify any potential weaknesses or deficiencies in the installation, allowing for adjustments or reinforcements to be made before the final load is applied.
To perform a load test, appropriate equipment and procedures should be followed. This usually involves gradually increasing the load in a controlled manner to simulate the expected stress on the anchor bolts. Monitoring tools, such as strain gauges or load cells, can be used to measure and assess the response of the bolts under different load conditions.
Checking for any signs of instability or movement
Aside from load testing, it is essential to visually inspect the anchor bolts and their surroundings for any signs of instability or movement. This inspection is crucial in identifying any potential issues that may compromise the structural integrity of the installation.
During this process, it is important to look out for visible signs such as cracks, gaps, or deflection in the structure. Additionally, any unexpected movement or shifting of the bolts should be noted and investigated further. These signs can indicate improper installation, weak connections, or inadequate support, all of which need to be promptly addressed.
Conducting necessary adjustments or reinforcements if required
If any issues or concerns are detected during the load testing or visual inspection, it is crucial to make the necessary adjustments or reinforcements to ensure the proper installation and stability of the anchor bolts.
Adjustments may include tightening or loosening the bolts to achieve the desired tension, realigning misaligned components, or correcting any issues identified during the inspection. In some cases, additional reinforcements, such as steel plates, washers, or epoxy grouts, may be required to enhance the anchoring system’s strength and stability.
It is important to remember that each installation may have its own unique requirements and specifications. Therefore, it is recommended to refer to the manufacturer’s guidelines and consult with a structural engineer during this step to ensure that the necessary adjustments or reinforcements are carried out accurately and effectively.
In conclusion, testing and verifying the proper installation of anchor bolts is a crucial step in ensuring the stability and safety of structures. Performing load tests, checking for signs of instability or movement, and conducting necessary adjustments or reinforcements are key actions to take during this process. By adhering to these steps and consulting with professionals when needed, you can be confident in the integrity and reliability of your anchor bolt installation.
Additional Tips And Considerations
When it comes to installing anchor bolts, following proper procedures is crucial for ensuring the stability and durability of your structure. However, there are some additional tips and considerations that you should keep in mind to further enhance the effectiveness of your anchor bolt installation. In this section, we will discuss some safety precautions when working with anchor bolts, the importance of proper maintenance and inspection of anchor bolts, as well as troubleshooting common installation issues and their solutions.
Safety Precautions When Working with Anchor Bolts
Working with anchor bolts can involve heavy machinery, power tools, and elevated heights, so it’s essential to prioritize safety to prevent accidents and injuries. Here are some safety precautions to consider:
- Always wear appropriate personal protective equipment (PPE), such as safety goggles, gloves, hard hats, and steel-toed boots. This will help protect you from any potential hazards on the construction site.
- Ensure that the work area is clear of any obstacles or debris that may impede your movement or cause tripping hazards.
- Before starting the installation process, carefully read and understand the manufacturer’s instructions for the anchor bolts you are using. Following these instructions will help you use and handle the anchor bolts safely.
- When using power tools, ensure they are in good working condition and always follow the manufacturer’s instructions for their use. Use the tools responsibly and with caution to prevent accidents.
- Do not exceed the recommended load capacities for the anchor bolts. Overloading the bolts can lead to structural failures and compromised safety.
- If you are working at high elevations, always use appropriate fall protection equipment, such as harnesses and secured ladders or scaffolding systems.
Proper Maintenance and Inspection of Anchor Bolts
Proper maintenance and regular inspection of anchor bolts are essential for their long-term performance and durability. Here are some tips to ensure their effective maintenance and inspection:
- Regularly inspect the anchor bolt installation for any signs of damage, corrosion, or loosening. This can include cracks, missing bolts, or excessive movement.
- If you notice any issues during the inspection, address them promptly. Replace any damaged or loose anchor bolts to maintain the structural integrity of the anchored elements.
- Regularly clean and remove any debris or substances that may accumulate around the anchor bolts. This will prevent corrosion and ensure the bolts remain securely fastened.
- Consider applying an appropriate protective coating or corrosion inhibitor to the anchor bolts to enhance their resistance to environmental factors.
- Follow the manufacturer’s recommendations for periodic inspections and maintenance tasks to ensure the longevity of the anchor bolt system.
Troubleshooting Common Installation Issues and Solutions
During the installation process, you may encounter certain issues that can affect the effectiveness of the anchor bolts. Here are some common installation issues and their solutions:
| Issue | Solution |
|---|---|
| The anchor bolts are not properly aligned with the holes. | Make sure to carefully measure and mark the drilling locations before starting the installation. Double-check the alignment of the anchor bolts with the holes to ensure a proper fit. |
| The anchor bolts are not adequately tightened. | Ensure that you follow the recommended torque specifications provided by the manufacturer. Utilize a torque wrench to achieve the proper tension for each anchor bolt. |
| The anchor bolts are too short. | If the anchor bolts are not long enough to reach the desired depth, consider using longer bolts or consult an engineer for alternative anchoring solutions. |
| The anchor bolts are not properly embedded in the concrete. | Ensure that the holes are properly cleaned of debris and dust before inserting the anchor bolts. Use a suitable adhesive to ensure a strong bond between the bolt and the concrete. |
By troubleshooting these common installation issues and implementing the appropriate solutions, you can ensure that your anchor bolts provide the necessary stability and safety for your structure.
Frequently Asked Questions
How Are Anchor Bolts Placed?
Anchor bolts are typically placed by first drilling holes in the concrete or masonry. The bolts are then inserted into the holes, ensuring they are level and align with the required structural positions. Nuts and washers are then fastened onto the bolts to secure them in place.
How Do You Install Concrete Anchor Bolts?
To install concrete anchor bolts, follow these steps: 1. Drill holes in the concrete using a hammer drill. 2. Insert anchor bolts into the holes and make sure they are level. 3. Tighten the nuts on the bolts using a wrench.
4. Attach the item you want to anchor to the bolts. 5. Test the anchor’s stability and make any necessary adjustments.
How Deep Should Anchor Bolts Be In Concrete?
Anchor bolts should be embedded in concrete to a depth of at least 7 inches for residential construction and 12 inches for commercial construction. This ensures proper anchoring and stability for structural elements. Additionally, anchor bolts should have a minimum diameter of 1/2 inch and be positioned with proper spacing to meet building code requirements.
How Do You Fit Anchor Bolts To The Wall?
To fit anchor bolts to the wall, follow these steps: 1. Mark the position of the anchor on the wall. 2. Drill a hole using a masonry bit that matches the size of the anchor. 3. Insert the anchor into the hole, ensuring it is flush with the wall.
4. Tighten the anchor with a wrench or screwdriver. 5. Attach the desired object to the anchor using the provided hardware.
Conclusion
To sum up, installing anchor bolts is an essential step in ensuring structural stability and safety in construction projects. By following the step-by-step guide provided in this blog post, you can confidently tackle the installation process. Remember to choose the appropriate anchor bolt type, consider load requirements, and use the correct tools and techniques for successful installation.
With careful attention to detail, you’ll be well on your way to securely fastening anything from walls to equipment. Happy anchoring!