To install an RV awning from scratch, begin by measuring the area where you want to install the awning and locating the studs for support. Then, attach the awning brackets to the RV using screws, making sure they are securely fastened.
Planning Your Rv Awning Installation
Assessing your RV for Awning Installation
One of the first steps in planning your RV awning installation is assessing your RV to determine its suitability for an awning. Start by examining the exterior of your RV and identifying a suitable location for the awning that will provide shade and protection. Look for a flat area with enough clearance that allows for easy extension and retraction of the awning. Check for any obstructions such as windows, vents, or lights that may hinder the installation process. It’s important to ensure that the area you choose is structurally capable of supporting the weight and stress of the awning.
Determining the Right Size and Type of Awning
Once you have assessed your RV, it’s time to determine the right size and type of awning for your needs. Measure the length of the area you have chosen for installation to determine the appropriate awning size. Consider the height and width of your RV as well, as this will impact the overall coverage and functionality of the awning. It’s essential to choose an awning that is compatible with your RV’s design and style, for both aesthetic appeal and practicality. Research different types of awnings, such as manual vs. electric, and consider the features that align with your preferences and budget.
Gathering the Necessary Tools and Materials
Before embarking on your RV awning installation, gather all the necessary tools and materials to ensure a smooth and efficient process. Here is a comprehensive list of what you will need:
- Measuring tape or ruler to measure the area and determine the appropriate awning size
- Awning installation kit, which typically includes brackets and hardware
- Power drill with the suitable bits for drilling holes and screwing
- Level to ensure the awning is installed evenly and correctly
- Ladder or step stool for accessing the installation area
- Silicone caulk to seal any gaps or openings
- Screws or bolts (check the awning’s instructions for the appropriate size)
- Assistant to help hold the awning in place during installation
By gathering all the necessary tools and materials, you’ll be well-prepared to tackle your RV awning installation project with confidence and ease. Take your time to understand and follow the manufacturer’s instructions specific to your chosen awning model. With proper planning and execution, you’ll soon have a functional and stylish awning for your RV, providing you with an enjoyable outdoor space wherever you go.
Preparing Your Rv For Awning Installation
Before you start installing an RV awning from scratch, it’s important to prepare your RV properly. This includes cleaning and prepping the installation area, ensuring proper measurements and markings, and removing any existing awning or obstacles that may hinder the installation process. By following these steps, you can ensure a smooth and successful awning installation on your RV.
Cleaning and Prepping the Installation Area
Before you begin installing your RV awning, it’s crucial to clean and prep the installation area. This not only ensures a clean surface for installation but also improves the longevity of your awning. Here are the steps you should follow:
- Inspect the area and remove any debris, dirt, or mold that may have accumulated. This can be done using a broom or a mild household cleaner.
- Once the area is clear, rinse it thoroughly with water to remove any remaining cleaning solution.
- Dry the area completely before proceeding to the next step. You can use a clean towel or allow it to air-dry naturally.
Ensuring Proper Measurements and Markings
Accurate measurements and markings are essential to ensure the correct installation of your RV awning. Here’s what you need to do:
- Using a measuring tape, measure the width where you want to install the awning. It’s important to measure both the top and bottom of the area to ensure consistency.
- Once you have the measurements, mark the desired installation position with a pencil or a marker. Make sure the markings are visible and easily identifiable.
- Double-check the measurements and markings to ensure accuracy before proceeding to the next step. This will help avoid any potential issues during the installation process.
Removing Any Existing Awning or Obstacles
If your RV has an existing awning or any obstacles in the installation area, it’s important to remove them before proceeding with the installation. Here’s what you need to do:
- Inspect your RV for any existing awnings or attachments that need to be removed. Carefully detach and remove them according to the manufacturer’s instructions.
- Check for any other obstacles such as screws, nails, or brackets that might obstruct the installation. Remove these obstacles using appropriate tools.
- Ensure that the area is clear and free from any potential hindrances before proceeding with the awning installation.
By following these steps to prepare your RV for awning installation, you can ensure a smooth and hassle-free process. With a clean and prepped installation area, accurate measurements and markings, and the removal of any existing awning or obstacles, your RV will be ready for a beautiful and functional new awning.

Step-By-Step Rv Awning Installation Process
Installing an RV awning from scratch may seem like a daunting task, but with the right step-by-step process, you can have your awning up and providing shade in no time. In this guide, we will walk you through each stage of the RV awning installation, ensuring that your awning is securely mounted, properly aligned, and ready to use.
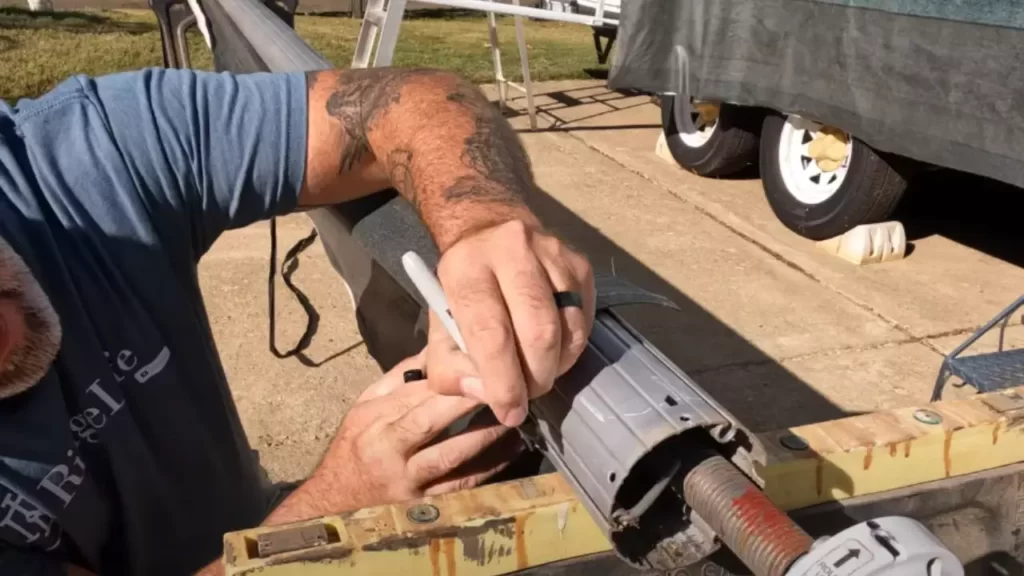
Mounting the Awning Brackets Securely
The first step in the RV awning installation process is mounting the awning brackets securely. These brackets are what hold the awning in place and ensure its stability. Follow these steps to mount the brackets:
- Begin by selecting the appropriate location for the awning brackets on the side of your RV. Ensure that the location allows for proper clearance and doesn’t interfere with any existing structures or features.
- Using a tape measure, mark the exact placement of the brackets. This will help you accurately position the brackets for installation.
- Next, drill pilot holes at the marked locations. These pilot holes will act as guides for the screws that will secure the brackets to the RV.
- Align the brackets with the pilot holes and use screws to attach them to the RV. Make sure to use the appropriate screws for your RV’s exterior material to ensure a secure attachment.
- Double-check the brackets for stability and adjust if necessary. It’s crucial to ensure that the brackets are properly secured before proceeding to the next step.
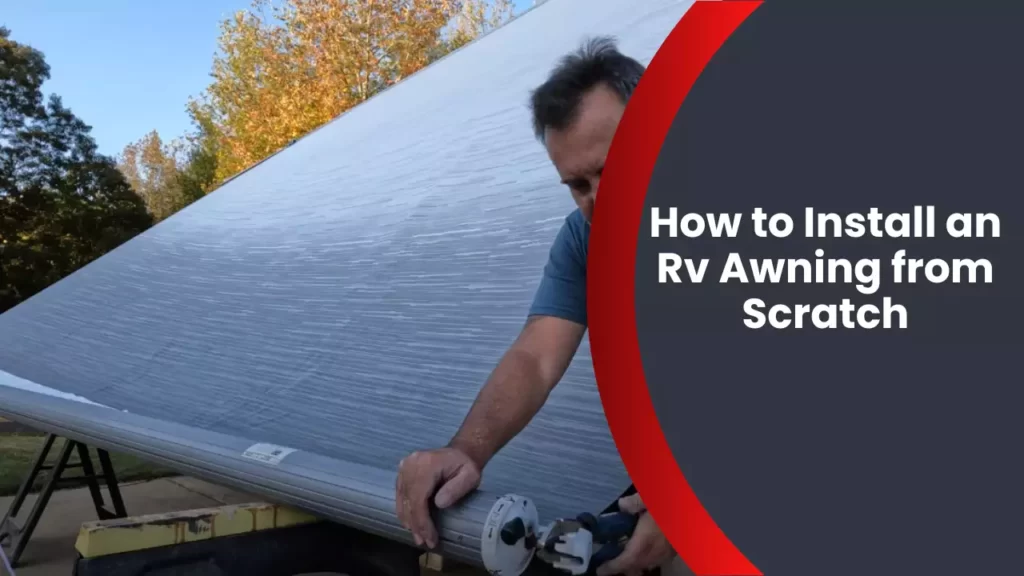
Attaching the Roller Tube and Fabric to the Brackets
Once the brackets are securely mounted, the next step is attaching the roller tube and fabric to the brackets. Follow these steps for a successful attachment:
- Slide the roller tube into the brackets, ensuring that it is positioned correctly and aligned with the brackets.
- Secure the roller tube in place by tightening any screws or bolts provided with your awning kit. This will prevent the tube from shifting or coming loose during use.
- Unroll the awning fabric and lay it over the roller tube, making sure that it is centered and aligned properly.
- Using the fabric’s attachment mechanism (e.g., hooks, Velcro, or snaps), secure the awning fabric to the roller tube. Be sure to follow the manufacturer’s instructions for attaching the fabric.
Extending and Adjusting the Awning for Proper Alignment
With the roller tube and fabric securely attached, it’s time to extend and adjust the awning for proper alignment. Follow these steps to ensure your awning is aligned correctly:
- Gently extend the awning by pulling it out to the desired length. Take care not to extend it too forcefully or quickly, as this could damage the awning or its components.
- Once the awning is fully extended, ensure that it is level and aligned with the ground. Use a level to check for any unevenness or angling that may need adjustment.
- If adjustments are needed, refer to the instructions provided by the awning manufacturer. They may include specific mechanisms or features for aligning and adjusting the awning.
Securing the Awning Legs and Hardware
The final step in the RV awning installation process is securing the awning legs and hardware. Follow these steps to ensure a secure and stable awning:
- Extend the awning legs and position them at a suitable height to provide the desired shade coverage.
- Verify that the legs are securely locked in place and cannot move or collapse unintentionally.
- Tighten any hardware or clamps that secure the awning legs, ensuring a tight fit that prevents any wobbling or movement.
- Inspect the entire awning installation for any loose or unstable components. Tighten any screws, bolts, or fasteners that may have come loose during the installation process.
Now that you have followed these steps, your RV awning is properly installed, secure, and ready to enjoy. Take some time to test the operation of the awning, retracting and extending it to ensure smooth functionality. With your new awning in place, you can now relax and enjoy the shade and comfort it provides during your RV adventures!
Tips And Techniques For A Successful Installation
When it comes to installing an RV awning from scratch, following the right tips and techniques can make all the difference. Whether you’re a seasoned camper or a newbie to the world of recreational vehicles, a successful installation is essential for enjoying a comfortable outdoor experience. In this section, we will delve into some expert advice on how to ensure a smooth and hassle-free installation process.
Following Manufacturer’s Instructions and Guidelines
To set yourself up for success, it’s crucial to carefully read and follow the manufacturer’s instructions and guidelines for installing your RV awning. These instructions are specially designed to help you achieve the best results and ensure the awning is properly secured to your vehicle. Be sure to familiarize yourself with these instructions and have them readily accessible throughout the installation process. By adhering to the manufacturer’s guidelines, you can avoid costly mistakes and ensure a safe and secure installation.
Working with a Partner for Safety and Support
Installing an RV awning can be a two-person job, so it’s highly recommended to have a partner to assist you. Working together not only makes the installation process easier but also enhances safety and reduces the risk of injuries. Having an extra set of hands allows one person to hold and support the awning while the other person handles the installation tasks. This teamwork ensures that your awning is properly secured and minimizes any potential accidents or mishaps.
Checking for Proper Alignment and Tension
Once you have the main framework of your RV awning installed, it’s crucial to check for proper alignment and tension before proceeding further. This step ensures that your awning will extend and retract smoothly, providing the desired shade and protection. Carefully inspect the alignment of the awning arms, making sure they are parallel to each other and appear symmetrical. Additionally, check the tension of the awning fabric to ensure it is neither too loose nor too tight. This attention to detail will help prevent any issues and guarantee a hassle-free operation of your RV awning.
Troubleshooting Common Installation Issues
Even with the best-laid plans, installation issues can sometimes arise. Therefore, it’s important to be prepared to troubleshoot common problems that may occur during the installation process. Here are a few common issues to keep in mind:
- Improper Slope: Ensure that your awning is properly sloped to prevent rainwater from pooling and causing damage. Adjust the arms and use a leveling tool to achieve the correct slope.
- Misaligned Hardware: Check that all screws, bolts, and brackets are correctly aligned and tightened. Loose or misaligned hardware can compromise the stability of the awning.
- Sagging Fabric: If you notice any sagging in the fabric, adjust the tension by tightening the adjustable knobs or straps provided with your awning.
- Difficult Retraction: In case the awning becomes difficult to retract, check for any obstructions or debris hindering its movement. Clearing any blockages should restore smooth operation.
By keeping these troubleshooting tips in mind, you can quickly address any installation issues that may arise and continue to enjoy the benefits of your RV awning.

Maintenance And Care For Rv Awnings
Keeping your RV awning in top shape is essential for a hassle-free outdoor experience. Regular maintenance and care can prolong the lifespan of your RV awning, ensuring that it remains functional and adds beauty to your camping adventures. In this section, we will cover the necessary steps to clean and maintain the awning fabric, inspect and lubricate the moving parts, and store the awning properly during travel or off-season.
Cleaning and maintaining the awning fabric
Proper cleaning and maintenance of the awning fabric can help prevent dirt buildup, staining, and damage caused by mold or mildew. Here are some steps to follow:
- Start by removing loose dirt and debris from the fabric using a soft bristle brush or broom.
- Prepare a mixture of mild soap or detergent and lukewarm water.
- Gently scrub the fabric with the soapy water using a soft brush or sponge. Avoid using abrasive cleaners or brushes that can damage the fabric.
- Rinse the fabric thoroughly with clean water to remove any soap residue.
- Allow the fabric to air dry completely before retracting the awning.
Additionally, it is crucial to inspect the awning fabric regularly for signs of wear and tear. Look out for any small rips, tears, or holes and address them promptly to prevent further damage.
Inspecting and lubricating moving parts
The moving parts of your RV awning, such as the arms, hinges, and springs, require regular inspection and lubrication to ensure smooth operation. Follow these steps:
- Visually inspect the moving parts for any signs of rust, corrosion, or damage. Pay close attention to the screws and joints.
- If any of the parts appear worn or damaged, replace them immediately.
- Apply a silicone-based lubricant to the moving parts, including the hinges and springs, to reduce friction and ensure smooth operation.
- Open and close the awning several times to distribute the lubricant evenly.
Regular inspection and lubrication will help prevent unwanted squeaking and extend the lifespan of the moving parts.
Storing the awning during travel or off-season
Properly storing the awning during travel or off-season is crucial to prevent damage and unnecessary wear. Here are some guidelines to follow:
- Clean the awning fabric thoroughly and allow it to dry completely.
- Retract the awning fully and secure it using the manufacturer’s recommended method.
- Consider using an awning cover to protect the fabric from UV rays, dirt, and weather elements.
- Store the awning in a cool, dry place to prevent mold and mildew growth.
By properly storing your RV awning, you can ensure its longevity and avoid potential issues when you’re ready to hit the road again.
Enhancing Your Rv Awning Experience
Installing an RV awning is a great way to enjoy the outdoors while providing shade and protection from the elements. But did you know that there are several ways to make your RV awning experience even better? By adding accessories, using awning tie-downs, and expanding your outdoor living space, you can take your RV awning to the next level.
Adding accessories like lights or sunshades
One way to enhance your RV awning experience is by adding accessories such as lights or sunshades. Adding LED lights to your awning can create a cozy and inviting atmosphere during the evenings. These lights are easy to install and come in various colors and styles to suit your preferences.
If you’re looking for additional shade, consider adding a sunshade to your awning. Sunshades are specifically designed to attach to your awning, providing extra protection from the sun’s glare and heat. They are lightweight, durable, and easy to set up, making them a perfect addition to your RV awning setup.
Using awning tie-downs for stability in windy conditions
Windy conditions can pose a challenge to your RV awning. To ensure stability and prevent damage, consider using awning tie-downs. These tie-downs are specifically designed to secure your awning to the ground, providing extra support and stability during gusty winds.
When installing awning tie-downs, make sure to follow the manufacturer’s instructions carefully. Typically, these tie-downs are made of durable materials such as ropes or straps and come with stakes or anchors to secure them firmly to the ground. By properly securing your awning, you can enjoy peace of mind knowing that it will stay in place even during windy weather.
Expanding your outdoor living space with awning rooms or extensions
If you’re looking to maximize your outdoor living space, consider adding awning rooms or extensions. These additional attachments can transform your RV awning into a fully enclosed space, providing more room for relaxation, dining, or even sleeping.
Awning rooms and extensions are usually made of lightweight materials, making them easy to set up and take down. They feature zippered doors and windows for easy access and ventilation. Whether you’re hosting a gathering with friends or simply want to enjoy some privacy in the great outdoors, an awning room or extension can provide the perfect solution.
Enhancing your RV awning experience is easy and affordable. By adding accessories like lights or sunshades, using awning tie-downs for stability, and expanding your outdoor living space with awning rooms or extensions, you can create a comfortable and inviting outdoor space for all your RV adventures.
When it comes to installing an RV awning from scratch, you may have some questions in mind. In this section, we will address some of the most frequently asked questions about the installation process and maintenance of an RV awning.
How long does it take to install an RV awning from scratch?
Installing an RV awning from scratch can vary in terms of time depending on a few factors. Generally, it can take between 2 to 4 hours to complete the installation process. The exact time might vary based on your experience, the size of the awning, and the type of RV you have. However, with the right tools and proper instructions, the installation process can be relatively straightforward.
Can I install an awning on any type of RV?
Yes, you can install an awning on any type of RV as long as it is compatible with your vehicle. RV awnings come in various sizes and styles, making it possible to find one that fits your specific RV model. It is important to measure the available space on your RV before purchasing an awning to ensure a proper fit.
What tools do I need for the installation process?
Before you begin the installation process, it is essential to gather the necessary tools. Here is a list of tools you’ll typically need:
- Drill and appropriate drill bits
- Screwdriver
- Tape measure
- Level
- Wrench
- Sealant
Having these tools readily available will make the installation process smoother and more efficient.
How do I properly clean and maintain my RV awning?
Cleaning and maintaining your RV awning is crucial to ensure its longevity and functionality. Here are some tips to help you properly clean and maintain your RV awning:
- Inspect the awning regularly for any damages or signs of wear and tear.
- Remove any dirt or debris from the awning using a broom or soft brush.
- Create a mixture of mild soap and water, use a sponge or soft cloth to gently scrub the awning.
- Rinse the awning thoroughly with clean water and allow it to air-dry completely.
- Apply a protective awning treatment or sealant to prevent fading and damage from UV rays.
- When retracting or extending the awning, do it slowly and carefully to avoid any potential damage.
By following these maintenance steps, you can ensure that your RV awning remains in good condition and serves you well for years to come.
Frequently Asked Questions
Can I Install An Awning Myself?
Yes, you can install an awning yourself. However, it’s important to carefully follow the installation instructions provided by the manufacturer. It’s also recommended to have a helper, use proper tools, and ensure that you have the necessary skills and experience to complete the installation safely and correctly.
Can You Attach An Awning To Wood?
Yes, you can attach an awning to wood. Wood is a suitable material for mounting awnings due to its strength and durability. Ensure proper installation to ensure it is securely attached and can withstand weather conditions.
Can You Put An Rv Awning Away Wet?
No, it is not recommended to put an RV awning away wet. This can cause mold and mildew to form, leading to damage and unpleasant odors. It is best to let the awning dry completely before retracting it to maintain its longevity and cleanliness.
How Do You Anchor An Awning To A House?
To anchor an awning to a house, follow these steps: 1. Choose a suitable location on the house wall. 2. Mark the spots where the anchors will be installed. 3. Drill holes into the wall at the marked spots. 4. Insert wall anchors into the holes.
5. Secure the awning brackets to the wall anchors using screws. Remember to consult the awning manufacturer’s instructions for specific steps and guidelines.
Conclusion
Installing an RV awning from scratch may seem like a daunting task, but with the right guidance and tools, it is completely doable. By following the step-by-step instructions in this blog post, you can easily install an awning that will provide shade and comfort during your camping adventures.
Remember to take accurate measurements, gather all the necessary materials, and carefully follow the instructions provided by the manufacturer. With a little patience and some basic DIY skills, you’ll have your RV awning up and ready to go in no time.
Start enjoying the great outdoors with a functional and stylish awning for your RV. Happy camping!