To install an outside outlet, first turn off the power at the main electrical panel. Then, locate the desired location for the outlet, install a weatherproof electrical box, and connect the wiring following local electrical codes and regulations.
Planning And Safety Precautions
When it comes to installing an outside outlet, proper planning and safety precautions are crucial. This ensures a smooth and safe installation process, reducing the risk of electrical hazards and potential damage. In this section, we will explore the necessary steps to assess your electrical needs, choose an ideal location, and check for potential hazards, providing you with the knowledge and confidence to complete this project effectively.
Assessing the Electrical Needs for the Outside Outlet
In order to determine the electrical needs for the outside outlet, it is important to consider the intended use and anticipated power requirements. Here are some key factors to keep in mind:
- Identify the intended purpose of the outlet. Will it be used for outdoor lighting, power tools, or other equipment?
- Calculate the anticipated power requirements. Check the wattage or amperage of the devices that will be connected to the outlet. This will help you ensure that the circuit can handle the electrical load.
- Consider future needs. It is always a good idea to plan for potential future needs when installing electrical outlets. This will save you time and effort down the line.
By carefully assessing your electrical needs, you can select the appropriate outlet and ensure that it meets your requirements now and in the future.
Choosing the Ideal Location for the Outlet
When choosing the location for your outside outlet, there are a few important factors to consider:
- Accessibility: Select a location that is easily accessible and convenient for use. This will ensure that you can easily connect and disconnect devices as needed.
- Proximity to a power source: Identify the closest electrical source and determine if it can accommodate an additional outlet or if you will require a new power run.
- Protection from the elements: Ensure that the chosen location will provide adequate protection from rain, snow, and other weather conditions. Consider using weatherproof outlet enclosures for added safety.
- Keep it away from flammable materials: Avoid placing the outlet near flammable materials, such as stored gasoline, propane tanks, or woodpiles, to reduce the risk of fire hazards.
By selecting the ideal location for your outside outlet, you will maximize convenience and functionality while prioritizing safety.
Checking for Potential Electrical Hazards
Prior to installation, it is important to thoroughly check for potential electrical hazards in the area where the outside outlet will be installed. Here are a few steps to follow:
| Hazard | Precautionary Measures |
|---|---|
| Overhead power lines | Ensure the outlet location is clear of any overhead power lines to prevent accidental contact. |
| Underground utilities | Contact your local utilities provider to determine the location of any underground cables or pipelines to avoid damaging them during installation. |
| Damaged wiring or outlets | Inspect existing wiring and outlets for any signs of damage or wear. If you notice any issues, consult a licensed electrician before proceeding with the installation. |
| Moisture or water exposure | Ensure that the outlet and its components are designed for outdoor use, providing proper protection against moisture or water exposure. |
By checking for these potential electrical hazards, you can mitigate risks and ensure a safe installation process.
Gathering The Necessary Tools And Materials
Before you can start installing an outside outlet, you’ll need to gather a few essential tools and materials. Having everything prepared in advance will make the installation process smoother and more efficient. Here is a list of the items you will need:
Outlet box
The outlet box is the housing unit that will protect the electrical connections and wiring. It is usually made of durable plastic or metal and can be mounted on a wall or other appropriate surface. Make sure the outlet box is weatherproof to withstand outdoor conditions.
Electrical wire
Electrical wire is a crucial component for making the necessary connections. Choose wire that is rated for outdoor use and has the appropriate gauge for the power load you expect the outlet to handle. Copper wire is commonly used for outdoor electrical installations.
Wire strippers
Wire strippers are essential for removing the insulation from the electrical wire. They have different-sized holes that allow you to strip the wire without damaging the conductors inside. Make sure to select wire strippers that are suitable for the gauge of wire you are using.
Screwdriver
A screwdriver will be needed to secure the outlet box and make any necessary adjustments during the installation process. Depending on the type of screws used, you may need a Phillips or flathead screwdriver. It’s a good idea to have both types on hand to cover all possibilities.
Outdoor electrical cover
An outdoor electrical cover is designed to protect the outlet from moisture, dust, and other elements that can cause damage. Make sure to choose a cover that is compatible with your specific outlet box size and style. Some covers come with built-in gaskets for added weather resistance.
GFCI outlet
GFCI stands for Ground Fault Circuit Interrupter. This type of outlet is recommended for outdoor installations as it provides extra protection against electric shock by quickly shutting off the circuit in the event of a ground fault. Make sure the GFCI outlet you choose is rated for outdoor use.
Electrical tape
Electrical tape is used to secure and insulate the electrical connections. It provides an extra layer of protection against moisture and prevents accidental contact with live wires. Make sure to choose electrical tape that is UL listed and suitable for outdoor applications.
By having all of these tools and materials ready, you’ll be well-prepared to proceed with the installation process. Keep in mind that safety should be your top priority when working with electricity, so always ensure the power is turned off before starting any electrical work. Now that you have everything you need, let’s move on to the next steps of installing an outside outlet.
Shutting Off Power And Preparing The Wires
Turning off the power to the electrical circuit
Before starting any electrical work, it is crucial to turn off the power to the electrical circuit to ensure your safety. Turning off the power to the circuit will prevent any electrical shock or injury that may occur. Here are the steps to turn off the power:
- Locate the main electrical panel in your house. The electrical panel is usually found in the basement, garage, or utility room.
- Open the panel door by removing the screws securing it.
- Inside the panel, you will find a row of circuit breakers or fuses. These breakers control the power supply to different parts of your home.
- Identify the breaker that controls the circuit where you want to install the outside outlet. Look for labels or markings that indicate which breaker corresponds to the area.
- Once you have identified the correct breaker, turn it off by flipping the switch to the off position.
- Check the outlet you are working on to make sure the power is off by using a voltage tester. Insert the tester into the outlet slots and if it doesn’t light up or make a sound, it means the power is off.
Identifying the correct breaker in the electrical panel
Identifying the correct breaker in the electrical panel is an essential step to ensure the power is completely shut off. This will prevent any accidental electrocution while working on the outside outlet. Here’s how you can identify the correct breaker:
- Start by turning on a light or appliance in the area where the outside outlet is located.
- Go to the electrical panel and systematically turn off each breaker one at a time.
- While turning off each breaker, have someone assist you by monitoring the light or appliance to see when it turns off.
- Once you notice that the light or appliance has turned off, you have identified the correct breaker.
- Double-check using a voltage tester to ensure there is no power flowing to the outlet.
Removing the old outlet (if applicable)
If you are replacing an existing outlet, you will need to remove it before installing the new outside outlet. Follow these steps to remove the old outlet:
- Initially, start by turning off the power to the outlet using the steps mentioned earlier.
- Using a screwdriver, remove the screws securing the outlet cover plate. Put the screws somewhere safe so you don’t lose them.
- Gently pull the outlet cover plate away from the wall to expose the outlet.
- Next, unscrew the screws securing the outlet to the electrical box. Carefully pull the outlet out from the box, ensuring not to disturb any wires.
- Take a picture or make a diagram of the wiring connections before disconnecting any wires. This will help you during the installation of the new outlet.
- Disconnect the wires from the old outlet by loosening the screws holding them in place.
- Remove the old outlet and set it aside.
Preparing the wires for the new outlet
Once the old outlet has been removed, you can begin preparing the wires for the new outside outlet. Follow these steps to ensure proper preparation:
- Inspect the wires for any damage or frayed insulation. If you notice any issues, you may need to replace the affected wires.
- Strip the ends of the wires to expose the copper conductor. Use wire strippers to remove approximately 1/2 inch of insulation from the ends of each wire.
- If needed, use wire nuts to secure the ends of the wires together. Twist the ends of the wires together and then twist a wire nut onto the connected ends to ensure a secure connection.
- Label each wire according to the wiring diagram or picture you took earlier to ensure correct connection when installing the new outside outlet.
- Finally, double-check that all wires are properly prepared and labeled before proceeding with the installation of the new outside outlet.
Installing The Outlet Box And Wiring
Choosing the Appropriate Box for Outdoor Use
When it comes to installing an outside outlet, one of the vital steps is to choose the appropriate box for outdoor use. Unlike indoor outlets, outdoor outlets need to be protected from the elements such as rain, snow, and extreme temperatures. That’s why it’s crucial to select a box specifically designed for outdoor environments.
These outdoor outlet boxes are typically made of durable materials like PVC or metal that can withstand harsh weather conditions. They are also designed with features such as waterproof gaskets or weather-resistant covers to ensure the electrical connections remain safe and secure. So, make sure you invest in a high-quality outdoor-rated box that meets the safety standards and requirements of your local building codes.
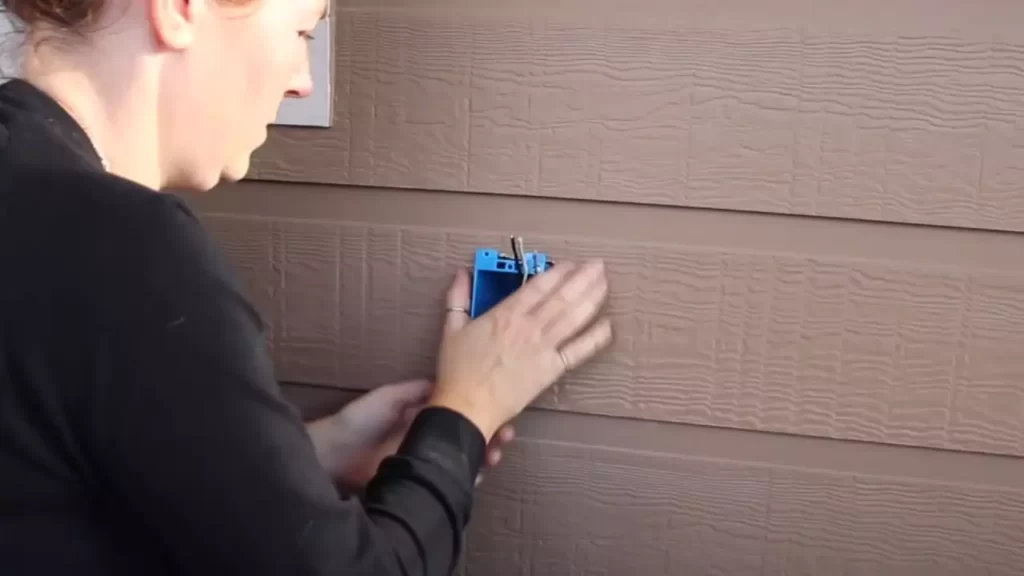
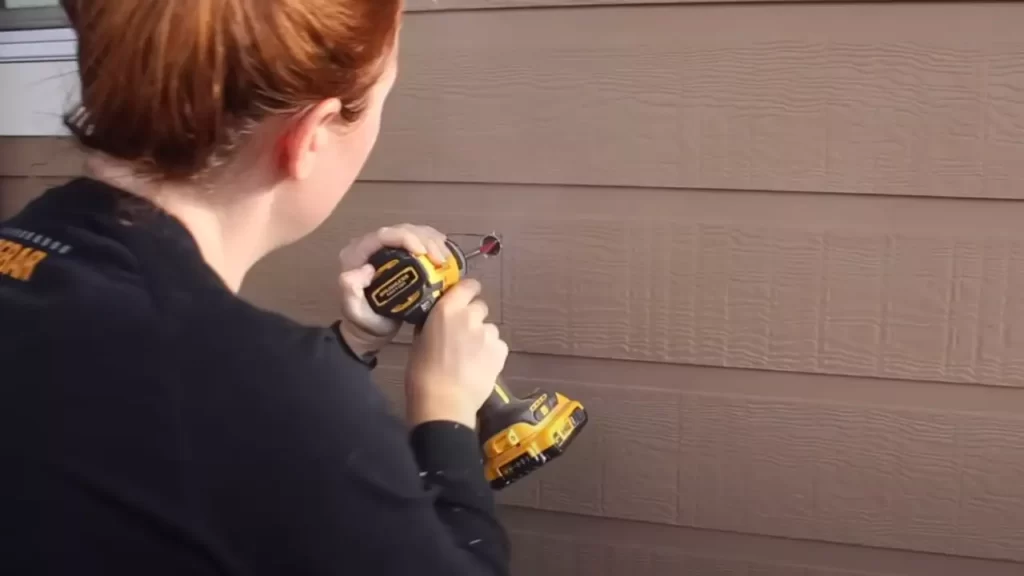
Mounting the Box Securely on the Exterior Surface
Once you have chosen the appropriate outdoor-rated box, the next step is to mount it securely on the exterior surface. This ensures that the box stays in place and provides a stable foundation for the outlet. Here’s how you can securely mount the box:
- Locate the desired spot for the outlet and mark it on the exterior surface.
- Using a drill and appropriate screws or bolts, attach the box to the surface. Make sure to use anchors or other hardware suitable for the material you are mounting the box on.
- Ensure that the box is level and firmly attached, avoiding any protruding screws or loose fittings that may pose a hazard or compromise the waterproofing of the box.
Routing the Wires Through the Box
Now that the box is securely mounted, it’s time to route the wires through the box. Proper wire routing is essential for a safe and efficient electrical connection. Here’s how you can do it:
- Start by carefully removing the knockout holes from the box using a screwdriver or knockout punch tool.
- Insert the electrical wires through the knockout holes and into the box.
- Make sure to leave enough slack in the wires inside the box to allow for easy connection and future maintenance.
Connecting the Wires to the Outlet
Once the wires are routed through the box, the final step is to connect them to the outlet itself. This is where the electrical connection is made, providing power to your outdoor devices. Follow these steps to connect the wires:
- Strip the protective insulation off the end of each wire using wire strippers, exposing about half an inch of bare copper.
- Identify the appropriate terminals on the outlet for the different wires (hot, neutral, and ground).
- Connect the respective wires to their corresponding terminals, ensuring a tight and secure connection.
- Use wire nuts or terminal screws to secure the connections and prevent any exposed wires from touching each other.
Remember to double-check all the connections and ensure they are properly tightened and insulated. Additionally, it is always a good practice to test the outlet with a voltage tester to ensure it is functioning correctly before using it.

Testing And Finalizing The Installation
After successfully wiring the outside outlet, it is crucial to conduct a voltage test to ensure the power is off before proceeding with the installation. This step is essential to protect yourself from potential electrical hazards. In addition, installing a Ground Fault Circuit Interrupter (GFCI) outlet will provide an extra layer of safety, especially in outdoor environments where exposure to water is possible.
Once the outlet is in place, securing it properly inside the electrical box ensures a stable and durable installation. To complete the project, installing an outdoor electrical cover will protect the outlet from weather elements, extending its lifespan. Below, we will discuss each of these steps in detail, giving you the confidence to complete the installation successfully.
Conducting a voltage test to ensure the power is off
Before touching any wires or conducting any work on the outlet, it’s critical to verify that the power is off. This will greatly reduce the risk of electrical shock. To conduct a voltage test, follow these steps:
- Ensure all switches and circuits connected to the outlet are turned off.
- Using a non-contact voltage tester, hold it against the outlet and surrounding wires to confirm there is no current.
- If the tester does not detect any voltage, it is safe to proceed with the installation. However, if voltage is detected, it may indicate that the power is still active. In such cases, contact an electrician to further investigate and ensure safety.
Installing a GFCI outlet for added safety
When installing an outside outlet, it is highly recommended to utilize a GFCI outlet. A GFCI outlet monitors the flow of electricity and shuts off the power if it detects any imbalances, such as a ground fault. Follow these steps to install a GFCI outlet:
- Begin by turning off the power supply to the designated circuit at the breaker box.
- Remove the existing outlet cover and outlet, ensuring all wires are safely disconnected.
- Connect the wires to the appropriate terminals on the GFCI outlet, following the manufacturer’s instructions.
- Carefully insert the GFCI outlet into the electrical box, making sure not to pinch or damage any wires.
- Secure the GFCI outlet to the electrical box using the provided screws.
- Attach the outlet cover and, once again, ensure that the power to the circuit is off by conducting a voltage test using a non-contact voltage tester.
- Remember to label the outlet as a GFCI for future reference.
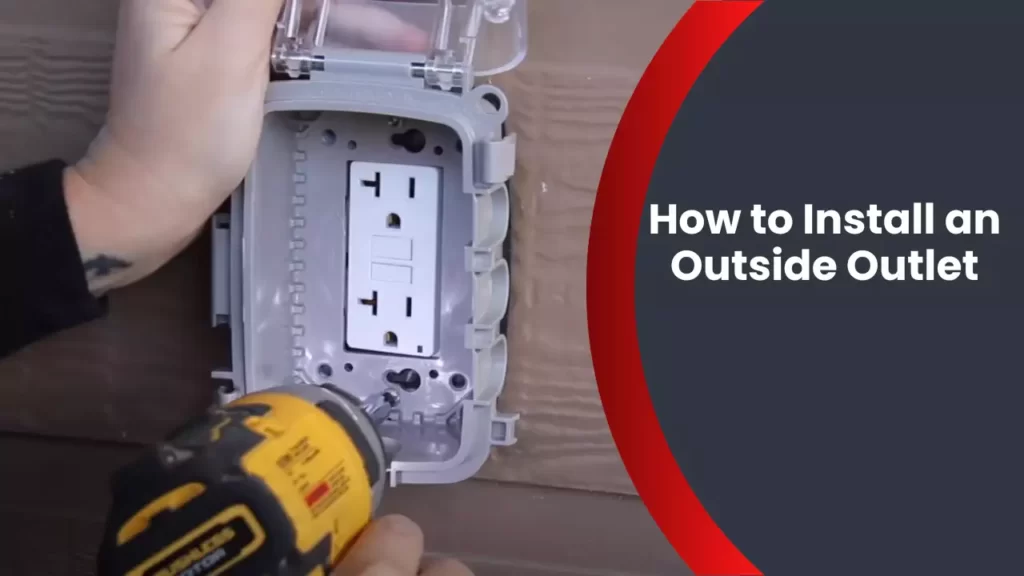
Securing the outlet in the box
After installing the GFCI outlet, it is crucial to secure it properly inside the electrical box. This step ensures the outlet remains stable and provides a secure connection. Follow these simple steps to secure the outlet:
- Position the outlet in the electrical box, aligning the screw holes on the outlet with the corresponding openings in the box.
- Insert screws through the outlet into the screw holes in the box.
- Tighten the screws until the outlet is securely fastened to the box, ensuring it does not move or wobble.
Installing the outdoor electrical cover
Once the outlet is secured in the electrical box, the final step is to install the outdoor electrical cover. This cover protects the outlet from weather elements, safeguarding it from rain, snow, and other potential hazards. Follow these steps to complete the installation:
- Select an outdoor electrical cover that is specifically designed for your outlet and weather conditions.
- Place the cover over the outlet, aligning the openings with the outlet’s receptacles and mounting holes.
- Using the provided screws, secure the cover to the outlet, ensuring it is tightly fitted.
- Double-check that the cover is fully sealed and there are no gaps or exposed areas that could allow moisture or debris into the outlet.
By successfully conducting a voltage test, installing a GFCI outlet, securing it in the electrical box, and adding an outdoor electrical cover, you have completed the process of installing an outside outlet. Ensure all connections are tight and properly sealed to prevent any electrical issues or weather damage in the future. Remember, if you have any doubts or concerns, consult a professional electrician for guidance.
Tips For Outdoor Outlet Installation
Installing an outdoor outlet can be a convenient and practical addition to your outdoor space. Whether you need it for an electric grill, lighting, or powering your landscaping tools, having an outlet outside can make your outdoor activities more enjoyable. However, it’s important to install the outlet correctly and take precautions to protect it from the elements. Here are some essential tips for outdoor outlet installation that will ensure its durability and functionality.
Using weather-resistant materials
When it comes to outdoor outlets, it’s crucial to choose materials that can withstand the harsh outdoor conditions. This means opting for weather-resistant products that can resist moisture, UV rays, and temperature fluctuations. Look for outlets, covers, and conduit made from durable materials such as PVC or nylon.
Additionally, make sure to use outdoor-rated electrical wires and connections. These cables are specifically designed to handle the outdoor environment and are often insulated with moisture-resistant materials. Using the right materials ensures that your outdoor outlet will stand up to rain, snow, and freezing temperatures, guaranteeing safe and reliable operation.
Protecting the outlet from moisture
To protect your outdoor outlet from moisture, it’s crucial to take additional measures during installation. One effective way to prevent water infiltration is by using a waterproof outlet cover. These covers are designed to seal tightly and create a barrier against water, keeping the outlet and its wiring dry.
| Tip | Action |
|---|---|
| 1 | Apply a layer of silicone caulk around the base of the outlet cover to create an additional barrier against moisture penetration. |
| 2 | Ensure that the conduit and cable connections are properly sealed with waterproof tape or connectors. |
| 3 | Position the outlet at an angle, sloping away from the opening, to prevent water accumulation. |
Regularly inspecting and maintaining the outlet
Once your outdoor outlet has been installed, it’s important to regularly inspect and maintain it to ensure its longevity and safety. Regular inspections should include checking for any signs of damage, loose connections, or worn-out covers. Pay attention to any changes in functionality or signs of moisture accumulation.
Maintaining the outlet involves cleaning the cover, removing debris, and trimming nearby vegetation that could cause obstructions or abrasion to the wires. If you notice any issues, it’s crucial to address them promptly to prevent further damage and potential safety hazards.
By following these tips for outdoor outlet installation, you can enjoy the convenience and functionality of an exterior power source while ensuring its durability and safety. Remember to use weather-resistant materials, protect the outlet from moisture, and regularly inspect and maintain it for optimal performance. With the right precautions in place, your outdoor outlet will be a reliable addition to your outdoor space.
Frequently Asked Questions
How Do You Install An Outdoor Electrical Outlet?
To install an outdoor electrical outlet, follow these steps: 1. Begin by turning off the power to the area and marking the desired location. 2. Dig a trench to lay the conduit from the main panel to the outlet location. 3.
Install PVC conduit and use junction boxes as needed. 4. Connect the wires from the main panel to the outlet, ensuring proper grounding. 5. Test the outlet to ensure it functions correctly and safely.
How Much Does It Cost To Install An Outdoor Outlet?
The cost of installing an outdoor outlet depends on various factors such as the complexity of the job and the location. On average, it can range anywhere from $200 to $500, including labor and materials. It is best to consult an electrician for an accurate estimate based on your specific requirements.
Do Outdoor Outlets Need To Be On Their Own Circuit?
Outdoor outlets do not necessarily need to be on their own circuit. However, it is highly recommended for safety reasons to have outdoor outlets on a dedicated circuit. This prevents overload and reduces the risk of electrical accidents.
What Are The Rules For Exterior Outlets?
Exterior outlets must follow these rules: 1) Use weather-resistant covers for protection. 2) Install ground fault circuit interrupters (GFCIs) for safety. 3) Position outlets at least a foot above the ground. 4) Ensure outlets are at least 6 feet away from any water sources.
5) Comply with local building codes for proper installation.
Conclusion
Installing an outside outlet can be a simple and cost-effective way to enhance the functionality of your outdoor space. Following the steps outlined in this guide, you can ensure a safe and successful installation process. Remember to always prioritize safety and consult a professional if you are unsure.
With a little effort and the right tools, you can enjoy the convenience of an outdoor outlet for all your electrical needs. Happy DIY-ing!