To install an outlet box, you need to turn off the power supply, remove the cover plate, and disconnect the wires from the existing outlet. Then, attach the outlet box to the wall and secure it with screws, before connecting the wires to the new outlet and installing the cover plate.
Understanding The Role Of An Outlet Box
Importance of outlet boxes in electrical installations
An outlet box is an essential component in any electrical installation. It not only provides a secure housing for electrical connections, but it also plays a crucial role in ensuring the safety and functionality of the electrical system. Understanding the importance of outlet boxes can help you make informed decisions when it comes to installing or replacing them in your home or workplace.
Exploring the types of outlet boxes
Outlet boxes come in a variety of types, each designed for specific purposes and installation requirements. Here are some common types of outlet boxes you might encounter:
| Type | Description |
|---|---|
| Switched Outlet Box | This type of outlet box is specifically designed for accommodating switches and outlets together. It allows you to control the power supply to your electrical appliances or devices. |
| New Construction Outlet Box | As the name suggests, this type of outlet box is suitable for new construction projects. It is typically installed when walls are open and is secured directly to the framing members for stability. |
| Old Work Outlet Box | If you are planning to install an outlet box in an existing wall, the old work outlet box is the one you need. It is designed to be retrofitted into an already finished wall without the need for extensive remodeling. |
| Ceiling Outlet Box | For installations that require outlets or lighting fixtures to be mounted on the ceiling, ceiling outlet boxes are the ideal choice. They provide a secure attachment point for hanging light fixtures or ceiling fans. |
These are just a few examples of the types of outlet boxes available in the market. The specific type you need will depend on your project requirements and the location where the box will be installed.
Choosing the right outlet box for your specific needs
When it comes to choosing the right outlet box for your specific needs, several factors should be considered. These include the following:
- The electrical load that the outlet box will need to handle
- The number of outlets or switches that will be connected
- The location of the installation (e.g., wall, ceiling, floor)
- The material and size of the outlet box
- The type of wiring method used
By taking these factors into account, you can ensure that the outlet box you choose is suitable for your specific needs and complies with electrical codes and safety standards.
In conclusion, understanding the role of an outlet box is crucial for any electrical installation project. By recognizing the importance of outlet boxes, exploring the types available, and selecting the right one for your specific needs, you can ensure a safe and efficient electrical system in your home or workplace.
Preparing For The Installation Process
Before embarking on the installation of an outlet box, it is crucial to adequately prepare for the task at hand. This involves gathering the necessary tools and materials, ensuring safety precautions are in place, and most importantly, shutting off the power supply before starting. By following these steps, you can ensure a smooth and safe installation process.
Gathering the necessary tools and materials
To successfully install an outlet box, it is essential to have the right tools and materials at your disposal. By gathering these beforehand, you can save time and prevent potential delays during the installation process. Here is a list of tools and materials you will need:
| Tools | Materials |
|---|---|
|
|
Ensuring safety precautions are in place
Prioritizing safety throughout the installation process is paramount. By taking the necessary precautions, you can protect yourself and avoid accidents or electrical mishaps. Here are some safety measures to consider:
- Wear safety goggles and gloves to protect your eyes and hands.
- Ensure the area is well-lit to prevent any mishaps during the installation.
- Keep flammable materials away from the installation site.
- Double-check that the power supply is shut off to eliminate the risk of electric shock.
- If necessary, work with a partner who can assist you and provide an extra set of eyes.
Shutting off the power supply before starting
Before diving into the installation process, it is crucial to shut off the power supply to the area where you will be working. This ensures your safety and prevents any electrical mishaps. Follow these steps to turn off the power:
- Locate the circuit breaker panel in your home.
- Identify the circuit breaker that controls the power to the area where the outlet box will be installed.
- Flip the switch of the circuit breaker to the “Off” position.
- To ensure safety, use an electrical tester to verify that the power is indeed turned off.
By carefully following these steps and adhering to safety precautions, you are now ready to proceed with the installation process. With all the tools and materials on hand and the power supply safely shut off, you can confidently move forward and successfully install your outlet box.
Installing The Outlet Box
Installing an outlet box is an essential step when it comes to electrical installations. The outlet box not only provides a safe space to house electrical connections but also ensures a seamless and professional finish. In this guide, we will walk you through the process of installing an outlet box, covering each step from locating the ideal position to securely mounting the box against the wall.
Locating the ideal position for the outlet box
Before you start installing the outlet box, it is crucial to determine the ideal position where it should be placed. Take into consideration the purpose of the outlet and the proximity to power sources. You want to find a location that is easily accessible and convenient for use. Additionally, ensure that the outlet box will meet electrical code requirements in terms of height and spacing from other outlets or switches.
Tracing the outline of the outlet box on the wall
Once you have determined the perfect spot for the outlet box, use a pencil or marker to trace its outline on the wall. This step will serve as a guide during the cutting process and help ensure that the hole is accurately positioned. Make sure to take accurate measurements to ensure a precise fit for the box.
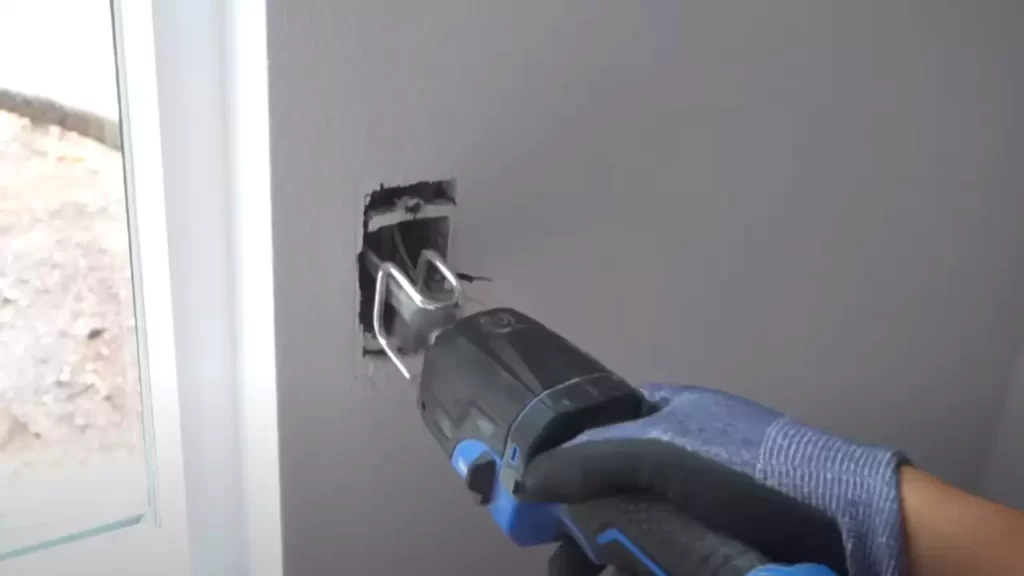
Cutting a hole for the box using the appropriate tools
Now that you have traced the outline, it’s time to cut a hole in the wall for the outlet box. Depending on the type of wall material, you may need different tools such as a drywall saw or a keyhole saw. Carefully follow the traced lines and begin cutting. Take your time and work slowly to prevent any accidental damage to the surrounding area. Remember to wear protective goggles and a mask to safeguard yourself from debris.
Mounting the outlet box securely and flush against the wall
After cutting the hole, it’s time to mount the outlet box. Place the box into the hole, ensuring that it fits securely and flush against the wall. Use screws or nails (if applicable) to fix the box in place. Ensure that the box is level and straight before tightening the screws or nails. It is crucial to secure the box properly for safety and aesthetic purposes. Remember to check that the box doesn’t protrude from the wall and remains flush with the surrounding area.
By following these steps, you can successfully install an outlet box in your desired location. Taking the time to carefully locate, trace, cut, and mount the box will result in a professional-looking and functional addition to your electrical setup.
Wiring The Outlet Box
Installing an outlet box is an essential step in any electrical project. Once you’ve chosen the right location for your outlet box, the next crucial step is to wire it properly. In this section, we will guide you through the process of wiring the outlet box, ensuring a safe and efficient electrical connection for your home.
Understanding electrical wiring basics
Before you begin wiring the outlet box, it’s important to have a basic understanding of electrical wiring. This knowledge will enable you to handle the wires correctly and avoid any potential hazards. Here are some key concepts to keep in mind:
- Electricity flows in a circuit, which consists of a power source, usually a breaker, wires, and the device or appliances connected to the circuit.
- Electrical wires are typically color-coded to identify their purpose. Black wires are hot wires, white wires are neutral wires, and green or bare wires are ground wires.
- Always make sure to turn off the power supply before working with electrical wiring to prevent electrical shock.
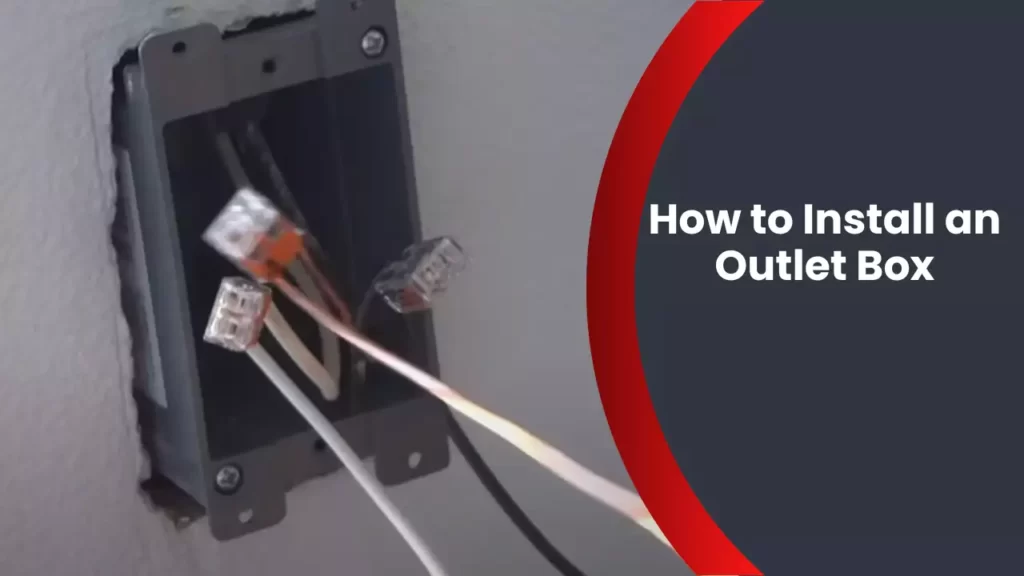
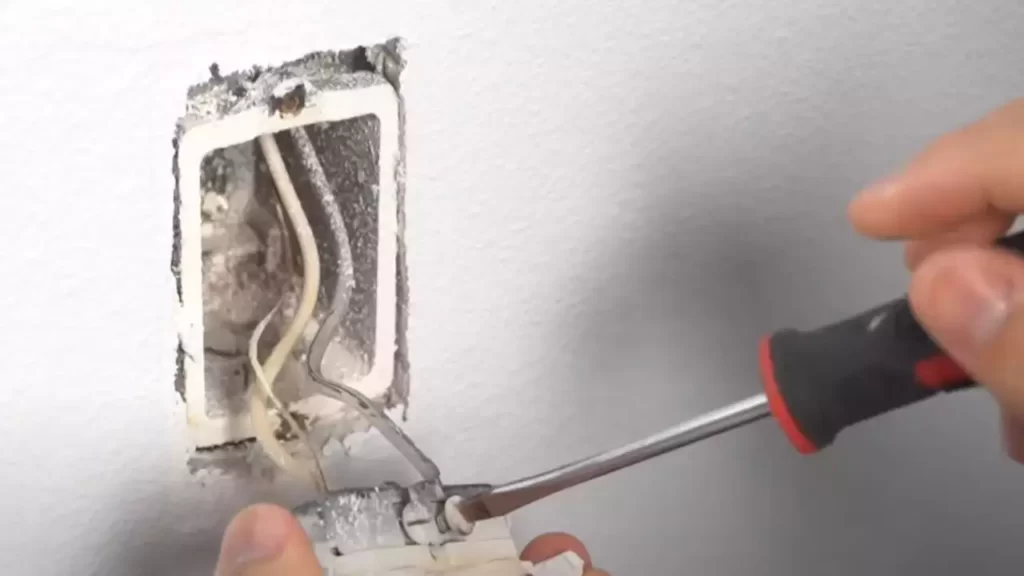
Stripping and connecting the wires
Once you have a good understanding of electrical wiring basics, it’s time to strip and connect the wires for your outlet box. Follow these steps:
- Start by stripping off about half an inch of insulation from the end of each wire using a wire stripper tool.
- Identify the black hot wire and connect it to the brass-colored screw on the outlet. Use a screwdriver to tighten the screw securely.
- Take the white neutral wire and connect it to the silver-colored screw on the outlet. Again, tighten the screw firmly.
- If you have a ground wire, it should be connected to the green screw or grounding terminal on the outlet. Make sure it is tightly secured.
Grounding the outlet box
Grounding your outlet box is an important safety measure, as it diverts any excess electrical current to the ground, protecting you and your devices from potential electrical shocks. Follow these steps to ground your outlet box:
- Attach the grounding wire to the green screw or grounding terminal on the outlet.
- Connect the other end of the grounding wire to the grounding screw inside the outlet box.
- Ensure that all connections are tight and secure, providing a solid path for grounding.
Testing the wiring for proper connections
After completing the wiring process, it’s crucial to test the connections to ensure everything is in proper working order. Here’s how you can do that:
- Turn the power back on.
- Use a voltage tester to check if there is power running to the outlet.
- If the tester indicates power, plug in a device or use a multimeter to check the outlet’s functionality.
- If the outlet is working correctly, you can proceed to install the outlet cover plate.
By following these steps and checking the connections thoroughly, you can successfully wire an outlet box and enjoy the convenience of having power at your fingertips.
Mounting The Outlet Plate
Once you have successfully installed the outlet box and ensured that it is securely attached to the wall, the next step is to mount the outlet plate. The outlet plate serves as the outer covering for the outlet box, providing a neat and finished look to the installation. Mounting the outlet plate involves a few simple steps. Read on to learn more.
Choosing a suitable outlet plate
Before you begin mounting the outlet plate, it’s important to choose a suitable one that fits your specific needs. Outlet plates come in various sizes, styles, and materials. Consider the following factors:
- Size: Ensure that the outlet plate matches the size of your outlet box.
- Style: Choose a style that complements the overall aesthetic of the room.
- Material: Outlet plates are available in materials like plastic, metal, and wood. Select a material that suits your preferences and requirements.
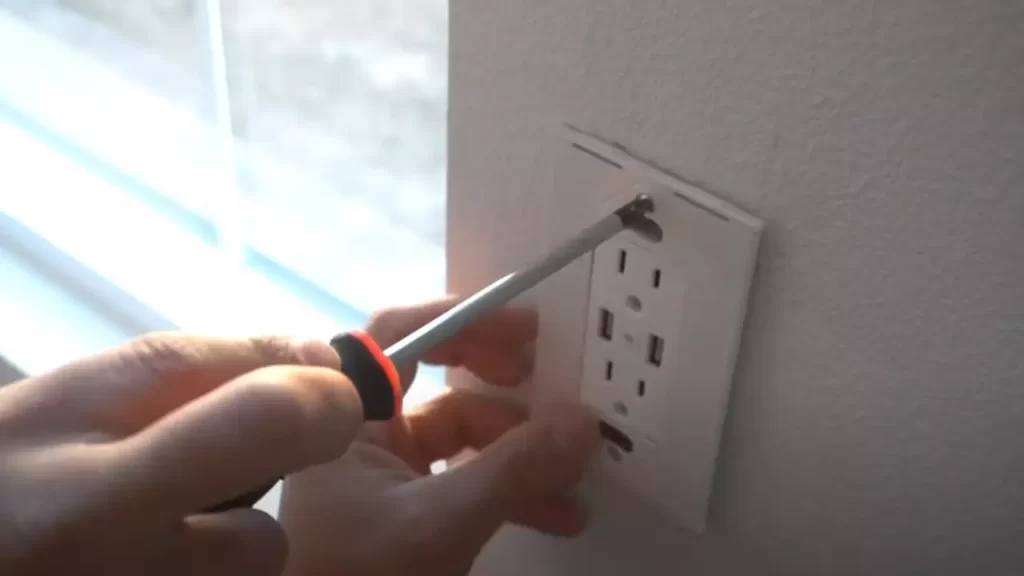
Attaching the outlet plate to the box
Once you have chosen a suitable outlet plate, it’s time to attach it to the outlet box. Follow these steps:
- Hold the outlet plate against the box, aligning the screw holes of the plate with those on the box.
- Ensure that the plate sits flush against the wall, with no gaps or misalignment.
- Insert the screws provided with the outlet plate into the screw holes on the plate, running them through the appropriate openings on the box.
- Tighten the screws gently, using a screwdriver, until the plate is securely attached to the box. Be careful not to overtighten, as it may cause damage.
Securing the outlet plate with screws
After attaching the outlet plate to the box, the final step is to secure it using screws. Follow these guidelines:
- Make sure each screw is positioned correctly and inserted into the designated screw hole on the plate.
- Tighten each screw firmly, ensuring that the plate remains flat against the wall.
- Check to see if any screws are loose or need further tightening.
- Inspect the plate for any visible gaps or unevenness and correct them if necessary.
Finalizing The Installation
Congratulations! You’re almost done installing your outlet box. Now, it’s time to finalize the installation to ensure everything is functioning properly and safely. In this section, we will guide you through the steps to restore power to the circuit, test the newly installed outlet box for functionality, troubleshoot common issues, and provide safety tips for maintaining the outlet box.
Restoring power to the circuit
Before restoring power to the circuit, make sure all the connections are secure and there are no exposed wires. Once you’ve double-checked everything, follow these steps to restore power:
- Go to your electrical panel or circuit breaker box
- Locate the circuit that the outlet box is connected to
- Switch the circuit back to the “On” position
By following these steps, you will restore power to the circuit and enable electricity to flow to the newly installed outlet box.
Testing the newly installed outlet box for functionality
After restoring power, it’s crucial to test the outlet box to ensure it’s working correctly. To test the functionality of the outlet box, follow these steps:
- Get an electrical device, such as a lamp or phone charger
- Plug the device into the outlet
- Turn on the device or check if it’s charging
If the device powers on or charges, it means the outlet box is functioning properly. However, if the device doesn’t work, you may need to troubleshoot the issue.
Troubleshooting common issues
If the outlet box isn’t working as expected, here are some common issues to troubleshoot:
- Check if the circuit breaker tripped and switch it back on
- Ensure all the connections are secure and tighten any loose wires
- Inspect the outlet for any damage or signs of a short circuit
- Use a voltage tester to check if there is power running to the outlet
By following these troubleshooting steps, you can identify and resolve common issues with your outlet box.
Safety tips for maintaining the outlet box
Maintaining the outlet box is essential to ensure safety and prevent malfunctions. Here are some safety tips to follow:
- Regularly inspect the outlet box for any signs of damage or wear
- If you notice any issues, such as sparks or a burning smell, immediately turn off the circuit and consult a professional electrician
- Avoid overloading the outlet box by plugging in too many devices
- Keep the area around the outlet box clear and free from dust or debris
By adhering to these safety tips, you can maintain your outlet box in excellent condition and ensure a safe electrical system in your home.
Frequently Asked Questions
Do You Need An Electrician To Install An Outlet Box?
Yes, it is recommended to hire an electrician to install an outlet box. They have the expertise to ensure proper installation and minimize the risk of electrical hazards.
How Do You Install An Outlet Box In Drywall?
To install an outlet box in drywall, follow these steps: 1. Mark the location on the wall where you want the outlet. 2. Cut a hole in the drywall using a drywall saw or utility knife. 3. Insert the outlet box into the hole and secure it with screws.
4. Connect the wiring to the outlet, making sure to follow electrical safety precautions. 5. Attach the outlet cover and test the outlet to ensure it’s working properly. Remember to always consult a professional or an electrician if you’re unsure about any step.
How To Install An Electrical Remodel Box?
To install an electrical remodel box, follow these steps: 1. Turn off the power supply. 2. Locate the area where the remodel box will be installed. 3. Trace the outline of the box on the wall. 4. Cut a hole using a drywall saw or reciprocating saw.
5. Securely attach the remodel box to the wall using screws.
How High Should Box Be For Outlets?
The box for outlets should be at least 2 inches deep to accommodate the wiring connections safely and provide enough space for the switch or receptacle. This ensures the outlet is properly installed and meets electrical code requirements.
Conclusion
To wrap up, installing an outlet box may seem daunting at first, but with the right tools and guidance, it can be a fairly straightforward process. By following the steps outlined in this guide, you can ensure a safe and efficient installation.
Remember to always prioritize safety precautions and consult a professional if needed. Now you’re ready to take on your next electrical project with confidence!