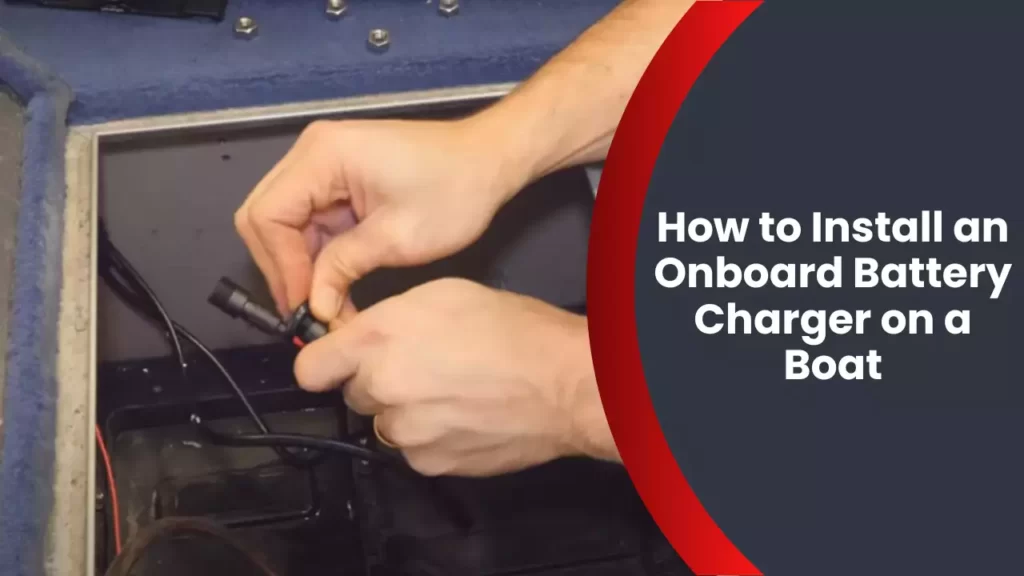
To install an onboard battery charger on a boat, you need to follow a few simple steps. First, locate a suitable location for the charger near the batteries.
Then, connect the charger’s positive and negative leads to the corresponding battery terminals. Finally, secure the charger in place and test its functionality. This installation process ensures that your boat’s batteries are efficiently charged and ready for use. It’s important to have a reliable battery charger to maintain the performance of your boat’s electrical system.
By following these steps, you can easily install an onboard battery charger and ensure the uninterrupted operation of your marine equipment.
Understanding The Importance Of An Onboard Battery Charger
Installing an onboard battery charger on your boat is a crucial step towards ensuring a smooth and uninterrupted boating experience. The battery charger plays a vital role in keeping your boat’s batteries in optimal condition, allowing you to enjoy longer trips without worrying about power disruptions.
Exploring the Benefits of an Onboard Battery Charger
When it comes to boating, having a reliable power source is essential. Here are some key benefits of investing in an onboard battery charger:
- Convenience: With an onboard battery charger, you can easily recharge your boat’s batteries without the hassle of removing them from the boat. This saves you time and effort, allowing you to focus on enjoying your time on the water.
- Efficiency: An onboard battery charger is designed to provide a steady and consistent charge to your boat’s batteries. This ensures that they are fully charged and ready for use whenever you need them. By maintaining optimal charge levels, you can extend the lifespan of your batteries, saving you money in the long run.
- Versatility: Most onboard battery chargers are equipped with multiple charging modes, allowing you to charge different types of batteries. Whether you have a lead-acid, gel, or AGM battery, an onboard charger can accommodate your specific needs and ensure efficient charging.
- Protection: Investing in a high-quality onboard battery charger can protect your boat’s batteries from common issues such as overcharging, undercharging, and sulfation. These chargers are equipped with advanced features like temperature compensation and battery maintenance modes, which help prolong battery life and prevent damage.
Assessing the Impact of a Reliable Battery Charger on Boat Performance
A reliable battery charger can have a significant impact on your boat’s overall performance. Here’s how:
- Consistent Power Supply: By keeping your boat’s batteries fully charged, an onboard battery charger ensures a consistent power supply to your boat’s electrical systems. This means that your navigation equipment, lights, radios, and other essential devices will operate smoothly, reducing the risk of sudden power failures while you’re out on the water.
- Quick Start-ups: One of the worst experiences for any boater is trying to start the engine, only to find that the battery is dead. With a reliable onboard battery charger, you can avoid this frustrating situation. A fully charged battery ensures quick and reliable engine start-ups, allowing you to get on the water without any delays.
- Prolonged Battery Life: Properly maintaining and charging your boat’s batteries can significantly extend their lifespan. By providing the correct charging profiles and preventing overcharging or undercharging, an onboard battery charger helps maximize the longevity of your batteries. This means fewer battery replacements and more savings for you.
Don’t underestimate the importance of an onboard battery charger for your boat. It not only ensures uninterrupted power supply but also contributes to the overall performance and longevity of your boat’s batteries. Invest in a reliable charger today and enjoy worry-free boating adventures!
Gathering The Necessary Tools And Materials
When it comes to installing an onboard battery charger on your boat, gathering the necessary tools and materials is the first step towards ensuring a successful installation. Having the right tools and materials handy will not only save you time and frustration but also contribute to a smooth and efficient installation process. In this section, we will discuss identifying the essential tools for the installation process and selecting the right onboard battery charger for your boat.
Identifying the essential tools for the installation process
Before you begin installing an onboard battery charger on your boat, it’s crucial to have the necessary tools at your disposal. Here are some essential tools you will need:
| Tools | Description |
|---|---|
| Wire cutters/strippers | Used for cutting and stripping wires during the installation process. |
| Screwdrivers | A variety of screwdrivers, including Phillips and flathead, to handle different types of screws. |
| Drill | Necessary for drilling holes and securing the charger onto the boat. |
| Wrenches | To tighten and loosen nuts, bolts, and other fasteners. |
| Wire connectors and soldering materials | To connect wires securely and ensure proper conductivity. |
| Multimeter | Used for testing electrical connections and troubleshooting. |
| Heat shrink tubing | To protect wire connections from moisture and corrosion. |
| Marine-grade wiring | Ensure you use wiring specifically designed for marine applications to withstand the harsh marine environment. |
| Mounting hardware | To securely fasten the onboard battery charger to your boat’s surface. |
Gathering these essential tools beforehand will save you time and ensure a smooth installation process. It’s important to note that each boat installation may have specific requirements, so be sure to check the manufacturer’s instructions for any additional tools or materials needed.
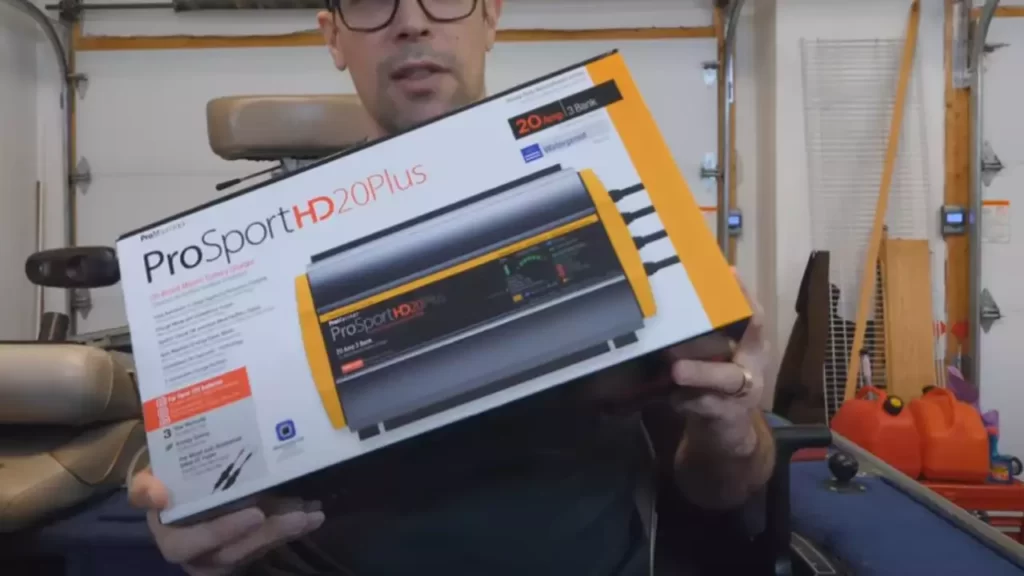
Selecting the right onboard battery charger for your boat
Choosing the right onboard battery charger is crucial to ensure optimal performance and longevity of your boat’s batteries. Before making a decision, consider the following factors:
- Battery type and capacity: Determine the type and capacity of your boat’s batteries to ensure compatibility with the charger.
- Charging capacity: Consider the charging capacity of the charger. Higher capacity chargers can charge batteries faster.
- Number of batteries: If you have multiple batteries on your boat, choose a charger that can accommodate and charge them simultaneously.
- Smart charging technology: Opt for a charger that incorporates smart charging technology, which automatically adjusts the charging process based on battery condition.
- Waterproof and shockproof design: Given the marine environment, choose a charger that is specifically designed to withstand water exposure and vibrations.
- Warranty: Look for a charger with a good warranty, as it reflects the manufacturer’s confidence in its quality and performance.
Taking these factors into consideration will help you select the right onboard battery charger that meets your boat’s specific needs. Remember to consult the manufacturer’s specifications and recommendations for further guidance.
Ensuring Safety Measures
When it comes to installing an onboard battery charger on a boat, safety should be your top priority. Working with electrical components requires caution and adherence to safety guidelines. Before starting the installation process, it is essential to review the necessary safety measures to mitigate any potential risks or accidents.
Reviewing safety guidelines for working with electrical components
Before getting your hands dirty, it is crucial to review the safety guidelines for working with electrical components. By following these guidelines, you can prevent electrical hazards and ensure a safe installation process.
- Always wear protective equipment, such as safety gloves and goggles, to safeguard yourself from potential injuries.
- Make sure to work in a well-ventilated area to prevent the accumulation of harmful fumes.
- Keep your work area clean and organized, minimizing the risk of accidents caused by tripping or falling.
- Ensure that the boat’s power supply is disconnected before starting any electrical work.
- Avoid working alone and have someone nearby in case of an emergency.
Disconnecting the boat’s battery before installation
Disconnecting the boat’s battery is an essential step to ensure your safety during the installation process. By following the proper procedure, you can prevent electrocution or damage to the electrical system of your boat.
- Begin by turning off all electrical devices and systems powered by the boat’s battery.
- Locate the boat’s battery and identify the positive (+) and negative (-) terminals.
- Using the appropriate size wrench or pliers, loosen the bolts or screws connecting the battery cables to the terminals.
- Once the cables are disconnected, tape them off or cover them with insulating material to prevent accidental contact.
Remember, safety should always come first when working with electrical components. Following these safety guidelines and properly disconnecting the boat’s battery will help ensure a smooth and risk-free installation of the onboard battery charger.
Locating The Ideal Position For Mounting
When it comes to installing an onboard battery charger on your boat, one of the most crucial steps is deciding on the ideal position for mounting. This decision should be made based on various factors like available space, accessibility, and protection from the elements. In this section, we will discuss how to assess the available space on your boat for the charger and consider the accessibility and protection of the chosen location.
Assessing available space on the boat for the charger
Before you can determine the ideal position for mounting the onboard battery charger, it’s essential to assess the available space on your boat. Consider the following points:
- Measure the dimensions of the charger and ensure that there is enough space to accommodate it.
- Identify a location where the charger can be mounted securely without obstructing other boat components or interfering with the boat’s functionality.
- Take into account any clearance requirements specified by the manufacturer for safe and optimal operation of the charger.
Considering accessibility and protection from elements
Accessibility and protection are critical factors to consider when choosing the location to mount your onboard battery charger. Here are some considerations:
Accessibility:
- Select a location that allows easy access for connecting and disconnecting the charger.
- Consider the length of the power cord and ensure it can reach the charger from the boat’s power source.
- Ensure that the location doesn’t impede any future maintenance or servicing tasks.
Protection from elements:
- Choose a mounting position that provides adequate protection to the charger from moisture, direct sunlight, and excessive heat.
- Avoid locations where the charger may be susceptible to water splashes or spray.
- Consider installing the charger in a compartment or using a protective cover to shield it from the elements.
By considering the available space, accessibility, and protection from the elements, you can determine the ideal position for mounting an onboard battery charger on your boat. Taking the time to assess these factors will ensure the charger is securely mounted and functions optimally for long-lasting performance.
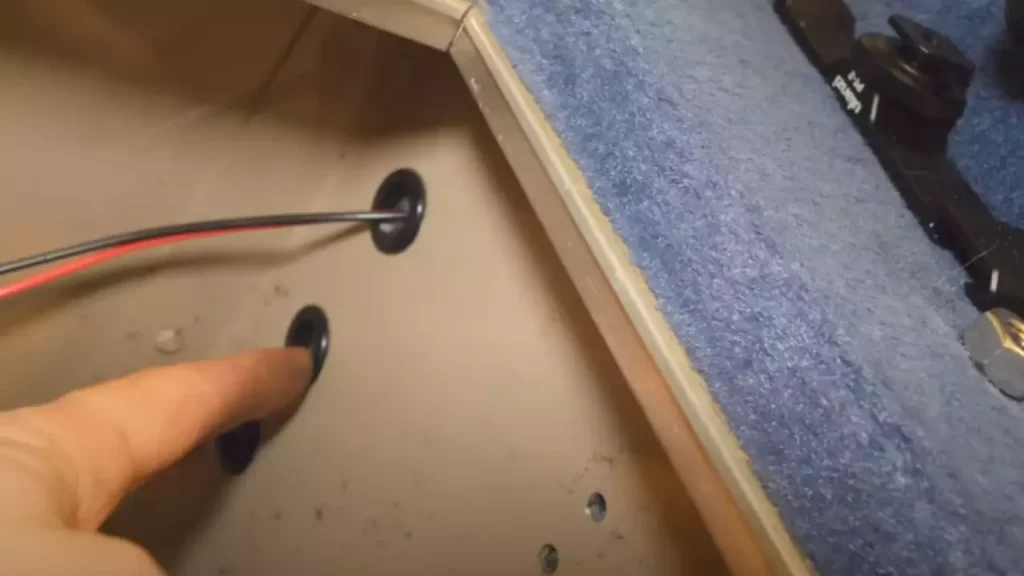
Preparing The Mounting Surface
Before installing an onboard battery charger on your boat, it is crucial to properly prepare the mounting surface. This step is crucial because it ensures the charger is securely and stably attached to the boat, preventing any unwanted movement or dislodging.
Cleaning and preparing the chosen location for installation
The first step in preparing the mounting surface is to clean the chosen location where you intend to install the onboard battery charger. This ensures that any dirt, debris, or residue that may interfere with the proper installation or functioning of the charger is removed.
Ensuring a secure and stable mounting surface
Once the area is clean, the next step is to ensure that the mounting surface provides a secure and stable base for the charger. This is essential to prevent any potential damage or displacement while the boat is in motion or exposed to rough water conditions.
Here are some key considerations to keep in mind:
- Make sure the surface is flat and level, avoiding any uneven or sloping areas that can compromise the stability of the charger.
- Inspect the surface for any existing damage or weakness that may affect the integrity of the installation. Repair or reinforce these areas before proceeding with the mounting.
- Choose the appropriate mounting hardware that is specifically designed for the type of surface you are working with. This ensures a secure and reliable attachment.
- Follow the manufacturer’s guidelines for placement and positioning of the charger. This will help optimize its performance and ensure easy access for future maintenance or troubleshooting.
By taking the time to clean and prepare the mounting surface, as well as ensuring its security and stability, you can proceed with confidence in installing your onboard battery charger. This will not only guarantee its proper functioning but also extend its lifespan, ensuring many hassle-free boating adventures ahead.
Wiring The Onboard Battery Charger
Understanding the Charger’s Wiring Diagram and Instructions
Before we dive into the process of wiring an onboard battery charger on your boat, it’s crucial to have a clear understanding of the charger’s wiring diagram and instructions. These diagrams and instructions are typically provided by the manufacturer and serve as your roadmap for a successful installation.
The wiring diagram will illustrate the specific connections and components of the charger, including the positive and negative terminals, as well as any additional wires or fuses that may be required. Take the time to carefully study the diagram, ensuring you comprehend how each component fits into the overall wiring of the charger.
Make sure you also read through the instructions provided by the manufacturer. These instructions are designed to guide you through the installation process step by step. Pay close attention to any specific requirements or recommendations mentioned in the instructions, such as wire gauges, connection types, or the use of crimp or solder connectors.
Installing Appropriate Wires and Connectors
Once you have a grasp of the charger’s wiring diagram and instructions, it’s time to gather the materials needed to install the appropriate wires and connectors. Ensuring that you use high-quality wires and connectors is essential for a reliable and safe installation.
When selecting the wires for the installation, consider the ampacity (current-carrying capacity) recommended by the manufacturer. It’s important to use wires that can handle the charging current outputted by the charger without overheating or causing voltage drops. To find the appropriate wire gauge, you can refer to the ampacity charts available online or consult an electrician for guidance.
Next, choose the connectors that will be compatible with the charger and your boat’s electrical system. Crimp connectors are commonly used for connecting wires as they provide a secure and reliable connection. However, you can also opt for solder connectors if you have experience with soldering.
Ensure that the wires and connectors are properly sized to fit your boat’s electrical system and the charger. Using undersized or oversized wires and connectors can result in poor performance, electrical issues, or even damage to the charger.
Remember to carefully strip the ends of the wires before attaching the connectors. Use a wire stripper to remove the insulation, exposing the bare wire. This will provide a tight connection and prevent any loose or faulty connections.
In conclusion, wiring the onboard battery charger on your boat requires a thorough understanding of the charger’s wiring diagram and instructions. By carefully following the manufacturer’s guidelines and using appropriate wires and connectors, you can ensure a successful and reliable installation.
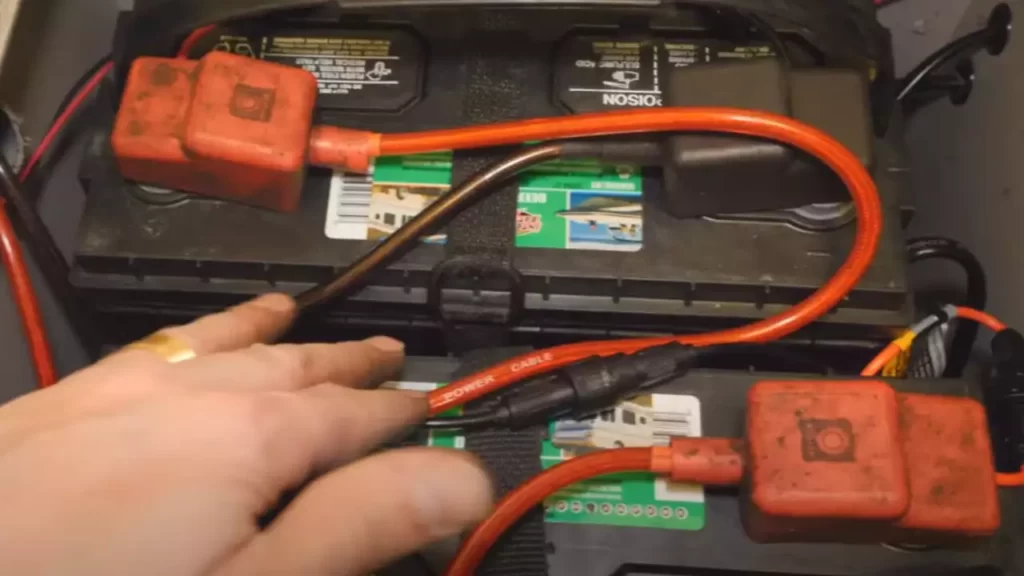
Connecting The Charger To The Boat’S Battery
After properly mounting the onboard battery charger on your boat, the next step is to connect it to the boat’s battery. Ensuring a correct and secure connection is essential for the charger to function effectively and to avoid any potential damage or safety hazards.
Identifying the positive and negative terminals on the battery
Before connecting the charger, it is crucial to identify the positive and negative terminals on your boat’s battery. The positive terminal is typically marked with a ‘+’ symbol or the letters ‘POS’ or ‘P,’ while the negative terminal is marked with a ‘-‘ symbol or the letters ‘NEG’ or ‘N.’
If the terminals are not clearly labeled, you can also differentiate them by their size and color. The positive terminal is often larger in size and has a red or orange color, while the negative terminal is smaller and usually has a black or blue color.
Properly connecting the charger to the battery’s terminals
Once you have identified the positive and negative terminals on the battery, it is time to connect the onboard battery charger. Follow these steps to ensure a secure and proper connection:
- Make sure the charger is turned off and unplugged from any power source before starting the connection process.
- Locate the positive and negative charging leads on the charger. These are typically color-coded, with red representing positive and black representing negative.
- Attach the positive charging lead to the positive terminal on the battery. Ensure a tight connection by fastening the lead securely to the terminal.
- Attach the negative charging lead to the negative terminal on the battery. Again, ensure a tight and secure connection.
- Double-check that all connections are secure and properly fastened, minimizing the risk of any loose or detached wires.
Once you have completed these steps, you can safely turn on the onboard battery charger and connect it to a power source. This will initiate the charging process and ensure that your boat’s battery stays charged and ready for your next adventure on the water.
Verifying Proper Functionality
Verifying the proper functionality of an onboard battery charger is an essential step to ensure that it is operating as it should. This step ensures that your boat’s battery will be adequately charged and ready for use when you are out on the water. There are two key aspects to consider when verifying the functionality: checking for electrical connection integrity and testing the charger’s functionality with a voltmeter.
Checking for Electrical Connection Integrity
Before testing the charger’s functionality, it is crucial to check the electrical connection integrity. This step helps to identify any potential issues that could affect the charger’s performance. Here’s how you can do it:
- Inspect the charger’s power cord for any signs of damage, such as frayed wires or exposed parts. Ensure that the power cord is securely connected to both the charger and the boat’s electrical system.
- Check the battery cables and connections for any signs of corrosion or loose connections. Ensure that the cables are securely attached to the battery terminals.
- Examine the fuse or circuit breaker associated with the charger. Verify that it is not blown or tripped. Replace any faulty fuses or reset the breaker if necessary.
By thoroughly checking the electrical connection integrity, you can address any underlying issues and ensure that the charger will function optimally.
Testing the Charger’s Functionality with a Voltmeter
To further verify the proper functionality of the onboard battery charger, testing it with a voltmeter is essential. This step allows you to measure the voltage output and ensure it aligns with the charger’s specifications. Follow these steps:
- Set the voltmeter to the DC voltage setting appropriate for the battery voltage level.
- Connect the voltmeter’s red probe to the positive terminal of the battery and the black probe to the negative terminal.
- Turn on the charger and allow it to run for a few minutes to stabilize.
- Read the voltmeter display and compare it to the charger’s specifications. Ensure that the voltage output falls within the acceptable range.
If the voltage output is not within the specified range, there may be an issue with the charger that requires further investigation or professional assistance.
Verifying the proper functionality of an onboard battery charger is crucial to maintaining a reliable and efficient electrical system on your boat. By checking the electrical connection integrity and testing the charger’s functionality with a voltmeter, you can ensure that your battery will remain charged and ready for your boating adventures.
Monitoring And Maintaining The Onboard Battery Charger
Properly monitoring and maintaining your onboard battery charger is crucial for the overall performance and longevity of your boat’s battery system. By understanding the charger’s maintenance requirements and implementing effective battery charging strategies, you can ensure that your batteries are always in optimal condition and ready for your next boating adventure.
Understanding the charger’s maintenance requirements
To ensure that your onboard battery charger operates efficiently and effectively, it’s important to understand its specific maintenance requirements. Refer to the manufacturer’s instructions for detailed guidelines on maintaining your charger.
- Regularly inspect the charger for any signs of damage or wear.
- Keep the charger clean and free from dirt, debris, and moisture.
- Check all connections and cables to ensure they are secure and free from corrosion.
- Monitor the charger’s performance and note any unusual behavior or error codes.
- Regularly update the charger’s firmware or software as recommended by the manufacturer.
By following these maintenance requirements, you can ensure that your charger operates optimally and minimizes the risk of any unexpected issues that may affect your boat’s battery system.
Implementing effective battery charging strategies
Along with maintaining the charger itself, implementing effective battery charging strategies is key to prolonging the lifespan of your boat’s batteries. Consider the following tips:
- Charge your batteries regularly, especially after each use or when they reach a certain discharge level.
- Avoid overcharging your batteries, as this can lead to overheating and reduced battery life.
- Use a smart charger that automatically adjusts the charging process based on the battery’s condition and needs.
- Consider a multi-stage charging process that includes bulk charging, absorption charging, and float charging to ensure complete battery replenishment.
- Monitor the batteries’ voltage levels regularly using a battery voltage monitor.
By implementing these effective battery charging strategies, you can maximize the performance and lifespan of your boat’s batteries, ultimately enhancing your boating experience.
Troubleshooting Common Installation Issues
Installing an onboard battery charger on your boat can greatly improve the charging efficiency and overall performance of your batteries. However, like any installation, there can be some common issues that may arise along the way. In this section, we will highlight these potential problems and provide troubleshooting steps to help you overcome them.
Identifying possible issues during installation
During the installation process, there are a few issues that you may come across. By identifying these issues early on, you can save time and ensure a successful installation. Below are some possible issues that you may encounter:
- Incorrect wiring connections
- Low voltage or insufficient power supply
- Defective charger or battery
- Poor grounding
- Inadequate ventilation
Troubleshooting steps for resolving common problems
If you encounter any of the issues mentioned above or face any other common problems during the installation process, here are some troubleshooting steps you can follow to resolve them:
- Check wiring connections: Ensure that all wiring connections are properly made and secure. Double-check the polarity of the cables to make sure they are correctly attached to the battery and charger.
- Verify power supply: Use a voltmeter to measure the voltage of the power supply and ensure it is within the recommended range. If the voltage is low, consider using a higher capacity power source or consult an electrician.
- Test charger and battery: If you suspect a defective charger or battery, test them individually to confirm their functionality. Use a multimeter to check if the charger is outputting the correct voltage and if the battery is storing and releasing power properly.
- Improve grounding: A poor grounding connection can impact the performance of your onboard battery charger. Make sure the grounding terminal is securely attached and free from corrosion. Consider using a grounding plate or consulting a professional if you’re unsure about the quality of your grounding.
- Enhance ventilation: If your charger or batteries are getting too hot during operation, it may be due to inadequate ventilation. Ensure that the charger and batteries are installed in a well-ventilated area to dissipate any excess heat. You can also use ventilation fans or install additional vents if necessary.
By following these troubleshooting steps, you can overcome common installation issues and ensure that your onboard battery charger operates smoothly and efficiently. Remember to always refer to the manufacturer’s instructions and consult a professional if you’re unsure about any specific aspects of the installation process.
Ensuring You Have A Reliable Onboard Battery Charger
Installing an onboard battery charger on your boat is a wise decision that can greatly enhance your boating experience. Not only does it eliminate the hassle of constantly removing and recharging your batteries, but it also ensures that your batteries are always ready to go when you need them. However, it’s important to remember that the performance and longevity of your onboard charger greatly depend on its proper installation. In this section, we will discuss the key factors to consider when installing an onboard battery charger to ensure that you have a reliable and efficient charging system for your boat.
Recap of the benefits of having an onboard charger on your boat
Before we dive into the installation process, let’s quickly recap the numerous benefits of having an onboard battery charger for your boat:
- Convenience: With an onboard charger, you can keep your batteries charged without the need for external chargers or power cords. This means no more hauling batteries back and forth, saving you time and effort.
- Efficiency: Onboard chargers are designed to deliver a consistent and optimal charge to your batteries, maximizing their performance and lifespan.
- Protection: Many modern onboard chargers come with built-in safety features that protect your batteries from overcharging, overheating, and other potential issues.
- Flexibility: Onboard chargers typically have multiple charging banks, allowing you to charge and maintain multiple batteries simultaneously.
Importance of proper installation for long-term performance
To ensure the long-term performance and reliability of your onboard battery charger, proper installation is crucial. Here are a few key considerations to keep in mind:
- Location: Choose a suitable location for your charger that is dry, well-ventilated, and easily accessible. Avoid mounting it in areas prone to extreme temperatures, excessive moisture, or direct exposure to sunlight.
- Mounting: Securely mount the charger using the provided brackets or hardware to ensure it remains stable even in rough seas. Make sure the mounting location allows for proper airflow around the charger to prevent overheating.
- Wiring: Follow the manufacturer’s instructions carefully when connecting the charger to your boat’s electrical system. Use appropriate gauge wiring and connectors to minimize voltage drop and ensure efficient power transfer.
- Disconnect Switch: Consider installing a battery disconnect switch between the charger and the batteries for added safety and easy maintenance. This allows you to isolate the charger from the batteries when not in use or during servicing.
- Grounding: Properly ground the charger according to the manufacturer’s specifications. This ensures electrical safety and minimizes the risk of damage to the charger or your boat’s electrical system.
By adhering to these installation guidelines, you can ensure that your onboard battery charger operates at its full potential, providing you with reliable charging performance and extending the lifespan of your boat batteries. Remember, investing a little time and effort in the proper installation of your onboard charger can go a long way in maximizing its benefits for years to come.
Frequently Asked Questions
Where Do You Mount A Marine Battery Charger?
Mount a marine battery charger in a well-ventilated area, away from direct sunlight and potential water exposure. Ensure it is securely fastened, preferably close to the batteries to minimize cable length. Consider the charger’s dimensions and compatibility with the boat’s layout for easy access and maintenance.
Where Does An Onboard Battery Charger Get Its Power?
The onboard battery charger gets its power from the electrical system of the vehicle or boat it is installed in. It connects to the vehicle’s battery and uses its power to charge the connected battery.
Can You Charge A Battery While It Is Still Connected To The Boat?
Yes, you can charge a battery while it is still connected to the boat.
Do Boat Batteries Charge When Plugged Into Shore Power?
Yes, boat batteries charge when connected to shore power.
Conclusion
Installing an onboard battery charger on your boat is a crucial step towards maintaining a reliable power source while on the water. By following the step-by-step guide outlined in this blog post, you can easily install the charger and ensure a hassle-free boating experience.
From choosing the right charger to connecting the batteries, we have covered all the essential aspects. Remember, a properly installed onboard battery charger will not only enhance the performance of your boat’s electrical system but also provide peace of mind during your adventures on the water.
Happy boating!